Keep container gardens hydrated for weeks in USDA zone 7 with ollas and wicking beds

Key takeaways
- Ollas, porous clay pots, release water slowly into the soil, significantly reducing watering frequency for container plants.
- Wicking beds and self-watering planters use capillary action to draw water from a reservoir, providing consistent moisture.
- Simple DIY solutions like drip bottles and capillary mats can offer short-term hydration for container gardens.
- Mulching container plants with 2-3 inches of organic material helps retain soil moisture and reduce evaporation.
- Rainwater harvesting systems can provide a sustainable, chlorine-free water source for passive irrigation setups.
- Proper plant selection, including drought-tolerant varieties, can further minimize water needs in container gardens.
Leaving your container garden behind for a vacation can be a source of anxiety for any grower. In places like central Texas, where summer temperatures regularly exceed 95 degrees Fahrenheit, a few days without water can turn thriving plants into dry husks. Traditional daily watering becomes impossible, and relying on a neighbor might not always be an option.
Fortunately, there are time-tested and low-tech solutions that can keep your container plants hydrated for days, or even weeks, while you are away. From ancient clay pots to modern self-watering designs, these passive irrigation methods leverage natural principles to deliver water directly to plant roots, ensuring your garden remains vibrant until your return.
the challenge of container garden hydration
Container gardens, while offering flexibility and aesthetic appeal, present a unique set of watering challenges compared to in-ground plantings. The confined soil volume in a pot heats up faster and dries out significantly quicker, often requiring daily — sometimes twice-daily — watering during hot summer months. For example, a 10-gallon container in USDA zone 8 might need 1 to 2 gallons of water per day for a thirsty tomato plant, a rate unsustainable without constant attention.
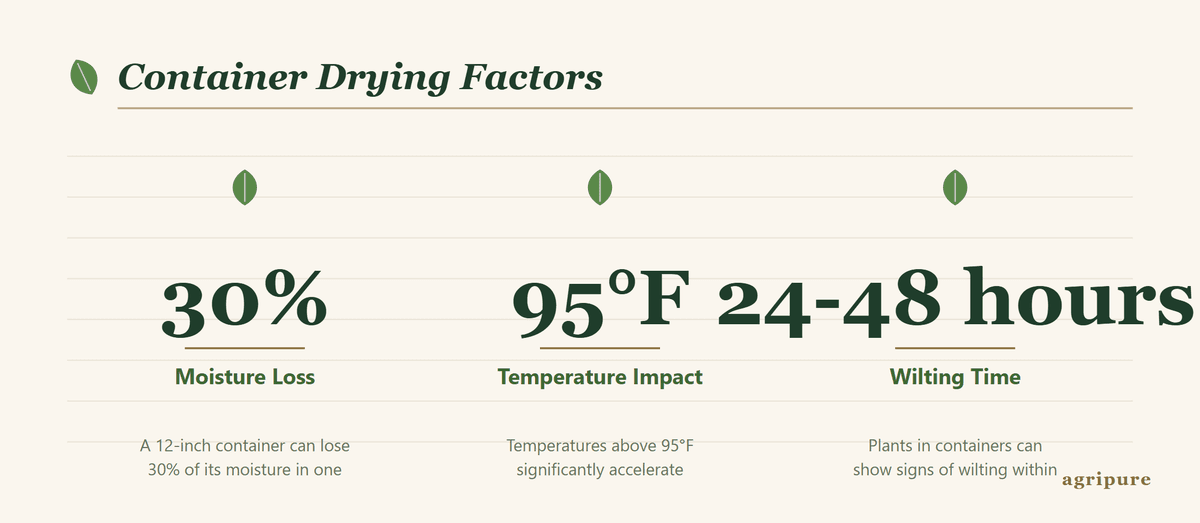
why containers dry out so fast
Several factors contribute to the rapid drying of container soil. First, the limited soil volume means less water storage capacity. Second, the exposed sides of the pot allow for increased evaporation from the soil surface and through the pot material itself, especially with porous materials like terracotta. Third, plant roots quickly fill the available space, creating a dense network that efficiently extracts moisture. Without a consistent water supply, plants in containers can experience water stress within 24 to 48 hours, leading to wilting, stunted growth, and reduced yields. Even in cooler climates, like USDA zone 5, a 12-inch pot can lose 30% of its moisture content in a single warm day.
- Limited soil volume: Less water storage than in-ground beds.
- Increased evaporation: Exposed pot sides and surface contribute to moisture loss.
- Root density: Plants quickly consume available water.
- Material porosity: Terracotta pots lose water through their walls.
- Temperature fluctuations: Containers heat up and cool down faster, affecting water demand.
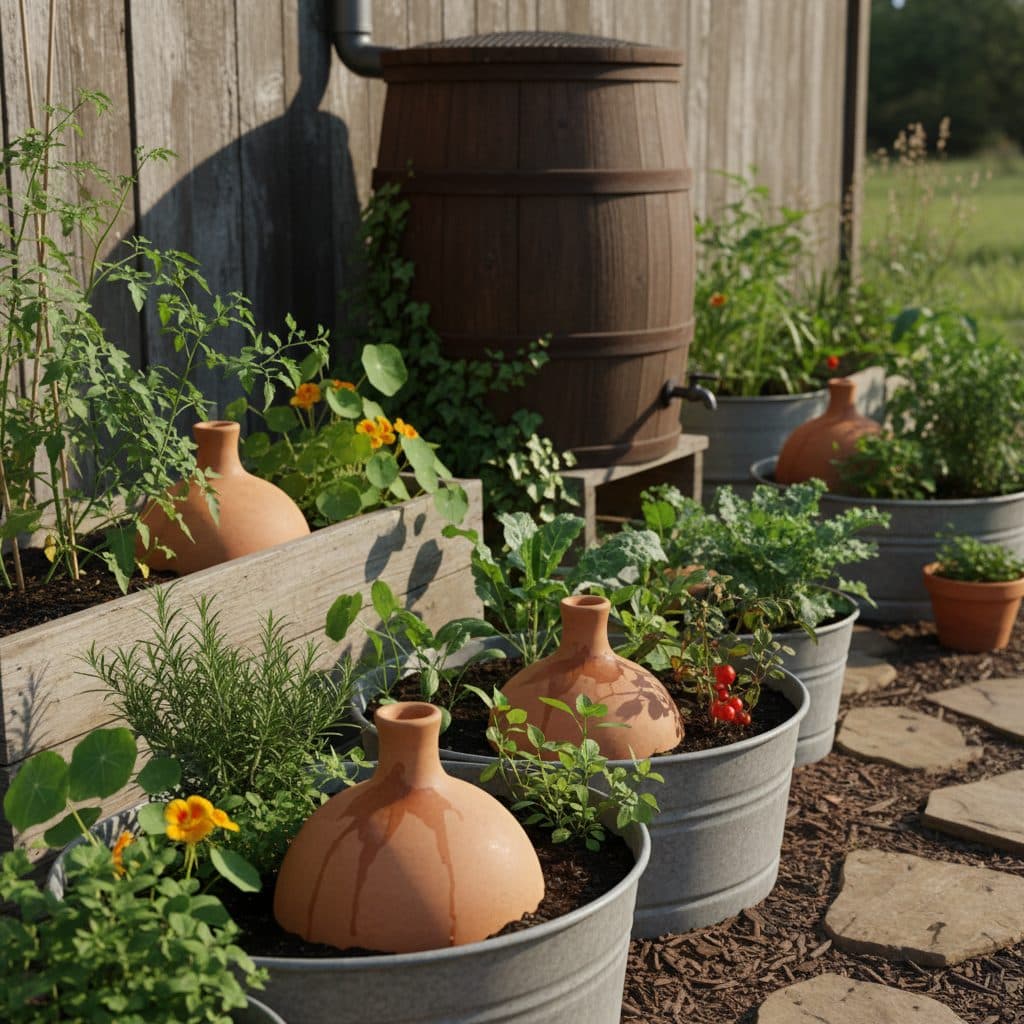
ollas: ancient irrigation for modern pots
Ollas (pronounced ‘oy-yahs’) are unglazed, porous clay pots that have been used for irrigation for thousands of years, with evidence dating back to ancient China and the Roman Empire. These simple vessels are buried in the soil near plants, filled with water, and slowly release moisture directly to the root zone through their porous walls. This method can reduce water usage by up to 70% compared to surface watering, according to research from SARE [2]. For a 15-gallon container in a hot climate, a 1-gallon olla can provide consistent moisture for three to five days.
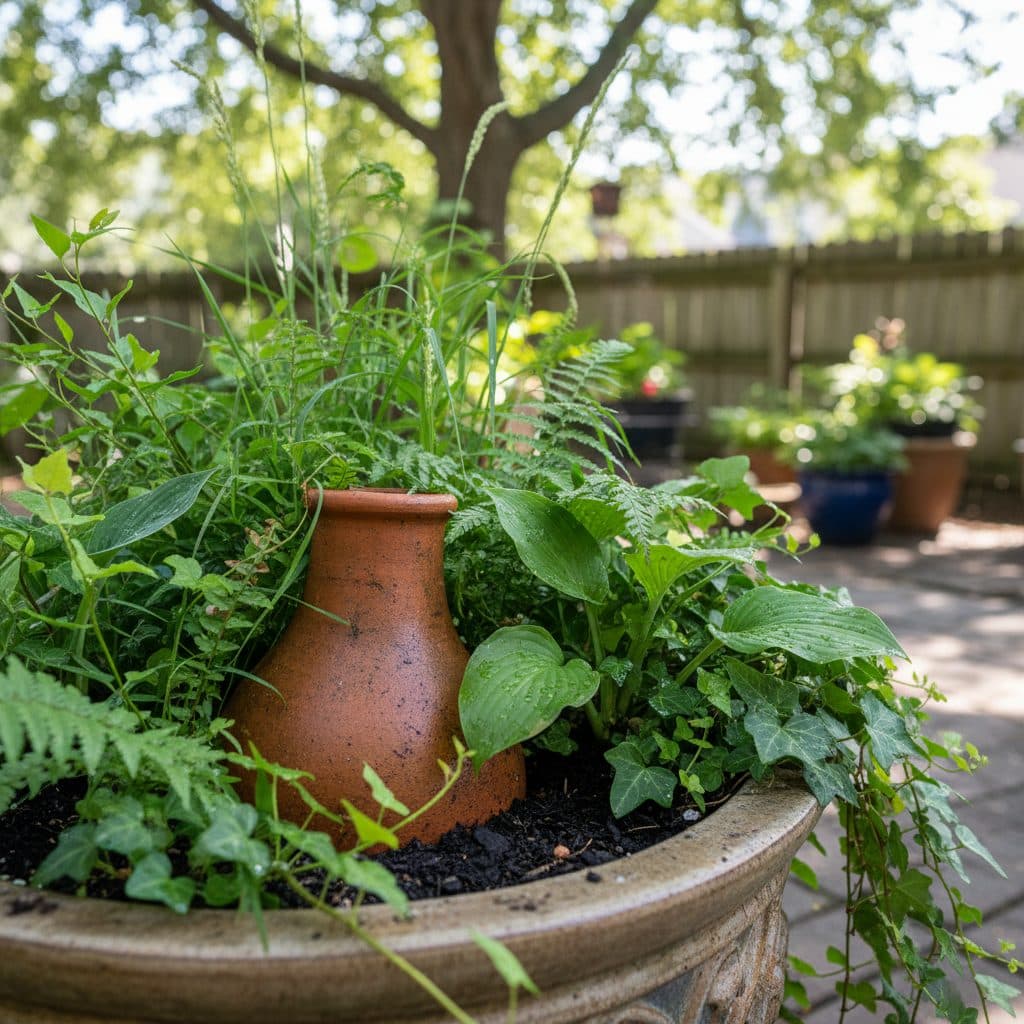
how ollas work and installation tips
The magic of ollas lies in their passive, demand-driven water delivery. As plant roots grow near the olla, they create a suction force that pulls water through the clay. This means water is only released when the soil dries out and the plants need it, minimizing waste from evaporation and runoff. To install an olla, bury it in the center of your container, leaving the neck exposed for refilling. For larger containers, like those 20 inches or more in diameter, consider using two smaller ollas or a larger single one to ensure even distribution. Fill the olla with water, and cover the opening to prevent debris and mosquito breeding. You can even connect multiple ollas with a garden PE irrigation hose for an automated refill system, especially useful for extended absences.
- Bury the olla: Leave only the neck exposed for refilling.
- Place centrally: For optimal water distribution in the container.
- Cover the opening: Prevents evaporation and insect entry.
- Refill regularly: Check water levels every few days, or less frequently depending on plant needs and olla size.
- Consider size: Match olla size to container and plant water demands; a 0.5-gallon olla is good for a 5-gallon pot.

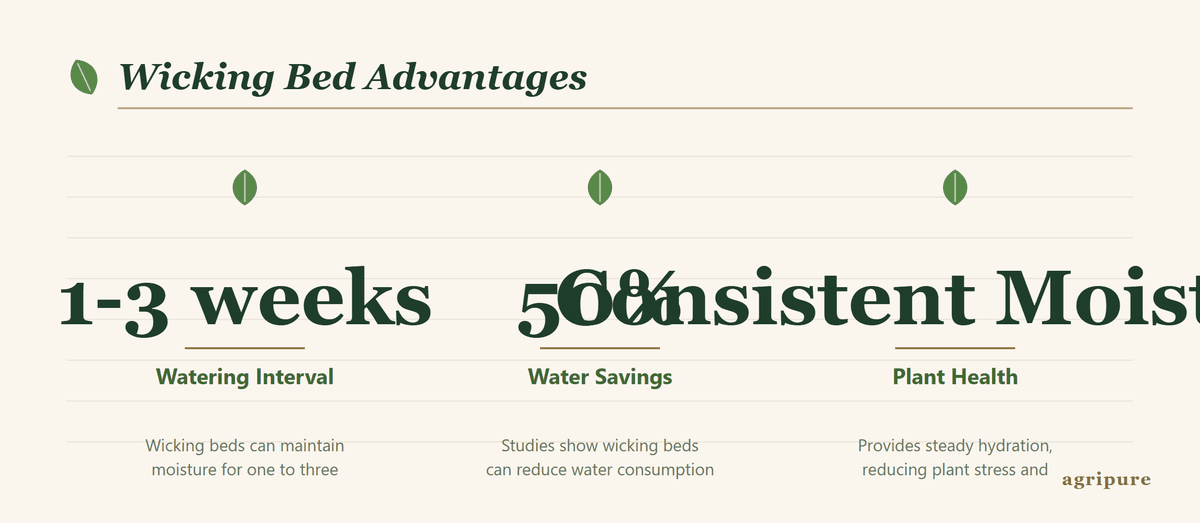
wicking beds and self-watering planters
Beyond ollas, wicking beds and self-watering planters offer another robust solution for consistent container hydration. These systems operate on the principle of capillary action, drawing water from a reservoir below the soil up into the root zone. A properly designed wicking bed can keep plants watered for one to three weeks, depending on the reservoir size and plant water demand. Many commercial self-watering planters, like those found in garden centers, typically have a water reservoir that can hold 1 to 5 gallons, sufficient for several days of watering in moderate climates.
building a simple wicking bed for containers
You can construct a simple wicking bed for a large container or raised bed using readily available materials. Start with a large container, at least 15 gallons in volume, and drill an overflow hole about 4 inches from the bottom. This hole prevents waterlogging. Next, create a water reservoir at the bottom using a layer of gravel or an inverted plastic pot, then cover it with a permeable fabric. Fill the rest of the container with a high-quality potting mix. A ‘wick’ — often a piece of geotextile fabric or a section of PVC pipe with holes — extends from the soil down into the reservoir, drawing water upwards. This ensures the soil remains consistently moist without being saturated, which is ideal for many plants, including heavy feeders like tomatoes and peppers that require 1 to 1.5 inches of water per week. For an even more sustainable approach, consider integrating a rainwater harvesting system to fill your wicking bed reservoirs.
- Select a large container: At least 15 gallons for effective wicking.
- Drill an overflow hole: Located 4 inches from the bottom to prevent saturation.
- Create a reservoir: Use gravel or an inverted pot at the base.
- Add a wicking layer: Geotextile fabric or perforated pipe for capillary action.
- Use quality potting mix: Essential for good wicking and plant health.
diy passive irrigation and water conservation
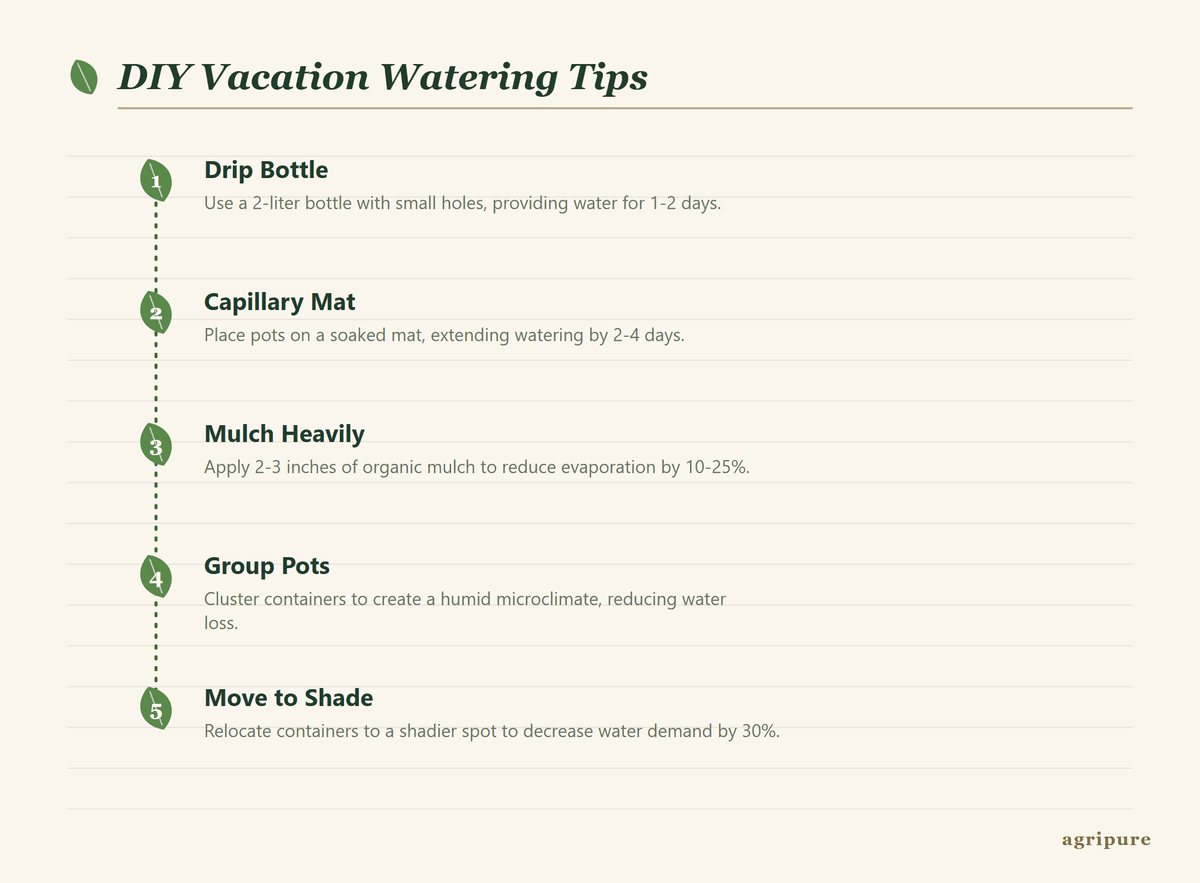
When ollas or wicking beds aren’t feasible, several DIY methods can offer temporary relief for container plants. A simple drip bottle system can provide water for one to three days. Take a plastic bottle, poke a few small holes in the cap, fill it with water, and invert it into the soil near the plant’s base. For a 2-liter bottle, this can deliver about 0.5 gallons of water slowly over 24-48 hours. Another option is a capillary mat, which can be particularly effective for multiple smaller pots. Place a water-soaked mat on a waterproof surface, then set your potted plants on top. The mat will draw water up into the pots through their drainage holes, keeping the soil moist for several days. This method works well for seed trays or small herb pots, extending their watering cycle by 2 to 4 days.
mulching and grouping for moisture retention
Regardless of the irrigation method chosen, integrating water conservation practices is crucial. Applying a 2-inch layer of organic mulch, such as straw, wood chips, or shredded leaves, to the soil surface of your containers can reduce evaporation by 10% to 25%. This protective layer also helps regulate soil temperature, keeping roots cooler in hot climates like USDA zone 9. Grouping containers closely together creates a microclimate with higher humidity, further reducing water loss from individual pots. For example, placing five 5-gallon pots together can reduce their combined water evaporation by 15% compared to spacing them out. Consider using drought tolerant shrubs in larger containers to further minimize water demands.
- Drip bottle system: Inverted plastic bottles with small holes.
- Capillary mats: Wicking water from a reservoir to pot bases.
- Mulching: 2-3 inches of organic material on soil surface.
- Grouping containers: Creates a humid microclimate.
- Shade cloth: Reduces direct sun exposure and heat stress.
sourcing water sustainably for passive systems
The effectiveness of any passive irrigation system is only as good as its water supply. For growers committed to sustainable practices, sourcing water efficiently is a key consideration. Rainwater harvesting stands out as an excellent option, providing a free, chlorine-free water source that is beneficial for plants and the soil microbiome. A typical 1,000 square foot roof can collect approximately 600 gallons of water from just one inch of rainfall, making it a significant resource even in regions with moderate precipitation, like the Pacific Northwest [1]. This collected water can then be used to fill ollas, wicking bed reservoirs, or even larger passive irrigation earthworks for in-ground gardens.
integrating water harvesting into your garden plan
Integrating a rainwater harvesting system doesn’t have to be complex. A simple rain barrel connected to a downspout can collect 50 to 100 gallons of water, enough to sustain several container gardens for weeks. For larger operations, or to fill multiple wicking beds, a series of barrels or a larger cistern might be more appropriate. Consider using a solar water pump to move harvested water from a storage tank to your irrigation systems, especially if the tank is at a lower elevation. The USDA Natural Resources Conservation Service promotes such water conservation practices, noting their benefits for both garden health and local ecosystems [0]. By planning for water collection, you ensure your passive irrigation systems have a reliable and sustainable supply, allowing you to leave your garden with confidence.
- Rain barrels: Simple, cost-effective rainwater collection.
- Cisterns: Larger capacity for extensive water storage.
- First flush diverters: Improve water quality by discarding initial runoff.
- Filtration: Basic screens prevent debris from entering storage.
- Gravity feed: Position storage above irrigation for passive flow.
| Method | Duration (Approx.) | Cost (DIY) | Maintenance | Best Use Case |
|---|---|---|---|---|
| Ollas | 3-10 days | Low ($5-$20 per olla) | Refill, occasional cleaning | Individual large containers, small groups |
| Wicking Beds | 1-3 weeks | Moderate ($20-$50 per bed) | Refill reservoir, check wicks | Large containers, raised beds, longer absences |
| Drip Bottles | 1-3 days | Very Low (recycled bottles) | Refill daily/bi-daily | Short trips, emergency watering |
| Capillary Mats | 2-4 days | Low ($10-$30 per mat) | Keep mat wet, clean | Multiple small pots, seed trays |
Optimize your garden’s hydration
Explore our range of irrigation tools and resources for efficient watering solutions.
Frequently asked questions
How long can ollas keep plants watered?
The duration depends on the olla size, container size, plant water needs, and climate. Generally, a 0.5-gallon olla can water a 5-gallon pot for three to five days, while larger ollas can extend this to over a week in moderate conditions.
Are wicking beds suitable for all types of plants?
Wicking beds work well for most thirsty plants like tomatoes, peppers, and leafy greens that appreciate consistent moisture. However, plants that prefer drier conditions, such as many succulents or Mediterranean herbs, might not thrive in the consistently moist environment of a wicking bed.
Can I use tap water in ollas and wicking beds?
Yes, tap water can be used, but rainwater or untreated well water is often preferred. Tap water, especially if it’s chlorinated, can potentially affect the beneficial soil microbes over time, though plants typically tolerate it. Consider letting tap water sit for 24 hours to allow chlorine to dissipate.
What size olla should I use for my container?
A good rule of thumb is to use an olla that holds about 10% of your container’s volume. For example, a 5-gallon container would benefit from a 0.5-gallon olla, while a 15-gallon container could use a 1.5-gallon olla or two smaller ones for even distribution.
How often do I need to refill a wicking bed reservoir?
Refill frequency depends on the reservoir’s capacity, plant size, and weather. A typical 5-gallon reservoir might last a week for mature plants in warm weather, but could last two to three weeks in cooler conditions or with smaller plants. Monitoring the water level is key.
Does mulching really make a difference in container watering?
Absolutely. A 2-inch layer of organic mulch can reduce water evaporation from the soil surface by 10% to 25%, significantly extending the time between waterings and helping to maintain more stable soil temperatures, which benefits root health.
References
- USDA Natural Resources Conservation Service (2024). USDA Natural Resources Conservation Service.
- EPA — Soak Up the Rain (2024). EPA — Soak Up the Rain.
- SARE — Sustainable Agriculture Research & Education (2023). SARE — Sustainable Agriculture Research & Education.
- ATTRA / NCAT Sustainable Agriculture (2023). ATTRA / NCAT Sustainable Agriculture.
- USDA National Agroforestry Center (2023). USDA National Agroforestry Center.