
DIY Self-Watering Containers: Save 50% Water in Urban Gardens
Key takeaways
- Self-watering containers can cut water consumption by 30% to 50% compared to traditional top-down watering.
- Wicking pots use a water reservoir and capillary action to deliver moisture directly to plant roots, minimizing evaporation.
- Basic wicking systems can be built from readily available materials like two 5-gallon buckets and a 2-inch PVC pipe.
- Ollas, unglazed clay pots buried in the soil, slowly release water over several days, benefiting plants in arid regions.
- Integrating rainwater harvesting with self-watering systems can provide up to 1,000 gallons of free water annually from a 1,000 sq ft roof.
- Proper soil mix, including perlite or vermiculite, is crucial for effective wicking and root health in container gardens.
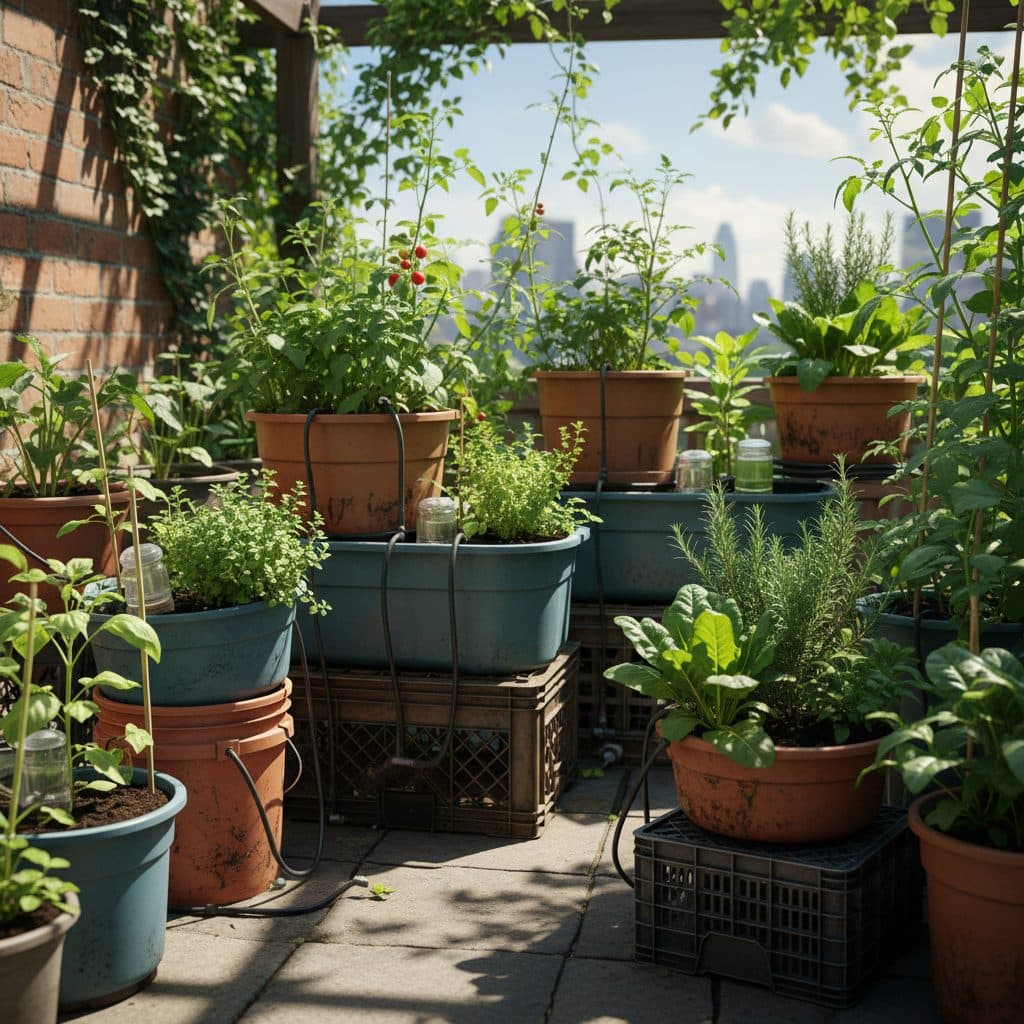
For many growers across the United States, from dry climates in Arizona to compact city balconies in New York, water conservation is a top priority. Traditional container gardening often means daily watering, especially during hot summer months when temperatures can reach 90 degrees Fahrenheit or higher. This constant effort can lead to significant water waste through runoff and evaporation, sometimes as much as 50% of the applied water [1].
Building your own self-watering containers and mini wicking pots offers a practical solution, drastically reducing water use and labor. These systems, utilizing principles from ancient passive irrigation techniques like ollas and modern wicking beds, ensure plants receive consistent moisture directly at the root zone. This approach can cut water consumption by 30% to 50% for plants like tomatoes and peppers, making gardening more efficient and sustainable for urban and small-space growers in any USDA zone.
The science behind self-watering and wicking systems
Self-watering containers operate on the principle of capillary action, drawing water from a reservoir up into the soil. This method delivers moisture directly to the plant roots, significantly reducing water loss from surface evaporation and runoff, which can account for 30% or more of water applied in traditional watering methods [1]. In a typical wicking pot, a perforated barrier separates the soil from a water reservoir below, with a wicking medium—often a piece of fabric or a soil column—connecting the two layers. This continuous moisture supply helps plants thrive, even in hot climates like USDA zone 9 in central Florida, where daily temperatures often exceed 95 degrees Fahrenheit.
how capillary action works in your garden
The consistent moisture availability from a wicking system promotes stronger root development and reduces plant stress, leading to more robust growth and higher yields. For instance, a study in California found that wicking beds used 40% less water while producing similar yields of leafy greens compared to conventional raised beds [2]. This efficiency is particularly beneficial for water-intensive crops such as cucumbers, squash, and strawberries, which can struggle with inconsistent watering. Understanding how to manage your water flow, perhaps with a 7-function nozzle hose, can make refilling reservoirs simple and efficient.
- Reservoir: Stores water at the bottom of the container.
- Wicking material: A fabric strip or soil column that draws water upwards.
- Perforated barrier: Separates soil from the reservoir, allowing water to pass.
- Overflow drain: Prevents waterlogging by letting excess water escape.
- Fill tube: Provides an easy access point to replenish the water reservoir.
Building a simple 5-gallon bucket wicking system
One of the most accessible DIY self-watering setups uses two 5-gallon buckets, a common sight at hardware stores across the US. This design is robust enough for plants like determinate tomatoes or bush beans, and can hold enough water to last three to seven days, depending on the plant’s needs and local conditions in USDA zone 6. The process involves creating a reservoir in one bucket and a planting area in the other, then connecting them with a wicking material. You’ll need basic tools like a drill with a 1/4-inch bit and a 2-inch hole saw, along with a piece of 2-inch PVC pipe.
materials and step-by-step construction
For the soil mix, a blend of good quality potting mix, compost, and perlite or vermiculite (at a 3:1:1 ratio) works well to ensure proper aeration and moisture retention. Avoid heavy garden soil, which can compact and hinder wicking action. This system is particularly effective for urban gardeners in places like Boston, Massachusetts, where space is limited and consistent watering can be a challenge. Consider using a small garden PE irrigation hose for precise filling of multiple containers.
- Two 5-gallon buckets: One for the reservoir, one for planting.
- 2-inch PVC pipe (12 inches long): For the fill tube.
- Drill with 1/4-inch bit and 2-inch hole saw: For drainage and fill tube holes.
- Landscape fabric or old t-shirt: For the wicking material.
- Potting mix: A light, well-draining blend.
Expanding to mini wicking beds and ollas for patios
For larger patio gardens or small raised beds, mini wicking beds offer increased planting space while retaining the water-saving benefits. These can be constructed from repurposed plastic tubs, old bathtubs, or purpose-built containers, providing enough room for several plants like peppers, eggplants, or even a small patch of strawberries. A typical mini wicking bed might measure 2 ft by 4 ft and hold 10-15 gallons of water in its reservoir, sustaining plants for up to two weeks in temperate climates like USDA zone 7. The key is a larger reservoir and a robust wicking layer, often achieved with a gravel or perlite base covered by landscape fabric.
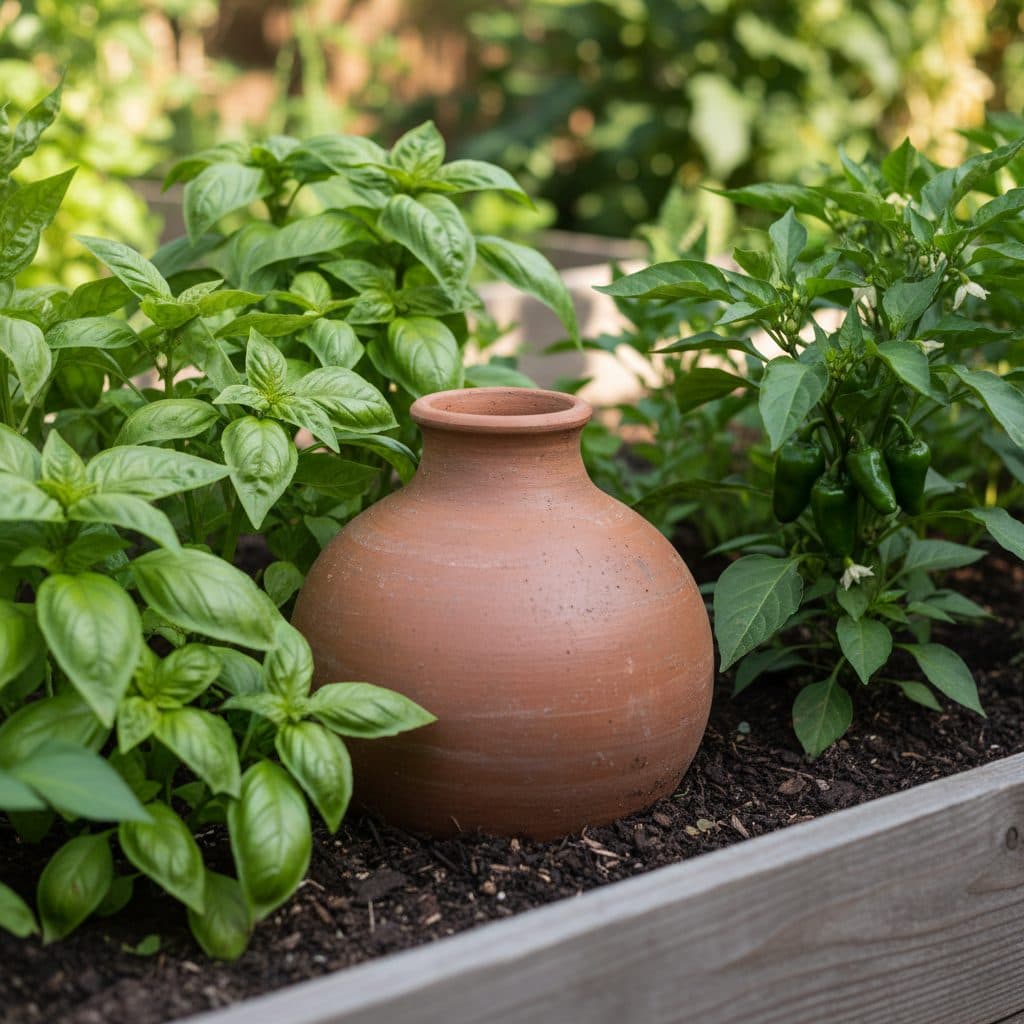
ancient wisdom: the power of ollas
Ollas (pronounced ‘oy-yahs’) are unglazed clay pots that have been used for passive irrigation for thousands of years in arid regions worldwide. When buried in the soil with only the neck exposed, water slowly seeps through the porous clay directly into the root zone of surrounding plants. A single olla with a 2-gallon capacity can effectively water a 2-foot diameter area for several days, significantly reducing surface evaporation and runoff [3]. This method is particularly effective for drought-tolerant plants or in dry areas like the American Southwest, where water conservation is critical. Ollas can reduce water use by 50% to 70% compared to surface irrigation.
- Repurposed containers: Old plastic bins, galvanized troughs, or even wooden crates lined with pond liner.
- Reservoir material: Gravel, perlite, or a dedicated water grid for larger beds.
- Wicking fabric: Heavy-duty landscape fabric or geotextile to separate reservoir from soil.
- Fill pipe: A larger diameter pipe (3-4 inches) for easier filling.
- Olla size: Typically 1-5 gallon capacity, depending on the area to be watered.
Integrating rainwater harvesting for sustainable refills
To truly maximize the sustainability of your self-watering containers, consider integrating a rainwater harvesting system. Capturing rainwater from your roof can provide a free, high-quality water source for your garden, reducing reliance on municipal water supplies. A typical 1,000 square foot roof in a region receiving 30 inches of annual rainfall can collect approximately 18,600 gallons of water per year [4]. Even a small rain barrel connected to a downspout can collect hundreds of gallons of water during a single storm, enough to refill dozens of self-watering containers for weeks.
connecting your system to the sky
Setting up a rain barrel is a straightforward project. You’ll need a barrel (typically 50-100 gallons), a downspout diverter, and a spigot near the bottom. For larger systems, multiple barrels can be linked, or a larger cistern can be installed. This harvested water is ideal for your wicking beds, as it’s free of chlorine and other chemicals often found in tap water, which can be beneficial for sensitive plants. Learn more about how to set up your own system by reading our article on rainwater harvesting. In areas like the Pacific Northwest, where annual rainfall can exceed 40 inches, this approach can significantly offset garden water needs.
- Rain barrel capacity: Common sizes range from 50 to 100 gallons.
- Downspout diverter: Directs rainwater into the barrel.
- Overflow hose: Prevents barrel from overflowing, directs excess water away.
- Screen filter: Keeps debris out of the barrel.
- Raised platform: Elevates the barrel for better water pressure when filling containers.
Maintaining and optimizing your self-watering garden
While self-watering systems reduce daily chores, they still require some attention to ensure optimal plant health and longevity. Regularly check the water reservoir, especially during peak growing season or hot spells in regions like USDA zone 10 in southern California, where plants can transpire rapidly. Aim to refill the reservoir before it completely dries out to maintain consistent moisture. A visual indicator, like a float valve or a clear section of the fill tube, can make monitoring easier. Over time, salt buildup can occur in the soil, so occasionally flushing the container with plain water from the top can help prevent this issue.
troubleshooting and long-term care
The type of soil mix is critical for success; a light, airy mix with good drainage and water retention is ideal. Heavy garden soil will compact and impede wicking action. Consider a mix of 50% potting mix, 30% compost, and 20% perlite or vermiculite for best results. For perennial plants like blueberries or certain herbs in USDA zone 5, consider larger wicking beds that can accommodate their root systems for several years. Inspect your containers annually for any damage or clogs in the wicking system, especially before the spring planting season around April in the northern US.
- Monitor water levels: Check reservoirs every 2-3 days in summer, less often in cooler periods.
- Top watering: Occasionally water from the top to flush out accumulated salts.
- Nutrient management: Use liquid fertilizers in the reservoir or slow-release granular fertilizers in the soil.
- Pest control: Regularly inspect plants for pests, as consistent moisture can sometimes attract certain insects.
- Winterization: For containers in cold climates, drain reservoirs and protect pots from freezing temperatures below 32 degrees Fahrenheit.
| Feature | 5-Gallon Wicking Bucket | Mini Wicking Bed | Olla |
|---|---|---|---|
| Water Capacity | 2-3 gallons | 10-20 gallons | 1-5 gallons |
| Watering Frequency | Every 3-7 days | Every 1-2 weeks | Every 3-10 days |
| Ideal Plants | One tomato, peppers, herbs | Multiple leafy greens, bush beans, small root crops | Drought-tolerant plants, large shrubs |
| Water Savings | 30-50% | 30-50% | 50-70% |
| Complexity | Low | Medium | Low |
Grow more with less effort
Explore our extensive plant guides to find the best crops for your new self-watering system.
Frequently asked questions
What kind of soil should I use in a self-watering container?
You should use a light, well-draining potting mix that includes amendments like perlite or vermiculite. A good ratio is 50% potting mix, 30% compost, and 20% perlite to ensure proper wicking and aeration for roots, preventing compaction.
How often do I need to refill the reservoir?
Refill frequency depends on plant size, weather, and container size. Smaller containers or hot, windy conditions in USDA zone 9 might require refilling every 2-3 days, while larger wicking beds in cooler climates can last 1-2 weeks.
Can I use self-watering containers for all types of plants?
Most plants, especially vegetables like tomatoes, peppers, and leafy greens, thrive in self-watering systems. Plants that prefer consistently moist soil, such as Chinese Water Chestnut, are particularly well-suited. However, plants that prefer dry conditions, like some succulents, may not do as well.
Do self-watering containers prevent overwatering?
Yes, self-watering containers are designed with an overflow drain that prevents the soil from becoming waterlogged. This ensures plants only take up the water they need, reducing the risk of root rot, especially in areas with heavy rainfall like the Pacific Northwest, which can receive over 40 inches annually.
How do I fertilize plants in a self-watering system?
You can add liquid fertilizer directly to the water reservoir, allowing it to be wicked up with the water. Alternatively, incorporate slow-release granular fertilizer into the potting mix at the beginning of the growing season, typically around May in USDA zone 6.
Are self-watering containers suitable for cold climates?
Yes, but they require winterization. In USDA zones below 7, drain the reservoirs to prevent freezing and cracking, and store containers indoors or protect them from freezing temperatures below 32 degrees Fahrenheit to extend their lifespan.
References
- USDA Natural Resources Conservation Service (2024). USDA Natural Resources Conservation Service.
- EPA — Soak Up the Rain (2024). EPA — Soak Up the Rain.
- SARE — Sustainable Agriculture Research & Education (2023). SARE — Sustainable Agriculture Research & Education.
- ATTRA / NCAT Sustainable Agriculture (2023). ATTRA / NCAT Sustainable Agriculture.
- USDA National Agroforestry Center (2023). USDA National Agroforestry Center.