How to grow onions: sets, seeds, and day-length
Pick the wrong onion for your latitude and you will grow a beautiful green plant that never makes a bulb.
Onions are not complicated to grow, but they are unforgiving of one mistake: choosing the wrong type for where you live. A short-day onion planted in Minnesota will rush to bulb in May, when it is still too small to matter. A long-day onion planted in Texas may sit all summer waiting for daylight that never arrives. Get the day-length match right — that single decision — and the rest of the crop follows naturally from good soil, consistent water, and a little patience with the cure.
This guide walks through all three starting methods (sets, seeds, and transplants), explains the latitude map that determines which onion will actually bulb for you, covers soil, water, and feeding, and takes you through the two to four weeks of curing that separates an onion that stores for six months from one that rots in a week. Whether you are growing yellow storage onions in the Great Lakes or sweet Vidalias in Georgia, the mechanics are the same once you have the right seed in hand.
Onions fit naturally beside the other alliums and root crops you may already be growing. They share bed space comfortably with carrots, and they cross-link neatly to the companion-planting and raised-bed methods covered elsewhere on the site. A 10-foot row yields 20 to 25 lbs at harvest — enough to keep a household in storage onions through winter without a second thought.
Long-day vs short-day: the latitude map that determines everything
Onions are photoperiod-sensitive crops. They do not bulb because the weather gets warm or because the calendar says July — they bulb when the day length crosses a threshold that is hardwired into the variety. That threshold differs by type, and the type you need is determined almost entirely by your latitude.
Long-day onions (37–47° N latitude, roughly the northern tier of the contiguous US and most of Canada) initiate bulbing at 14 to 16 hours of daylight. Plant them in early spring; by late June or July, days are long enough to trigger bulbing. Varieties include Copra, Stuttgarter, Red Wethersfield, and the pungent yellow storage types dominant in the Great Lakes and Pacific Northwest.
Intermediate-day onions (32–42° N, a belt that overlaps the mid-South and transition zones) bulb at 12 to 14 hours. They give gardeners from Kansas to northern Georgia a workable middle option. Reliable varieties: Candy, Superstar, and Sierra Blanca. Note that intermediates are generally not long-term storage onions — expect three to four months rather than six to eight.
Short-day onions (25–35° N, the Deep South and Gulf states) bulb at only 10 to 12 hours of daylight. They are planted in fall in the South and harvested in spring. The famous Vidalia (Georgia), Walla Walla (transplanted to the Pacific Northwest, but historically short-day in origin), Granex, and Texas 1015Y all fall here. Short-day types tend toward sweetness and mild flavor, which is partly why they do not store as long as pungent long-day varieties.
The boundaries are not walls — they are gradients. As Johnny’s Selected Seeds notes, day-length adaptation falls on a continuum with some overlap. A gardener in Nashville (36° N) can try both intermediate and short-day types; someone in Portland, Oregon (45° N) should stick to long-day. The rule of thumb: if you are north of the 37th parallel, go long-day. If you are between 32° and 37°, test an intermediate. Below 32°, short-day is the reliable choice.
| Type | Latitude range | Bulbs at | Planting season | Typical flavor | Storage |
|---|---|---|---|---|---|
| Long-day | 37–47° N | 14–16 hrs | Early spring | Pungent | 6–8 months |
| Intermediate-day | 32–42° N | 12–14 hrs | Early spring | Mild to pungent | 3–4 months |
| Short-day | 25–35° N | 10–12 hrs | Fall (southern US) | Sweet/mild | 1–2 months |

Sets, seeds, or transplants: choosing your starting method
Once you have the right type for your latitude, you need to decide how you are starting the crop. Three methods exist, and they involve real tradeoffs in cost, timing, variety access, and final bulb size.
Sets
Onion sets are thumbnail-sized bulbs grown the previous year and sold at garden centers in spring. They are the easiest method — press them pointed-end-up about one inch into the soil, and shoots emerge within days. The problem is that sets have already completed one growing season. That early maturity signal causes many of them to flower mid-summer rather than put energy into a storage bulb. University of Nebraska–Lincoln Extension is direct on this: sets are not the best way to grow large onions for storage. They work well for green onions pulled early, but if you want fat, long-keeping bulbs, sets often disappoint. Variety selection is also limited to whatever the local garden center stocks — usually red, yellow, or white, with no cultivar specificity.
Seeds
Growing from seed gives you access to every cultivar in the catalog and costs far less per plant than sets or transplants. The catch is time: onion seeds need 10 to 12 weeks indoors before they can move outside. Sow in late February or early March, 1/4 inch deep, under bright light (12 to 14 hours of fluorescent or LED is ideal), and maintain 60–70°F soil temperature. Germination is slow and uneven compared with other vegetables. Keep the seed moist but not waterlogged; onion germination typically runs seven to ten days. Thin to stand one seedling per cell if you are using plug trays. Direct seeding into the garden is also possible in milder climates — sow as soon as the soil is workable in spring, 1/4 to 1/2 inch deep, rows 12 to 18 inches apart — but you will have fewer weeks of leaf growth before bulbing begins.
Transplants
Transplants are bareroot plants started from seed and sold in bundles at nurseries or through mail order in early spring. They split the difference — more variety choice than sets, less lead time than starting from seed yourself. The principle from Nebraska Extension is worth memorizing: each leaf on a transplant represents one future layer in the bulb. Move a pencil-thin transplant with six leaves into the garden, and you are starting a six-layer onion. That is why early transplanting matters — you want as many leaves as possible to form before day length triggers bulbing, because once bulbing starts, leaf production stops and the harvest clock starts.
For all three methods, plant outdoors as soon as the soil is workable and has reached at least 50°F. Onions can tolerate light frost after they are established, but a hard freeze on tiny seedlings causes bolting — the plant flowers instead of bulbing, which ruins the crop. Plant early enough to build leaf mass; do not plant so early that you expose seedlings to a deep freeze.
Soil, sun, and spacing
Onions are shallow-rooted — most feeding roots sit in the top six to eight inches of soil — which makes soil preparation more consequential than with deep-rooted crops. They need well-drained ground with high organic matter. Sandy loam is ideal; heavy clay drains too slowly and keeps the base of the bulb wet, which invites Fusarium basal rot. Raised beds work particularly well for onions, giving you control over drainage and the loose, friable texture that lets bulbs expand without restriction. For an introduction to building that foundation, the guide to raised-bed gardening covers the principles.
Target a soil pH of 6.0 to 7.0. Below 6.0, onions struggle to absorb phosphorus and sulfur (sulfur compounds are what give pungent varieties their bite and storage stability). Work in two to three inches of finished compost before planting rather than fresh manure, which can cause nitrogen spikes that push leafy growth and reduce storage quality. Good soil from the ground up is one of the most detailed topics we cover in the organic gardening soil guide.
Onions need full sun — at least six hours, and eight to ten is better. Crowded or shaded plants grow fewer leaves and produce smaller bulbs. Space transplants or thinned seedlings three to four inches apart within rows and 12 to 18 inches between rows for storage-bulb production. If you want nothing but green onions, you can pack them as close as two inches within the row and pull them young. Do not hill soil up around emerging bulbs — that encourages stem rot at the neck. Once bulbs begin to push out of the soil and shoulder up, that is normal and desirable; leave them above ground.
Watering and feeding
Onions are consistent drinkers. Their shallow roots cannot chase water down through a soil profile, so they depend on what you supply from above. One inch of water per week is the minimum — more during hot, dry spells when bulbs are sizing up rapidly. University of Maryland Extension puts it plainly: onion bulb size is directly proportional to the amount of water applied. That is not a metaphor. Skimping on water during the last six weeks before harvest leaves you with smaller, lighter bulbs that store less well.
At the same time, do not drown them. Onions sitting in saturated soil for more than a day or two develop root rot at the base and become vulnerable to bacterial soft rot in storage. The goal is consistent moisture — not wet, not bone dry. A two-inch layer of straw mulch between rows reduces evaporation, moderates soil temperature, and is worth the hour it takes to apply.
Stop watering entirely when bulbs reach full size and tops begin to fall naturally. Continued watering at that stage pushes moisture into the neck of the bulb, which compromises the curing process and invites Botrytis neck rot in storage.
For fertilizer, onions are moderate feeders. Apply a balanced fertilizer at planting (two to three lb of a 10-10-10 blend per 100 sq ft, or two to three inches of finished compost worked in). Side-dress with a nitrogen source — urea (46-0-0) at 0.25 to 0.5 lb per 25-foot row, or a nitrogen-rich organic fertilizer — once or twice during the growing season, at about four weeks after transplanting and again when bulbing begins. Stop all nitrogen applications once bulbing is underway. Excess nitrogen at that stage delays maturity and produces thick, fleshy necks that do not cure properly and rot in storage.

Common pests and diseases
Onions have fewer pest problems than most garden vegetables, but two insects and three diseases cause most of the damage gardeners see.
Thrips
Onion thrips (Thrips tabaci) are tiny — barely visible without a hand lens — but a heavy infestation can reduce bulb yield by 30 to 50%. Adults are yellow to brown, and they feed in the inner folds of leaves close to the bulb, causing silvery streaking and leaf distortion. Hot, dry conditions favor thrips population explosions. Monitor with yellow sticky traps. For low pressure, insecticidal soap or neem oil applied in the morning (when thrips are active) provides reasonable control. Floating row cover installed at transplanting prevents colonization entirely, though you will need to remove it to allow air movement once temperatures climb above 80°F.
Onion maggot
The onion maggot (Delia antiqua) is the larva of a small fly that lays eggs near the base of plants in spring. Maggots bore into the stem and bulb, causing wilting and decay. Early-season plantings see the heaviest pressure. Floating row cover again is the most reliable organic defense — install it at planting and leave it through the first generation (usually four to six weeks). Crop rotation of three years or more between allium plantings reduces overwintering populations in the soil.
Diseases
Three diseases account for most losses:
- Downy mildew (Peronospora destructor) develops in cool, wet weather and appears as a white-to-purple mold on older leaves. Improve air circulation and avoid overhead watering in the afternoon. Rotate alliums on a three-year cycle where mildew has been a problem.
- Fusarium basal rot causes lower leaves to yellow and the base of the bulb to develop a brown, water-soaked rot. It thrives in warm, wet soils. Good drainage is the primary prevention.
- Botrytis neck rot is the storage disease — it typically does not show up until weeks after harvest, when a fluffy gray mold appears at the neck. Caused by incomplete curing or harvesting in wet conditions. Cure thoroughly (see below) and cull any bulb with a soft neck before it goes into storage.
Container and small-space growing
Full-sized storage onions need room to bulb — at least six to eight inches of soil depth and consistent root moisture — but the small-space version is genuinely excellent. Bunching onions and scallions (Allium fistulosum) are compact, non-bulbing, and perfectly suited to containers. A 10-inch pot at least six inches deep will hold a handful of plants. Fill it with a well-draining potting mix, sow seeds or sets one to two inches apart, and set it in a spot that gets six or more hours of sun. Cut leaves as needed and they will regrow two or three times through the season; harvest the whole plant at the base when tops reach six inches.
If you want to attempt bulbing onions in a container, choose a variety on the smaller end — a Cipollini or a red torpedo — and use a pot at least 12 inches deep and 18 inches wide. Match day length to your latitude as you would in the ground; the day-length physiology does not change just because the roots are in a pot. Water frequently, since containers dry out faster than garden beds, and feed every two weeks with a dilute balanced fertilizer once plants have five or six leaves. You will not match open-ground yields, but a pot on a south-facing patio can produce a respectable handful of cured bulbs.
Green onions grown from seed are also one of the best crops for beginning gardeners who have only a balcony or small patio — they are fast (ready in 60 to 70 days from seed), undemanding, and easy to fit into any available container alongside herbs. The broader principles for starting that kind of small-space growing apply well here, whether you are seeding onions or herbs — see the herb garden guide for a starting framework.
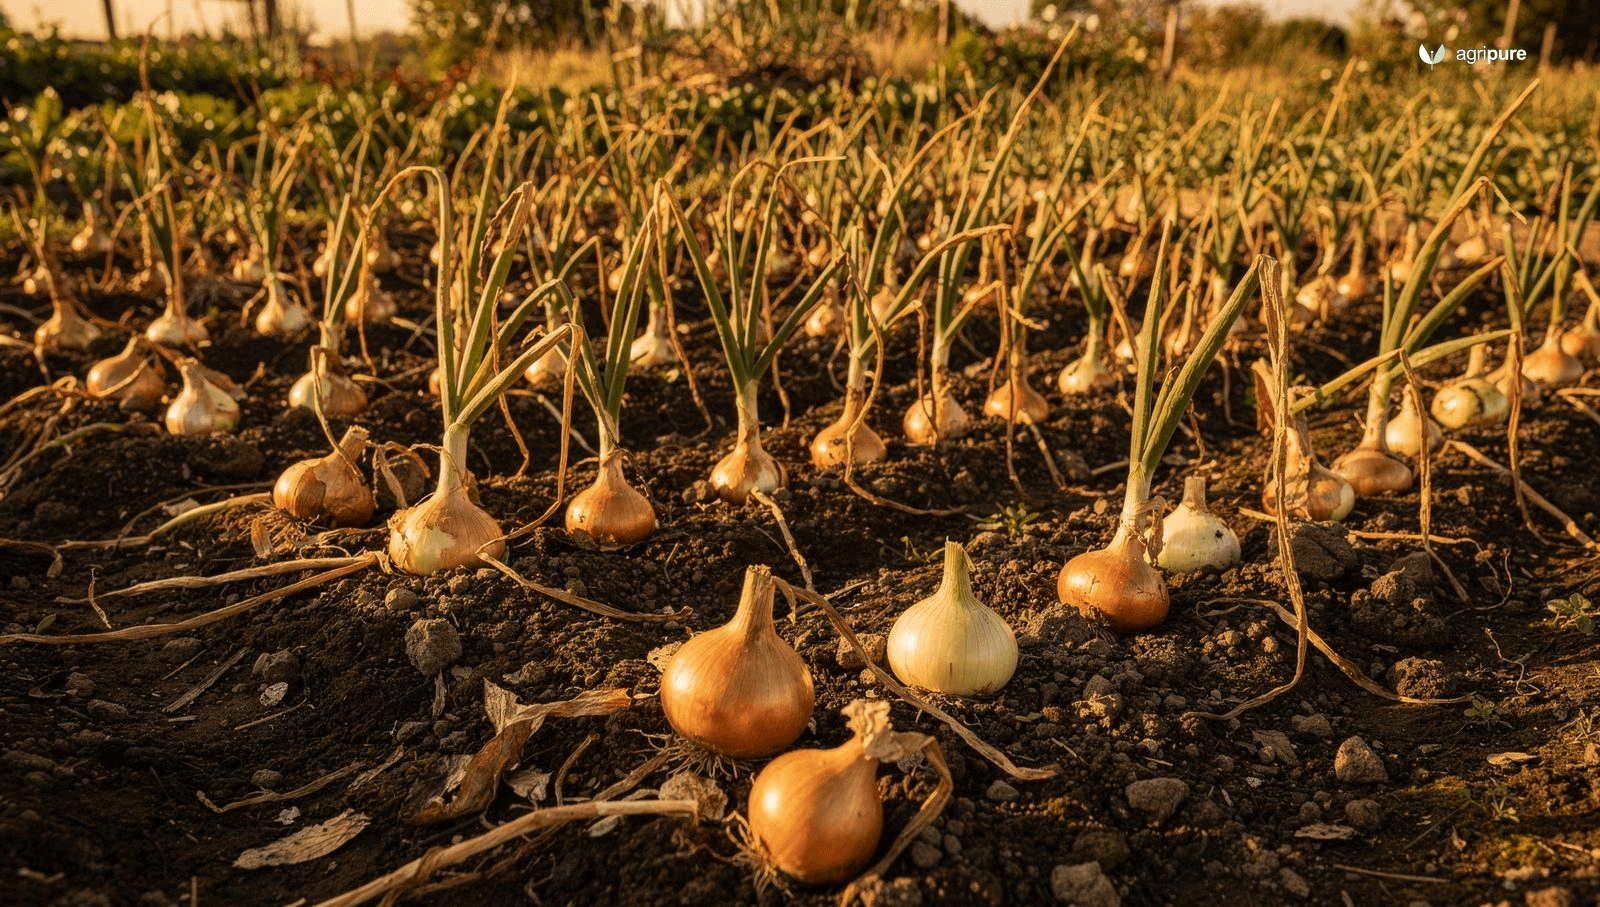
Harvest, curing, and storage
Harvesting too early or skipping the cure are the two mistakes that ruin an otherwise good onion crop. Both have clear, observable signals that tell you exactly what to do.
When to harvest
Harvest when about two-thirds of the tops have fallen over and begun to dry naturally. The neck — the tissue above the bulb — will start to shrink and feel papery rather than fleshy and green. Nebraska Extension puts the flavor peak at 80% foliage die-back, but do not wait much longer than that: once tops are fully dead and the neck is fully dry, the bulb’s outer skin starts to crack and peel, and it becomes vulnerable to rehydration and rot if the weather turns wet. The harvest window is typically 10 to 14 days from first tops falling to the point where the crop must come out.
For storage-quality bulbs, harvest on a dry, sunny day. Avoid harvesting immediately after irrigation or rain, since wet soil on the roots and wet outer skins dramatically increase the risk of Botrytis in storage. Loosen the bulbs gently with a fork rather than yanking by the top, which can bruise the neck and create an entry point for rot.
Curing
Curing is not optional. A freshly harvested onion has a green, fleshy neck that is an open invitation for Botrytis neck rot. The cure closes and papery-dries that neck, seals the outer skins into a protective layer, and reduces water content so the bulb can keep for months rather than weeks.
Spread bulbs in a single layer — not piled — in a warm (75–90°F), well-ventilated space out of direct rain and sun. A covered porch, a greenhouse with good airflow, or a shed with the windows open all work. Leave the roots and tops attached until curing is complete. In dry, warm conditions curing takes two to four weeks; in humid or cooler weather it takes longer. The cure is complete when the neck is completely dry and papery, the outer skins feel like tissue paper, and the root plate is dry and hard. At that point, trim the tops to one inch above the bulb and clip the roots close to the base.
Storage
Sort bulbs carefully before they go into long-term storage. Any bulb with a soft neck, visible mold, cuts, or bruising should be used immediately — it will not keep. Only firm, fully cured bulbs with tight papery skins go into storage. Keep them at 32–36°F and 60% humidity or less. Do not freeze them, and do not store them at 40°F or above — that temperature range triggers sprouting. Keep onions away from potatoes, which give off moisture, and away from fruits that emit ethylene.
A properly cured long-day storage onion — a Copra, a Stuttgarter, a Redwing — stored under those conditions will last six to eight months. A sweet short-day onion (Vidalia, Candy, Granex) stores only one to two months because its lower sulfur and higher sugar content make it physiologically less stable. The pungency that makes a storage onion sharp-tasting is also what makes it last.

The takeaway
Onions reward the gardener who does two things right before the season even begins: picks a variety matched to their latitude, and gives transplants enough time indoors to build real leaf mass before going into the ground. Everything else — soil, water, curing — follows from those two decisions.
Choose your type from the latitude map. Start transplants in late February. Get them into the garden as soon as the soil hits 50°F. Water consistently, stop when tops fall, cure for the full two to four weeks, and sort carefully before storage. A 10-foot row will yield 20 to 25 lbs of onions that carry a kitchen through most of winter. That return, from seed to cured bulb, is one of the quieter rewards of growing your own food — and the kind of thing that makes square-foot gardening and companion planting worth learning alongside it.
Frequently asked questions
What is the difference between long-day and short-day onions?
Long-day onions (grown north of about 37° N latitude) initiate bulbing at 14 to 16 hours of daylight. Short-day onions (grown in the Deep South, roughly 25–35° N) bulb at 10 to 12 hours. Planting a short-day variety in the North causes it to bulb when the plant is still small; a long-day variety in the South may never bulb at all. Match the type to your latitude before choosing a cultivar.
Are onion sets or transplants better for storage onions?
Transplants — either grown from seed indoors or purchased bareroot — produce better storage onions than sets. Sets have already completed one growing season, which predisposes them to bolt mid-summer rather than form a storage bulb. Use sets for green onions pulled early; use transplants or seeds for bulb production.
How do you know when onions are ready to harvest?
Harvest when about two-thirds of the tops have fallen over naturally and the necks are beginning to dry and feel papery. Flavor peaks at about 80% foliage die-back. Harvest on a dry day within one to two weeks of that signal; waiting too long lets the outer skin crack and exposes the bulb to re-wetting and rot.
How long does it take to cure onions?
Two to four weeks at 75–90°F in a well-ventilated, rain-protected space. The cure is complete when the neck is completely papery, the outer skins feel like dry tissue paper, and the root plate is hard and dry. Skip or rush the cure and Botrytis neck rot will appear in storage within weeks.
Can you grow onions in containers?
Yes — bunching onions and scallions grow readily in a 10-inch pot at least six inches deep. Full bulbing onions need a minimum of 12 inches of depth and 18 inches of width, consistent watering, and the same day-length-matched variety you would use in the ground. Container yields are lower than open-ground yields but still worthwhile on a sunny balcony or patio.
References
- Growing onions in home gardens — University of Minnesota Extension
- Growing Onions — Sets, Plants or Seeds? — University of Nebraska–Lincoln Extension
- Harvesting and Curing Onions — University of Nebraska–Lincoln Extension
- Growing Onions in a Home Garden — University of Maryland Extension
- Map & Key Features of Long-Day, Intermediate-Day & Short-Day Onions — Johnny’s Selected Seeds Grower’s Library
- Onions — Texas A&M AgriLife Extension Service
- Varietal Selection — Onion Types — Utah State University Extension
- Onions and day length — University of Maryland, Maryland Grows blog