How to grow broccoli: timing the cool-season window
“Broccoli is one of the most rewarding cool-season crops you can grow — but only if you catch the window.”
Broccoli is a cool-season brassica that rewards patience, planning, and precise timing. Get it into the ground when temperatures are still dropping or have not yet climbed, and you will harvest a dense, sweet head followed by weeks of productive side shoots. Miss the window by a few weeks and the plant bolts into yellow flowers before the head ever sizes up. The difference between success and failure is almost entirely about temperature and timing.
That is the premise of this guide. Rather than a list of garden platitudes, what follows is the actual sequence — from variety choice and seed-starting math, through soil prep and spacing, to harvesting the main head and coaxing out every last side shoot. The pests section focuses on cabbage worms, which are the single most common reason a broccoli crop looks ragged by harvest time, and what actually stops them.
Broccoli fits naturally into a raised-bed system, pairs well with the succession-sowing rhythm of a well-planned kitchen garden, and is one of the crops that rewards starting from seed — a skill covered in our seed-starting guide.
Choosing the right variety
All supermarket broccoli belongs to the calabrese type — one large central head, followed by smaller side shoots. Within that category, days-to-maturity varies enough to matter. A 50-day variety and a 65-day variety planted on the same date will bolt at very different points in an early-summer heat wave, and that gap can determine whether you get a head at all.
For spring planting, choose varieties that mature in 50 to 60 days from transplant. In fall, where the window is longer (temps drop rather than rise), you can run slower-maturing types at 60 to 85 days. Utah State University Extension names Packman (50 days), Green Comet (55 days), and Premium Crop (65 days) as reliable performers across a range of climates. Waltham 29 is a widely available open-pollinated choice, known for prolific side shoots after the main head — a strong pick for gardeners who want extended harvest over maximum main-head size.
If you are growing in containers or on a balcony, look for compact hybrids: Di Cicco (48–70 days) and Belstar F1 (compact, 45 cm spread) stay manageable in a 12-gallon pot and still produce usable side shoots. The RHS also names Claret AGM for heavy cropping and Cardinal AGM for cold-hardiness, both useful in Zones 6 and below where late-fall harvests are the goal.
| Variety | Days to maturity | Best for | Side-shoot yield |
|---|---|---|---|
| Packman | 50 | Spring, fast-maturing | Moderate |
| Green Comet | 55 | Spring / fall general use | Moderate |
| Waltham 29 | 74 (open-pollinated) | Fall / extended harvest | High |
| Premium Crop | 65 | Fall, large heads | Moderate |
| Di Cicco | 48–70 | Containers, succession | High |
| Belstar F1 | 60 | Containers, compact spaces | High |
Timing your planting: spring and fall windows

Broccoli grows best when temperatures stay below 75°F during the day. It is not seriously damaged by frost down to 28°F, which makes it ideal for two windows each year: early spring and late summer into fall. Growing it through a hot summer is not a strategy — it is a guarantee of bolting.
Spring planting math
Work backwards from your last frost date. University of Minnesota Extension recommends setting transplants outdoors two to three weeks before the last spring frost. University of Maryland Extension puts transplants out four weeks before last frost, using five-to-seven-week-old seedlings. Split the difference and plan on three to four weeks before last frost for transplanting, with seeds started indoors six to seven weeks before that outdoor date.
Example: if your last frost is May 1, start seeds around February 18–March 1, transplant outdoors around April 3–17. The goal is to have the crop size up and be cut before consistent daytime temperatures climb above 75°F — in Minnesota, that is typically June; in Maryland and farther south, late May.
Fall planting math
Fall broccoli is, for many gardeners, the better crop. The plant matures as temperatures fall rather than rise, meaning it never hits the heat wall that causes spring crops to bolt. Utah State University Extension recommends planting 50 to 75 days before your anticipated maturity date. University of Maryland Extension puts transplants out by the first week of August, with seeds sown in mid-July — roughly 10 to 12 weeks before first fall frost.
Because broccoli tolerates frost, a fall crop can continue after nights drop to 28°F. Light frosts can actually sweeten the heads slightly by converting starches to sugars. Plan succession plantings two weeks apart to spread harvest across a longer window rather than getting everything at once.
Zone reference quick table
| USDA Zone | Spring transplant out | Fall seed start (indoors) | Fall transplant out |
|---|---|---|---|
| Zone 4 (MN, WI) | Late April | Mid-June | Late July |
| Zone 6 (PA, OH) | Early to mid-April | Early July | Early August |
| Zone 7 (MD, VA, KY) | Late March | Mid-July | Early to mid-August |
| Zone 8 (Pacific NW, SE) | Feb–Mar | August | September |
Soil, sun, and spacing
Broccoli is a heavy feeder with a shallow, fibrous root system — it draws from the top 12 inches of soil and needs that zone to be both nutrient-rich and consistently moist. The minimum requirement is six hours of direct sun daily; eight to 10 is better. In hot climates, afternoon shade from a taller crop or a structure can extend the spring window by a week or two.
Target a soil pH of 6.0 to 7.0, ideally 6.5. Below 6.0 and the plant becomes more susceptible to clubroot, a soil-borne disease that disfigures the root system. Incorporate two to three inches of well-rotted compost or manure before planting — per the RHS, two bucketfuls per square metre is a practical starting point. Fresh manure adds too much nitrogen too fast and can burn roots; compost that has finished is the standard.
Spacing matters more than most first-time broccoli growers expect. NC State Extension notes that close spacing — one foot by one foot — reduces head size and actively inhibits side shoot development, which is where much of the season’s yield comes from. The standard recommendation is 16 to 24 inches between plants and 24 to 30 inches between rows (University of Maryland Extension), or 18 inches by 24 to 36 inches as a working minimum. Wider spacing gives the plant room to build the stem mass and leaf canopy that feed side shoots for weeks after the main head is cut.
Watering and feeding

Broccoli needs one to two inches of water per week, consistent rather than periodic. Irregular watering — wet then dry cycles — stresses the root zone and produces hollow stems, bitter heads, or premature bolting. University of Maryland Extension recommends maintaining even soil moisture throughout the season; Utah State recommends drip irrigation when possible to keep water off the developing head.
A layer of straw or wood-chip mulch three to four inches deep around the base of each plant serves two purposes: it holds soil moisture and moderates the soil temperature, keeping roots cooler when late-spring temperatures begin to climb.
Feeding schedule
Broccoli is nitrogen-hungry at every stage. NC State Extension describes it as having a high nutrient requirement from either soil organic matter or fertilizer. A practical schedule, per Utah State University Extension:
- At transplanting: Apply a starter fertilizer (phosphorus-forward) to ease transplant stress.
- Four weeks after transplanting: Side-dress with nitrogen — ½ cup of 21-0-0 (ammonium sulfate) per 10-foot row, worked lightly into the soil at least four inches from stems.
- When the central head reaches quarter size: Apply a second ¼ cup of nitrogen per 10-foot row.
- Immediately after cutting the central head: Side-dress again with nitrogen to fuel side-shoot development. University of Maryland Extension and Utah State both list this post-harvest feeding as the key step most gardeners skip, and it is where weeks of additional harvest are either created or lost.
For organic growers, blood meal (12-0-0) and fish emulsion both work at similar timing intervals. Compost top-dressed after main head harvest is slower but builds soil structure as it feeds. Heavy feeders like broccoli also benefit from the long-term soil building described in our organic soil guide.
Common pests and diseases — the cabbage worm problem
Broccoli belongs to the brassica family, and most of its pest problems are shared with cabbage, cauliflower, kale, and Brussels sprouts. The most destructive and most common pest, by a significant margin, is the imported cabbageworm — the larva of the white cabbage butterfly (Pieris rapae), a white butterfly with a two-inch wingspan and distinctive black wing markings. Most gardeners have seen it fluttering around the vegetable patch and not realized it was the delivery mechanism for the ragged, hole-riddled leaves they find a week later.
The adults lay tiny, bullet-shaped yellow eggs on the undersides of outer leaves. The larvae that hatch are velvety green caterpillars with a single yellow stripe, and they feed first on outer leaves before boring into developing heads and leaving dark green fecal pellets through the florets. University of Maryland Extension notes two to four or more generations per year, so pressure continues from late spring through fall.
Cabbage worm control hierarchy
Control follows a simple priority order, from most effective and least input-heavy to more active intervention:
- Floating row cover (most effective). Installed at planting and kept in place until harvest, row cover physically prevents the butterfly from laying eggs. There is no caterpillar if there is no egg. University of Maryland Extension recommends this as the primary method — it requires no spraying, no monitoring, and no re-application. Remove it only for harvest.
- Hand-picking. Practical for small plantings or if row cover is not available. Check both leaf surfaces every two to three days; drop caterpillars into soapy water.
- Bacillus thuringiensis (Bt). A naturally occurring soil bacterium that is toxic specifically to caterpillar larvae. It must be applied while larvae are young — older caterpillars are harder to kill. Re-apply after rain. Bt is OMRI-listed for organic production and has no withdrawal period for vegetables.
- Spinosad, neem, pyrethrin. Effective organic options when Bt does not give full control. Spinosad is the strongest; rotate with Bt to avoid resistance. Apply in the evening to minimize impact on pollinators.
Crop rotation is the longer-term tool. Penn State Extension recommends a three-year rotation away from brassicas in any bed to break the cycle of soil-borne pests (including cabbage root maggot) and clubroot disease. Remove all plant debris at the end of the season — the imported cabbageworm overwinters as a chrysalis in plant material left on the ground.
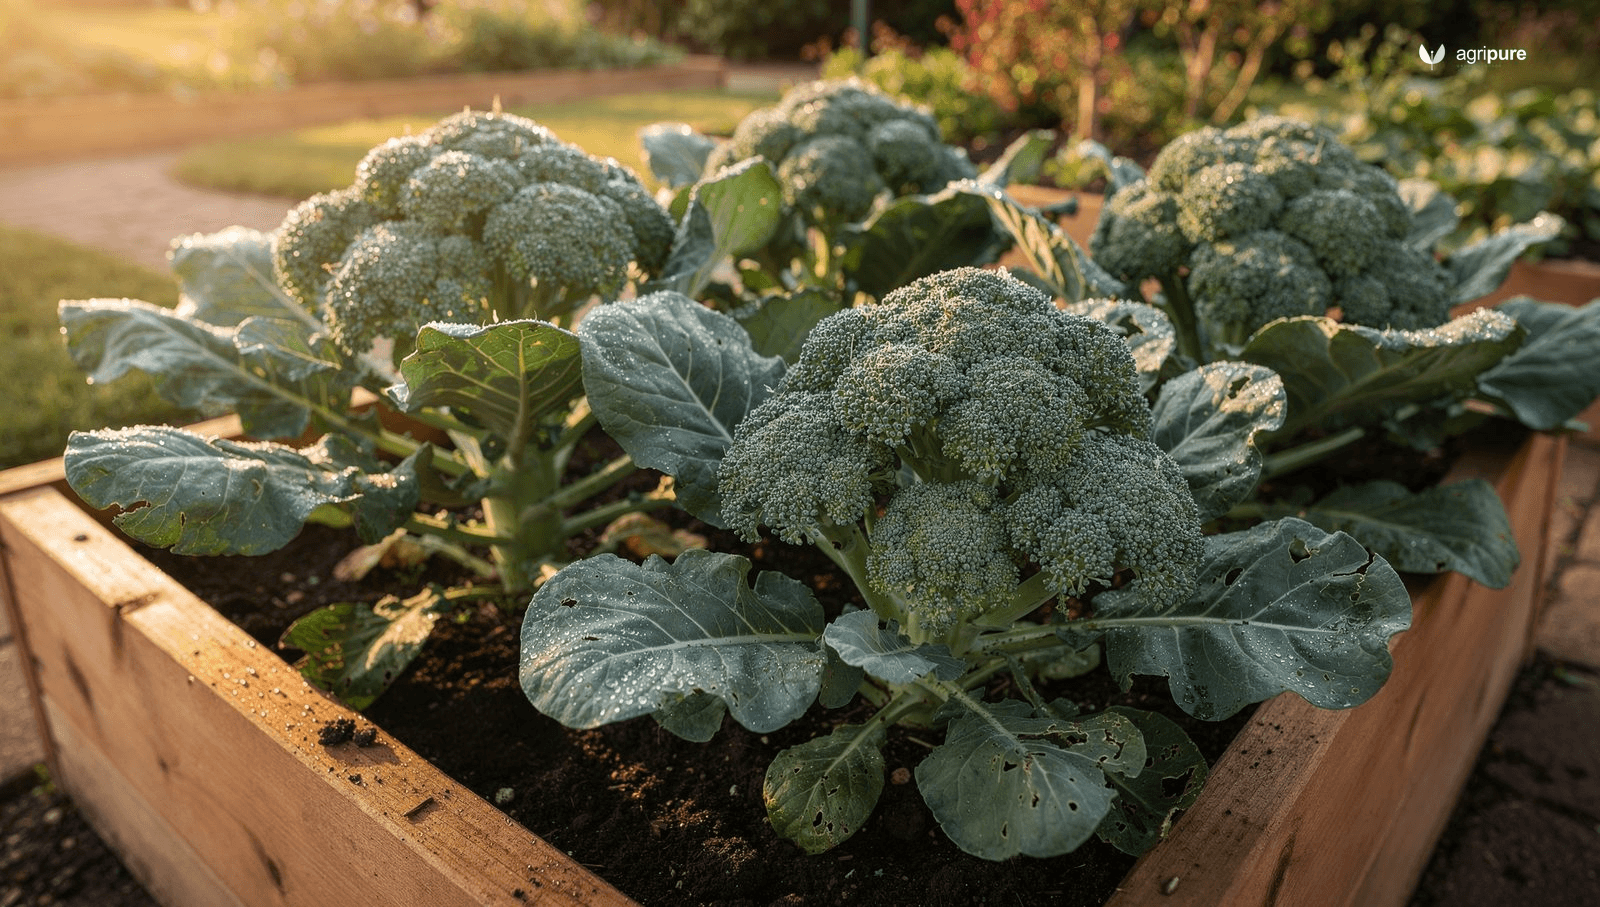
Harvesting the main head and maximizing side shoots

The central head is ready when it is tight, compact, and fully green — buds closed, no yellow showing anywhere. University of Maryland Extension puts this at three to eight inches across for most home-garden varieties. Once even a few florets open to yellow flowers, the flavor of the whole head degrades quickly and the plant moves its energy from side shoot production into seed set.
The cut itself matters. Use a sharp knife and cut the main stem leaving six to eight inches of stalk below the head. That stem — along with the lateral branches that remain — is what the side shoots will grow from. A clean cut heals faster than a ragged one and reduces disease entry points.
Penn State Extension notes that side shoots reach two to three inches and are worth harvesting on a regular basis. Utah State Extension puts them at three to six inches with continued water and fertilizer. The RHS advises cutting regularly: the more often you harvest, the more the plant redirects energy into producing new shoots. If you leave side shoots to open and flower, that signal — seed ripening — tells the plant the season is over.
How many harvests to expect
A well-managed broccoli plant at proper spacing can produce the main head plus four to six weeks of side-shoot cuts. Utah State Extension puts total yield at 7 to 10 lbs per 10-foot row with adequate water and post-harvest fertilizing. University of Maryland Extension estimates 4 to 6 lbs per 10-foot row at the lower end. The range is wide because spacing, nitrogen, and consistency of harvest are the three main variables.
To store freshly cut broccoli: unwashed, loosely wrapped in damp paper and placed in the refrigerator at 32°F with 95% relative humidity. University of Maryland Extension gives 10 to 14 days; the RHS notes it is best used as fresh as possible. For longer storage, blanch for three minutes in boiling water, shock in ice water, drain, and freeze — broccoli holds well in the freezer for up to 12 months.
Growing broccoli in containers
Broccoli is large enough that container growing comes with real constraints, but it is workable for balcony or patio growers using the right setup. The minimum usable container is 12 gallons (roughly 16 inches in diameter and 14 inches deep) per plant. A five-gallon bucket is too small — the plant will produce a stunted head and no side shoots worth harvesting.
Choose fast-maturing, compact varieties. Di Cicco (48–70 days, open-pollinated) is a reliable heirloom choice: it forms multiple small heads from the start rather than one large central head, which suits container growing well. Belstar F1 stays compact at 45 cm spread. Royal Tenderette Hybrid (50–60 days) is another compact option with good side-shoot production.
Use a high-quality potting mix — not garden soil, which compacts in containers — amended with compost. Container broccoli dries out faster than in-ground, so water more frequently: check daily in warm weather. Feed with a balanced liquid fertilizer (fish emulsion or diluted compost tea) every two weeks rather than dry granular side-dressing, which is easier to manage in containers without burning roots. The small-space companion to this approach is the square-foot gardening method, where one plant per square foot in a raised container bed is the standard allocation for brassicas.
Troubleshooting common problems
Even with good timing and spacing, broccoli throws surprises. These are the problems that come up most often, and what they usually mean.
- Small, tight heads that flower immediately (“buttoning”). Usually caused by transplanting too-large seedlings into cold soil, or by temperature stress during early head formation. Use 5-to-7-week-old transplants, not older.
- Hollow stems. A boron deficiency symptom in some soils, also associated with rapid growth driven by excess nitrogen. A balanced fertilizer approach (not just nitrogen) prevents most cases. A soil test before planting is the clean fix.
- Yellow heads before harvest. Heat stress — the plant is bolting. Harvest immediately, even if the head is smaller than ideal. The flavor is still usable for two to three days after yellowing begins.
- Ragged, holed leaves with no visible insects. Cabbage worm frass (dark green pellets) will be on the leaves and heading florets. Check undersides of leaves for caterpillars and apply Bt within 24 hours of confirmed sighting.
- Stunted plants with distorted, club-like roots (clubroot). A soil-borne disease favored by low pH and poor drainage. Raise pH to 7.0 with lime, improve drainage, and rotate brassicas on a three-year minimum cycle.
Broccoli is a forgiving crop when temperatures are right and an unforgiving one when they are not. Plan around the two cool windows in your zone, give the plant adequate spacing to build the scaffolding for side shoots, and do not skip the post-harvest nitrogen feed. The main head is the event everyone plants for; the side shoots are the actual return on the investment — and with consistent management, they can keep coming for a month after the first cut. Pair the harvest with smart companion planting choices from our companion planting guide, where aromatic herbs in the same bed add a layer of pest-masking diversity that supports the row-cover approach described above.
Frequently asked questions
When should I plant broccoli?
Broccoli is a cool-season crop with two planting windows. For spring, set transplants outdoors three to four weeks before your last frost date, starting seeds indoors six to seven weeks earlier. For fall, start seeds in mid-July (or set transplants by early August for most of the US), aiming to mature the crop before extended hard freezes — broccoli tolerates light frost to 28°F and can continue growing into November in Zones 6–8.
How do I get more side shoots from broccoli?
Three things determine side-shoot yield: spacing, water, and post-harvest nitrogen. Space plants at least 16–18 inches apart so lateral branches have room to develop. Water consistently at one to two inches per week. Immediately after cutting the central head, side-dress with a nitrogen fertilizer — ½ cup of 21-0-0 per 10-foot row, or a liquid fish emulsion for organic growers. Harvest side shoots regularly, every two to three days once they reach two to six inches, because leaving them to flower signals the plant to stop producing.
What is the best way to control cabbage worms on broccoli?
A floating row cover installed at planting and kept in place until harvest is the most effective single measure — it prevents the white cabbage butterfly from laying eggs, so there are no caterpillars. If row cover is not an option, inspect plants every two to three days and hand-pick caterpillars, or apply Bacillus thuringiensis (Bt) while larvae are young. Bt is an organic-approved biological pesticide with no pre-harvest interval and no effect on beneficial insects.
Can I grow broccoli in containers?
Yes, with the right variety and container size. Use a minimum 12-gallon (16-inch diameter) container per plant; anything smaller will produce a stunted head and no side shoots. Choose compact, fast-maturing varieties — Di Cicco (48–70 days), Belstar F1, or Royal Tenderette Hybrid. Water daily in warm weather and feed with liquid fertilizer every two weeks rather than dry granular applications.
When is broccoli ready to harvest?
The central head is ready when it is three to eight inches across, the floret buds are tight and dark green, and no yellow is showing. Cut with a sharp knife leaving six to eight inches of stalk. Once the buds begin opening to yellow flowers, flavor declines quickly — when in doubt, harvest early. Side shoots are ready at two to six inches long and should be harvested regularly to keep the plant productive.
References
- Growing broccoli in home gardens — University of Minnesota Extension
- Growing Broccoli in a Home Garden — University of Maryland Extension
- Broccoli in the Garden — Utah State University Extension
- Imported Cabbageworm on Vegetables — University of Maryland Extension
- Cole Crops for the Home Vegetable Garden — Penn State Extension
- How to grow broccoli — Royal Horticultural Society (RHS)
- Basics of Broccoli Production — NC State Extension