Key takeaways

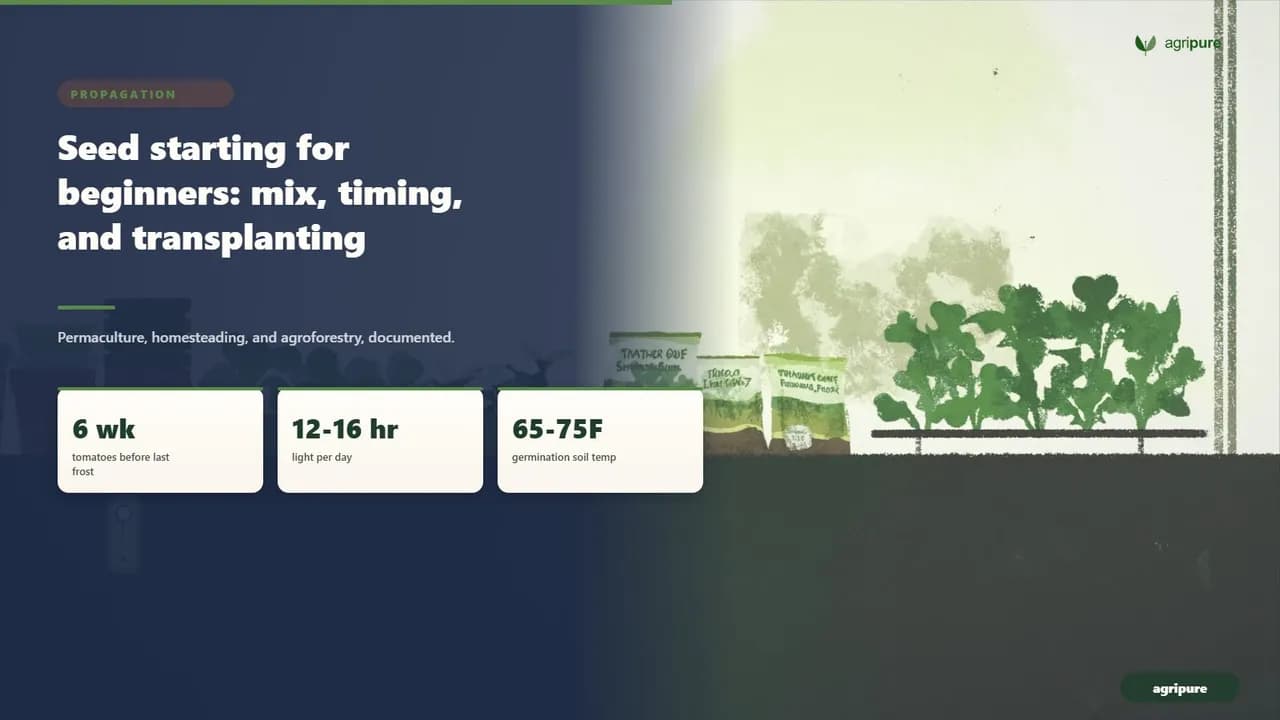
Seed starting trays positioned under a light source to prevent leggy growth before outdoor transplanting.
- Start seeds in a sterile, soilless seed starting mix — peat or coir with perlite and vermiculite — not garden soil, which is heavy, full of weed seeds, and carries the pathogens that cause damping-off.
- Decide sowing dates by counting back from your average last frost: tomatoes about 6 weeks, peppers and eggplant 8 weeks, brassicas 6 to 7 weeks, and cucurbits only 2 to 4 weeks; carrots, beets, and peas should be sown straight into the garden.
- A sunny window rarely gives enough light — seedlings want 12 to 16 hours under a grow light held 2 to 4 inches above the leaves, raised as they grow.
- Bottom heat matters more than air heat: 65 to 75 degrees F suits most seeds, while peppers want 80 to 90 degrees F to germinate, and a heating mat earns its keep.
- Prevent damping-off with clean trays, a sterile mix, and a surface that dries between waterings, then thin, pot up, and harden off over a week or two before transplanting out.
A flat of tomato seedlings on a basement shelf in March is the cheapest way to fill a summer garden — a 4 dollar seed packet holds more plants than you could buy for 60. It is also where most beginners lose their crop before it ever reaches the bed. Seeds drown in the wrong mix, stretch pale and leggy on a windowsill, or collapse overnight from a fungus they never saw coming. None of that is bad luck. Each failure traces to one of a handful of variables — mix, timing, light, heat, water — that you control completely indoors. Get those 5 right and germination stops being a gamble. This guide walks each one in order, with the numbers that matter, so your first flat behaves like a tenth.
Seed starting mix is not garden soil
The first decision is what you fill the tray with, and the single most common beginner mistake is reaching for a shovel of garden dirt. A proper seed starting mix is a soilless blend — usually sphagnum peat moss or coconut coir loosened with perlite and vermiculite — and across a tray of 24 or 72 cells it does the one job garden soil does badly: cradling a tiny root in light, sterile, evenly moist material 1 to 2 inches deep.
Why garden soil fails in a tray
Backyard soil behaves nothing like its open-ground self once you pack it into a 2-inch cell. As Oregon State University Extension puts it, typical backyard soil is too compacted, full of weed seeds, and not pasteurized, which can lead to seedling diseases and plant loss. It also notes that native soil often drains poorly and can form a crust that seedlings cannot push through. Three problems compound in that small volume:
- Compaction. Field soil slumps into a dense plug that starves roots of air and holds water like a sponge.
- Weed seeds. You cannot tell a weed seedling from your crop at the cotyledon stage, so a contaminated mix means guesswork.
- Pathogens. Unpasteurized soil carries the fungi and water molds that cause damping-off, the disease that fells seedlings at the soil line.
University of Minnesota Extension is blunt about the fix: do not use regular garden soil to start seeds, because it is heavy and potentially filled with weed seeds and pathogens, and a soilless potting mix of sphagnum peat moss, perlite, and vermiculite will work best. That is the opposite of the rich, biologically alive ground you want outdoors — for the difference between a sterile start and the living soil a mature garden runs on, the 2 media are doing different jobs.
A DIY seed starting mix recipe
You can buy a bag labeled seed starting mix, or blend your own. A workable homemade recipe from Oregon State Extension is one-third pasteurized soil or compost, one-third sand or vermiculite or perlite, and one-third coir or peat moss. A simpler soilless version many growers use is 2 parts peat or coir, 1 part vermiculite, and 1 part perlite, with a handful of screened compost if you want a touch of fertility. The mix should be fine, uniform, well aerated, and loose.
If you include any real soil or garden compost, pasteurize it first — spread it in a pan and hold it at 180 degrees F for 30 minutes, no hotter, since baking soil past that point releases compounds that can harm seedlings. A clean bagged mix needs no treatment; the value of the recipe is control over texture and cost when you are filling dozens of cells.
When to start seeds, counted back from your last frost
Timing is the variable that separates a stocky transplant from a pale, root-bound one, and it runs on a single anchor date: your average last spring frost. Everything counts backward from there, anywhere from 2 to 10 weeks depending on the crop. Start too early and seedlings outgrow their cells and stretch toward the glass; start too late and you lose weeks of the season. The math is simple once you have the date.
Count back from the frost-free week
Find your average last frost date first — a state climatologist or local Cooperative Extension office publishes it by ZIP code, and it shifts by weeks across a region. Then subtract each crop’s indoor head start. Iowa State University Extension frames the general rule cleanly: most annuals and vegetables grown from seed need to be started indoors 6 to 8 weeks before transplanting, and for a crop that needs 6 weeks plus one for hardening off, you count back to sow in, for example, the third week of March. Add that hardening-off week into every calculation — it is real time the plant spends not growing in the cell.
Weeks before frost, by crop
The head start spans a 2-to-10-week range, not one number — it varies by crop, and warm-season fruits need far longer indoors than cucurbits. Drawing on the Clemson and Rutgers extension schedules, here is where the common crops land:
- Peppers and eggplant — 8 to 10 weeks; the slowest, warmest germinators in the flat.
- Tomatoes — about 6 weeks, sometimes 6 to 8; aim for a stocky plant, not a tall one.
- Broccoli, cabbage, and other brassicas — 6 to 7 weeks; these tolerate cool soil and go out earlier.
- Lettuce and other greens — 5 to 6 weeks.
- Cucumber, squash, and melon — only 2 to 4 weeks; these grow fast and resent root disturbance, so a short, late start beats a long one.
Crop | Weeks before last frost | Start indoors or direct-sow |
|---|---|---|
Peppers, eggplant | 8 to 10 | Indoors |
Tomatoes | 6 (to 8) | Indoors |
Broccoli, cabbage | 6 to 7 | Indoors |
Lettuce, greens | 5 to 6 | Indoors |
Cucumber, squash, melon | 2 to 4 | Indoors (briefly) |
Carrots, beets, peas | — | Direct-sow |
Clemson Extension sums up the warm-season window as 4 to 8 weeks before planting outside, with peppers and eggplant at the long end and cucurbits at the short end. The lesson hidden in that table: starting everything on the same day in February is a mistake. Your peppers and your squash belong on the shelf 2 months apart.
What to direct-sow instead
Not every seed belongs in a tray. Some crops resent transplanting or simply grow faster outdoors. Rutgers Extension is direct: vegetables like carrots, beets, and peas should always be seeded directly in the garden. Root crops fork and stall when their taproot is disturbed, and peas and beans germinate so readily in soil above 60 degrees F that an indoor head start buys nothing. Reserve your shelf space and grow lights for the slow, frost-tender crops that genuinely need the jump — the tomatoes, peppers, and eggplant — and sow the rest where they will live.
Containers and soil blocks for seedlings
What to start seeds in
Almost anything that holds 1 to 2 inches of mix and drains will start a seed, which is why windowsill gardeners reach for yogurt cups and egg cartons. They work, with two caveats: every container needs drainage holes, and shallow ones like egg cartons dry out fast and cramp roots within a couple of weeks, so plan to pot up early. The common options, weakest to strongest:
- Egg cartons and yogurt cups. Free, but shallow and quick to dry; fine for a few seeds if you pot up within 2 to 3 weeks.
- Cell trays with a dome. Even watering, room for roots, and a humidity dome that holds germination moisture — the reliable default.
- Soil blocks. No plastic and no transplant shock, but they need a wetter mix and closer attention.

Purpose-made cell trays and inserts make the job tidier and the watering more even, and a tray with a clear humidity dome holds the moisture seeds need to germinate. Sow 2 or 3 seeds per cell and later thin to the strongest, as University of Maryland Extension advises — sowing in defined cells or rows rather than scattering also means that if damping-off appears, there is less chance it spreads across the whole flat.
Soil blocks, the no-plastic option
Soil blocks are the no-plastic alternative: you compress a damp, slightly stickier mix into free-standing cubes — commonly 2-inch blocks from a hand-held blocker — and the seedling roots stop at the air gap between blocks instead of circling. That air-pruning gives a stronger root system and skips transplant shock, since the whole block goes into the ground. Blocks need a wetter, higher-peat mix to hold their shape, and they dry faster at the edges, so they reward attention — but for a grower starting many seedlings without a drawer full of plastic, they are worth learning.
Light: a sunny window is rarely enough
This is where most windowsill seedlings fail. A south-facing window in late winter delivers a fraction of midsummer sun and often under 10 hours of daylight, and seedlings respond by stretching — pale, thin, leaning stems reaching for the glass. Leggy seedlings rarely recover into sturdy plants. The fix is a grow light, and the 2 numbers that matter are duration and distance.

How many hours, and how close
Seedlings are not houseplants; they want long, bright days. University of Maryland Extension recommends 12 to 16 hours of light daily, and to keep the lights no more than 4 inches above the tops of the seedlings, with as close as 2 inches ideal. Minnesota Extension gives the same window — lights 2 to 4 inches above the seedlings, on 12 to 16 hours per day — raised steadily as the plants grow. Put the lights on a timer so the photoperiod stays consistent without you thinking about it.
Which light, and the leggy test
You do not need a horticultural fixture. An ordinary LED or fluorescent shop light hung on adjustable chains does the job, because proximity matters more than spectrum at this stage — a cheap light 2 inches away beats an expensive one 2 feet away. Watch the seedlings for the verdict: short internodes and stout stems mean the light is close enough; stretching, floppy stems mean drop the fixture or raise the tray. The plant tells you before any meter would.
Bottom heat and germination temperature
Seeds germinate in response to soil temperature, not air temperature — and the mix in an indoor tray can sit 5 or more degrees cooler than the room. Warmth at the root zone is what wakes a seed and sets how fast it sprouts. Each species has a minimum, optimum, and maximum, the 3 cardinal temperatures that the thermal-time research quantifies, and hitting the optimum is the difference between germination in days and germination in weeks of rotting.
The numbers that matter
For most vegetables, a soil temperature of 65 to 75 degrees F is ideal for germination, per Clemson Extension. Warm-season crops run hotter. Minnesota Extension recommends a heating mat to hold the flat at 75 to 85 degrees F for tomatoes and 80 to 90 degrees F for peppers until seedlings emerge, then a soil temperature near 70 degrees F once they are up. Cool-season crops are the reverse — broccoli, cabbage, and spinach germinate happily in the 55 to 65 degrees F range and do not need a mat at all.
Crop group | Germination soil temperature | Heat mat? |
|---|---|---|
Most vegetables | 65 to 75 degrees F | Helpful |
Tomatoes | 75 to 85 degrees F | Yes |
Peppers, eggplant | 80 to 90 degrees F | Yes |
Brassicas, lettuce, spinach | 55 to 65 degrees F | No |
Move the tray once it sprouts
A seedling heating mat under the tray is the simplest way to reach those warm-crop targets in a cool basement. Minnesota Extension notes the same trick for disease control: warming the soil to 70 to 75 degrees F keeps seedlings growing vigorously past the stage where damping-off strikes. Once seeds have sprouted, move the tray off the mat and under the lights — the heat’s job is done, and warm, wet, still conditions invite trouble.
Watering, humidity, and preventing damping-off
Damping-off is the seedling killer that catches beginners off guard: healthy sprouts topple at the soil line overnight, their stems pinched and water-soaked. It is not a fluke — it is a disease, and it is preventable. University of Minnesota Extension names the culprits as 3 pathogens — the fungi Rhizoctonia and Fusarium and the water mold Pythium — all of which thrive in cool, wet, airless conditions. Your job is to deny them that environment.
Keep the surface dry and the air moving
Seeds need steady moisture to germinate, which is why a humidity dome helps for the first 1 to 2 weeks — but the moment seedlings emerge, the rules flip. The single most effective habit is to let the surface dry between waterings: keep the mix moist but never soggy, and the pathogens lose their footing. Watering from the bottom, by setting trays in a shallow tray of water until the surface darkens, keeps the crown dry while the roots drink. Pull the dome off once sprouts appear, and give the flat air movement — a small fan on low, or simply an open, uncrowded shelf — to dry the surface and stiffen the stems.
Start clean
Most damping-off arrives on dirty equipment or in reused soil. These 3 rules close that door:
- Use a new, sterile mix. Minnesota Extension says plainly: don’t reuse potting mix, and don’t use garden soil or compost.
- Sanitize containers. Soak used pots and trays in a 10% household bleach solution for 30 minutes before sowing.
- Sow thinly and pot up on time so seedlings never sit crowded in stale, saturated mix.
These are the same conditions the rhizosphere research describes — a sterile mix simply lowers the pathogen load a young root must survive while it establishes.
Quick damping-off triage: if seedlings start toppling, stop misting immediately, pull off the dome, move air across the tray with a fan, and water only from the bottom when the surface is dry. You cannot cure a collapsed seedling, but you can usually save the rest of the flat by drying it out and getting air moving the same day.
Thinning, potting up, hardening off, and transplanting out
The last stretch is about graduating seedlings from a protected tray to open ground without shocking them. These 4 steps carry them across, and skipping the last one is how a healthy flat dies in a weekend.
Thin and pot up
Once the first true leaves appear — the second set, roughly 2 to 3 weeks after sowing, not the rounded seed leaves — it is time to manage the crowd. Thin each cell to the single strongest seedling by snipping the others at the soil line rather than pulling, which spares the keeper’s roots. When roots fill the cell or seedlings outgrow a shallow container, pot up into a larger pot with fresh mix so growth never stalls. Maryland Extension’s rule of two or three seeds per cell, thinned to one, is the simple version of this.
Harden off, then transplant
Indoor seedlings have never felt wind, direct sun, or a cold night, and moving them straight outside over 1 day scorches and stresses them. Hardening off is the gradual fix. Rutgers Extension says to begin about one week before transplanting; Minnesota Extension stretches it to a week or two — set plants outside in a sheltered, part-sun spot for a couple of hours the first day, then add time and exposure daily, bringing them in if a frost threatens. After hardening off, transplant on a calm, overcast evening to limit shock, water them in, and settle them into a prepared bed. Most of these seedlings are headed for raised beds or the no-dig beds where they will spend the summer — the better that ground, the less the transplant notices the move.
The takeaway
Seed starting rewards control, not luck. Indoors you set every variable the seed cares about — a sterile soilless mix instead of garden dirt, a sowing date counted back from your last frost, 12 to 16 hours of light held inches off the leaves, bottom heat tuned to the crop, and a dry-enough surface that starves damping-off. Miss one and the flat tells you fast; the pale stem, the toppled sprout, the seedling still sulking in cold mix are all legible signals, not mysteries. Start your peppers 8 weeks out and your squash two, keep the trays clean, harden the plants off before they ever meet the wind, and the cheapest plants in the garden become the strongest. That first flat is a skill, and it compounds every season after.
Frequently asked questions
What is the best seed starting mix?
The best seed starting mix is a sterile, soilless blend of sphagnum peat moss or coconut coir with perlite and vermiculite. It is light, drains well, and is free of the weed seeds and pathogens found in garden soil. You can buy a bag labeled seed starting mix or blend your own from roughly 2 parts peat or coir, 1 part vermiculite, and 1 part perlite.
Can I use garden soil or potting soil to start seeds?
Avoid garden soil — it is heavy, full of weed seeds, and carries the pathogens that cause damping-off, and it forms a crust seedlings struggle to push through. Standard potting soil is also usually too coarse and rich for tiny seeds. Use a dedicated seed starting mix, which is finer and sterile, then pot up into potting soil once seedlings have true leaves.
How many weeks before the last frost should I start seeds indoors?
It depends on the crop. Count back from your average last frost date: peppers and eggplant about 8 weeks, tomatoes about 6 weeks, broccoli and cabbage 6 to 7 weeks, and cucumbers, squash, and melons only 2 to 4 weeks. Most vegetables fall in a 6 to 8 week window. Add a week or two for hardening off, and sow carrots, beets, and peas directly outdoors.
Why are my seedlings tall, pale, and falling over?
Tall, pale, leaning seedlings are stretching for light — a sunny window almost never provides enough. Give them a grow light 2 to 4 inches above the leaves for 12 to 16 hours a day. If seedlings instead topple at the soil line with pinched stems, that is damping-off, a fungal disease prevented with a sterile mix, clean trays, and a surface that dries between waterings.
Do I need a heat mat to start seeds?
For warm-season crops, a heat mat helps a lot. Most seeds germinate best at 65 to 75 degrees F, but peppers want 80 to 90 degrees F and tomatoes 75 to 85 degrees F — temperatures hard to reach in a cool room. A seedling heat mat under the tray hits those targets and speeds germination. Cool-season crops like broccoli and lettuce germinate fine at room temperature without one.
References
- University of Minnesota Extension. “Starting seeds indoors.” extension.umn.edu
- Clemson Cooperative Extension, Home & Garden Information Center. “FAQs about Starting Vegetable Seeds Indoors.” hgic.clemson.edu
- University of Maryland Extension. “Starting Seeds Indoors.” extension.umd.edu
- Oregon State University Extension Service. “Set seeds on the right path with homemade soil mixture.” extension.oregonstate.edu
- University of Minnesota Extension. “How to prevent seedling damping off.” extension.umn.edu
- University of Minnesota Extension. “Growing tomatoes in home gardens.” extension.umn.edu
- Rutgers NJAES Cooperative Extension. “Starting Vegetable Seeds Indoors” (FS787). njaes.rutgers.edu
- Iowa State University Extension and Outreach. “Can I start my seeds indoors yet?” yardandgarden.extension.iastate.edu
- University of Illinois Extension (Good Growing). “When should I start my seeds?” extension.illinois.edu
- University of Minnesota Extension. “Growing peppers.” extension.umn.edu
- Gilbertson, P. J., Berti, M. T., & Johnson, B. L. “Borage cardinal germination temperatures and seed development.” Industrial Crops and Products (2014). doi.org
- Raaijmakers, J. M., Paulitz, T. C., Steinberg, C., et al. “The rhizosphere: a playground and battlefield for soilborne pathogens and beneficial microorganisms.” Plant and Soil (2009). doi.org