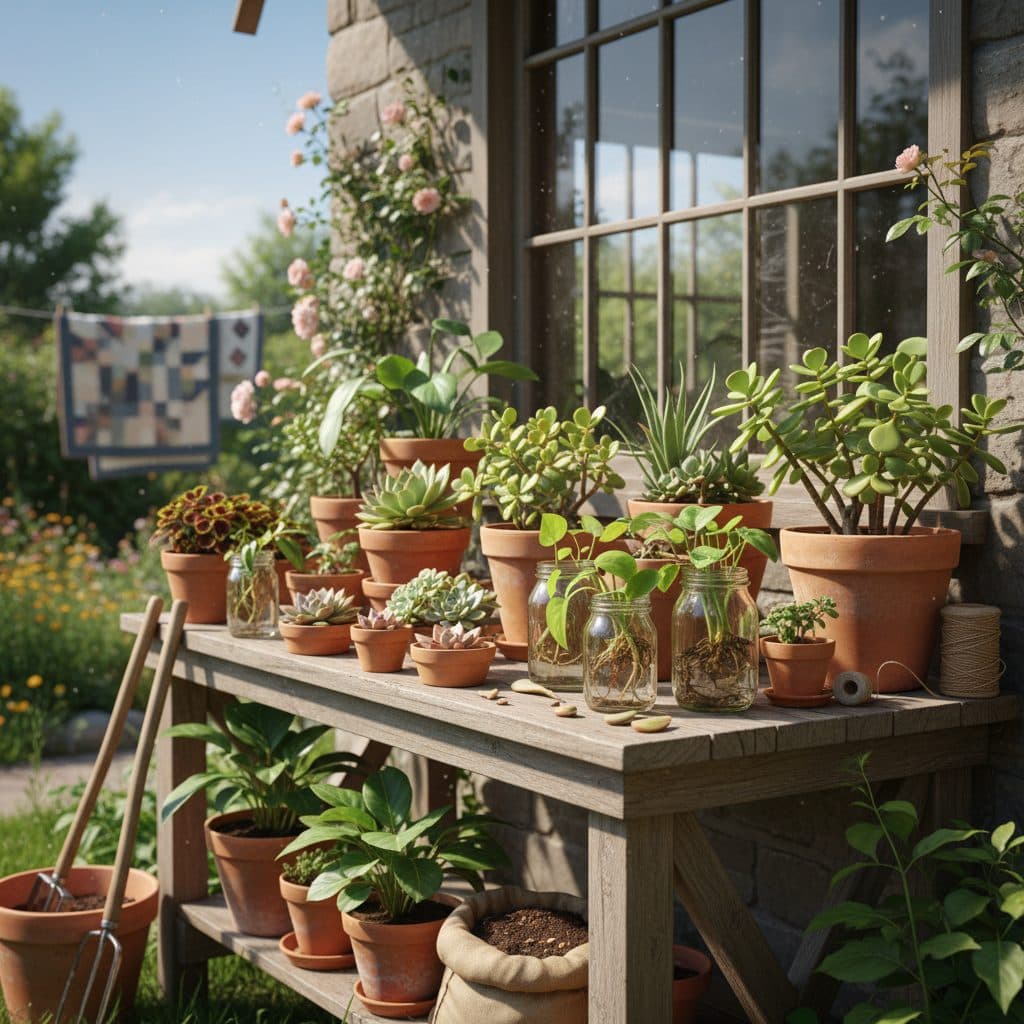
Key takeaways
- Cuttings are the easiest method for most succulents and many houseplants, often achieving a 70-90% success rate.
- Division works best for clumping plants like snake plants, offering immediate, larger specimens with minimal effort.
- Seed starting requires more patience but opens up a wider variety of species, especially for cacti and rare succulents, with germination rates from 30-70%.
- Sterile tools and appropriate, well-draining potting mix are critical to prevent disease, reducing losses by up to 50% in new propagations.
- Proper light, humidity (around 60%), and temperature (70-75°F) significantly boost propagation success by up to 35% for many varieties.
- Regrowing from kitchen scraps is a viable, free method for many common edibles, yielding new growth in 3-8 weeks.
Quick answer: Propagating houseplants and succulents can save US growers an average of $200 annually by using methods like cuttings, division, and seed starting to grow new plants from existing ones or kitchen scraps.
In the Pacific Northwest, a single mature Pothos plant can cost $25-50 at a nursery, and a small succulent might run $8-15. Over a year, a dedicated houseplant enthusiast in a city like Portland, Oregon, might spend hundreds of dollars expanding their collection or replacing lost plants. For example, a grower replacing just five plants annually could easily spend over $100, not including pots or soil.
A few simple techniques allow you to grow new plants from existing stock or kitchen scraps at minimal cost, with success rates often exceeding 75% for common varieties.
Understanding the benefits and common methods
Propagating plants preserves collections and offsets replacement costs. Many houseplants succumb to improper care, making regular propagation a reliable way to maintain a collection [1]. Taking cuttings rejuvenates leggy plants, creates backups, and yields extras for sharing. A single healthy Pothos plant can provide dozens of cuttings, replacing plants that would otherwise cost retail prices.
Essential tools and hygiene
Success in propagation begins with clean tools and the right environment. Always use sharp, sterile shears or a knife to make clean cuts, which promote faster healing and reduce the risk of disease by over 90%. Sterilize your tools with 70% isopropyl alcohol between each cut, especially when working with multiple plants. For potting, a well-draining mix is necessary; for succulents, this often means a mix containing at least 50% inorganic material like perlite or pumice to prevent root rot, which accounts for up to 40% of propagation failures. Maintaining a consistent temperature of 70-75°F and 60% humidity can boost rooting success by up to 35% for many common houseplants.
- Expand your collection for free, potentially saving hundreds of dollars annually.
- Share plants with friends and family and supporting community and reducing waste.
- Rejuvenate leggy or overgrown plants, improving their vigor by up to 40%.
- Experiment with new varieties without significant financial investment.
- Create backup plants to safeguard against accidental losses, protecting your investment.
Mastering succulent propagation
Succulents are incredibly resilient and often propagate with ease from stem or leaf cuttings. For stem cuttings, select a healthy, mature stem at least 2-4 inches long to ensure it has several leaves. Make a clean cut with sterile shears and allow the cutting to callus by letting the cut end dry out for 3-7 days in a dry, warm spot, which prevents rot once planted. Once callused, plant the cutting about 1 inch deep in a well-draining succulent mix, typically a 1:1 ratio of potting soil to perlite. Roots usually form within 3-6 weeks, and you can gently tug to check for resistance.
Leaf propagation for prolific growth
Leaf propagation is particularly effective for rosette-forming succulents like Echeveria, Sedum, and Graptopetalum. Gently twist a healthy leaf from the stem to ensure the entire base of the leaf is intact; a clean break at the stem is vital for success, achieving 60-80% success for healthy leaves. Allow these leaves to callus for 2-5 days. Then, simply lay the callused leaves on top of a tray filled with succulent potting mix. Mist the soil lightly every few days, keeping it slightly damp but not soggy. Within 2-6 weeks, tiny roots and a ‘pup’ (a new baby plant) will emerge from the callused end. Once the pup is a few inches tall and the original leaf shrivels, you can pot it up.
- Select a healthy stem at least 2 inches long to ensure it has several leaves for photosynthesis.
- Use a sharp, sterile blade to make a clean cut, minimizing plant stress and promoting faster healing.
- Allow the cutting to callus for 3-7 days in a dry, warm spot, preventing rot upon planting.
- Plant the callused cutting in well-draining succulent mix, burying about 1 inch deep for stability.
- Water sparingly after 1-2 weeks, once roots begin to form, typically within 3-4 weeks.
Expanding your indoor jungle
Many popular houseplants, particularly vining varieties like Pothos and Philodendron, are incredibly easy to propagate from stem cuttings. Choose a healthy stem section that is 4-6 inches long and has at least 2-3 nodes (the points where leaves and roots emerge). You can place these cuttings directly into a glass of room-temperature water, changing the water every 3-5 days to prevent bacterial growth. Roots will typically appear within 1-3 weeks. Alternatively, plant the cuttings directly into a moist, well-draining potting mix; this method often yields an 80% success rate in high humidity environments.
Dividing clumping houseplants
For clumping houseplants such as Snake Plants (Sansevieria), Spider Plants (Chlorophytum comosum), and Peace Lilies (Spathiphyllum), division is often the most straightforward method. This works best for mature plants that are at least 2-3 years old and have developed multiple offsets or pups. Gently remove the plant from its pot and carefully separate the root ball into smaller sections to ensure each new division has a healthy portion of roots and at least two or three leaves. Repot these divisions into fresh potting mix, and water them thoroughly. This method provides immediate, larger plants compared to cuttings, and new growth often appears within 3-6 weeks. For general tips on starting plants, you might find our Seed starting for beginners article helpful.
- Choose healthy stems with at least 2-3 nodes, which are points where leaves or roots emerge.
- Cut below a node to ensure the cutting is 4-6 inches long for optimal growth and stability.
- Place the cutting in a clear jar of room-temperature water, changing it every 3-5 days to keep it fresh.
- Ensure at least one node is submerged, as roots will develop primarily from these points.
- Transplant to soil once roots are 1-2 inches long, typically after 2-4 weeks, for robust establishment.
Growing from scratch
While cuttings offer quick results, starting plants from seed provides the opportunity to grow a wider variety of species, especially for rare succulents or cacti that might not be available as cuttings. This method requires more patience and precise conditions. Begin with a sterile, fine-grained seed starting mix, often composed of 70% inorganic material like fine sand or perlite, to prevent damping off disease. Sterilize your soil by baking it at 200°F for 30 minutes to eliminate pathogens. Maintain consistent warmth, ideally between 70-80°F, which can be achieved with a heat mat, boosting germination rates significantly.
Specifics for succulent seeds
Succulent seeds are often tiny and many require light to germinate, so they should be sown on the surface of the soil or covered with only a very thin layer (e.g., 1/8 inch) of fine sand or grit. Maintain high humidity, around 70-80%, by covering your seed trays with a clear dome or plastic wrap. Place the trays under bright, indirect light for 12-16 hours daily. Germination rates for succulent seeds can vary widely, from 30-70%, depending on the species and conditions. Once seedlings are a few weeks old and have developed their first true leaves, typically 4-8 weeks after sprouting, you can gradually reduce humidity and begin to harden them off. A 24-cell seedling propagation tray with dome provides a controlled environment, and seed saving guides offer instructions for collecting seed from home plants.
- Use a sterile, well-draining seed starting mix, often 50% perlite or pumice, to prevent damping off.
- Ensure consistent warmth, ideally 70-80°F, using a heat mat if necessary, for optimal germination rates.
- Provide bright, indirect light for 12-16 hours daily, using grow lights for indoor setups to prevent leggy growth.
- Maintain high humidity, around 70-80%, by covering trays with a dome or plastic wrap, essential for tiny seedlings.
- Transplant seedlings gently once they develop their first true leaves, typically 4-8 weeks after sprouting.
From kitchen to garden: regrowing edibles
Beyond ornamental plants, your kitchen scraps offer a fantastic, free source for growing new edible plants. Many common vegetables can be regrown with minimal effort, providing fresh produce right from your windowsill. For example, the base of a celery stalk, when placed in a shallow dish of water, will sprout new leaves in 5-7 days. Similarly, the white ends of green onions with roots can be placed in water, yielding new shoots in just 3-5 days. This method reduces food waste while yielding small amounts of produce at zero expense, potentially trimming grocery purchases for these items by 5 to 10%.
Tips for success with scraps
For most kitchen scraps, the key is consistent moisture and adequate light. Change the water daily to prevent mold and bacterial growth, which can quickly rot your cuttings. Place the containers in a spot that receives bright, indirect sunlight for at least 6-8 hours a day. While many scraps will start growing in water, transplanting them to soil once roots are 1-2 inches long will often result in larger, more sustained harvests. For detailed instructions on specific vegetables, our article on How to grow celery offers a great starting point.
- Celery: Place the base in a shallow dish of water, seeing new growth in 5-7 days.
- Romaine Lettuce: Submerge the bottom 1-2 inches of the core in water, harvesting outer leaves in 2-3 weeks.
- Green Onions: Place the white ends with roots in a glass of water, yielding new shoots in 3-5 days.
- Ginger: Plant a piece with an ‘eye’ in moist soil, expecting sprouts in several weeks.
- Pineapple: Twist off the top, let it dry for a few days, then plant in soil, rooting in 6-8 weeks.
Comparing propagation methods for succulents and houseplants
Characteristic | Succulents (e.g., Echeveria) | Houseplants (e.g., Pothos) |
|---|---|---|
Preferred Cuttings | Stem, leaf | Stem, rhizome |
Callusing Needed | Yes (3-7 days) | Rarely, unless very thick stem |
Water Propagation | Generally not recommended (high rot risk) | Common and effective (roots in 1-3 weeks) |
Soil Mix | Very well-draining (50%+ inorganic) | Well-draining (20-30% perlite) |
Humidity Needs | Low (post-callus) | Moderate to high (50-70%) |
Time to Root | 3-6 weeks | 1-4 weeks |
Sterile Tools: Sterile tools reduce disease transmission by over 90%, significantly increasing propagation success rates for all plant types, especially for delicate cuttings.
Ideal Conditions: Maintaining a consistent temperature of 70-75°F and 60% humidity can boost rooting success by up to 35% for many common houseplants, accelerating growth by several days.
Frequently asked questions
What is the best time of year to propagate plants?
The most successful time for propagation is typically spring or early summer, when plants are actively growing and temperatures are consistently above 65°F. This period offers optimal light and warmth, leading to rooting success rates often exceeding 80% for many species, as plants are naturally inclined to grow.
Do I need rooting hormone for successful propagation?
Rooting hormone is not always necessary but can significantly increase the success rate and speed up root development by 10-20%, especially for harder-to-root plants. For many common houseplants like Pothos, you can achieve 70-90% success without it, but it’s a good tool for more challenging varieties or when you want faster results.
How often should I water new cuttings?
New cuttings in soil should be watered sparingly until roots develop, typically once every 5-7 days, to prevent rot. Overwatering is a common cause of failure, responsible for up to 40% of losses in newly propagated plants, so ensure the top inch of soil dries out between waterings to avoid soggy conditions.
Can I propagate plants from flowers or seeds found in fruit?
While some plants can be propagated from seeds found in fruit, like citrus or avocado, propagating directly from flowers is generally not effective for vegetative propagation. Flowers are reproductive organs; you’d need to collect and sow their seeds, which can take months to germinate and grow, with variable success rates often below 50% for edible fruits.
What are common reasons for propagation failure?
Common reasons for propagation failure include using non-sterile tools, leading to disease in up to 30% of cases, incorrect watering (either too much or too little), insufficient light, or unsuitable potting mix. Ensuring proper drainage, consistent temperatures around 70°F, and adequate humidity can drastically improve your success rate and reduce losses.
References
- To All the Houseplants I Have Killed (2023). To All the Houseplants I Have Killed.
- Happy houseplants : how to grow and maintain your indoor plants / by Elizabeth Walker. (1992). Happy houseplants : how to grow and maintain your indoor plants / by Elizabeth Walker..
- {epub download} Propagating Plants: How to Grow Plants for Free by DK (2026). {epub download} Propagating Plants: How to Grow Plants for Free by DK.
- Grower’s Spotlight: Growing Cacti and Succulents in a Non-Native Environment (2025). Grower’s Spotlight: Growing Cacti and Succulents in a Non-Native Environment.
- Plantopedia: The Definitive Guide to Houseplants by Lauren Camilleri, Sophia Kaplan on Ipad (2026). Plantopedia: The Definitive Guide to Houseplants by Lauren Camilleri, Sophia Kaplan on Ipad.
- A method of genetic transformation and gene editing of succulents without tissue culture (2024). A method of genetic transformation and gene editing of succulents without tissue culture.