Key takeaways
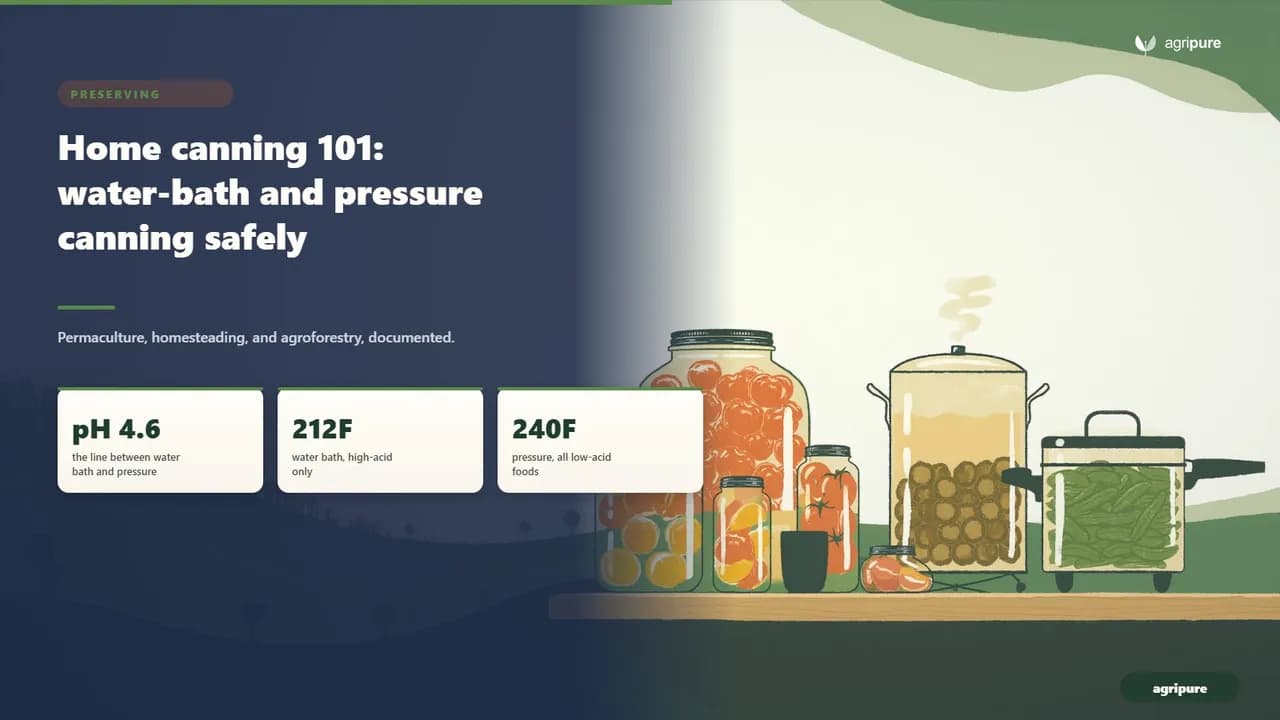
Glass Mason jars filled with preserved peaches and tomatoes lined up on a rustic wooden shelf.
Home-canned glass jars processed in a water bath to preserve the seasonal harvest.
- Home canning uses 2 methods, and the food decides which: water-bath canning for high-acid foods (fruits, jams, pickles, acidified tomatoes), pressure canning for every low-acid food (vegetables, meats, beans).
- The dividing line is a pH of 4.6. Below it, acid blocks the bacterium that causes botulism; at or above it, only the 240 to 250 degrees F of a pressure canner is hot enough to be safe.
- A boiling-water canner reaches 212 degrees F. That kills most microbes but not Clostridium botulinum spores, which is why low-acid green beans, corn, and potatoes must be pressure canned, never water-bathed.
- Use only tested recipes from the USDA, the National Center for Home Food Preservation, or university extension, and follow them exactly. Never improvise times, add flour or thickeners, or stretch the vegetables in a salsa.
- Match headspace, altitude, and jar prep to the recipe, learn to read a sealed lid, and when a jar looks or smells wrong, do not taste it.
A North American pantry in late summer is a kind of accounting: rows of canned tomatoes, peaches in light syrup, green beans, salsa, apple butter, each jar a few hours of August saved for February. Home canning is how that accounting stays honest, and it is one of the oldest skills in any homesteading kitchen, preserving the harvest through the lean months. It is also the one preserving method where a careless shortcut can put someone in a hospital. The science is not complicated, but it is strict: 1 number, a pH of 4.6, decides whether a food is safe in a water bath or needs a pressure canner, and getting that wrong is how botulism happens. This guide walks through both methods, when each is required, and the handful of rules that keep canning the safe, satisfying craft it should be.
Why acidity decides everything
Before you pick a canner, you have to know what kind of food you are canning, because acidity, not preference, sets the method. As the USDA puts it, whether a food is processed in a pressure canner or a boiling-water canner depends on the acidity of the food. That single fact organizes the entire craft, so it is worth understanding before you touch a jar. Much of what fills a summer kitchen comes straight from the raised beds out back, and what you grow is what you will sort into these 2 groups.
The pH 4.6 dividing line
Acidity is measured on the pH scale, and the lower the number, the more acidic the food. The threshold that matters for canning is 4.6. The USDA Complete Guide to Home Canning draws the line cleanly: acid foods have a pH of 4.6 or lower, and low-acid foods have pH values higher than 4.6. That half-point is not arbitrary. Below pH 4.6, the food is acidic enough to stop the one organism home canners most fear from making its toxin. At or above 4.6, nothing in the jar holds that organism back except heat — and a lot more heat than boiling water can provide.
High-acid foods (the water-bath group)
High-acid foods carry enough natural or added acid to be safe at boiling-water temperatures. According to the USDA, acid foods include fruits, pickles, sauerkraut, jams, jellies, marmalades, and fruit butters. In practice, that is most of what beginners want to put up:
- Fruits — canning peaches, canning pears, canning applesauce, and apple pie filling, plus berries and fruit packed in syrup or juice.
- Pickles and pickled vegetables — cucumbers, canning jalapenos, pickled beets, and the sweet-hot relish people call cowboy candy.
- Spreads — jams, jellies, marmalades, and an apple butter recipe for canning.
- Acidified tomatoes — canning tomatoes, canning tomato sauce, tomato juice, and canning salsa from a salsa recipe for canning, all with added acid.
Low-acid foods (the pressure-canner group)
Low-acid foods sit above pH 4.6, and that puts them squarely in pressure-canner territory. The list is long and includes most of the garden: as the USDA notes, low-acid foods include red meats, seafood, poultry, milk, and all fresh vegetables except for most tomatoes. That means canning green beans, canning potatoes, canning carrots, corn, peas, beets packed plain in water, meats, poultry, stocks, and dried beans are all pressure-canning jobs, with no water-bath option. The single most important rule in this guide follows from that line: if a food is low-acid, it must be pressure canned. There is no safe shortcut.
The two methods, and what each one is for
Those 2 categories map onto 2 pieces of equipment doing 2 different jobs at 2 different temperatures. Knowing which canner a food requires is the whole game, so this is the section to read twice. The comparison below is the short version; the rules behind it carry the safety.
Factor | Water-bath canning | Pressure canning |
|---|---|---|
Use for | High-acid foods (pH 4.6 or lower) | Low-acid foods (pH above 4.6) |
Foods | Fruits, jams, pickles, acidified tomatoes, salsa | Vegetables, green beans, potatoes, meats, beans |
Temperature | About 212°F (boiling) | 240 to 250°F |
How it gets there | Boiling water covering the jars | 10 to 15 PSI of trapped steam |
Typical time | 5 to 85 minutes | 20 to 100 minutes |
Water-bath canning
Water bath canning is the entry point for most people, and it is the right tool for every high-acid food. A boiling-water canner is simply a tall pot with a rack that holds jars off the bottom while they sit covered by an inch or 2 of boiling water. It reaches the boiling point of water — about 212 degrees F at sea level — and holds the filled, sealed jars there for the time the recipe specifies. That temperature is hot enough for acid foods because the acid does the rest of the work: with a pH at or below 4.6, surviving spores cannot grow or produce toxin. Processing times for acid foods are short by comparison, and the USDA notes the time to process acid foods in boiling water varies from 5 to 85 minutes depending on the food and jar size. Water bath canning supplies and a basic canning pot are inexpensive, which is why jams, pickles, and acidified tomatoes are where most home canners begin.
Pressure canning
Pressure canning is non-negotiable for low-acid foods, and the reason is temperature. A sealed pressure canner traps steam and raises the internal temperature far above boiling. The USDA is specific: all low-acid foods should be sterilized at temperatures of 240 to 250 degrees F, attainable with pressure canners operated at 10 to 15 PSI, and at those temperatures the time needed to destroy bacteria in low-acid canned food ranges from 20 to 100 minutes. A pressure canner is not the same thing as a pressure cooker sold for fast weeknight dinners; buy one rated and sized for canning, with either a dial gauge or a weighted gauge, and learn to vent it before you ever process food. The extra cost and the extra steps are the price of safely canning vegetables, beans, and meat at home.
Why boiling water is not enough for low-acid food
It is tempting to think a long, hard boil could stand in for a pressure canner. It cannot, and the numbers show why. Botulinum spores, the USDA explains, are very hard to destroy at boiling-water temperatures; the higher the canner temperature, the more easily they are destroyed. To kill those spores at 212 degrees F instead of 240, the time needed is not minutes but hours — the USDA puts the safe boiling-water processing time for low-acid foods at 7 to 11 hours, which no home recipe uses and which would reduce the food to mush anyway. The CDC states the conclusion plainly: pressure canning is the only recommended method for canning low-acid foods. Reaching the right temperature, not boiling longer, is what makes a low-acid jar safe.
Two canners side by side on a stove: a tall enamel boiling-water canner with jars under bubbling water, and a heavy pressure canner with a dial gauge and locking lid
The science of botulism, in plain terms
That low-acid jar is dangerous for 1 reason, and it has a name: Clostridium botulinum. Understanding what it is and how it behaves turns the 2 rules above from arbitrary chores into obvious precautions. This is the why behind every number in the guide, and it takes only 2 short paragraphs of biology.
What Clostridium botulinum is
Clostridium botulinum is a spore-forming bacterium that, as reviews of foodborne pathogens describe, lives and grows without oxygen and produces one of the most potent neurotoxins known. Its growth in canned food, the USDA warns, may cause botulism — a deadly form of food poisoning. A sealed canning jar is, by design, a low-oxygen environment, which is exactly the anaerobic condition this organism prefers. Botulinum spores are everywhere — in soil, on the skins of vegetables — and harmless to eat in most settings. The real danger is narrow: the inside of 1 improperly processed low-acid jar, where a single surviving colony can turn normal-looking food toxic.
Why home-canned low-acid food is the classic vehicle
The pairing of low-acid food and a sealed jar is precisely the risk. The CDC reports that home-canned vegetables are the most common cause of botulism outbreaks in the United States. When a low-acid food such as green beans is canned without a pressure canner, ordinary bacteria are killed by boiling, but the hardy botulinum spores survive. The jar then seals, oxygen is driven out, and over weeks of storage those spores can wake up and produce toxin in a food that looks perfectly normal. Two things prevent that outcome, and only 2: a pH at or below 4.6, or the 240-to-250-degree heat of a pressure canner.
Rows of home-canned low-acid vegetables in glass Mason jars on a wooden pantry shelf, green beans and carrots and corn, sealed and labeled
Use tested recipes, and follow them exactly
Those 2 safeguards — the right pH or the right pressure — only work at the times a tested recipe specifies, which leads to the second rule of safe canning: use only tested recipes, and do not change them. This is the rule most often broken by confident cooks, and it is the 1 most likely to cause harm. A canning recipe is a validated calculation, not a suggestion.
Why a recipe has to be tested
A canning recipe is not just a flavor formula; it is a validated heat-and-acid calculation. The National Center for Home Food Preservation strongly advises using only tested recipes from reliable sources for all home canning, warning that untested methods can increase the risk of foodborne illness, particularly botulism. Trustworthy sources are a short, named list:
- The USDA Complete Guide to Home Canning and its processing tables.
- The National Center for Home Food Preservation at nchfp.uga.edu.
- University Cooperative Extension services and the University of Georgia’s So Easy to Preserve.
Use those for your processing times and pressures. This article deliberately gives you the science and the method, not a table of minutes — because the right number depends on the food, the jar size, your altitude, and your canner, and the safe place to read it is the source itself.
The changes that quietly become dangerous
The temptation is always to tweak, and a few common tweaks are genuinely hazardous. Penn State Extension is blunt about the worst one: adding extra starch or thickeners to a recipe changes the rate of heat penetration and can result in undercooking. That rules out stirring flour, cornstarch, rice, pasta, or cream into a tomato sauce or soup before canning. The other classic mistake is diluting acid — adding extra onion, peppers, or other vegetables to salsas and tomato products dilutes the acidity, and those changes can cause botulism poisoning. A few adjustments are safe: salt is for flavor in most canned goods (use plain canning salt to keep brines clear, and note it matters for safety in pickles and sauerkraut), and the sugar in fruit syrup can be lightened. When in doubt, add the thickener or the extra handful of peppers at serving time, never in the jar.
The tomato rule: because some tomatoes test just above pH 4.6, the USDA recommends acidifying all home-canned tomatoes regardless of method — about 2 tablespoons of bottled lemon juice, or 1/2 teaspoon of citric acid, per quart (half that per pint). It is the cheapest insurance in the kitchen, and it is why a salsa canning recipe always lists an exact amount of acid you must not reduce.
A beginner’s path through each method
With the safety logic in place, the mechanics are straightforward. Both methods share the same preparation, then diverge at the canner. Read your tested recipe first, then follow it alongside the steps below — the workflow is the same whether you are putting up 4 jars or 40.
Preparing jars and lids
Good canning starts with clean glass and correct prep, and the prep depends on the recipe. Wash canning jars in hot, soapy water and keep them hot until you fill them so they do not crack. Whether you need to sterilize canning jars depends on the process: the USDA says all jams, jellies, and pickled products processed less than 10 minutes should be filled into sterile empty jars, and to sterilize you boil submerged jars 10 minutes at altitudes under 1,000 feet, adding 1 minute per additional 1,000 feet of elevation. The reassuring flip side is that whenever a food is processed 10 minutes or longer in a boiling-water canner, or processed in a pressure canner at all, the jars need not be presterilized, because the processing itself does the work. Use new, flat lids each time, follow the manufacturer’s instructions, and tighten screw bands fingertip-snug, not as hard as you can.
Water-bath canning, step by step
For high-acid foods, the routine is short and forgiving once the jars are filled — 5 steps from cold pot to cooling rack:
- Fill the canner and heat the water. Set jars on the rack with enough water to cover them by 1 to 2 inches, and bring it toward a boil while you pack.
- Pack jars and set headspace. Fill each jar to the recipe’s headspace — typically 1/2-inch for fruits and tomatoes, 1/4-inch for jams and jellies — then run a non-metal tool around the inside to release trapped air.
- Wipe, lid, and lower in. Clean each rim, apply the lid and band, and lower the jars into the boiling water with a jar lifter.
- Process by the recipe’s time and altitude. Start timing only once the water returns to a full boil, and add time for elevation as your tested recipe directs.
- Rest, then cool. Turn off the heat, wait 5 minutes, then lift jars out and let them cool undisturbed for 12 to 24 hours.
Pressure canning, step by step
Pressure canning adds a few critical steps, and each one matters for safety. The sequence:
- Add water per the manual. Pressure canners use a measured amount of water, not a full pot — usually a couple of inches — so check your model’s instructions.
- Load jars and set the wider headspace. Low-acid foods need 1 to 1-1/4 inches of headspace; pack accordingly, wipe rims, and apply lids.
- Vent the canner. Lock the lid and let steam exhaust steadily for 10 minutes before you add the weight or close the petcock. Venting drives out air that would otherwise lower the true temperature.
- Bring up to the recipe’s pressure. Process at the 10 to 15 PSI your tested recipe specifies for your altitude, holding it steady for the full time.
- Let it cool on its own. When time is up, turn off the heat and let the canner depressurize naturally — never force-cool it — then wait for the gauge to read zero before opening.
Altitude, headspace, and the details that fail quietly
These mechanics still fail quietly if 2 variables are wrong, and neither is about flavor: altitude and headspace. Both are simple once you know them, and both can ruin a batch of 7 perfect jars if ignored. Neither is a place to guess.
Know your elevation: the adjustment kicks in at 1,000 feet, so a canner in Denver (about 5,280 feet) needs more boiling-water time or 15 PSI instead of 10. If you are not sure of your altitude, your county Extension office or a quick map check will tell you before your first batch.
Adjusting for altitude
Altitude changes the boiling point, and that changes everything. The USDA warns that using the process time for canning food at sea level may result in spoilage if you live at altitudes of 1,000 feet or more, because water boils at lower temperatures as altitude increases. The fix is built into every good recipe: at elevation you either increase the process time in water-bath canning or raise the canner pressure in pressure canning. A canner in Denver or the Mountain West cannot use the same numbers as one at sea level on the Gulf Coast. Know your elevation before you start, and read the altitude column in your tested chart — this is one place a guess is genuinely unsafe.
Getting headspace right
Headspace is the gap between the food and the lid, and it is more than housekeeping. The USDA specifies 3 measurements — 1/4-inch for jams and jellies, 1/2-inch for fruits and tomatoes, and 1 to 1-1/4 inches for low-acid foods processed in a pressure canner — because that space lets food expand and lets a vacuum form as the jar cools. Too little headspace and food boils out, fouling the seal; too much and the jar may never pull a proper vacuum. Measure it with a tool rather than eyeballing it, and your seal rate will climb.
Reading seals and spotting spoilage
That seal you worked for is the last thing to verify, and reading it is a skill of its own — both the day after canning and months later in the pantry. A good 2 minutes of inspection is the final safety check, and it is non-negotiable. There are 2 checkpoints: the day-after seal and the day-of-use look.
A close-up of cooled Mason jars of canned green beans and tomatoes with a hand-free view of flat sealed lids, one lid showing a slightly concave center
What a good seal looks like
After 12 to 24 hours, check every jar. The simplest test comes straight from the National Center for Home Food Preservation: lids with concave centers have good seals. Press the center of each flat lid — it should be slightly dished and should not flex or pop. A lid whose center is flat or domed upward may not have sealed; refrigerate that jar and use it soon, or reprocess it with a new lid. Label sealed jars with the date and store them in a cool, dark, dry place.
The warning signs of a spoiled jar
Months later, inspect again before you open anything, because spoilage announces itself if you look. The NCHFP explains that microbial growth produces gas which pressurizes the food, swells lids, and breaks jar seals, so watch for these signals:
- A bulging, swollen, or unsealed lid, or a broken seal.
- Liquid that spurts out when the jar is opened.
- Rising air bubbles, cloudiness, or an off color in the jar.
- Mold, in white, blue, black, or green, on the surface or under the lid.
- Any foul or unnatural odor.
When in doubt, throw it out
The hardest rule is also the simplest: do not gamble. Botulinum toxin cannot be seen, smelled, or tasted, and the NCHFP is explicit — do not taste food from a jar with an unsealed lid or food that shows signs of spoilage. A suspect low-acid jar should be treated as if it contains toxin: the safe disposal method is to boil the containers and contents for 30 minutes to detoxify them before discarding, handling everything carefully and keeping it away from children and pets. No jar of green beans is worth the risk of guessing wrong.
Bringing it back to the harvest
Those risks managed, home canning becomes one of the most rewarding loops on a homestead: you grow it, you preserve it, you eat it in the off-season. The discipline comes down to 4 habits — learn the pH 4.6 line, match the method to the food, lean on tested recipes, and inspect every seal. Start with a water-bath batch of acidified tomatoes or a simple jam this summer, add a pressure canner when you are ready for green beans and stock, and let the kitchen garden fill the pantry 1 honest jar at a time. The garden gives you the harvest; canning, done by the rules, makes it last through 12 months.
Frequently asked questions
What is the difference between water-bath and pressure canning?
Water-bath canning processes jars in boiling water at about 212 degrees F and is used for high-acid foods (fruits, jams, pickles, and acidified tomatoes). Pressure canning reaches 240 to 250 degrees F under 10 to 15 PSI and is required for all low-acid foods, such as vegetables, beans, and meats, because only that higher temperature reliably destroys botulinum spores.
Which foods can I water-bath can, and which need a pressure canner?
You can water-bath can foods with a pH of 4.6 or lower: fruits, jams and jellies, pickles, and tomatoes with added acid. You must pressure can any low-acid food above pH 4.6 — green beans, corn, potatoes, carrots, beets packed plain, meats, poultry, and dried beans. If a food is low-acid, there is no safe water-bath option.
Why do I have to add lemon juice or citric acid to canned tomatoes?
Some tomatoes have a pH slightly above 4.6, so the USDA recommends adding acid to all home-canned tomatoes regardless of method — about 2 tablespoons of bottled lemon juice or 1/2 teaspoon of citric acid per quart (half that per pint). The added acid guarantees a pH of 4.6 or lower, which prevents Clostridium botulinum from growing.
Can I just boil low-acid food longer instead of pressure canning it?
No. Botulinum spores survive boiling-water temperatures, and the safe boiling-water time for low-acid foods runs 7 to 11 hours, which no recipe uses and which would destroy the food. Pressure canning is the only recommended method for low-acid foods because it reaches 240 to 250 degrees F, the temperature that actually kills the spores.
How do I know if a canned jar has gone bad?
Check the seal first: a good lid is slightly concave and does not flex. Discard or do not taste any jar with a bulging or unsealed lid, spurting liquid, rising bubbles, cloudiness, an off color, mold, or a foul odor. Botulinum toxin is invisible and tasteless, so when in doubt, throw it out — and boil suspect low-acid jars 30 minutes before disposal.
References
- USDA. “Complete Guide to Home Canning, Guide 1: Principles of Home Canning” (2015 revision). National Center for Home Food Preservation. nchfp.uga.edu
- National Center for Home Food Preservation. “Ensuring Safe Canned Foods.” nchfp.uga.edu
- Centers for Disease Control and Prevention. “Home-Canned Foods” (Botulism Prevention). cdc.gov
- National Center for Home Food Preservation. “Identifying and Handling Spoiled Canned Food.” nchfp.uga.edu
- Penn State Extension. “What Can You Change in a Canning Recipe?” extension.psu.edu
- University of Minnesota Extension. “Canning at home: Tomato products safety guidelines.” extension.umn.edu
- National Center for Home Food Preservation. “Safe home canning: the importance of using tested recipes.” nchfp.uga.edu
- Bintsis, T. “Foodborne pathogens.” AIMS Microbiology, 3(3), 529-563. doi.org