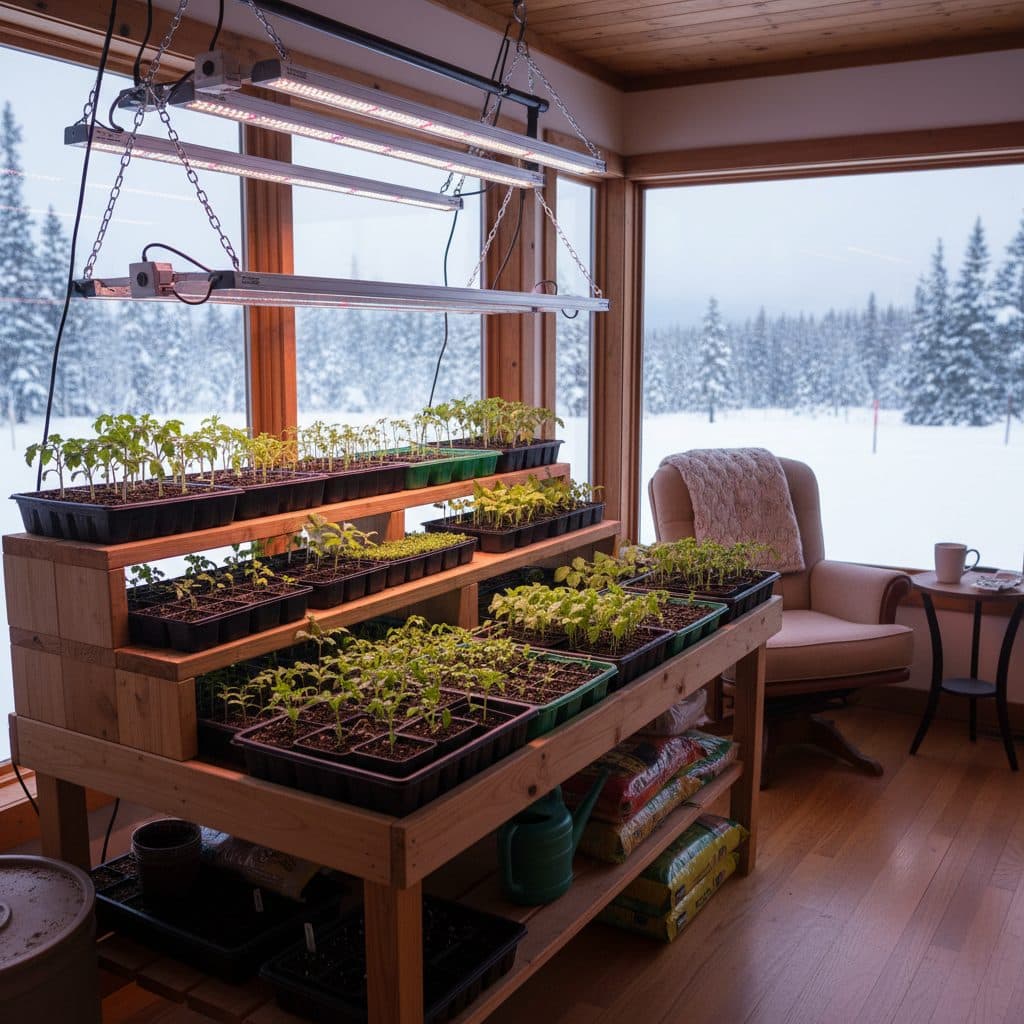
Key takeaways
- Proper timing, based on your USDA zone and last frost date, matters most for successful indoor seed starting.
- Utilize a sterile, well-draining seed starting mix and appropriate containers, such as 24-cell trays, to prevent disease.
- Provide 14-16 hours of strong, full-spectrum light daily to prevent leggy seedlings and support strong growth.
- Maintain consistent soil moisture and temperature, typically 65-75°F, for optimal germination rates.
- Harden off seedlings gradually over 7-14 days before transplanting them outdoors to minimize shock.
- Consider advanced techniques like bottom watering, soil blocking, and seed scarification for specific plant needs.
Quick answer: Starting seeds indoors allows US growers to extend their gardening season, achieve earlier harvests, and potentially increase crop yields by 20-30% by providing optimal conditions for seedling development before transplanting outdoors.
Across the United States, from USDA zone 3 to zone 10, many growers extend their gardening season and improve crop yields by starting seeds indoors. This practice allows for earlier harvests, stronger plants, and access to a wider variety of species than direct sowing permits. For instance, in colder regions like northern Minnesota (USDA zone 3-4), starting tomatoes indoors eight weeks before the last frost can mean a harvest up to 30 days earlier than if seeds were sown directly into the garden soil.
This playbook offers a comprehensive guide to indoor seed starting, moving from fundamental principles to more advanced techniques. We will cover everything from selecting the right seeds and equipment to managing light, water, and nutrients to ensure your seedlings thrive from germination to transplant. By following these proven methods, you can significantly increase your garden’s productivity and resilience, often seeing a 20-30% improvement in plant establishment rates compared to direct seeding.
Understanding your climate and timing for success
These takeaways points carry into this section, too.
Successful indoor seed starting hinges on understanding your local climate and, specifically, your average last frost date. This date, which can vary by several weeks even within a single state like Texas, dictates when you should begin sowing. Most seed packets provide guidance, suggesting a start time of 6-12 weeks before this critical date. For example, warm-season crops like tomatoes and peppers typically need 6-8 weeks indoors, while slower growers such as onions or leeks might require 10-12 weeks. Consulting your specific USDA plant hardiness zone is the first step in creating an accurate planting schedule for your region.
calculating your seed starting dates
To pinpoint your ideal indoor sowing dates, identify your average last frost date. This information is readily available from local agricultural extensions or online resources. Once you have this, count backward the recommended number of weeks for each crop. For instance, if your last frost is May 15th and your tomatoes need eight weeks indoors, you should aim to sow them around March 20th. This precise timing prevents seedlings from becoming root-bound or leggy before they can be safely transplanted outside, a common issue that can reduce yields by 15-20%.
- Identify your USDA plant hardiness zone.
- Determine your average last frost date.
- Consult seed packets for recommended indoor starting times.
- Count backward from the last frost date to find your sowing window.
- Adjust for specific microclimates or unusual weather patterns.
Essential equipment for vigorous seedlings
That work on understanding climate and sets up what follows here.
Starting seeds indoors requires a few pieces of equipment to ensure strong, healthy seedlings. A good quality seed starting mix is paramount; it should be sterile, fine-textured, and drain well, preventing damping-off disease which can wipe out 50% or more of young seedlings. Avoid using garden soil, as it can harbor pathogens and weed seeds. Containers range from simple recycled plastic trays to specialized 24-cell seedling propagation trays, which are excellent for managing individual plants.
lighting and temperature control
Adequate light is perhaps the single most important factor after germination. Seedlings require 14-16 hours of bright, full-spectrum light daily to prevent them from becoming leggy and weak. Fluorescent shop lights or LED grow lights positioned just 2-4 inches above the plant tops are effective. A consistent temperature, ideally between 65-75°F for most common vegetables like lettuce and broccoli, is also vital for strong growth. Many growers use heating mats to maintain soil temperatures around 70°F, which can significantly improve germination rates by 20-30% for heat-loving plants.
- Sterile seed starting mix, not garden soil.
- Drainage-friendly containers or seedling trays.
- Full-spectrum grow lights or fluorescent shop lights.
- Heating mat for consistent soil temperature.
- Spray bottle for gentle watering.
Sowing seeds and initial care
This builds directly on equipment.
The act of sowing seeds correctly sets the foundation for healthy plants. Always check seed packet instructions for planting depth; a general rule is to plant seeds at a depth two to three times their diameter. For very fine seeds, like those of many herbs, simply sprinkle them on the surface of the moistened seed starting mix and gently press them in. After sowing, mist the surface with water to settle the seeds without dislodging them. Covering trays with a clear dome or plastic wrap helps maintain high humidity, which helps germination, often boosting rates by 10-20%.
watering and ventilation
Consistent moisture is vital, but overwatering can be detrimental, leading to fungal issues. Water from the bottom by placing trays in a shallow pan of water for 15-20 minutes, allowing the mix to wick up moisture. This method prevents disturbance of tiny seedlings. Once seeds have germinated, remove the humidity dome and ensure good air circulation to prevent damping-off. A small fan running on a low setting for a few hours daily can strengthen stems and reduce disease risk by up to 40%. Remember, even in the early 20th century, growers understood the importance of proper care for young starts, as evidenced by advice for ‘husky chicks’ in 1923 and 1924 and emphasizing strong beginnings for future productivity [2, 3, 4].
- Plant seeds at the depth recommended on the packet.
- Mist gently after sowing to settle seeds.
- Use a humidity dome or plastic wrap until germination.
- Water from the bottom to avoid disturbing seedlings.
- Provide good air circulation with a small fan.
Advanced techniques for robust growth
Those sowing seeds and habits matter here as well.
Beyond the basics, several advanced techniques can further improve seedling vigor and resilience. Soil blocking, for instance, eliminates the need for plastic pots and promotes air-pruning of roots, leading to a denser, healthier root ball. This method can reduce transplant shock by up to 25%. Another technique involves scarification or stratification for seeds with hard coats or dormancy requirements. Scarification, a physical abrasion of the seed coat, can improve germination rates for species like morning glories by 50% or more. Seed saving practices also contribute to advanced growing, allowing selection for traits best suited to your specific garden conditions.
nutrition and beneficial microbes
Once true leaves appear, seedlings begin to require nutrients. A diluted liquid fertilizer, at one-quarter to one-half strength, applied every 7-10 days, provides essential elements. Consider using a balanced organic fertilizer with an NPK ratio like 2-2-2. Furthermore, incorporating beneficial microbes can significantly boost seedling health. Research shows that bacterial populations in juvenile maize rhizospheres originate from both seed and soil, influencing early plant development [5]. Introducing specific microbial inoculants can improve nutrient uptake and disease resistance, potentially increasing seedling survival rates by 15-20%.
- Utilize soil blocking for air-pruned roots.
- Perform scarification or stratification for difficult seeds.
- Apply diluted liquid fertilizer after true leaves emerge.
- Introduce beneficial microbial inoculants to the soil.
- Practice crop rotation in your garden for long-term soil health.
Hardening off and transplanting
These advanced techniques lessons apply to the steps below, too.
The transition from a controlled indoor environment to the unpredictable outdoors is a critical phase for seedlings. This process, known as hardening off, gradually acclimates plants to harsher conditions like direct sunlight, wind, and fluctuating temperatures. Skipping or rushing this step can lead to significant transplant shock, where plants wilt, stop growing, or even die, potentially losing 30-50% of your young plants. Begin hardening off 7-14 days before your planned transplant date, typically after your average last frost date has passed for your USDA zone.
the transplant process
Start by placing seedlings outdoors in a sheltered, shady spot for a few hours on the first day, gradually increasing their exposure to sunlight and wind over the next week or two. Bring them indoors if temperatures drop below 45°F overnight. When transplanting, dig a hole slightly larger than the seedling’s root ball. Gently remove the seedling from its container, being careful not to damage the roots. For crops like tomatoes, you can plant them deeper, burying part of the stem to encourage additional root development, which can increase overall plant stability by 20%. Water thoroughly after transplanting to settle the soil around the roots. For specific crops, like celery or pumpkins, specialized transplanting techniques can further boost success rates.
- Begin hardening off 7-14 days before transplanting.
- Gradually increase exposure to sun, wind, and cooler temperatures.
- Protect seedlings from temperatures below 45°F.
- Dig a hole slightly larger than the root ball.
- Water thoroughly immediately after transplanting.
Troubleshooting common seedling issues
These hardening off and points carry into this section, too.
Even experienced growers encounter problems with seedlings, but most issues are identifiable and correctable. Leggy seedlings, characterized by long, thin stems, are a common sign of insufficient light. This can reduce a plant’s structural integrity by 40%. The solution is to move lights closer, typically 2-4 inches above the plant tops, and ensure they run for 14-16 hours daily. Yellowing leaves often indicate a nutrient deficiency, particularly nitrogen, or overwatering. A diluted liquid fertilizer application or allowing the soil to dry slightly between waterings can resolve this.
pest and disease management
Damping-off disease, caused by fungi, is a swift killer of young seedlings, often causing them to collapse at the soil line. It thrives in overly wet, cool conditions and can destroy an entire tray of seedlings in 24 hours. Using sterile seed starting mix to ensure good air circulation, and avoiding overwatering are the best preventative measures. If an outbreak occurs, promptly remove affected seedlings and ensure better air flow. Common pests like fungus gnats thrive in moist soil; allowing the top inch of soil to dry out can significantly reduce their populations by 70-80%. For more general advice on common issues, consult resources like vegetable gardening for beginners: your questions answered.
- Leggy seedlings: provide more intense light.
- Yellowing leaves: check for nutrient deficiency or overwatering.
- Damping-off: ensure sterile mix, good air, and avoid overwatering.
- Fungus gnats: let soil surface dry out between waterings.
- White mold: improve air circulation and reduce humidity.
Comparison of seed starting methods
Method | Pros | Cons |
|---|---|---|
Traditional seed trays | Affordable, widely available, good for many crops. | Can be prone to damping-off, requires more potting up. |
Soil blocks | Reduces transplant shock, air-prunes roots, no plastic waste. | Requires specialized tool, can dry out faster, initial learning curve. |
Peat pots/pellets | Convenient for transplanting, biodegradable. | Can restrict root growth, may not fully decompose, can be expensive. |
Recycled containers | Free, reduces waste. | Requires drainage holes, may not be sterile, inconsistent sizes. |
Optimal light: Seedlings need 14-16 hours of full-spectrum light daily, positioned 2-4 inches above the plant tops, to prevent leggy growth and support strong development.
Temperature control: Maintaining a consistent soil temperature of 70-80°F, often with a heating mat, can increase germination rates for many vegetable seeds by 20-30%.
Hardening off: Gradually acclimating seedlings to outdoor conditions over 7-14 days can reduce transplant shock by up to 25%, leading to higher survival rates.
Shop seed starting essentials
Frequently asked questions
When should I start my seeds indoors?
You should generally start seeds indoors 6-12 weeks before your average last frost date, depending on the specific crop. For example, tomatoes often need 6-8 weeks, while slower-growing plants like onions might require 10-12 weeks to develop properly before transplanting.
What kind of light do seedlings need?
Seedlings require 14-16 hours of bright, full-spectrum light daily to prevent them from becoming leggy. Position fluorescent shop lights or LED grow lights just 2-4 inches above the plant tops for optimal intensity and growth.
How often should I water my indoor seedlings?
Watering frequency depends on humidity and temperature, but a good practice is to water from the bottom when the top half-inch of soil feels dry. This helps prevent damping-off disease and ensures consistent moisture without overwatering, which can be detrimental to 30% of young seedlings.
What is ‘hardening off’ and why is it important?
Hardening off is the process of gradually acclimating indoor-grown seedlings to outdoor conditions over 7-14 days before transplanting. This step matters because it minimizes transplant shock, which can otherwise cause up to 50% of your young plants to wilt or die.
Can I use garden soil for starting seeds indoors?
No, it is not recommended to use garden soil for starting seeds indoors. Garden soil can contain weed seeds, pests, and disease pathogens that can harm delicate seedlings. A sterile, fine-textured seed starting mix is preferred to prevent issues like damping-off, which can eliminate a large percentage of young plants.
How can I prevent leggy seedlings?
To prevent leggy seedlings, ensure they receive adequate light for 14-16 hours daily, with lights positioned 2-4 inches above the plant tops. Also, a small fan providing gentle air circulation for a few hours each day can help strengthen stems, reducing leggy growth by 40%.
References
- Starting Seeds Indoors (2023). Starting Seeds Indoors.
- Attwood’s pedigreed bulbs, roots, plants for fall planting indoors and outdoors / (1930). Attwood’s pedigreed bulbs, roots, plants for fall planting indoors and outdoors /.
- Conkey’s : the original buttermilk starting feed : raises husky chicks / (1924). Conkey’s : the original buttermilk starting feed : raises husky chicks /.
- Conkey’s : the original buttermilk starting feed : raises husky chicks / (1923). Conkey’s : the original buttermilk starting feed : raises husky chicks /.
- Bacterial populations in juvenile maize rhizospheres originate from both seed and soil (2016). Bacterial populations in juvenile maize rhizospheres originate from both seed and soil.