Water bath canning: the safe-start method for high-acid foods
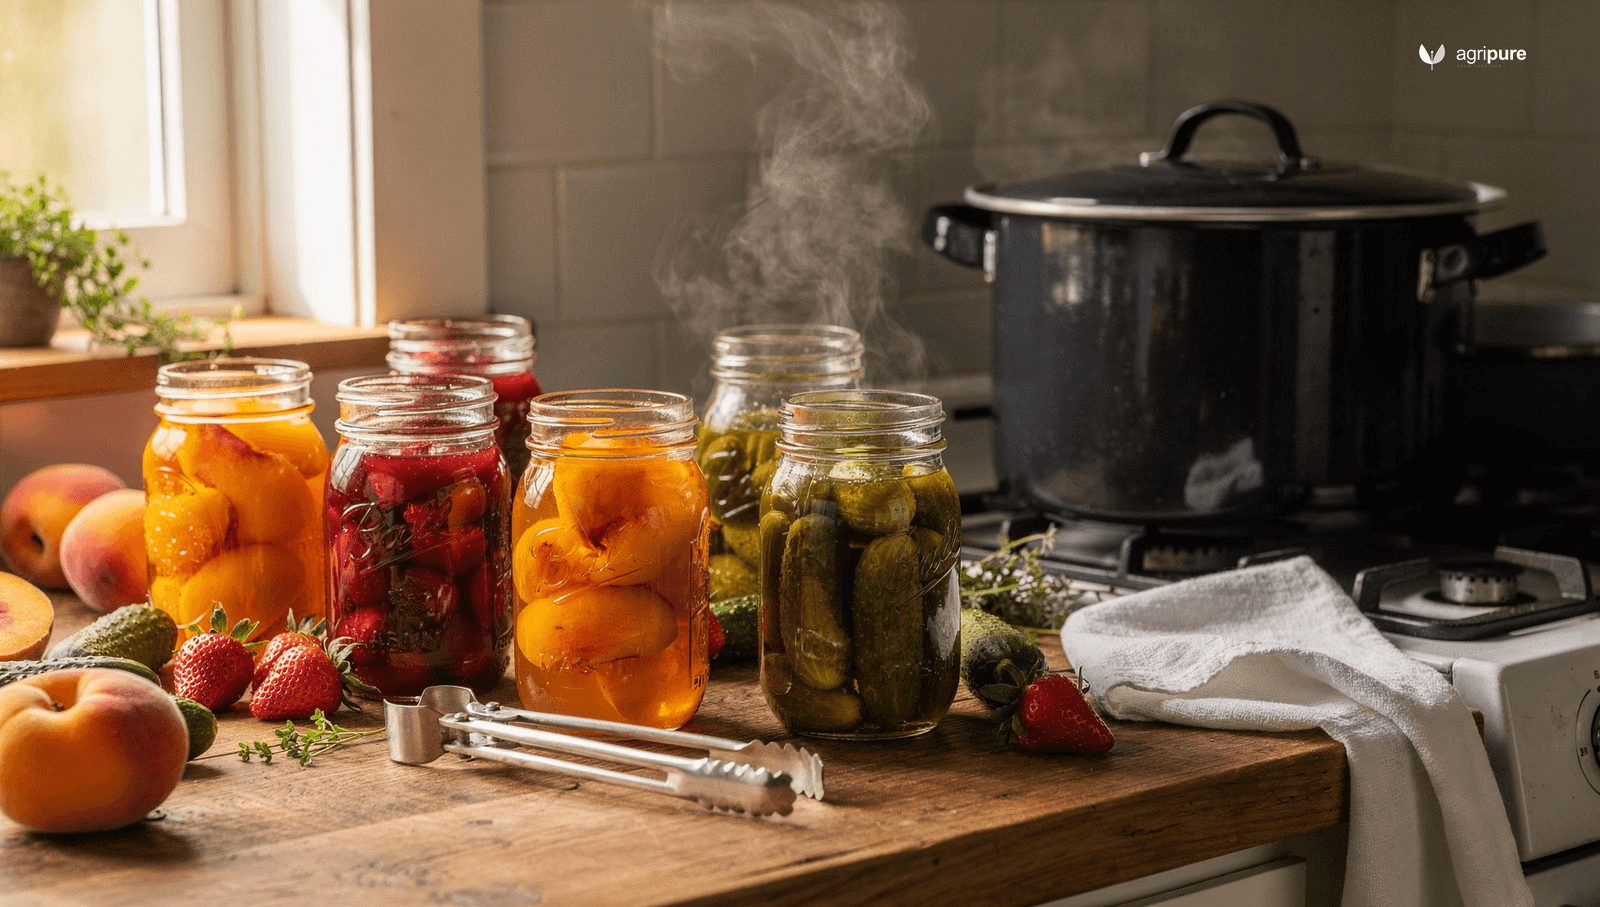
The pantry shelf that holds a year of summer fruit is built one jar at a time — and the first jar starts with knowing exactly why the method works.
Water bath canning is the oldest reliable method for putting food by, and it is still the right starting point for anyone building a homestead pantry. The science behind it is simple: boiling water at 212°F is hot enough to destroy the bacteria, yeasts, and molds that spoil high-acid foods — fruits, jams, jellies, pickles, and properly acidified tomatoes. For those foods, a pot of boiling water and a handful of mason jars is genuinely all you need.
The method has one hard boundary, and understanding it is the most important thing this guide will teach you. Water bath canning reaches 212°F. That temperature is not enough to destroy Clostridium botulinum spores in low-acid environments. Low-acid foods — every vegetable that is not pickled, all meats, beans, and most condiments — must be pressure canned. The dividing line is a pH of 4.6: foods at or below that value are safe for a boiling water bath; foods above it are not. This is not a preference; it is food safety established by the USDA and the National Center for Home Food Preservation (NCHFP).
This guide covers the full water bath process — equipment, jar prep, a tested step-by-step, altitude adjustments, troubleshooting, and storage. If you are also canning low-acid foods, the companion piece on pressure canning picks up where this one stops.
The safety rule: acidity determines your method
Every canning decision flows from one number: pH 4.6. That threshold, established through USDA research, is the point below which Clostridium botulinum spores cannot produce their toxin. Botulinum toxin is one of the most potent biological toxins known, and the critical fact about it is that it produces no visible sign — no obvious odor, no color change, no bubbles — in a sealed jar of low-acid food that was underprocessed. This is why the method and the recipe both matter, and why the NCHFP cautions against improvising.
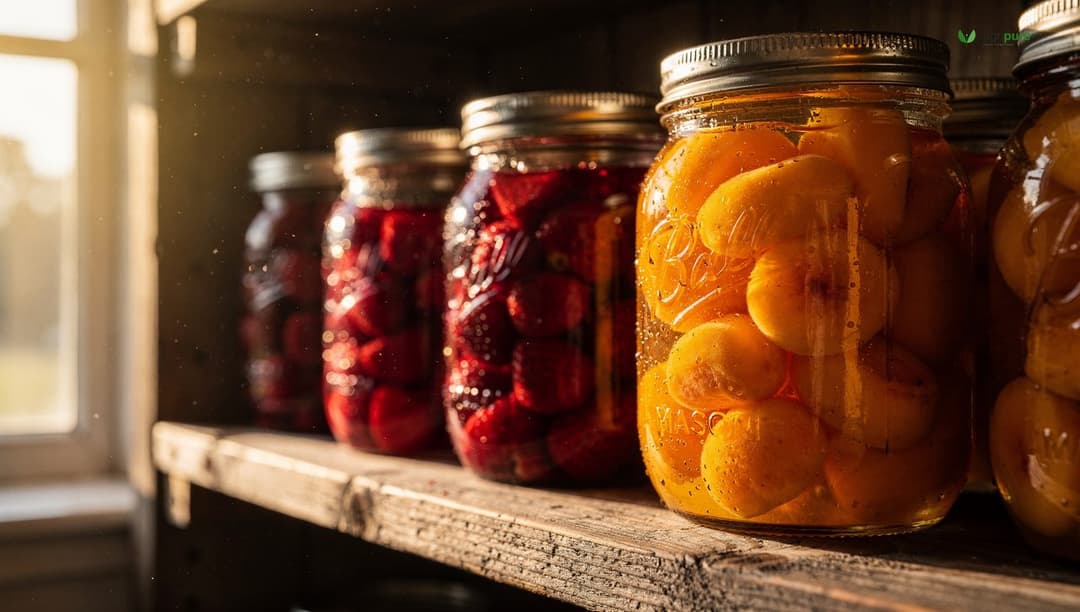
High-acid foods that are safe for water bath canning include most fruits (apples, berries, cherries, grapes, peaches, pears, plums), fruit juices, jams, jellies, marmalades, pickled vegetables, relishes, chutneys, and acidified tomatoes. Foods that sit near the pH 4.6 boundary — tomatoes, Asian pears, and figs — must have acid added: two tablespoons of bottled lemon juice per quart, or ½ teaspoon of citric acid per quart, before they go into the jar. Bottled lemon juice is specified because its acidity is standardized; fresh lemon juice varies and cannot be relied upon to bring pH reliably below 4.6.
Everything else — green beans, corn, beets (unless pickled in vinegar), carrots, meat, fish, poultry, dried beans — requires a pressure canner. The water bath cannot be pushed harder or run longer to make low-acid foods safe. The chemistry simply does not permit it.
Equipment: what you actually need
The barrier to entry for water bath canning is low. You need a canner and jars — and you may already own something that substitutes for the canner.
The canner. Any large, deep stockpot with a lid works as long as it meets three conditions: it must be deep enough to hold jars covered by at least one inch of water; it must hold a rack that keeps jars off the bottom; and its diameter should be no more than four inches wider than the burner, per Virginia Cooperative Extension guidance, to ensure stable boiling. A dedicated water bath canner costs $25–$60 and handles everything. A 21.5-quart stockpot with a round cake rack on the bottom does the same job.
Jars. Use only tempered-glass mason-style jars (Ball, Kerr, Weck, or equivalent). Re-used commercial food jars — pasta sauce, salsa, mayo — are not rated for home canning and can fail under thermal stress. Inspect every jar before each use: run a finger along the rim to check for chips or cracks, and check the side walls. A nicked rim is the leading cause of seal failure.
Lids and bands. Two-piece metal lids (flat disc plus screw band) are the standard. The flat disc lid is single-use — the sealing compound compresses during processing and cannot form a reliable seal a second time. Screw bands can be reused if they are undamaged and rust-free. Reusable lids (Tattler, Fowlers) work but require different technique; follow their manufacturer instructions exactly.
Other tools worth having. A jar lifter — the wide-grip tongs — is essential for pulling hot jars safely. A canning funnel keeps jar rims clean. A bubble freer (a thin plastic or wooden spatula) releases trapped air pockets. A digital timer. A permanent marker for dating lids. That is the full list.
| Item | Substitute option | Single-use? |
|---|---|---|
| Water bath canner | Deep stockpot + cake rack | No — reusable |
| Mason jars | None — use proper canning jars only | No — reusable if unchipped |
| Flat lid discs | None — must be new each use | Yes |
| Screw bands | None needed outside processing | No — reuse if undamaged |
| Jar lifter | Thick rubber-grip tongs (with care) | No |
| Canning funnel | Any wide-mouth funnel | No |
| Bubble freer | Thin chopstick or wooden skewer | No |
Preparing jars and lids
Jar preparation is not ceremonial — each step exists because of a specific failure mode. Skip a step and you risk a broken seal, thermal shock, or contamination.
Wash everything. Wash jars, lids, and bands in hot soapy water and rinse well. A dishwasher on the hot cycle works for jars. Lids and bands are hand-washed.
Inspect jars. After washing, run a fingertip around each rim. Any nick, crack, or rough spot is a discard — that jar will not seal and may shatter in the canner. Check the side walls for stress fractures.
Sterilize only if needed. Penn State Extension and the NCHFP both state clearly: if your product will be processed in a boiling water bath for 10 minutes or more, the jars do not need pre-sterilization — the processing time itself sanitizes them. Only products processed for fewer than 10 minutes (some jellies) require jars to be boiled empty for 10 minutes first. Most water bath recipes run well above 10 minutes, so this step is often unnecessary.
Keep jars hot until filling. Heat your jars in the canner water or in a 180°F oven. Putting hot food into cold jars can cause thermal shock and cracking. The jar does not need to be sterile, but it should not be cold.
Prepare lids. Current NCHFP guidance — updated from older advice — says lids do not need to be simmered before use; washing in hot soapy water is sufficient. Check the manufacturer’s current instructions on the box, as recommendations have evolved.
The step-by-step process
The following procedure follows USDA Complete Guide to Home Canning and NCHFP guidelines. Do not skip or reorder steps.
1. Fill the canner. Place the rack in the canner and fill with enough hot water that jars will be covered by one to two inches. Begin heating the water to a boil while you prepare your food.
2. Prepare your food. Follow your tested recipe exactly. Do not double a recipe and combine into a larger pot — heat penetration calculations are recipe-specific. Do not reduce the vinegar in any pickle recipe; the vinegar ratio is what makes the food safe.
3. Fill jars — hot pack or raw pack. Most water bath recipes give you a choice: raw pack (pack fresh food directly into the jar, cover with hot liquid) or hot pack (simmer food in liquid briefly, then pack). Hot pack generally produces better quality — the food softens slightly, fits more compactly, and floats less. Raw pack is faster. Either is safe when the recipe specifies it.
4. Leave correct headspace. Headspace — the gap between the food surface and the lid — is critical. Leave ¼ inch for jams and jellies, ½ inch for most fruits, juices, pickles, and relishes. Too little headspace and food boils out onto the sealing rim during processing; too much and air remains in the jar, preventing a vacuum seal.
5. Remove air bubbles. Run a bubble freer or thin spatula around the inside edge of the jar to release trapped air pockets. Recheck headspace and adjust if needed.
6. Wipe jar rims. Use a clean, damp paper towel to wipe the entire sealing surface of each jar rim. A single food particle between the rim and lid can prevent a seal. This step is not optional.
7. Apply lids and bands. Center the lid disc on the rim. Screw the band on fingertip-tight — until resistance is felt, then stop. Do not overtighten. The band must hold the lid down during processing but allow steam to escape; a band wrenched on with full force can prevent venting and cause seal failure.
8. Load and process. Lower jars into the canner using the jar lifter. Keep them upright — tilting can push food into the sealing area. The water must cover lids by one to two inches; add boiling water if needed. Put the lid on the canner and bring to a full rolling boil. Start timing only when the water reaches a full boil. If the canner stops boiling at any point, bring it back to a boil and restart the timer from zero.
9. Rest and remove. When processing time is complete, turn off the heat and remove the canner lid. Let jars sit in the hot water for five minutes — removing them immediately causes a thermal shock that can trigger siphoning (liquid loss). Lift jars straight out with the jar lifter and place on a towel on the counter, at least one inch apart. Do not tilt, press on lids, or cover with towels.
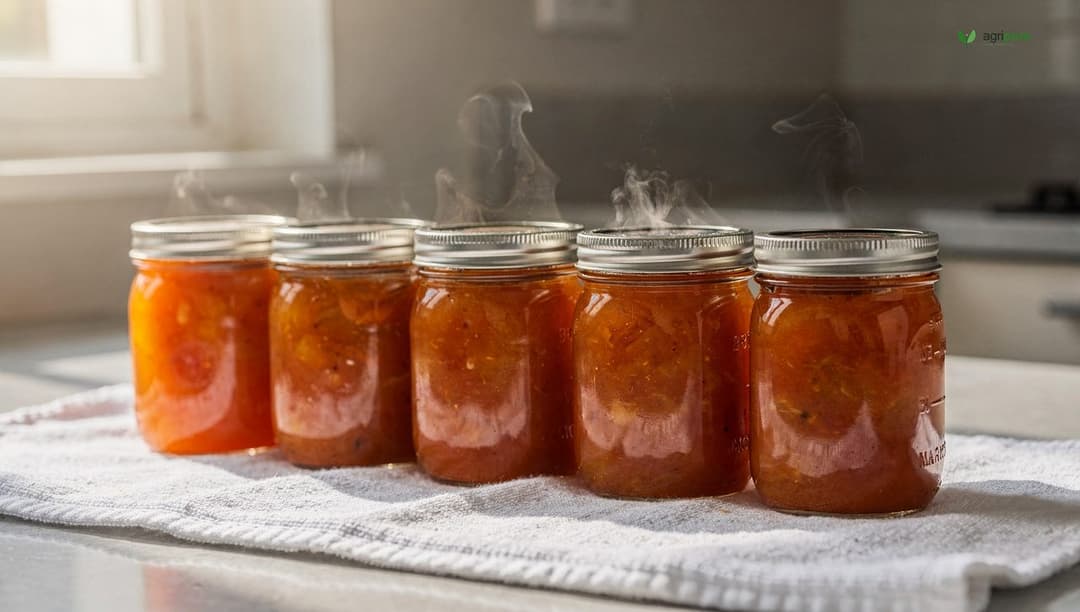
10. Cool and check seals. Let jars cool undisturbed for 12–24 hours. Then press the center of each lid: a properly sealed lid will be slightly concave (curved down) and will not flex when pressed. A lid that clicks up and down did not seal. Remove screw bands — the seal is held by the lid vacuum, not the band — wash bands, and store separately.
Processing times and altitude adjustments
Processing time is not guesswork — it is the product of USDA laboratory testing that determines how long it takes heat to penetrate to the center of a specific food in a specific jar size. Changing any variable (jar size, pack style, headspace, recipe) changes the safety calculation. Use the times given in your tested recipe exactly.
The reference times in USDA and NCHFP recipes are calculated for 0–1,000 feet elevation. At higher elevations, water boils at lower temperatures — approximately one degree Fahrenheit lower for every 500 feet of gain — so the same boiling-water process delivers less heat. The required adjustment, per USDA and every Cooperative Extension service:
| Altitude | Add to processing time | Why |
|---|---|---|
| 0–1,000 ft | No adjustment needed | Recipes are tested at this range |
| 1,001–3,000 ft | +5 minutes | Water boils at ~208–210°F |
| 3,001–6,000 ft | +10 minutes | Water boils at ~203–208°F |
| 6,001–8,000 ft | +15 minutes | Water boils at ~199–203°F |
| 8,001–10,000 ft | +20 minutes | Water boils at approximately 194–199°F |
Some common reference processing times at sea level (hot pack, unless noted):
- Fruit juice: five minutes, pints or quarts
- Berries, hot pack: 15 minutes for pints; 15 minutes for quarts
- Peaches, hot pack: 20 minutes for pints; 25 minutes for quarts
- Peaches, raw pack: 25 minutes for pints; 30 minutes for quarts
- Applesauce, hot pack: 15 minutes for pints; 20 minutes for quarts
- Jams and jellies (most): five to 10 minutes for half-pints and pints
- Pickles and relishes: 10–20 minutes depending on product and jar size
Always verify times against your specific recipe — the figures above are illustrative and may differ from the recipe in front of you. The USDA Complete Guide to Home Canning and the NCHFP website (nchfp.uga.edu) are the authoritative sources for tested times.
A note on raw pack vs. hot pack beyond quality: raw-packed jars almost always require a few minutes more than hot-packed jars of the same product, because cold food in the jar must be heated through from ambient temperature. The recipe table will reflect this. Do not use the hot-pack time for a raw-pack jar.
What you can and cannot water bath can
Knowing the category boundaries prevents the most dangerous canning error. The rule is simple: pH 4.6 or below = water bath safe; above 4.6 = pressure canning required. If you are unsure of a food’s pH, do not guess — look it up in the NCHFP tables or use a tested recipe from a trusted source. Below is a working reference:
| Food category | Method | Notes |
|---|---|---|
| Most fruits (apples, berries, peaches, pears, plums, cherries) | Water bath | pH well below 4.6 |
| Tomatoes | Water bath with added acid | Add 2 tbsp bottled lemon juice per quart, or ½ tsp citric acid |
| Figs and Asian pears | Water bath with added acid | Same acidification required; pH naturally sits near 4.6 |
| Jams, jellies, marmalades | Water bath | High sugar + fruit acidity keeps pH low |
| Pickled vegetables (in vinegar brine) | Water bath | Vinegar acidifies to below 4.6 — never reduce vinegar |
| Fruit juices and nectars | Water bath | High natural acidity |
| Plain vegetables (green beans, corn, beets, carrots) | Pressure canning only | pH above 4.6; botulism risk in water bath |
| Meat, poultry, fish, seafood | Pressure canning only | Low acid and dense; botulism risk |
| Dried beans and legumes | Pressure canning only | Reconstituted pH above 4.6 |
| Dairy products | Not recommended for home canning | No tested recipes; safety not established |
If you are preserving a bumper harvest of vegetables — green beans from the garden, for example — and want to avoid pressure canning, your safe options are freezing, fermenting or pickling in an acidified brine, or dehydrating. Pickling changes the product substantially, and fermenting produces a different food — but both are legitimate and safe alternatives to a pressure canner for low-acid vegetables.
Troubleshooting: seals, siphoning, and spoilage
Most water bath canning problems have a clear cause and a clean solution. The University of Minnesota Extension troubleshooting guide and Penn State Extension both provide detailed breakdowns — below is a working reference for the issues you will actually encounter.
Seal failure. A lid that did not seal (it clicks when pressed, or lifts off cleanly) is frustrating but fixable if caught within 24 hours. Options: reprocess with a new lid within 24 hours; refrigerate and use within several days; or freeze. To prevent seal failure: wipe jar rims meticulously before lidding; use only new, undamaged flat lids; tighten bands fingertip-tight (not wrenched on); inspect jars for rim chips before each use.
Siphoning (liquid loss). Siphoning — when brine or syrup escapes the jar during or after processing, leaving food exposed at the top — is almost always caused by removing jars from the canner too quickly, by a sudden temperature change, or by loose screw bands. It does not automatically mean the jar is unsafe: if the lid sealed and the seal holds, the food is generally still good. However, any exposed food near the headspace is more prone to surface mold. Watch it closely and use sooner. To prevent siphoning: rest jars in the canner for five minutes after turning off heat before removing; ensure bands are fingertip-tight; avoid temperature swings.
Jar breaks in the canner. Thermal shock — cold jars filled with hot food, or cold water added to a hot canner — is the main cause. Keep jars warm until filling. If a jar breaks in the canner, remove fragments carefully, check remaining jars for glass contamination, and process undamaged jars as normal after clearing the water.
Signs of spoilage to never ignore. When you open a jar — or before you do — look and listen. Discard any jar showing: a bulging or loose lid; spurting or foaming liquid when opened; any off-odor; mold (white, blue, black, or green); cloudy liquid in a recipe that should be clear; or floating sediment in a product that should be solid. Do not taste to test — botulinum toxin has no detectable flavor and a tiny amount is lethal. When in doubt, throw it out. Seal a potentially spoiled jar in a plastic bag before discarding so no people or animals can access it.
Storage, shelf life, and using your pantry
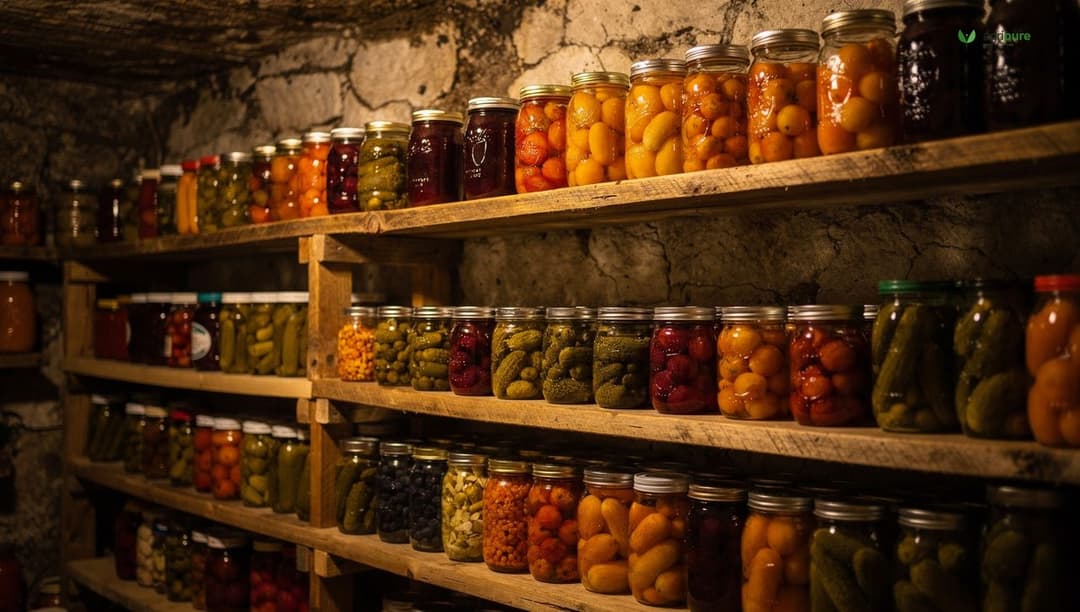
A properly sealed jar stored correctly will remain safe and maintain quality for 12–18 months. “Safe” and “at peak quality” are not the same: the USDA notes that properly sealed and stored canned food is technically safe indefinitely, but color, texture, and flavor degrade noticeably after 18 months. Most home canners find that keeping jars rotating on a 12-month cycle produces the best eating.
Store jars in a cool, dark, dry location at 50–70°F. Avoid garages, attics, or anywhere temperatures swing dramatically — heat accelerates quality loss, and freezing can break seals. Remove screw bands before storing (bands that are left on can rust and fuse to the lid, or mask a failed seal). Label every jar with the product and date before shelving.
Store jars on the pantry shelf without their bands. When you pull a jar to use it, press the lid again before opening: if it has lost its seal in storage, the center will flex. Any jar that has gone soft since you last checked it goes in the bin, not on the table. This two-second check costs nothing and is the last line of defense.
Once opened, treat home-canned foods like any fresh preserved product: refrigerate and use within two to four days for most fruits, jams, and pickles. There is no special handling needed beyond what you would give a commercial jar of the same product after opening.
For long-term pantry building, water bath canning pairs naturally with dehydrating and root cellaring. Different preservation methods suit different crops: high-sugar fruits and pickled vegetables are excellent candidates for the water bath; root vegetables and winter squash keep better in a cellar; dried herbs, beans, and grains store best dehydrated. A working homestead pantry uses all three.
Frequently asked questions
What foods can be water bath canned?
High-acid foods with a pH of 4.6 or lower: most fruits, jams, jellies, pickled vegetables, relishes, chutneys, fruit juices, and acidified tomatoes. Foods above pH 4.6 — plain vegetables, meats, and dried beans — must be pressure canned. Tomatoes and figs sit near the boundary and require bottled lemon juice or citric acid added to each jar before processing.
What is the difference between water bath canning and pressure canning?
Water bath canning uses boiling water at 212°F, which is hot enough to destroy pathogens in high-acid foods (pH ≤ 4.6). Pressure canning reaches 240–250°F under 10–15 PSI of steam pressure, which is the only temperature that destroys Clostridium botulinum spores in low-acid foods. Using a water bath canner on low-acid foods is a serious botulism risk regardless of how long you process them.
How do I sterilize canning jars?
If your product will be processed in a boiling water bath for 10 minutes or more — which covers most water bath recipes — the jars do not need pre-sterilization. The processing time itself sanitizes them. For products processed fewer than 10 minutes (some jellies), boil empty jars for 10 minutes in the canner before filling. Always wash jars in hot soapy water and inspect rims for chips before each use.
Do I need to adjust processing time for altitude?
Yes. USDA and NCHFP processing times are calculated for 0–1,000 feet elevation. Above that, water boils at lower temperatures and the process is less effective. Add five minutes (1,001–3,000 ft), 10 minutes (3,001–6,000 ft), 15 minutes (6,001–8,000 ft), or 20 minutes (8,001–10,000 ft) to the recipe time. Skipping this adjustment at altitude can result in underprocessed food.
Why did my jar not seal?
The most common causes of seal failure are a chipped or dirty jar rim (food particles on the sealing surface), a damaged or reused flat lid, and overtightening the screw band. Reprocess within 24 hours with a new lid, or refrigerate and use within a few days. To prevent it: wipe rims meticulously, use new lids only, and tighten bands fingertip-tight.
References
- Ensuring Safe Canned Foods — National Center for Home Food Preservation / University of Georgia
- Selecting the Correct Processing Time — National Center for Home Food Preservation
- USDA Complete Guide to Home Canning, Guide 1: Principles of Home Canning — USDA National Institute of Food and Agriculture / NCHFP
- Checklist for Water Bath Canning — Penn State Extension
- Time, Temperature, and Pressure in Canning Foods — Penn State Extension
- Boiling Water Bath Canning — Virginia Cooperative Extension / Virginia Tech
- Food Preservation and Canning Troubleshooting Guide — University of Minnesota Extension
- Altitude Adjustments for Home Canning — South Dakota State University Extension