Olla Irrigation: Reduce Garden Water Use by 50% in Dry US Regions

Key takeaways
- Olla irrigation can reduce garden water use by 50% to 70% compared to surface watering methods [2].
- Unglazed terracotta pots are essential for ollas, allowing water to slowly wick into the soil.
- Proper olla placement and sizing are critical for efficient water delivery to plant root zones.
- Integrating ollas with rainwater harvesting systems can maximize water conservation and reduce reliance on municipal sources [1].
- Wicking beds and passive earthworks complement ollas by retaining moisture and improving soil health.
- Regular maintenance, including cleaning and winterization, extends the lifespan and effectiveness of ollas.
In arid regions of the US, such as the Southwest where annual rainfall can be as low as 8 inches, efficient water management in gardens is not just a best practice—it’s a necessity. Traditional surface irrigation methods often lead to significant water loss through evaporation and runoff, especially during hot summer months. For example, in parts of California experiencing extreme drought, gardeners are constantly seeking methods to sustain their plants with less water.
One ancient technique, olla irrigation, offers a practical and effective solution for home gardeners and small-scale farmers across the nation. This method, which involves burying unglazed clay pots in the soil, can reduce water consumption by 50% to 70% compared to conventional watering, delivering moisture directly to plant roots where it’s needed most [2]. It’s a simple, low-tech approach that aligns well with modern goals of water conservation and sustainable agriculture.
understanding ollas: ancient wisdom for modern gardens
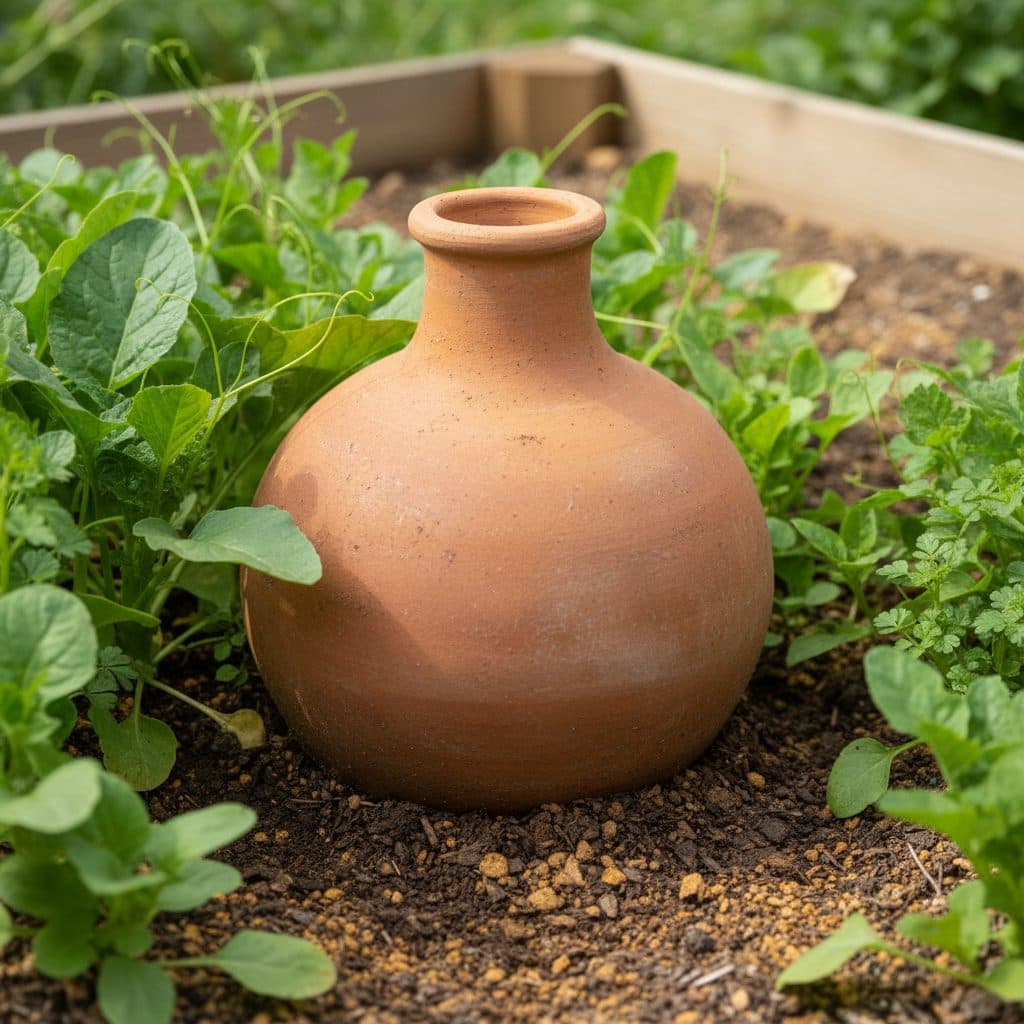
Ollas, pronounced ‘oy-yahs,’ are unglazed clay pots with a narrow neck, historically used for irrigation in arid climates for thousands of years. The principle is straightforward: when buried in the soil, the porous clay allows water to slowly seep out, creating a consistent moisture zone around plant roots. This passive delivery system minimizes evaporation from the soil surface, a major benefit in hot, dry climates like those found in USDA zones 8 and 9 across the southern US.
how ollas work underground
The magic of an olla lies in its **porous terracotta material**. When the surrounding soil dries out, the water potential gradient pulls moisture from inside the olla through its walls and into the soil. This creates a localized, consistently moist environment that encourages deeper root growth, making plants more resilient to drought conditions. A single olla can effectively water a circular area of 18 to 36 inches in diameter, depending on soil type and plant needs. This precise delivery means less water is wasted on weeds or lost to the atmosphere, a crucial factor when every gallon counts in states like Texas or Nevada.
- **Reduces water evaporation**: Water is delivered below the soil surface, minimizing loss to the sun and wind.
- **Promotes deep root growth**: Plants seek out the consistent moisture source, developing stronger root systems.
- **Suppresses weed growth**: The soil surface remains drier, discouraging shallow-rooted weeds.
- **Saves time and effort**: Ollas require less frequent refilling compared to daily surface watering.
- **Simple to install and maintain**: No complex plumbing or electricity is needed for operation.

choosing and installing ollas for your garden
Selecting the right olla is crucial for success. The pot must be **unglazed terracotta** to allow water to seep through its walls. Glazed pots, while decorative, will not function as an irrigation device. Sizes vary from small one-quart pots for individual herbs to multi-gallon vessels for larger shrubs or small trees. For most garden vegetables in USDA zone 7, a one-gallon olla is a good starting point, capable of supporting two to four plants.
proper placement and burial techniques
To install an olla, dig a hole in your garden bed that is slightly wider and deeper than the olla itself. Bury the olla with its rim extending one to two inches above the soil surface to prevent soil and debris from entering the pot. Place plants around the olla, typically within 6 to 12 inches, to ensure their roots can access the moisture. For row crops, space ollas every 2 to 3 feet along the row. In a 4 ft by 8 ft raised bed, two to three one-gallon ollas are usually sufficient. Once buried, fill the olla with water and cover the opening with a lid or stone to minimize evaporation and keep out pests. Consider using a garden PE irrigation hose for easy refilling of multiple ollas from a central water source.
- **Select unglazed terracotta**: Essential for water wicking; avoid glazed pots.
- **Match size to plant needs**: One-quart for small herbs, one-gallon for vegetables, larger for trees.
- **Bury with rim exposed**: Keep 1-2 inches above soil to prevent contamination.
- **Space plants appropriately**: Position within 6-12 inches of the olla for optimal root access.
- **Cover the opening**: Use a lid, stone, or saucer to reduce evaporation and deter pests.
beyond ollas: passive irrigation earthworks and wicking beds
While ollas are excellent for localized watering, a broader approach to water conservation involves integrating them with passive irrigation earthworks and wicking beds. These systems are designed to capture and hold water in the landscape, making it available to plants over longer periods. For instance, in regions like the Pacific Northwest, where heavy rains are common, swales and rain gardens can capture thousands of gallons of runoff annually, preventing erosion and recharging groundwater [0].
wicking beds for consistent moisture
A wicking bed is a self-watering garden bed that uses a water reservoir at the bottom to provide continuous moisture to the soil above through capillary action. This system is particularly effective for thirsty plants like tomatoes or leafy greens, and can significantly reduce the frequency of watering. A typical wicking bed, 12 inches deep, might contain a 4-inch gravel or sand layer for the reservoir, a geotextile fabric barrier, and 8 inches of growing medium. This design can hold 20 to 30 gallons of water for a 4 ft by 4 ft bed, making it ideal for urban gardens or areas with strict water restrictions. You can learn more about specific plant needs in Drought tolerant plants: how to choose them by zone and water them right.
- **Swales**: Contours dug on slopes to slow, spread, and sink rainwater into the soil.
- **Rain gardens**: Depressions planted with water-loving species to absorb stormwater runoff from impervious surfaces.
- **Keyline design**: A system of plowing and planting on contour to maximize water infiltration across a landscape.
- **Terracing**: Creating level steps on hillsides to reduce runoff and increase water retention for crops.
- **Wicking beds**: Self-watering raised beds with an internal water reservoir.
integrating ollas with rainwater harvesting systems
The effectiveness of olla irrigation is greatly enhanced when paired with rainwater harvesting. Collecting rainwater from rooftops or other impervious surfaces provides a free, high-quality water source for refilling ollas, reducing reliance on municipal water supplies. A typical 1,000 square foot roof in an area receiving 30 inches of annual rainfall can yield approximately 18,000 gallons of water per year [1]. This collected water can be stored in cisterns or rain barrels and then used to replenish ollas as needed.
designing a closed-loop watering system
For a truly sustainable garden, consider a system where rainwater is collected, stored, and then gravity-fed or pumped to ollas. A simple setup might involve directing downspouts into one or more 50-gallon rain barrels, strategically placed near garden beds. For larger gardens or properties in dry regions like the high desert of New Mexico, a larger cistern (200+ gallons) connected to an array of ollas via a low-pressure drip system or manual filling can be highly efficient. Rainwater harvesting: catch the free water on your roof provides detailed guidance on setting up such systems. This approach not only conserves water but also reduces your utility bills, making gardening more affordable and resilient.
- **Rain barrels**: Collect rainwater from downspouts for immediate garden use.
- **Cisterns**: Larger storage tanks for collecting and holding significant volumes of rainwater.
- **First flush diverters**: Devices that remove initial contaminants from rainwater before it enters storage.
- **Leaf screens/filters**: Prevent debris from entering rain barrels or cisterns.
- **Gravity-fed systems**: Utilize elevation differences to deliver water from storage to ollas without pumps.
maintenance and long-term care for olla systems
While ollas are low-maintenance, a bit of care ensures their longevity and continued effectiveness. Over time, mineral deposits from hard water can accumulate on the olla’s surface, potentially reducing its porosity. In areas with high mineral content, such as many parts of Arizona, it’s advisable to periodically clean ollas. This can be done by soaking them in a dilute vinegar solution (one part vinegar to ten parts water) for 24 hours, then scrubbing them clean. This process should be performed annually or bi-annually, depending on water quality.
winterizing ollas in cold climates
For gardeners in USDA zones 6 and colder, where ground freezes regularly, winterization is essential to prevent ollas from cracking. Water expands when it freezes, and a full olla can easily break. Before the first hard freeze, typically when temperatures consistently drop below 32°F, empty the ollas completely. If you can, remove them from the ground, clean them, and store them in a protected, frost-free location like a shed or garage. If removal isn’t practical due to size or integration into a larger system, ensure they are thoroughly drained and covered to prevent water from re-entering. This simple step can extend the life of your ollas for many years, making them a durable investment for your garden.
- **Regular cleaning**: Soak in a 1:10 vinegar solution to remove mineral buildup every 1-2 years.
- **Check for cracks**: Inspect ollas annually for damage that could lead to rapid water loss.
- **Refill frequency**: Monitor soil moisture and plant health to adjust refilling schedule, typically every 2-4 days.
- **Pest control**: Ensure lids are secure to prevent insects or small animals from entering the olla.
- **Winter drainage**: Completely empty ollas before freezing temperatures to prevent cracking.
| Method | Water Efficiency | Installation Complexity | Maintenance Needs | Cost (Initial) |
|---|---|---|---|---|
| Olla Irrigation | High (50-70% reduction) [2] | Low (bury pots) | Low (refill, occasional cleaning) | Low ($10-30 per olla) |
| Drip Irrigation | High (30-50% reduction) [3] | Medium (lines, emitters, pump) | Medium (clogging, leaks) | Medium ($50-200 per zone) |
| Sprinkler System | Low (high evaporation/runoff) | High (plumbing, heads, timer) | Medium (head adjustment, leaks) | High ($200-1000+ per zone) |
| Hand Watering | Variable (often inefficient) | Very Low (hose) | High (daily attention) | Very Low (hose, nozzle) |
Grow More with Less Water
Explore our guide to drought-tolerant plants that thrive with efficient irrigation methods like ollas.
Frequently asked questions
What types of plants are best suited for olla irrigation?
Ollas are particularly effective for plants that prefer consistent moisture but are sensitive to overhead watering, such as tomatoes, peppers, squash, and many herbs. They work well for most vegetables and small shrubs, especially in USDA zones 7-10 where evaporation is high. However, very shallow-rooted plants or those requiring extremely dry conditions might not benefit as much.
How often do ollas need to be refilled?
The refill frequency depends on several factors, including plant size, soil type, weather conditions, and olla size. Generally, ollas need to be refilled every two to four days. In very hot, dry conditions or with large, thirsty plants, they might need daily refilling, while in cooler weather, they could last up to five days or more.
Can ollas be used in raised beds or containers?
Yes, ollas are excellent for raised beds and large containers. For a standard 4 ft by 8 ft raised bed, two to three one-gallon ollas are usually sufficient. In containers, a smaller olla (one-quart or half-gallon) can be used for individual plants, providing consistent moisture and reducing the need for frequent hand watering, especially for plants like strawberries or peppers.
Are there any disadvantages to using ollas?
One potential disadvantage is the initial cost of purchasing or making the ollas, which can range from $10 to $30 each. Also, in very cold climates (USDA zone 6 and below), ollas must be drained or removed during winter to prevent cracking from freezing water. They also require manual refilling, which, while less frequent than hand watering, is still a task.
How do ollas compare to drip irrigation systems?
Both ollas and drip irrigation are highly water-efficient, reducing water use by 30% to 70% compared to sprinklers [3]. Ollas are simpler, require no pumps or electricity, and are less prone to clogging. Drip systems offer more precise control over water delivery to individual plants and can be automated, but they involve more complex installation and maintenance of emitters and lines.
References
- USDA Natural Resources Conservation Service (2024). USDA Natural Resources Conservation Service.
- EPA — Soak Up the Rain (2024). EPA — Soak Up the Rain.
- SARE — Sustainable Agriculture Research & Education (2023). SARE — Sustainable Agriculture Research & Education.
- ATTRA / NCAT Sustainable Agriculture (2023). ATTRA / NCAT Sustainable Agriculture.
- USDA National Agroforestry Center (2023). USDA National Agroforestry Center.