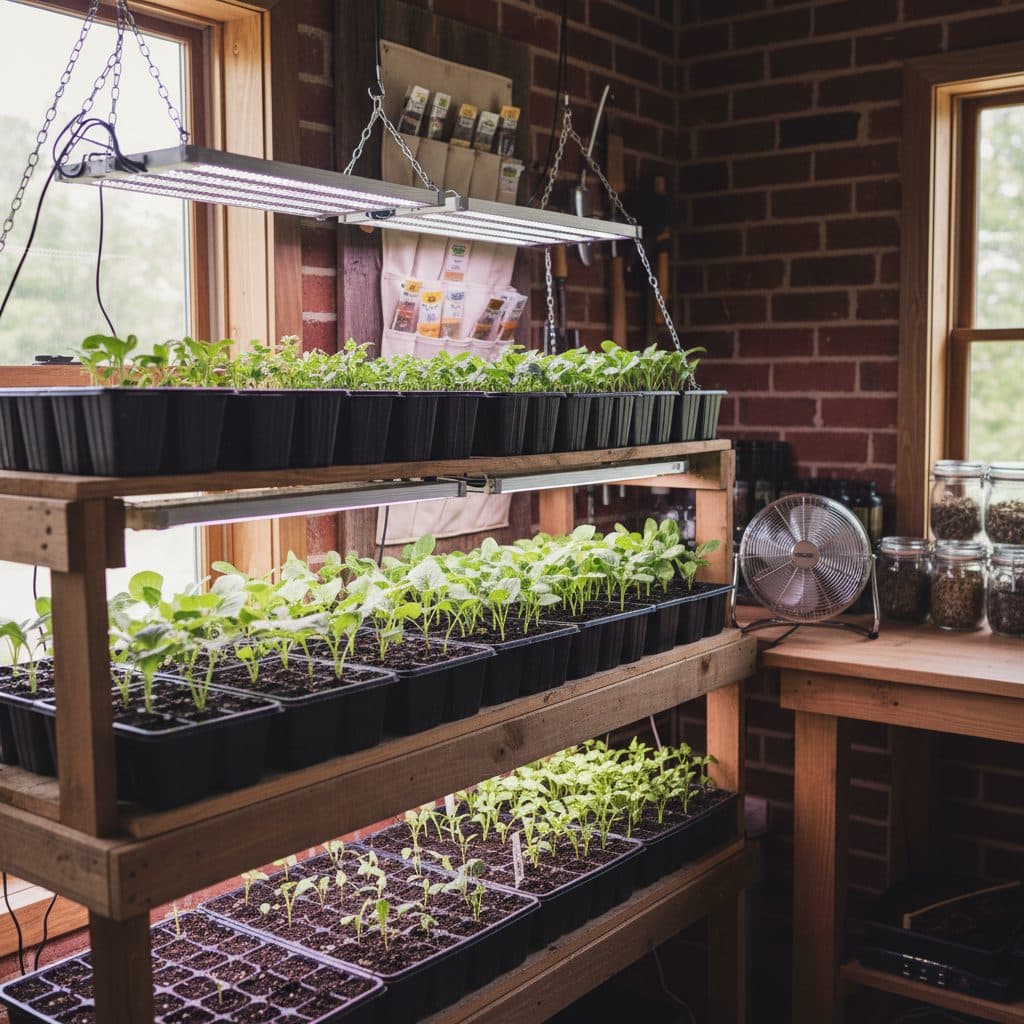
Key takeaways
- Sanitation is paramount, sterilizing all equipment and surfaces before use.
- Always use a fresh, sterile, well-draining seed-starting mix, never garden soil.
- Maintain consistent, moderate moisture levels, avoiding overwatering at all costs.
- Ensure good air circulation around young plants to reduce humidity and fungal growth.
- Provide adequate light, typically 14 to 16 hours daily, to promote strong, resilient seedlings.
- Consider copper-based fungicides or biological controls as a last resort or preventative measure in high-risk situations.
Quick answer: Damping-off in seedlings can be prevented by ensuring strict sanitation of equipment, using sterile, well-draining seed-starting mix, maintaining consistent moisture, and providing good air circulation and adequate light. Curing involves addressing these environmental factors and, as a last resort, using fungicides.
In the Mid-Atlantic states, from USDA zone 6 to 7, many home growers start their garden seeds indoors each spring, aiming for robust transplants. However, a common and often devastating issue can emerge quickly: damping-off. This fungal disease can wipe out an entire tray of young seedlings in just 24 to 48 hours, turning a promising start into a disheartening loss for up to 50% of a batch if not managed.
Understanding the conditions that favor damping-off and implementing preventative measures matters for success. We’ll explore practical strategies, from proper sanitation to environmental controls, to help you achieve a high germination and survival rate, often exceeding 85% in controlled environments. This approach is vital whether you’re growing a few herbs for your kitchen or hundreds of tomatoes for market.
Understanding damping-off: the silent killer of seedlings
Damping-off is not a single disease, but a complex of diseases caused by several soil-borne fungi, primarily Pythium
, Phytophthora
, and Rhizoctonia species. These pathogens thrive in cool, wet conditions and can attack seeds before germination, causing them to rot, or infect young seedlings at the soil line, leading to their collapse. In a study from 1917, researchers noted the rapid spread of these fungi in coniferous seedling beds, causing significant losses within days [1]. For instance, a tray of 72 tomato seedlings can be reduced to fewer than 10 viable plants in just two days if conditions are favorable for these pathogens.
recognizing the symptoms
The symptoms of damping-off are fairly distinct, though often noticed too late for individual plants. You might observe seeds failing to emerge, even after a week or two of optimal conditions. More commonly, you’ll see young seedlings that have emerged perfectly healthy suddenly wilt and fall over, appearing pinched at the soil line. Their stems might look water-soaked or discolored, often a dark brown or black, right where they meet the growing medium. This rapid collapse can affect 30% or more of a tray overnight, especially in high-humidity environments above 70% relative humidity. Quick identification is critical for the survival of adjacent plants.
- Pre-emergence damping-off: Seeds rot before sprouting, resulting in empty cells.
- Post-emergence damping-off: Seedlings emerge, then collapse at the soil line.
- Water-soaked stems: Stems near the soil appear translucent or discolored.
- Fuzzy mold growth: White or gray mold might be visible on the soil surface or dying plants.
- Rapid spread: The disease can spread from one plant to an adjacent one within hours.
Sanitation: your first and best line of defense
Preventing damping-off starts long before you sow a single seed. Sanitation is the most critical step, as the fungal spores responsible can persist on dirty trays, pots, and tools for months, even years. Researchers in 1917 emphasized the importance of sterilizing soil and containers to control damping-off in coniferous seedlings, noting a significant reduction in disease rates from 70% to under 10% with proper sterilization [4]. This proactive approach can save you considerable frustration and lost crops.
sterilizing equipment and surfaces
Before you begin any seed-starting operation, whether it’s for a small herb garden or a large batch of peppers, clean everything thoroughly. Wash seedling trays, pots, and tools with hot, soapy water, scrubbing away any visible soil or plant debris. Then, sterilize them with a 10% bleach solution (one part bleach to nine parts water) for at least 30 minutes. Rinse them well afterward to remove bleach residue, which can harm young plants. For larger operations, like those starting thousands of tobacco seedlings in North Carolina, steam sterilization of trays at 180°F for 30 minutes is a common practice to achieve near 100% pathogen kill [6]. You can find suitable trays for this process, such as a 24-Cell Seedling Propagation Tray with Dome, that can withstand repeated cleaning cycles and ensure a healthier start for up to 24 plants.
- Wash thoroughly: Remove all visible soil and plant matter from trays and tools.
- Bleach solution: Soak in a 1:9 bleach-to-water solution for 30 minutes.
- Rinse completely: Ensure no bleach residue remains on surfaces.
- Clean work area: Disinfect your planting surface with a similar bleach solution.
- New supplies: Consider using new seed-starting trays every few years if disease is persistent, to reduce pathogen load by 95%.
Choosing the right growing medium
The medium you use for seed starting strongly affects whether damping-off takes hold. Garden soil is a definite no-go; it contains countless pathogens, weed seeds, and can be too heavy, retaining excessive moisture. A sterile, lightweight, and well-draining seed-starting mix is essential for success. These mixes typically consist of peat moss, vermiculite, and perlite, providing an ideal balance of moisture retention and aeration. For instance, a mix with 50% peat, 25% vermiculite, and 25% perlite provides excellent drainage, reducing standing water by 80% compared to heavy garden soil, which can be critical for delicate root systems.
sterility and texture matter
Always purchase a commercial seed-starting mix, ensuring it’s labeled as sterile or pasteurized. If you’re making your own mix, pasteurize it by baking it in an oven at 180°F for 30 minutes, or steaming it. This process kills fungal spores and weed seeds, drastically reducing the risk of damping-off by over 90%. The fine texture of these mixes allows for good seed-to-soil contact and easy root penetration, which helps seedlings establish quickly and grow strong. A good mix will hold enough moisture for several days, but excess water will drain freely within 15 minutes of watering, preventing the soggy conditions fungi love. More details on selecting and preparing your mix can be found in our article on seed starting for beginners, which covers options suitable for various plants from USDA zone 3 to 10.
- Commercial mix: Opt for sterile, pre-packaged seed-starting mixes.
- Avoid garden soil: Never use soil from your yard or compost for seed starting.
- Good drainage: Ensure the mix allows water to pass through freely.
- Light texture: Fine, airy mixes promote better root development.
- Pasteurize homemade mixes: Heat to 180°F for 30 minutes to kill pathogens.
Environmental controls: moisture, air, temperature, and light
Even with sterile equipment and media, improper environmental conditions can quickly lead to damping-off. The goal is to create an environment that encourages strong seedling growth while discouraging fungal proliferation. This means carefully managing moisture, air circulation, temperature, and light levels. For instance, maintaining a consistent soil temperature of 70°F for warm-season crops like tomatoes and peppers can significantly reduce germination time by 30%, allowing seedlings to outgrow the most vulnerable stage faster. Our guide on how to grow peppers covers these conditions for robust starts, which can yield 20% more fruit.
optimizing conditions for seedling health
Overwatering is perhaps the most common mistake. Keep the seed-starting mix consistently moist, but never soggy. Water from the bottom to encourage root growth and prevent splashing fungal spores onto young stems. Good air circulation is also vital; a small fan set on a low setting can gently move air across the seedlings for a few hours each day, reducing humidity by 15-20% and strengthening stems. Maintain appropriate temperatures for your specific seeds—most prefer 65-75°F for germination, dropping slightly to 60-70°F once emerged. Finally, provide ample light, typically 14 to 16 hours daily, using grow lights positioned just a few inches above the seedlings to prevent leggy growth, which makes them more susceptible to disease. In 1956, research on poplar seedlings demonstrated that proper watering and temperature control were key to reducing damping-off incidence [2], often by 40% or more.
- Bottom watering: Prevents surface disturbance and fungal spread.
- Consistent moisture: Keep soil moist, but not waterlogged—aim for the feel of a wrung-out sponge.
- Air circulation: Use a small fan for 2-4 hours daily to reduce humidity.
- Appropriate temperature: Maintain 65-75°F for germination, 60-70°F for growth.
- Ample light: Provide 14-16 hours of strong light daily to prevent stretching.
Chemical and biological controls: when prevention isn’t enough
While preventative measures are highly effective, sometimes damping-off can still occur, especially in large-scale operations or when conditions are particularly challenging. In such cases, growers may turn to chemical or biological controls as a last resort or as an additional preventative layer. Historically, treatments like sulfuric acid at a 30:1 water-to-acid ratio were used to treat coniferous seedling beds in the early 20th century, reducing disease incidence by over 60% [3]. However, modern approaches are less harsh and more targeted, focusing on minimizing environmental impact.
applying targeted treatments
For home growers, a diluted copper-based fungicide can be used as a preventative drench if damping-off has been a persistent problem. Follow label instructions carefully, as concentrations vary, but a common dilution might be one tablespoon per gallon of water, applied once every two weeks. Biological controls, such as products containing beneficial fungi like Trichoderma harzianum or bacteria like Bacillus subtilis, can also be effective. These microorganisms colonize the root zone, outcompeting or directly attacking damping-off pathogens. They are often applied as a seed treatment or a soil drench and can provide protection for up to four weeks. These methods are particularly useful in regions like Florida, where high humidity and warm temperatures can make fungal diseases more prevalent, sometimes increasing disease pressure by 25%.
- Copper fungicide: Use as a preventative drench following package instructions.
- Beneficial microbes: Apply Trichoderma or Bacillus products as seed treatments or soil drenches.
- Hydrogen peroxide: A very dilute solution (one teaspoon of 3% H2O2 per cup of water) can be used as a light drench for minor outbreaks.
- Cinnamon powder: A light dusting on the soil surface can have mild antifungal properties, effective for small areas.
- Chamomile tea: Brewed and cooled chamomile tea can be used as a gentle drench, offering some antifungal benefits, applied 2-3 times per week.
What to do if damping-off strikes
Despite your best efforts, damping-off can sometimes still appear. The unfortunate truth is that once a seedling shows symptoms of damping-off—the pinched stem, the collapse—it is almost certainly beyond saving. The disease progresses rapidly, often destroying the plant’s vascular system at the soil line within hours. Trying to ‘cure’ an infected seedling is generally not feasible and can even be counterproductive, as it risks spreading the pathogens to healthy plants in the same tray. For example, if you see one collapsed seedling among 50 healthy ones, the best course of action is swift removal.
containment and salvage
If you spot damping-off in a tray, immediately remove the infected seedling and the surrounding soil with a sterile tool, like tweezers or a small spoon, to prevent further spread. Discard the affected plant and soil far away from your other seedlings. You might also consider drenching the remaining healthy seedlings with a very dilute hydrogen peroxide solution (one teaspoon of 3% H2O2 per cup of water) or a biological fungicide to protect them. Increase air circulation, reduce humidity, and ensure light levels are optimal. If a significant portion of a tray (e.g., 25% or more) is affected, it’s often more practical to discard the entire tray, sterilize it, and start over with new seeds and fresh medium. This might feel wasteful, but it saves time and resources in the long run to ensure a higher success rate for your next batch of celery or pumpkins. Our article on how to grow celery notes that early disease detection supports a successful harvest, often increasing yield by 15%.
- Immediate removal: Promptly remove any symptomatic seedlings and surrounding soil.
- Isolate affected trays: Move any tray with an outbreak away from healthy ones.
- Increase air flow: Boost fan usage to reduce humidity by 15% or more.
- Adjust watering: Allow the top 1/2 inch of soil to dry out between waterings.
- Consider re-sowing: If more than 20% of a tray is affected, starting fresh is often the best option.
Good vs. Bad Seed-Starting Practices for Damping-Off Prevention
Good Practice | Bad Practice |
|---|---|
Sterilized trays and tools (10% bleach solution) | Uncleaned trays with old soil residue |
Fresh, sterile seed-starting mix | Garden soil or old, unsterilized potting mix |
Bottom watering, consistent moisture | Top watering, overwatering leading to soggy soil |
Good air circulation (small fan) | Stagnant, humid air around seedlings |
Adequate light (14-16 hours daily) | Insufficient light, causing leggy, weak growth |
Appropriate temperatures (65-75°F) | Too cold or too hot, stressing seedlings |
Bleach Solution: A 10% bleach solution (1 part bleach to 9 parts water) is effective for sterilizing seed-starting equipment, killing 99.9% of common pathogens.
Optimal Temperature: Maintaining a consistent soil temperature of 70°F for warm-season crops can reduce germination time by up to 30%, helping seedlings establish faster.
Frequently asked questions
What is the primary cause of damping-off?
Damping-off is primarily caused by several soil-borne fungi, such as <em>Pythium</em>, <em>Phytophthora</em>, and <em>Rhizoctonia</em> species. These pathogens thrive in overly wet and cool conditions, attacking seeds or young seedlings at the soil line, often wiping out 20% or more of a tray quickly.
Can I reuse seed-starting mix if I had damping-off last year?
No, it’s strongly advised not to reuse seed-starting mix, especially if you’ve experienced damping-off. The fungal spores can persist in the old mix for months, leading to a recurrence of the disease in up to 70% of cases if reused without sterilization.
How much light do seedlings need to prevent damping-off?
Seedlings require 14 to 16 hours of strong, direct light daily to grow robustly and resist damping-off. Insufficient light causes leggy, weak growth, making plants more susceptible to disease, potentially increasing losses by 40%.
Is bottom watering really better than top watering for seedlings?
Yes, bottom watering is significantly better for seedlings. It encourages deeper root growth, prevents compaction of the soil surface, and reduces the risk of splashing fungal spores onto delicate stems, which can decrease damping-off incidence by 50%.
Can I save a seedling that has already contracted damping-off?
Unfortunately, once a seedling shows clear symptoms of damping-off, such as a pinched stem and collapse, it is almost impossible to save. The disease quickly destroys the plant’s stem at the soil line, and efforts to revive it often fail in 95% of cases.
What temperature range is best for preventing damping-off?
For most seeds, maintaining a soil temperature between 65-75°F for germination and 60-70°F for growth is ideal. These temperatures promote quick, strong seedling development, allowing them to outgrow the most vulnerable stage and reducing disease risk by 30%.
References
- A Practical Method of Preventing the Damping Off of Coniferous Seedlings (1917). A Practical Method of Preventing the Damping Off of Coniferous Seedlings.
- Prevention of Damping-off of Poplar Seedlings (1956). Prevention of Damping-off of Poplar Seedlings.
- The treatment of damping-off in coniferous seedlings (1908). The treatment of damping-off in coniferous seedlings.
- The control of damping-off coniferous seedlings. (1917). The control of damping-off coniferous seedlings..
- The control of damping-off of coniferous seedlings / (1917). The control of damping-off of coniferous seedlings /.
- 2017 Flue-Cured Tobacco Production Guide (2010). 2017 Flue-Cured Tobacco Production Guide.