How to grow tomatoes: from seedling to harvest
Tomatoes reward specificity: the right variety for your space, the right support before it’s needed, and water measured in inches — not guesses.
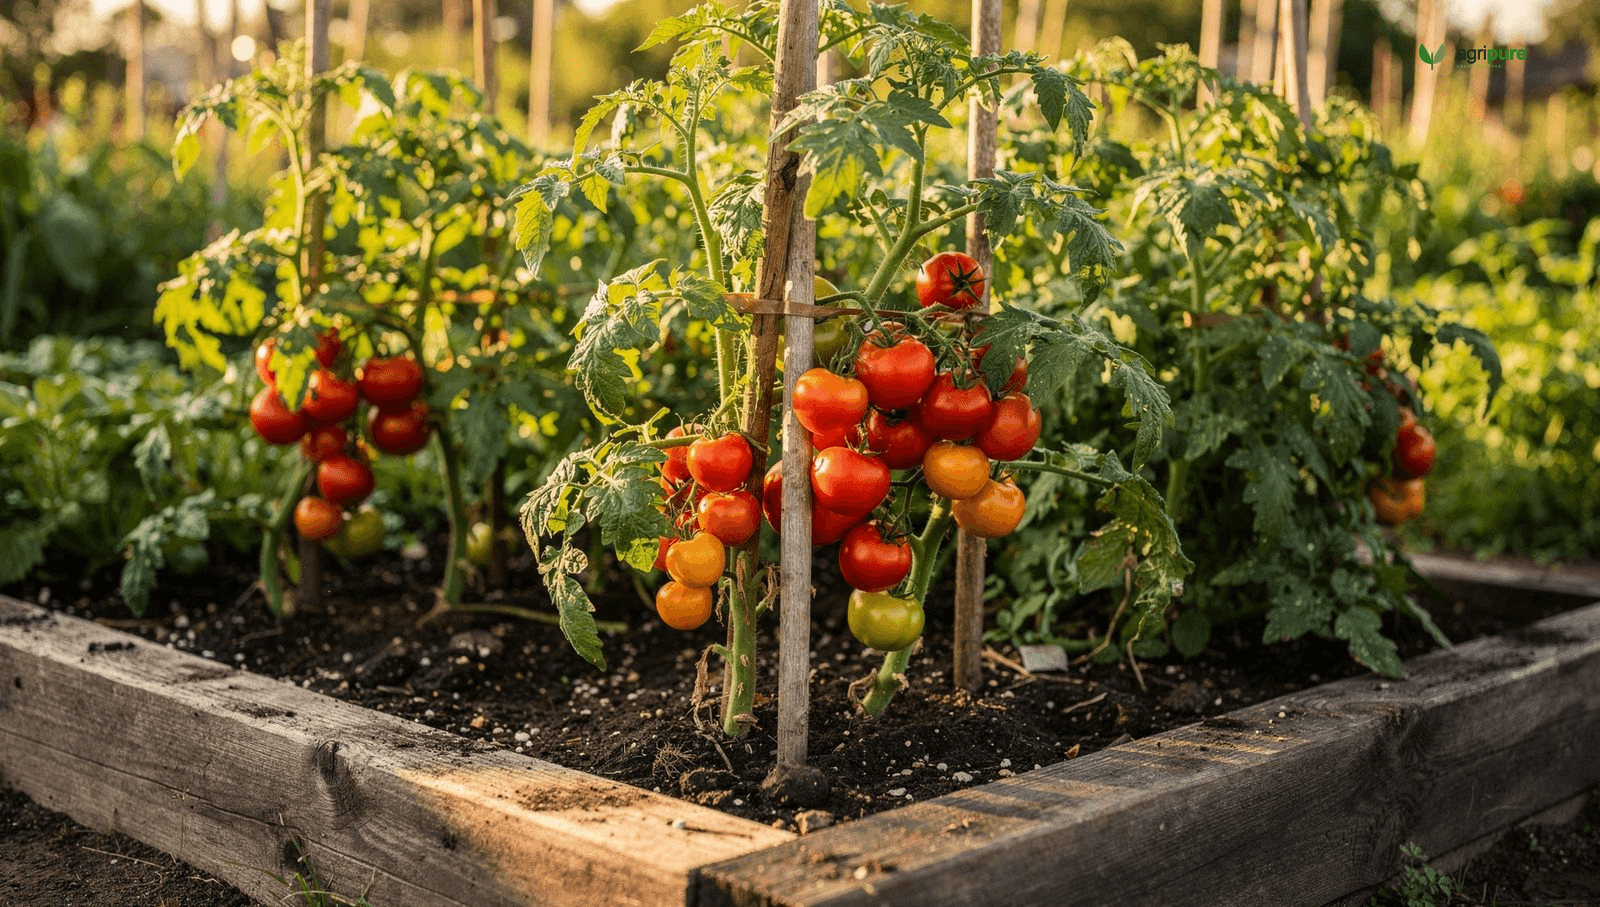
Tomatoes sit at the center of almost every kitchen garden in North America, and with good reason. A single well-grown plant can yield 10 to 15 pounds of fruit over the season — sometimes more. But that output requires a clear plan. The wrong variety in a container, a stake installed too late, or watering that lurches between soggy and bone-dry will cost you fruit before October arrives.
This guide runs from seed to harvest: how to choose between determinate and indeterminate types, how to start from seed or source a transplant, how to prep the soil, set up support, water, feed, and troubleshoot the pests and diseases that show up reliably every summer. It also covers container growing, because a 5-gallon pot on a balcony is a legitimate tomato garden if you pick the right variety.
The numbers here come from university Cooperative Extension guides — Penn State, University of Minnesota, University of Maryland, Illinois, and Iowa State — rather than seed catalog copy. Where ranges exist, they reflect variation by climate zone and cultivar. Your last-frost date and your soil are the local variables only you can supply.
Determinate vs. indeterminate: choosing your type
Every tomato variety is either determinate or indeterminate, and that single trait shapes everything else: how much space it needs, whether it requires staking, how long you’ll harvest, and whether it suits a container or a canning batch.
Determinate (also called bush-type) varieties carry a gene — SELF-PRUNING — that tells the plant to stop vegetative growth once fruit sets on each growing tip. The result is a compact plant, typically 24–30 inches tall, that produces most of its fruit in a concentrated 4–6 week window, then slows down. That predictability makes determinates ideal if you’re canning sauce or salsa, growing in containers, or working with a short season. Celebrity (70 days, globe-shaped, 8–12 oz, disease-resistant) and Roma (80–85 days, pear-shaped, classic paste type) are two of the most proven.
Indeterminate varieties produce fruit on side branches rather than growing tips and keep growing until frost kills them, reaching 3–5 feet or more in a season. They need a strong trellis, cage, or stake from day one, but they reward the infrastructure with fresh fruit from midsummer through October. Sun Gold (bright orange cherry type, intensely sweet) and Better Boy (large slicer, 72 days) are popular indeterminate picks that perform across a wide range of zones.
| Trait | Determinate | Indeterminate |
|---|---|---|
| Plant height | 24–30 inches | 3–5+ feet |
| Harvest window | 4–6 weeks, concentrated | Continuous until frost |
| Support needed | Optional / minimal | Required — cage or 6-ft stake |
| Best use | Canning, small spaces, containers | Fresh eating, long season |
| Pruning suckers | Not needed | Beneficial for airflow and yield |
| Popular examples | Celebrity, Roma, Patio Princess | Sun Gold, Better Boy, Brandywine |
| Days to maturity (transplant) | 55–85 days | 60–80+ days |
Starting from seed vs. buying transplants — and getting the timing right
Starting from seed gives you access to hundreds of varieties that never appear on a nursery bench — including most heirlooms and specialty paste types. It also costs less per plant once you own a heat mat. The trade-off is six weeks of indoor management before the plant sees outdoor soil.
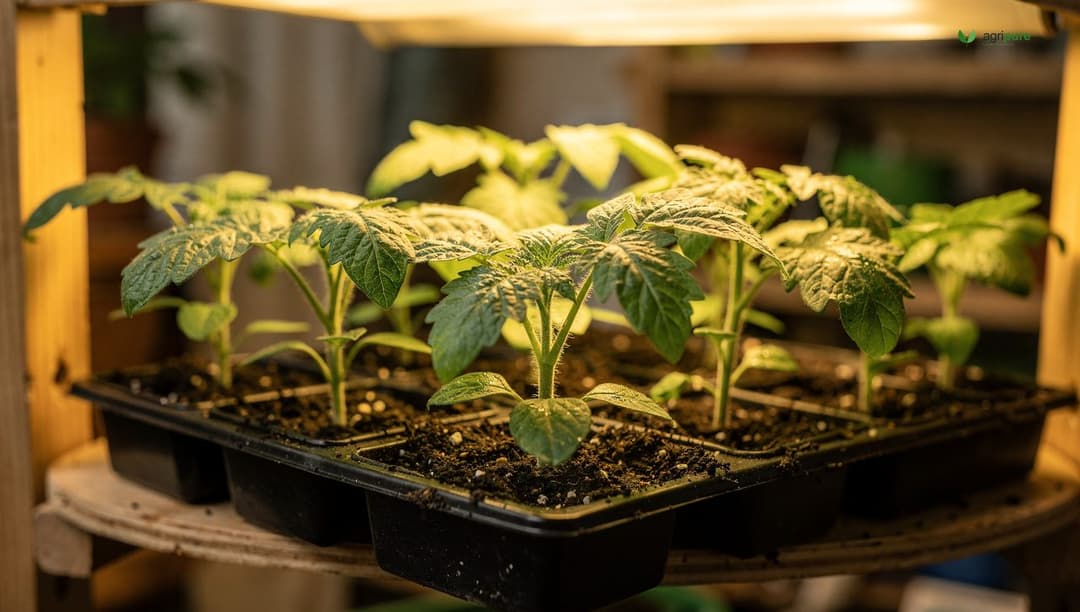
Sow seeds indoors 5–6 weeks before your planned transplant date — which itself should fall after your last frost date and once soil temperature has reached at least 60°F. In Minnesota that points to a mid-April indoor start. In Maryland or Illinois it may be early April. Fill 2-inch cells or small pots with a sterile seed-starting mix, plant seeds ¼ inch deep, and keep the medium at 75–85°F for germination. A heat mat under the trays makes this reliable; without one, germination slows and becomes uneven. Once seedlings emerge, move to a bright windowsill or grow lights and drop the temperature to about 70°F. Leggy seedlings mean insufficient light — they need 14–16 hours of strong light per day, which almost always requires supplemental fixtures indoors. If you’re new to seed starting, the seed-starting guide covers heat mats, light setups, and damping-off prevention in detail.
If you’re sourcing transplants from a nursery, select stocky plants 6–10 inches tall with dark green leaves and a stem thick enough that it doesn’t bend in your hand. Avoid anything already flowering — it’s been stressed in its pot and will sulk after transplant. Before planting outdoors, harden transplants off for 7–10 days: set them outside in a sheltered spot for a few hours the first day and extend exposure gradually until they’re spending full days outdoors. Skip hardening-off and you risk sunscald on leaves that have never seen direct sun.
Soil, sun, and spacing: the foundation
Tomatoes are heavy feeders that need excellent drainage, full sun, and room to breathe. Get all three right and the plant does most of the work. Miss one and problems compound through the season.
Sun. Tomatoes need a minimum of six hours of direct sun daily; eight to 10 hours produces better yields and reduces disease pressure. A bed that’s shaded by a fence after 2 pm is a marginal tomato site — plan accordingly or choose shade-tolerant crops for that spot instead.
Soil. Target a pH of 6.0–6.8 — slightly acidic, which keeps calcium, phosphorus, and magnesium available. A soil test from your county extension office costs $15–$20 and removes the guesswork. Work in 2–3 lbs of a balanced complete fertilizer (10-10-10) per 100 square feet before planting, along with generous compost. Adding ¼ cup of gypsum to each planting hole supplies calcium directly to the root zone and reduces blossom-end rot risk. Building soil organic matter over several seasons is the long game — see building living soil for the framework. Raised beds with loose, amended soil suit tomatoes especially well because they drain freely and warm quickly in spring; the raised-bed gardening guide covers construction and fill.
Spacing. Plant determinate types 2 feet apart; indeterminate types 3 feet apart — in rows 4–5 feet apart. Crowding is the single most common beginner mistake. Close plants look fine in June and turn into a disease-prone thicket by August. Bury the stem deeper than it sat in its pot — up to two-thirds of the stem can go underground, and every buried node produces roots. A deeper root system feeds the plant more reliably through dry spells.
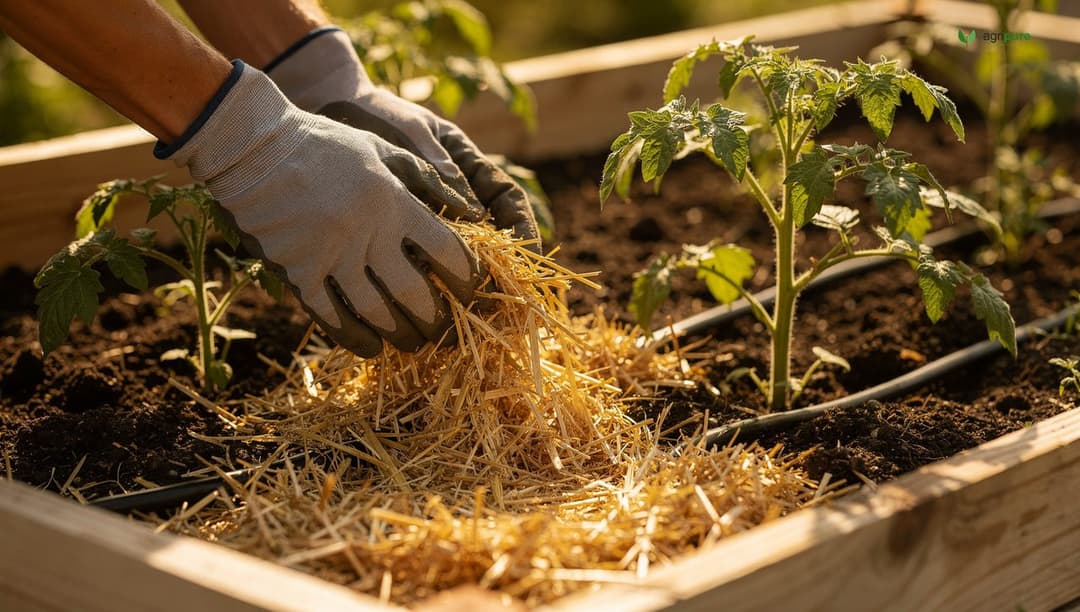
For mulch, apply 2–3 inches of straw, shredded leaves, or wood chips around the base of each plant after transplanting. Mulch stabilizes soil moisture, reduces splash-back of soil-borne fungal spores, moderates soil temperature, and keeps the fruit count up when August drought arrives. The guide to mulching covers material choices and application depth.
Watering and feeding through the season
Tomatoes want consistent moisture — not feast-and-famine cycles. 1 to 1.5 inches of water per week is the standard target from Penn State and University of Minnesota Extension, delivered by rain or irrigation directly to the soil. Check soil moisture at 2 inches deep; if it’s dry at that depth, water. If it’s still damp, hold off.
Overhead watering — sprinklers, hose arcing over the foliage — is worth avoiding. Wet leaves at night create ideal conditions for Septoria leaf spot and early blight. Water at the soil line, in the morning if possible, so any splash dries before evening. Drip irrigation solves this problem entirely and pays for itself in reduced disease and water use across a few seasons.
Inconsistent moisture — a week of dry, then a soaking rain — causes two problems directly: blossom-end rot and fruit cracking. Both are physiological, not infectious, and both trace back to the roots not being able to move calcium or water steadily. Mulch helps buffer the fluctuations between rain events.
For fertilizer, start with a high-phosphorus diluted liquid starter at transplant — high phosphorus drives root development, which is what you need in the first two weeks. Avoid heavy nitrogen at planting; nitrogen pushes leafy green growth and delays the switch to flowering. Once the first fruits start to enlarge, side-dress with a granular fertilizer: about ½ cup of 46-0-0, or 1 cup of 27-3-3, per 100 feet of row, as recommended by University of Minnesota Extension. In containers, switch from a balanced 20-20-20 to a high-potassium formula (9-15-30) once flowers open — potassium drives fruit quality and size.
Support and pruning: keeping the plant manageable
Install support at planting — not after the plant leans. A stake driven through established roots damages them, and a cage set around a 3-foot sprawling plant is harder to position correctly than one dropped over a seedling.
Cages work well for determinate types and smaller indeterminates. Use sturdy wire fencing with 6-inch mesh — small mesh is impossible to reach through for harvesting. A cage made from a 5-foot roll of concrete reinforcing wire, formed into a 20-inch diameter cylinder, will outlast a decade of cheap store-bought cages. Space cages at least 4 feet apart.
Stakes are the choice for large indeterminates. Drive a 6-foot wooden or steel stake 12 inches into the ground, 4–6 inches from the plant stem, at planting. Tie the main stem loosely to the stake every 8–10 inches using soft twine or cloth strips — never wire. As the plant grows, add ties. Staked plants need their suckers removed (see below) to keep growth focused on the single main stem; this produces larger fruit and better air circulation.
Pruning suckers applies mainly to indeterminate plants. A sucker is the shoot that emerges in the crotch between the main stem and a leaf branch — if left, it becomes a full secondary stem. For staked plants, remove suckers when they’re small (under 2 inches) by snapping them off with your fingers. For caged plants, you can leave the first one or two suckers below the first flower cluster; they contribute to yield without losing structural control. Remove any growth within 12 inches of the ground regardless of training method — low foliage contacts the soil and is the first entry point for early blight.
Common pests and diseases
Three problems account for most home-garden tomato losses: early blight, blossom-end rot, and tomato hornworm. Each is manageable with a clear diagnosis and a targeted response.
Early blight (Alternaria solani) is a fungal disease that starts on the oldest, lowest leaves: small brown lesions with concentric rings — the classic bull’s-eye pattern. It moves upward through the season, defoliating the lower plant if left unchecked. It thrives in warm, humid conditions and splashes up from soil. Management: keep lower leaves pruned to 12 inches above the ground, mulch heavily, water at the base, rotate tomatoes to a new location each year, and choose resistant varieties when available. Once active, a copper-based fungicide slows spread but doesn’t eliminate it.
Late blight (Phytophthora infestans) is far more destructive — the same pathogen that caused the Irish potato famine. It appears as large, dark, water-soaked patches on leaves and stems, with white mold on the undersides in humid weather. It can defoliate a plant in 14 days. Late blight is favored by daytime temperatures in the upper 70s°F paired with high humidity and cool nights. If you see it, remove and bag affected plants immediately — do not compost. Confirm the diagnosis with your county extension office before pulling healthy plants.
Blossom-end rot is not a disease — it’s a calcium-deficiency disorder. The first sign is a sunken, brownish-black spot (½–1 inch) on the blossom end of developing fruit. The calcium is usually present in the soil but can’t reach the fast-growing fruit when watering is inconsistent or when excess nitrogen pushes too much leafy growth. Fix: mulch, consistent watering, gypsum at planting, and no excess nitrogen. Remove affected fruits so the plant directs energy to the next flush.
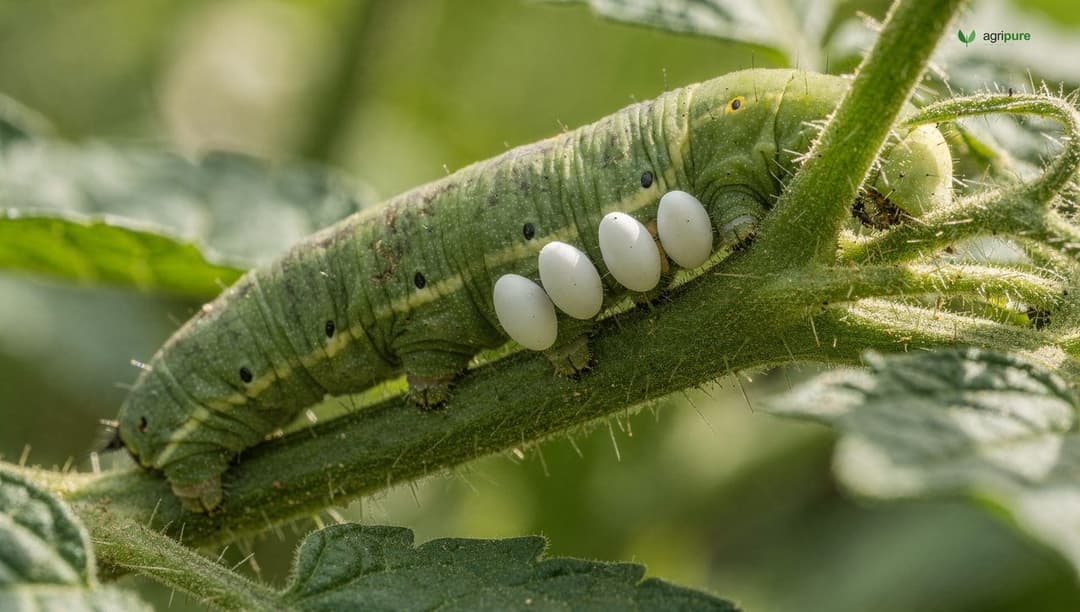
Tomato hornworm (Manduca quinquemaculata) is easy to miss until the damage is obvious — a caterpillar that reaches 3 inches long, green, with eight V-shaped white stripes and a black horn on its rear. It can strip branches overnight. Hand-pick and destroy; apply Bacillus thuringiensis (Bt) if the infestation is heavy. Leave any hornworms that have white egg sacs attached to their backs alone — those are parasitic wasp cocoons that will kill the caterpillar and seed your garden with natural pest control.
Companion planting can reduce pest pressure. Basil and marigolds near tomatoes have shown some reduction in thrips in field and greenhouse trials, and they make good neighbors in any case. See the full companion planting guide for the mechanisms and evidence.
Growing tomatoes in containers
Container tomatoes work — but only if the container, the variety, and the watering match each other. The three most common failures are an undersized pot, the wrong variety, and irregular watering that a pot magnifies more than a bed does.
Container size. Use at least a 14-inch diameter pot, and 18–20 inches is better — Penn State Extension’s trials showed larger pots produced visibly larger plants and heavier yields. Large containers hold more root mass and more water, which matters when a July afternoon pushes the foliage into rapid transpiration. Determinates and compact indeterminates can manage in 5-gallon containers; large vining types need 10 gallons minimum and will still likely need daily watering by midsummer.
Variety selection. Choose varieties bred for containers: Bush Early Girl, Patio Princess, Tumbler (three plants fit a 14-inch pot), or Window Box Roma for a paste type. These are not diminished versions of full-size tomatoes — they were selected specifically for pot performance. A standard indeterminate like Better Boy in a 5-gallon bucket will produce stressed, low-yield fruit and need watering twice a day in summer heat.
Soil and feeding. Use a potting mix with composted pine bark, peat or coir, and perlite for drainage. Avoid high-peat mixes that compress mid-season, reducing aeration. Begin with a timed-release fertilizer mixed in per the label; after two weeks, supplement with weekly soluble fertilizer — balanced 20-20-20 before flowers, then shift to a high-potassium formula (9-15-30) once flowers open. Container tomatoes are heavy feeders precisely because the small soil volume exhausts nutrients faster than a garden bed.
Container growing pairs naturally with raised-bed gardening thinking — both involve controlled soil volumes and deliberate feeding. If you’re starting a new food garden from scratch, the two approaches complement each other well.
Harvest, ripening, and storage
The most useful thing to know about tomato harvest is this: the vine is not a ripening requirement. University of Maryland Extension is explicit on the point — light is not necessary for ripening mature tomatoes. The fruit contains all the ethylene and color chemistry it needs once it begins to turn. Picking at the “breaker” stage — when color first begins to show — protects fruit from splitting, bird damage, and late blight on the vine, and the flavor difference from fully vine-ripened fruit is minimal.
Pick when fruit is firm and the color is changing. For red varieties, harvest once the shoulders turn from green to orange-pink; the fruit will finish to full red at room temperature in 3–7 days. For yellow and orange types, harvest when the fruit gives slightly under thumb pressure. Peak quality develops at a daily average temperature of about 75°F — which means late-season fruit ripened in cool fall temperatures (below 60°F) will be less flavorful, regardless of where it ripens.
Store unripe tomatoes at room temperature, stem side up, one layer deep, not touching each other. Do not refrigerate tomatoes at any stage — temperatures below 50°F permanently damage the cell membranes that carry flavor compounds, producing the mealy, flavorless texture that refrigerated supermarket tomatoes are famous for. Green tomatoes at the end of the season can be wrapped individually in newspaper and stored at 50–70°F; they will ripen over 1–3 weeks.
If you end up with more tomatoes than you can eat fresh, canning is the classic solution. The companion article on square-foot gardening covers how to maximize yield from limited space — useful when you’re planning how many plants to run next season.
The takeaway
Tomatoes repay specificity. Match the variety to your space and goal — determinate for containers and canners, indeterminate for a long fresh-eating season. Start seeds 5–6 weeks before transplant, harden off carefully, bury the stem deep, install support at planting, water consistently at the roots, and keep the lower foliage off the ground. Diagnose problems early — blossom-end rot responds to steady moisture, early blight to pruning and air circulation, hornworm to hand-picking. And harvest before the fruit is fully colored; it will finish on your counter, and it will be better for not having cracked or rotted on the vine.
Get the fundamentals right in the first season and you’ll know exactly what to change in the second. That iteration — one bed, one season at a time — is how kitchen gardens actually improve.
Frequently asked questions
How long does it take to grow tomatoes from seed?
From seed to first ripe fruit typically takes 90–120 days, depending on variety. Seeds are started indoors 5–6 weeks before the last frost, giving you transplants 6–10 inches tall. From transplant to first harvest runs 55–90 days — early-season cultivars at the short end, large beefsteak types at the long end.
How often should I water tomato plants?
Aim for 1 to 1.5 inches of water per week, delivered consistently. Check the soil at 2 inches deep and water when it’s dry. Container tomatoes in summer heat may need watering daily or even twice daily. Inconsistent moisture — alternating dry and soaking — causes blossom-end rot and fruit cracking.
What is the difference between determinate and indeterminate tomatoes?
Determinate tomatoes stop growing at 24–30 inches and ripen most of their fruit in a concentrated 4–6 week window — best for canning, containers, and short seasons. Indeterminate tomatoes keep growing 3–5+ feet and produce fruit continuously until frost — best for fresh eating over a long season. Indeterminates require stronger support structures and benefit from sucker removal.
Why are my tomatoes getting black spots on the bottom?
That is blossom-end rot — a sunken, brownish-black spot on the fruit’s blossom end. It’s caused by calcium deficiency in the developing fruit, usually from inconsistent watering or excess nitrogen preventing calcium uptake. Mulch, consistent moisture, and adding gypsum to the planting hole at the start of the season are the practical fixes. Remove affected fruits so later fruit develops normally.
Can I grow tomatoes in pots?
Yes, with the right variety and pot size. Use a 14-inch diameter container minimum — 18–20 inches gives better yields. Choose compact determinate or container-bred varieties like Patio Princess, Bush Early Girl, or Tumbler. Use a well-draining potting mix and feed weekly with liquid fertilizer once the transplant has established, switching to a high-potassium formula when flowers appear.
References
- Growing tomatoes in home gardens — University of Minnesota Extension
- Growing Tomatoes in a Home Garden — University of Maryland Extension
- Tomato Diseases and Disorders in the Home Garden — Penn State Extension
- Tomatoes: From Seedlings to Fruit — Penn State Extension
- Container Grown Tomatoes — Penn State Extension
- How to Grow Tomatoes — University of Illinois Extension
- Managing Tomato Diseases, Disorders, and Pests — Iowa State University Extension