Key takeaways
- Select dormant scionwood 6-8 inches long from one-year-old growth with 3-4 buds.
- Match rootstock and scion diameters closely, ideally 1/4 to 1/2 inch for optimal cambium contact.
- Make two precise, clean cuts for the whip and the tongue on both scion and rootstock.
- Ensure maximum cambium layer alignment and contact for successful union formation.
- Secure the graft tightly with grafting tape and seal all exposed cuts with grafting wax.
- Monitor the graft for growth over 3-6 weeks, providing consistent moisture and protection from pests.
Quick answer: Whip-and-tongue grafting achieves high success rates for apples and pears by maximizing cambium contact through precise cuts and proper sealing. This technique is best performed in late winter or early spring on dormant scionwood and rootstock.
In the Pacific Northwest, home growers often find themselves with established apple trees they wish to diversify, or perhaps a beloved heirloom variety they want to propagate. Whip-and-tongue grafting offers a reliable method, and a careful grafter working with well-matched dormant wood can expect most unions to take [1]. This technique is particularly well-suited for apples and pears, allowing you to add new varieties to existing trees or start new ones on specific rootstocks tailored for your USDA zone.
For instance, a grower in USDA Zone 6 might graft a ‘Honeycrisp’ scion onto a dwarfing rootstock like ‘M.27’ to produce fruit in a small backyard orchard, accepting that a tree that dwarf needs a permanent stake and will not tolerate weed competition or a dry summer. This guide will walk you through the whip-and-tongue grafting process step by step, from selecting your materials to securing the graft and ensuring its long-term success. Grafting is typically performed in late winter or early spring, often between February and April, when both scion and rootstock are dormant [4].
Understanding whip-and-tongue grafting for fruit trees
Whip-and-tongue grafting is a fundamental technique for propagating apples and pears, known for creating a strong, durable graft union [1]. This method is especially effective because it maximizes the contact between the cambium layers of the scion (the desired variety) and the rootstock (the root system), which is critical for successful healing and growth. When done correctly, success rates can range from 80% to 95% in ideal conditions, making it a preferred choice for many orchardists in regions like the Mid-Atlantic, where varied climates demand robust unions.
why choose this method?
The primary advantage of the whip-and-tongue method lies in its mechanical strength and the large surface area of cambial contact, which is significantly greater than simple whip grafts. This increased contact area promotes faster healing and a more secure union, reducing the chance of breakage from wind or other stresses later on. For example, a well-executed whip-and-tongue graft on a 3/8-inch diameter rootstock can withstand considerable stress within a few months. It’s particularly useful for grafting dormant scionwood onto dormant rootstock, typically in late winter or early spring before bud break to ensure the best chance of survival for new trees in USDA zones 4 through 8.
- Provides a strong, interlocking graft union.
- Maximizes cambium contact for high success rates.
- Ideal for dormant scionwood and rootstock.
- Suitable for apples and pears in various US climates.
- Can be used on rootstock diameters from 1/4 inch to 1/2 inch.
Gathering your tools and materials
Before you begin, assembling the right tools and materials matters for a successful grafting operation. A sharp grafting knife is paramount; a dull blade crushes plant tissue instead of slicing it, and crushed tissue does not callus cleanly [1]. You’ll also need a sharpening stone to maintain a razor edge throughout the process. For securing the graft, specialized grafting tape or rubber bands are essential, providing firm pressure without girdling the union as it grows. Grafting wax or tree wound sealant will protect the exposed cuts from desiccation and pathogens; an unsealed union is the commonest reason a well-cut graft still dries out and fails.
selecting scionwood and rootstock
The scionwood should be dormant, healthy, one-year-old growth from the desired apple or pear variety, ideally collected in late winter. Look for wood that is 6-8 inches long with 3-4 healthy buds, and a diameter between 1/4 and 1/2 inch, matching the rootstock as closely as possible. Store scionwood in a cool, moist environment, such as a refrigerator at 35-40°F, wrapped in damp newspaper or sawdust and sealed in a plastic bag, for up to 2-3 months. Keep it well away from apples, pears and other ripening fruit in the same fridge: the ethylene they give off kills the buds, with no outward sign until the graft fails to push in spring. The rootstock should also be dormant and of a similar diameter to the scion. Common apple rootstocks include ‘MM.111’, which gives a large semi-vigorous tree rather than a true standard, and ‘M.27’, which gives a very dwarf tree. M.27 has a shallow, brittle root system and needs a permanent stake or trellis for the life of the tree, not just while it establishes. Check each rootstock's stated cold hardiness against your own zone rather than assuming the Malling series covers zones 3 through 9 — the dwarfing stocks in particular are not reliably hardy at the cold end of that range. Selecting a rootstock adapted to your local soil and climate, perhaps a cold-hardy variety for USDA Zones 4-6, is vital for the long-term health of your new tree.
- Sharp grafting knife and sharpening stone.
- Dormant scionwood, 6-8 inches long, 1/4-1/2 inch diameter.
- Dormant rootstock, matching scion diameter.
- Grafting tape or rubber bands.
- Grafting wax or tree wound sealant.
Making the whip and tongue cuts
The precision of your cuts is the most critical factor in whip-and-tongue grafting, directly impacting the success rate. Aim for clean, flat surfaces that maximize cambium contact between the scion and rootstock. Begin by making a long, sloping cut (the ‘whip’) on both the rootstock and the base of the scion. This cut should be approximately 1 to 1.5 inches long, roughly three to four times the diameter of the wood, so a 1/4-inch scion takes a cut near 1 inch and a 1/2-inch scion a cut near 1.5 inches. Make this cut in a single, smooth motion to avoid jagged edges that hinder healing.
creating the interlocking tongue
After making the whip cut, create the ‘tongue.’ This is a secondary cut made into the face of the whip cut, starting about one-third of the way down from the tip and extending inward, parallel to the main cut. The tongue should be about 1/2 to 3/4 inch long. This interlocking tongue provides mechanical stability and further increases the surface area where the cambium layers can meet and fuse [1]. Repeat this process precisely on both the rootstock and the scion. The goal is for the two pieces to fit together snugly, like puzzle pieces, with minimal gaps. In regions like the Central Valley of California, where rapid growth is common, a tight fit ensures quick callus formation. Always cut away from your body to prevent injury, and consider using a grafting guard for safety.
- Make a 1 to 1.5-inch long whip cut on both scion and rootstock.
- Ensure the whip cut is smooth and flat, without steps or ridges.
- Create a 1/2 to 3/4-inch long tongue cut into the face of the whip.
- The tongue should be parallel to the main cut, starting one-third down from the tip.
- Practice these cuts on scrap wood until you achieve consistent precision.
Joining and securing the graft
Once you have made precise whip and tongue cuts on both the scion and rootstock, the next critical step is to join them carefully. Align the two pieces so that their cambium layers — the thin, green layer just beneath the bark — are in direct contact. This is paramount for the graft to heal and grow, as the cambium is where new growth cells are produced [1]. If the diameters of the scion and rootstock are not perfectly matched, align the cambium on at least one side. A successful union depends on this cellular connection, which can lead to over 85% success if done correctly. Do not force the pieces together, as this can damage the delicate cambium.
wrapping and sealing the union
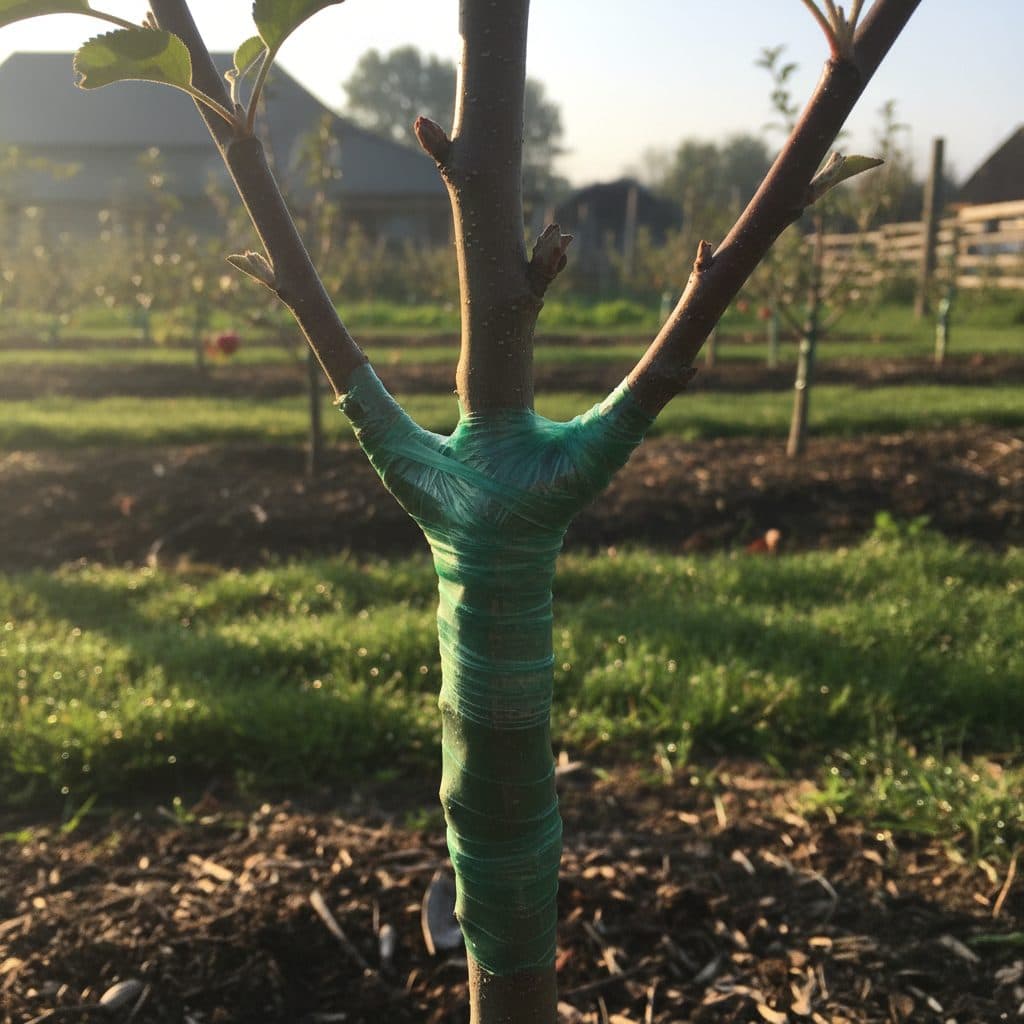
After joining the scion and rootstock, firmly secure the union with grafting tape or rubber bands. Wrap the tape tightly, starting from below the union and working your way up, overlapping each turn by about 50%. The tension should be sufficient to hold the pieces firmly together, preventing any movement that could interrupt the healing process. Wrap only the union itself. Seal the cut tip of the scion and any other exposed cut surface with grafting wax or a thin film of parafilm, rather than carrying tight tape or rubber bands up over the buds, which then cannot push through. This prevents moisture loss — or desiccation — and protects against disease entry [1]. In arid regions like Arizona, sealing is even more critical. Many grafting tapes are self-adhesive and biodegradable, but if using non-biodegradable tape, remember to remove it after 2-3 months to prevent girdling. Consider using a Garden PE Irrigation Hose nearby for consistent watering.
- Align scion and rootstock to ensure maximum cambium contact on at least one side.
- Wrap the graft union tightly with grafting tape, overlapping by 50%.
- Cover all exposed cut surfaces, including the scion tip, to prevent desiccation.
- Ensure firm pressure to hold the pieces securely without crushing them.
- Remove non-biodegradable tape after 2-3 months to prevent girdling.
Post-grafting care and monitoring
After successfully joining and securing your whip-and-tongue graft, proper aftercare is essential for the long-term survival and growth of your new fruit tree. During the first 2-3 weeks, the graft union is most vulnerable as the callus tissue begins to form. Maintain consistent moisture in the rootstock’s soil, but avoid overwatering, which can lead to root rot. For trees in containers, a soil moisture meter can help you judge watering, though the reading is a rough guide rather than a calibrated figure — the aim is soil that stays evenly damp and never waterlogged. Protecting the graft from strong winds and direct, intense sunlight can also prevent stress, especially in regions like the high plains of Colorado where conditions can be harsh.
monitoring growth and removing tape
Over the next few weeks, observe the scion for signs of life. Swelling buds and the emergence of small leaves indicate a successful graft. This new growth typically appears within 3-6 weeks, depending on the species and ambient temperatures, such as the 60-75°F range ideal for callus formation. If you used non-biodegradable grafting tape, remove it after 2-3 months to prevent girdling, which can constrict growth and kill the scion. Carefully cut the tape without damaging the newly formed union. Continue to monitor for any suckers emerging from the rootstock below the graft union; these should be removed promptly, as they compete for nutrients and, left alone, can overtake the scion entirely. Regular pruning of these suckers is vital for the scion’s development.
- Maintain consistent soil moisture around the rootstock.
- Protect the graft from strong winds and excessive sunlight.
- Monitor for bud swell and leaf emergence, typically within 3-6 weeks.
- Remove non-biodegradable grafting tape after 2-3 months.
- Promptly remove any suckers growing from the rootstock below the graft.
Whip-and-Tongue Grafting vs. Other Common Grafting Methods
Method | Key Advantages | Typical Success Rate |
|---|---|---|
Whip-and-Tongue | High mechanical strength, excellent cambium contact, good for small diameters. | 80-95% |
Cleft Graft | Good for grafting small scions onto larger rootstocks (1-2 inches diameter). | 60-80% |
Bark Graft | Used for grafting onto very large rootstocks (2+ inches diameter), multiple scions possible. | 50-70% |
Budding (T-budding) | Uses a single bud, efficient use of scionwood, good for summer grafting. | 70-90% |
Optimal Scion Size: Scionwood should be 6-8 inches long with 3-4 buds, and 1/4 to 1/2 inch in diameter, ideally matching the rootstock.
Cambium Contact: Getting the cambium layers of scion and rootstock to meet, on at least one side, is the single factor that decides whether a graft takes.
Timing is Key: Grafting is most successful in late winter or early spring, typically between February and April, before bud break, when temperatures are consistently above 40°F.
Frequently asked questions
When is the best time to perform whip-and-tongue grafting for apples and pears?
The ideal time for whip-and-tongue grafting is in late winter or early spring, typically from February to April in many US regions, when both the scion and rootstock are dormant. This timing allows the graft to heal before the active growing season begins, leading to success rates often above 80%.
How do I ensure maximum cambium contact for my graft?
To ensure maximum cambium contact, make precise, clean cuts that are 1 to 1.5 inches long on both the scion and rootstock. Align the two pieces carefully so that the green cambium layers, just under the bark, meet perfectly on at least one side. Without that alignment the two pieces cannot form a vascular connection, and the graft will fail no matter how well it was wrapped.
What should I do if the scion and rootstock diameters don’t match perfectly?
If the diameters don’t match perfectly, align the cambium layers on one side of the graft. It’s more important to have perfect alignment on one side than to have imperfect alignment all around. This strategy still allows for successful callus formation, and a single well-aligned side is enough for the union to knit.
How long does it take for a whip-and-tongue graft to show signs of growth?
Signs of growth, such as swelling buds and emerging leaves, typically appear within 3-6 weeks after grafting, depending on the species and ambient temperatures. Consistent temperatures between 60-75°F are optimal for callus development, leading to visible growth within this period.
When should I remove the grafting tape from the union?
If you used non-biodegradable grafting tape, it should be carefully removed after 2-3 months. This prevents the tape from girdling the growing union, which would otherwise strangle the flow of water and sugars and kill the scion.
Can I graft different types of fruit trees together, like an apple onto a pear?
Apples and pears are different genera and are not compatible for grafting onto each other — treat it as something that does not work, rather than something with long odds. Grafting is most successful between closely related species, such as different apple varieties onto apple rootstock, or pear varieties onto pear rootstock [2].
References
- The graft union, grafting and budding (2003). The graft union, grafting and budding.
- Apples and pears and their relatives (2003). Apples and pears and their relatives.
- Biotechnology of apples and pears (2003). Biotechnology of apples and pears.
- The growing of apples and pears (2003). The growing of apples and pears.
- Apples & pears (1911). Apples & pears.