Key takeaways
- A 275-gallon rain barrel can provide sufficient water pressure for a small to medium garden, typically 0.43 PSI per foot of elevation.
- Elevating your rain barrel by 3 to 5 feet can generate enough pressure (1.3 to 2.1 PSI) for most drip emitters to function effectively.
- Gravity drip systems can reduce water consumption by 30% to 70% compared to traditional watering methods, especially for crops like hot peppers [2].
- Proper filtration prevents clogging in drip emitters, which often have openings as small as 0.02 inches.
- Combining gravity drip with passive irrigation methods like ollas or wicking beds can improve water efficiency in arid regions.
- Regular maintenance, including flushing lines and cleaning filters, extends the lifespan of a gravity drip system beyond 5 years.
Quick answer: A gravity-fed drip irrigation system, using an elevated 275-gallon rain barrel, can efficiently water a 750-square-foot garden by leveraging natural pressure to deliver water directly to plant roots, minimizing waste.
In many parts of the United States, from the arid Southwest to the humid Southeast, water conservation is a critical concern for growers. For instance, in California’s Central Valley, where agriculture accounts for about 80% of human water use, finding efficient irrigation methods is essential. Gravity-fed drip irrigation, especially when paired with rainwater harvesting, offers a practical solution for home gardeners and small farms looking to reduce their water footprint and grow resilient crops.
This method leverages simple physics to deliver water directly to plant roots, minimizing evaporation and runoff. By collecting rainwater in a barrel and using elevation to create pressure, you can establish an effective irrigation system without relying on pumps or electricity. This approach is particularly useful for gardens up to 750 square feet, providing a steady, controlled water supply that can significantly improve plant health and yield, as demonstrated in studies on hot pepper production using rooftop rainwater [2].
The physics of pressure: elevation and gravity
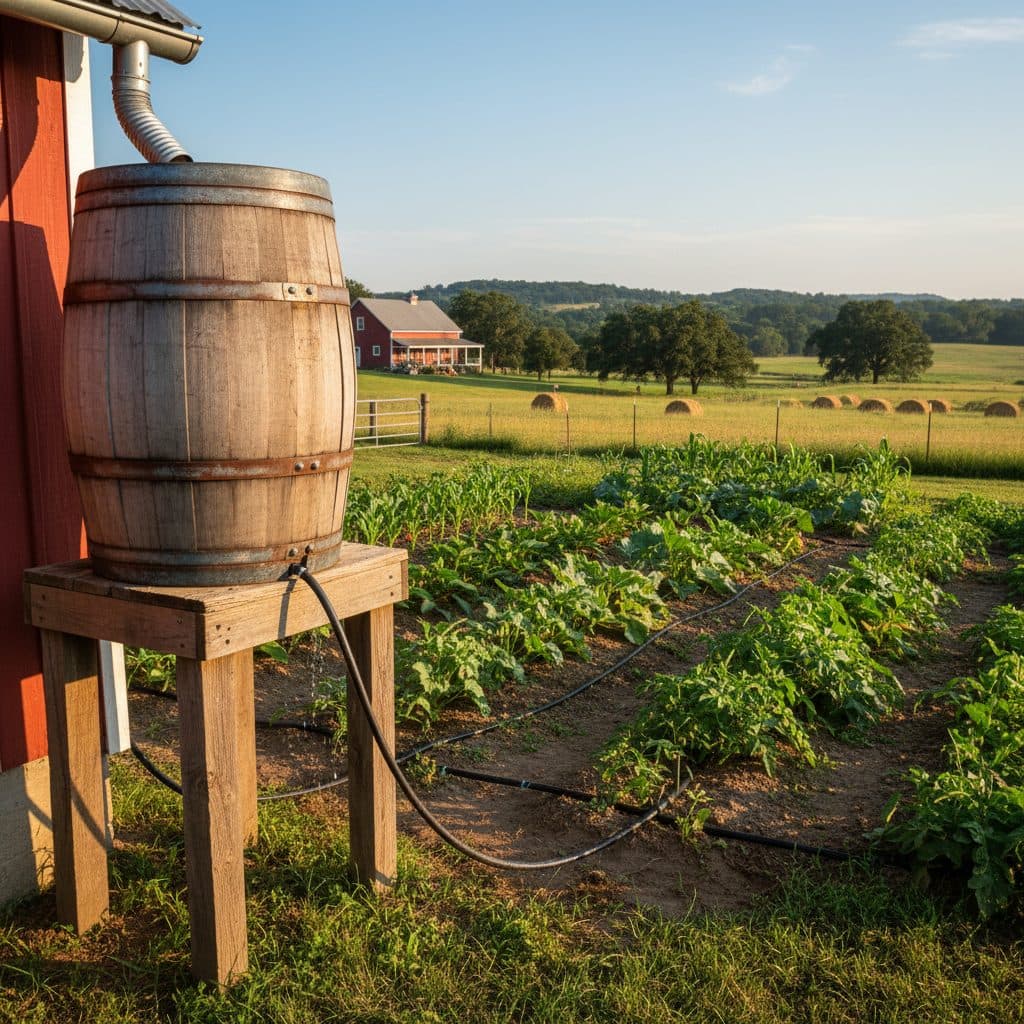
Understanding how gravity creates pressure is fundamental to designing an effective gravity-fed drip system. For every foot of elevation difference between the water level in your rain barrel and the drip emitters, you gain approximately 0.43 pounds per square inch (PSI) of pressure. This means a rain barrel elevated 4 feet above your garden bed will generate about 1.72 PSI, which is often enough to operate many types of drip emitters and tubing, especially those designed for low-pressure applications. Studies in mountainous regions have shown the viability of using elevation for drip irrigation with snow and rainwater for crops like grapes [4].
Calculating required elevation for drip emitters
Most drip emitters require a minimum operating pressure, typically ranging from 0.5 PSI to 5 PSI, though some pressure-compensating emitters need more. For example, a common 0.5-gallon-per-hour (GPH) emitter might function adequately at 1 PSI, requiring your barrel to be elevated at least 2.3 feet. To achieve 2 PSI for a larger system or longer runs, you would need an elevation of roughly 4.6 feet. The volume of your rain barrel also plays a role; a 275-gallon IBC tote, for instance, provides a substantial reservoir, ensuring consistent pressure over time as water levels drop, though the pressure will decrease slightly with the water level.
- Static pressure: Measured when water is not flowing, based solely on elevation.
- Dynamic pressure: Actual pressure when water is flowing through the system, always lower than static pressure due to friction.
- Friction loss: Occurs in pipes, fittings, and emitters, reducing available pressure, especially in longer runs or smaller diameter tubing (e.g., 1/4 in).
- Head pressure: Another term for the pressure created by the height of a column of water.
- PSI conversion: One foot of water column equals 0.433 PSI.
Setting up your rain barrel and filtration
The rain barrel is the heart of your gravity-fed system. A common choice is a 55-gallon food-grade barrel or a larger 275-gallon IBC tote, which provides significantly more storage capacity and a more stable base. For optimal pressure, the barrel should be placed on a sturdy, elevated platform: a concrete block foundation or a wooden stand built from 4×4 lumber can raise a 55-gallon barrel 3 to 5 feet off the ground, yielding 1.3 to 2.1 PSI. In areas like the Pacific Northwest, where annual rainfall can exceed 40 inches, a single large barrel can collect thousands of gallons per season from a typical 1,000-square-foot roof.
Essential filtration for drip systems
Rainwater, while free, often contains debris like leaves, pollen, and roof grit, which can quickly clog drip emitters with tiny orifices, sometimes as small as 0.02 inches. A multi-stage filtration system prevents blockages. Start with a coarse screen at the downspout to prevent larger debris from entering the barrel. Inside the barrel, a floating intake filter can draw cleaner water from just below the surface. Finally, install a fine mesh filter (100 to 200 mesh) after the barrel’s spigot and before the main drip line. This setup keeps lines clear and extends system life [3].
- Downspout filter: Prevents large debris (leaves, twigs) from entering the barrel.
- Barrel screen: A fine mesh over the barrel opening to keep out insects and smaller particles.
- Floating intake: Draws water from the cleanest part of the barrel, just below the surface.
- Y-filter: A common inline filter with a removable screen (100-200 mesh) for final particulate removal.
- Backflush valve: Allows for easy cleaning of the Y-filter without disassembling the system.
Designing and installing your drip system
Once your rain barrel is set up, the next step is designing the drip system layout. For a typical 500-square-foot vegetable garden in USDA zone 6, a main supply line of 1/2-inch or 3/4-inch polyethylene tubing is usually sufficient to carry water from the barrel. This larger diameter tubing minimizes friction loss, allowing for longer runs (up to 100 feet for a 1/2-inch line at 2 PSI). From the main line, smaller 1/4-inch feeder lines or individual emitters are run to each plant. You can find various sizes of tubing and fittings, such as this Garden PE Irrigation Hose, to suit your specific garden needs.
Emitter selection and spacing
Emitter choice depends on your plants’ water requirements and soil type. For sandy soils, which drain quickly, higher flow emitters (e.g., 1 GPH) or closer spacing (6 to 12 inches) might be needed. For clay soils, which absorb water slowly, lower flow emitters (e.g., 0.5 GPH) spaced 12 to 18 inches apart are often better to prevent runoff. Pressure-compensating emitters can provide a uniform flow rate across varying terrain or longer runs, even with the modest pressure from a gravity system, ensuring consistent watering for all plants. Studies have shown drip irrigation can reduce water use by 30% to 70% compared to traditional methods [5].
- Mainline tubing: Typically 1/2 in or 3/4 in polyethylene for water distribution.
- Lateral lines: Smaller 1/4 in tubing or integrated drip tape for direct plant watering.
- Emitters: Deliver water at a specific rate (e.g., 0.5 GPH, 1 GPH) directly to the root zone.
- Fittings: Connectors, tees, elbows, and end caps to build the system.
- Punch tool: Used to create holes in the mainline for inserting 1/4 in fittings or emitters.
Integrating with passive irrigation and earthworks
While gravity-fed drip irrigation is highly efficient, combining it with other passive irrigation techniques can further improve water conservation and soil health, especially in dry climates like those found in Arizona or parts of Texas. Ollas, for instance, are unglazed clay pots buried in the soil that slowly release water through their porous walls directly to plant roots. A single olla, holding 1 to 3 gallons, can effectively water a 2-foot diameter area for several days, reducing surface evaporation by up to 50% compared to surface drip [6]. This ancient method complements drip by providing a consistent, deep water source that encourages strong root development.
Wicking beds and passive earthworks
Wicking beds are self-watering garden beds that have a water reservoir at the bottom, from which water is drawn upwards into the soil by capillary action. These systems can drastically reduce watering frequency (sometimes requiring refills only every 1 to 3 weeks) and are particularly effective for thirsty crops in raised beds. Earthworks, such as swales and berms, are designed to slow, spread, and sink rainwater into the landscape. A well-designed swale, 18 inches deep and 3 feet wide, can capture hundreds of gallons of runoff from a heavy rain event, allowing it to infiltrate the soil slowly and recharge groundwater, benefiting nearby plants and trees. These techniques, often used in conjunction with rainwater harvesting, create resilient landscapes that require less supplemental irrigation, even in challenging environments like the arid northwest Himalayas [1].
- Ollas: Unglazed clay pots buried to slowly release water directly to roots.
- Wicking beds: Self-watering raised beds with a bottom reservoir for capillary action.
- Swales: Ditches dug on contour to catch and infiltrate rainwater.
- Berms: Mounds of earth often paired with swales to direct water flow.
- Keyline design: A system of earthworks that optimizes water distribution across a landscape.
Comparison of Irrigation Methods for a 500 sq ft Garden
Method | Water Use Efficiency | Initial Cost | Maintenance |
|---|---|---|---|
Hose & Sprinkler | Low (30-50%) | $50 – $150 | Daily manual watering |
Gravity Drip (Rain Barrel) | High (70-90%) | $150 – $400 | Weekly checks, filter cleaning |
Pumped Drip (Grid Power) | Very High (85-95%) | $300 – $800 | Automated, pump maintenance |
Ollas (Supplemental) | Very High (90%+) | $10 – $30 per olla | Refill every few days/weeks |
Pressure Calculation: For every 1 foot of elevation, your gravity-fed system gains approximately 0.43 PSI of water pressure.
Water Savings: Drip irrigation can reduce water consumption by 30% to 70% compared to traditional watering methods [5].
Barrel Capacity: A 275-gallon rain barrel can store enough water to irrigate a 750-square-foot garden for several weeks without rain.
Frequently asked questions
How much elevation do I need for a gravity-fed drip system?
You typically need 2 to 5 feet of elevation for a gravity-fed drip system to provide sufficient pressure. Each foot of elevation adds about 0.43 PSI, so 5 feet of elevation will give you approximately 2.15 PSI, which is adequate for most low-pressure drip emitters to function effectively.
What size rain barrel is best for gravity drip irrigation?
For a small to medium garden (up to 750 square feet), a 55-gallon barrel can work, but a 275-gallon IBC tote is often preferred for its larger capacity and more consistent pressure. A larger barrel means less frequent refilling and a more stable water supply for your plants, especially during dry spells.
How do I prevent clogging in a gravity drip system?
Preventing clogging requires a multi-stage filtration system. Start with a coarse screen at the downspout, use a fine mesh screen over the barrel opening, and install a 100 to 200 mesh Y-filter after the barrel’s spigot. Regular flushing of the drip lines also helps remove sediment and ensures consistent water flow to all emitters.
Can gravity drip irrigation work for all plant types?
Gravity drip irrigation is highly effective for many plant types, especially vegetables, berries, and small trees. It delivers water directly to the root zone, reducing fungal diseases and water waste. However, plants that prefer overhead watering or have very dense root systems might require adjustments to emitter spacing or flow rates to ensure adequate coverage.
What are the benefits of combining gravity drip with ollas?
Combining gravity drip with ollas provides a dual irrigation strategy. The drip system offers consistent surface watering, while ollas provide deep, slow-release irrigation directly to the root zone, reducing surface evaporation by up to 50% [6]. This combination is particularly beneficial in hot, arid climates for crops like tomatoes or squash, promoting deeper root growth and increased water efficiency.
How often should I clean my gravity drip system?
Regular maintenance keeps the system working properly over time. The main filter should be checked and cleaned weekly during peak irrigation season, or more often if your rainwater is particularly dirty. Drip lines should be flushed annually by removing end caps and allowing water to run through, clearing any accumulated sediment to maintain optimal flow rates.
References
- Gravity-fed drip irrigation system for hilly terraces of the northwest Himalayas (2003). Gravity-fed drip irrigation system for hilly terraces of the northwest Himalayas.
- Evaluation Drip Irrigation Method for Hot Peppers Production Using Roof-top Rain Water in Home Garden Irrigation at Water Scarce Area of Fadis, Estern Oromia Re (2019). Evaluation Drip Irrigation Method for Hot Peppers Production Using Roof-top Rain Water in Home Garden Irrigation at Water Scarce Area of Fadis, Estern Oromia Re.
- EVALUATION OF GRAVITY DRIP IRRIGATION KIT IN A GREENHOUSE (2023). EVALUATION OF GRAVITY DRIP IRRIGATION KIT IN A GREENHOUSE.
- DRIP IRRIGATION FOR GRAPE VARIETIES WITH SNOW AND RAIN WATER IN THE CONDITIONS OF MOUNTAINOUS REGIONS (2020). DRIP IRRIGATION FOR GRAPE VARIETIES WITH SNOW AND RAIN WATER IN THE CONDITIONS OF MOUNTAINOUS REGIONS.
- Farmers’ Approaches to Drip Irrigation Applications and the Factors Affecting the Utilization from Drip Irrigation Subsidies: Case of Adana and Niğde Provinces (2022). Farmers’ Approaches to Drip Irrigation Applications and the Factors Affecting the Utilization from Drip Irrigation Subsidies: Case of Adana and Niğde Provinces.
- USDA Natural Resources Conservation Service (2024). USDA Natural Resources Conservation Service.