Key takeaways
- Bare-root trees are best planted in late winter or early spring, typically 6-8 weeks before the last frost.
- Proper hole size is crucial: 2-3 times wider than the root spread, and only deep enough for the root collar to be at soil grade.
- Ensure the graft union is positioned 2-4 inches above the final soil line to maintain rootstock benefits.
- Backfill the hole with native soil, avoiding heavy amendments, and water deeply immediately after planting (1-2 gallons).
- Prune 30-50% of the top growth at planting to balance the root-to-shoot ratio and encourage strong structural development.
Quick answer: Plant bare-root fruit trees in late winter or early spring, 6-8 weeks before the last frost. Dig a hole 2-3 times wider than the root spread, ensuring the graft union is 2-4 inches above the soil line, then prune 30-50% of top growth.
In the fertile valleys of Washington State or the rolling hills of Pennsylvania, planting a bare-root fruit tree can be one of the most rewarding steps in establishing a home orchard. Bare-root trees, typically dormant saplings dug from nursery fields, offer significant advantages, often costing 30-50% less than their containerized counterparts and allowing for a thorough inspection of the root system before planting. This method, practiced by growers for centuries, provides a robust start for apples, peaches, and cherries across USDA zones 4-9.
This guide covers planting bare-root fruit trees step by step, from site selection and digging a hole of the right dimensions to pre-planting preparation, planting depth, and first-year aftercare to establish the tree.
Preparing for bare-root success
Choosing bare-root fruit trees offers several benefits for the home grower. They are often 30-50% less expensive than containerized trees, allowing you to establish a larger orchard budget. For example, a 3-foot bare-root apple sapling might cost $20-30, whereas a similar potted tree could be $40-60. Additionally, bare-root trees allow for a thorough inspection of the root system, enabling you to prune any damaged or circling roots before planting, which is difficult with potted specimens. The ideal time for planting bare-root trees is late winter to early spring, generally 6-8 weeks before the last expected frost in your USDA zone. In the Mid-Atlantic, this typically means March or April for growers in USDA zone 6, ensuring the tree is dormant but the soil is workable.
Upon arrival, your bare-root trees should be planted as soon as possible. If immediate planting is not possible, store the trees carefully. Keep the roots moist and cool, ideally at 35-40°F, which can extend viability for up to 2-3 weeks. Wrap the roots in damp burlap, sphagnum moss, or sawdust, and store the tree in a cool, dark location like a root cellar or unheated garage. Bare-root trees often establish faster than container-grown trees, with studies showing quicker root growth into native soil within the first 12 months because roots grow directly into surrounding earth without bound potting mix [5].
Benefits of bare-root trees
- Cost savings, often 30-50% compared to containerized trees.
- Opportunity to inspect and prune roots for optimal growth.
- Faster establishment in the landscape, as roots immediately interact with native soil.
- Wider variety of species and cultivars available from nurseries.
- Reduced transplant shock compared to trees grown in pots.
Choosing the right spot and preparing your soil
Site selection directly affects fruit tree health, requiring adequate sunlight, drainage, and wind protection. Most fruit trees, from apples in Michigan to peaches in Georgia, need at least 6-8 hours of direct sunlight daily. Good drainage is necessary; standing water for even 24-48 hours can suffocate roots. In regions like the Pacific Northwest, where rainfall can exceed 40 inches annually, well-draining soil prevents root rot in the first 1-2 years. Avoid low-lying frost pockets where cold air settles and damages early blossoms.
Before digging, perform a soil test through your local extension office for around $15-30. This provides data on pH and nutrient levels to confirm soil matches the needs of your fruit tree, such as apples preferring a pH of 6.0-7.0. In heavy clay soil, amend the entire planting bed rather than the single hole, or choose rootstocks adapted to clay. Avoid amending only the planting hole, which creates a basin effect where roots hesitate to grow into native soil and circle within the first 6-12 months.
Site considerations
- Minimum 6-8 hours of direct sunlight daily.
- Well-drained soil to prevent root rot.
- Protection from strong winds, especially in open areas.
- Access to a water source for regular irrigation during the first year.
- Avoid frost pockets, which are low-lying areas where cold air settles.
Digging the planting hole
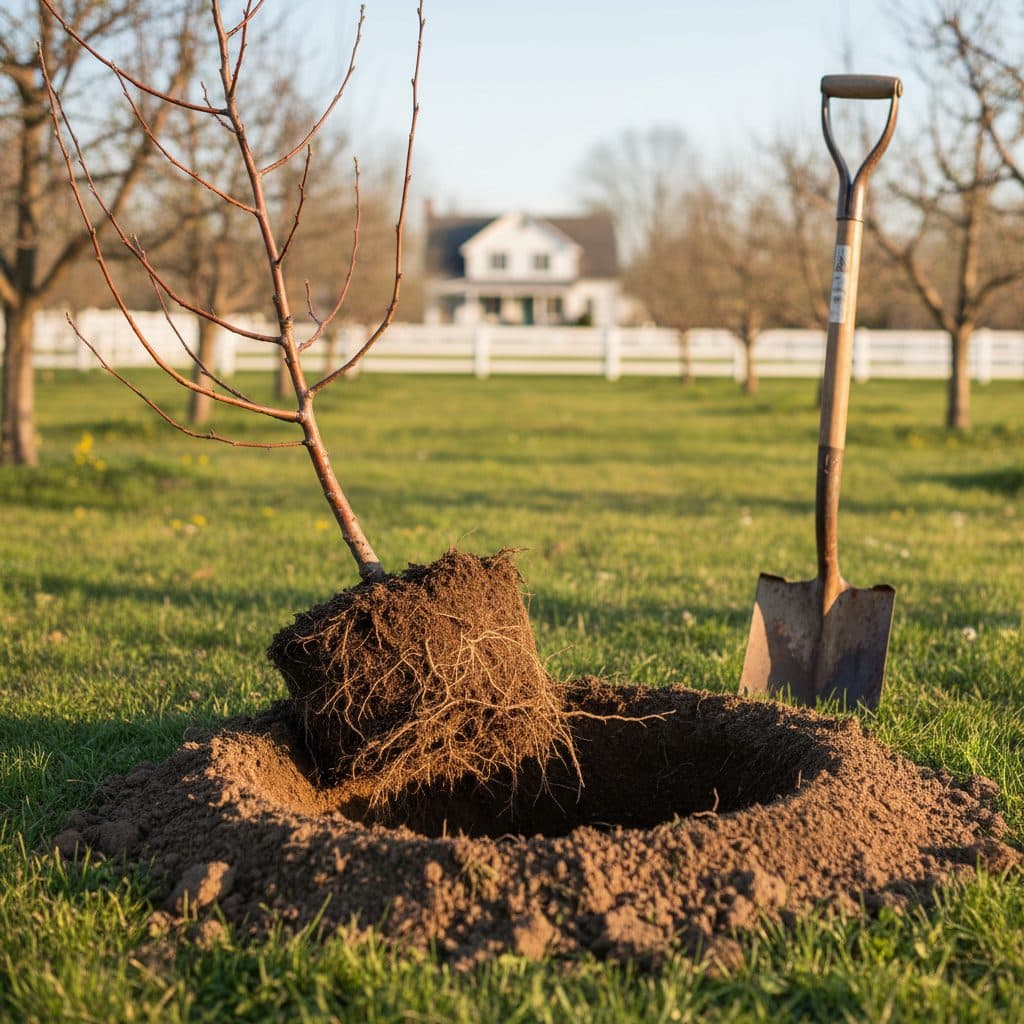
The size of your planting hole determines long-term root spread. It needs to be wide, but not excessively deep. Dig the hole 2-3 times wider than the spread of the tree’s root system when it’s laid out. For a typical 4-foot tall bare-root sapling, the root spread might be 18-24 inches, meaning your hole should be 3-4 feet wide. This width allows the roots to spread naturally and grow into the surrounding native soil without encountering compacted sides. However, the depth is more precise: dig only deep enough so that the root collar (the point where the roots meet the trunk) will be at or slightly above the final soil grade. [3]
The graft union, often identifiable as a slight bulge on the trunk where the scion (fruiting variety) joins the rootstock, should sit 2-4 inches above the soil line after planting to prevent the scion from rooting. If the scion roots, it can negate the benefits of the rootstock, such as dwarfing or disease resistance. In areas with heavy, compacted clay soils, such as those found in much of the Midwest, digging a hole slightly shallower and planting on a 2-4 inch high mound can significantly improve drainage and oxygen availability to the roots, which are most active in the top 12-18 inches of soil. [4] Ensure the sides of the hole are not glazed or compacted, especially in clay, which can impede root penetration; roughen them with a shovel if necessary.
Key hole dimensions
- Hole width: 2-3 times wider than the root spread.
- Hole depth: Only as deep as the root system, ensuring the root collar is at soil grade.
- Graft union placement: 2-4 inches above the final soil line.
- Sides of the hole: Roughen smooth sides in clay soil to encourage root penetration.
- Central mound: A small, firm mound of soil in the center helps spread roots.
Placing and securing your bare-root tree
Before placing the tree, gently untangle and spread out the roots over the small mound of soil at the bottom of the hole. This encourages outward root growth instead of circling. Hold the tree centered at the correct depth so the graft union sits 2-4 inches above the surrounding soil grade. Begin backfilling with native soil, breaking up large clumps. Gently tamp the soil around the roots to remove air pockets without over-compacting, keeping the top 12-18 inches porous so roots receive oxygen [4].
Once the hole is about two-thirds full, give the tree its first deep watering, applying 1-2 gallons of water directly into the hole. This settles the soil around the roots and eliminates smaller air pockets, ensuring good root-to-soil contact. [1] After the water drains, finish filling the hole with soil, creating a slight basin around the tree to help collect future rainfall. This basin, approximately 18-24 inches in diameter, will help direct future irrigation or rainfall directly to the root zone, reducing water runoff by up to 20%. Consider using a soil moisture meter to monitor hydration, especially during the first 12 weeks, ensuring the top 6-12 inches of soil remain consistently moist but not waterlogged. If your tree is exposed to strong winds, a single stake placed 12-18 inches from the trunk for the first 6-12 months can provide necessary support.
Planting sequence
- Spread roots evenly over a central soil mound.
- Verify graft union height (2-4 inches above soil).
- Backfill with native soil, avoiding amendments in the hole.
- Gently tamp soil to remove large air pockets.
- Water thoroughly (1-2 gallons) mid-way through backfilling.
Post-planting care and initial pruning
After planting, initial pruning balances the root-to-shoot ratio and helps establish scaffold structure. Since some roots are inevitably lost during transplanting, reducing the top growth by 30-50% helps the compromised root system support the remaining branches. For a whip (an unbranched sapling), cut the top at 30-36 inches from the ground to encourage branching and the development of strong scaffold branches within the first growing season. [1] For branched trees, select 3-5 well-spaced scaffold branches, removing others, and cut back the selected branches by about one-third. Consult our detailed guide on how to prune fruit trees for species-specific advice and techniques.
Watering is arguably the most important aftercare step for the first year. Provide 1-2 gallons of water per week in the absence of significant rainfall, especially during dry periods in regions like California’s Central Valley. In arid regions like Arizona, new trees may require 3-5 gallons of water per week during peak summer heat, while in more humid climates like Florida, 1-2 gallons might suffice. Apply a 2-4 inch layer of organic mulch, such as wood chips or straw, around the base of the tree, keeping it 6-12 inches away from the trunk to prevent rodent damage and moisture buildup. This 2-4 inch layer of organic material can reduce soil temperature fluctuations by up to 10°F and conserve soil moisture by 20-30%, significantly benefiting root establishment during the first 12 months. Protect the trunk from sunscald and pests with a tree guard for the first 2-3 years.
Aftercare priorities
- Prune 30-50% of top growth to balance root-to-shoot ratio.
- Water consistently, 1-2 gallons per week, for the first growing season.
- Apply 2-4 inches of organic mulch, 6-12 inches from the trunk.
- Protect the trunk from sunscald and pests with tree guards.
- Monitor for pests and diseases, addressing issues promptly.
Graft union height: Ensure the graft union sits 2-4 inches above the final soil line to prevent scion rooting and maintain rootstock benefits.
Watering frequency: A newly planted bare-root tree needs 1-2 gallons of water per week for its first growing season in most US climates, especially in dry periods.
Frequently asked questions
Can I plant bare-root trees in the fall?
While spring is generally preferred, bare-root trees can be planted in the fall in USDA zones 7-9 where winters are mild. Planting should occur at least 6-8 weeks before the ground freezes solid to allow for some root establishment before dormancy, typically by late October in Zone 7.
How do I store bare-root trees if I can’t plant them immediately?
If you can’t plant within 1-2 days, ‘heel in’ your trees by temporarily burying their roots in a trench of moist soil or sand. Alternatively, store them in a cool (35-40°F), dark place with roots wrapped in damp burlap or sawdust for up to 2-3 weeks, ensuring they remain dormant.
What if my soil is heavy clay?
For heavy clay soils, like those found in parts of the Midwest, consider planting on a slight mound (6-12 inches high) to improve drainage. You can also amend the entire planting area with organic matter, but avoid amending just the planting hole, which can create drainage issues within 6-12 months.
How much should I prune a bare-root tree at planting?
Prune 30-50% of top growth at planting to compensate for root loss during digging. For a whip, cut the top at 30-36 inches. For branched trees, select 3-5 scaffold branches and reduce their length by one-third to encourage strong structural development.
When will my bare-root tree produce fruit?
The time to first fruit varies by species and rootstock, but many bare-root fruit trees, like apples on semi-dwarfing rootstock, can begin producing a small crop within 2-4 years after planting. Full production typically starts around 5-7 years, depending on care and climate.
References
- Tree Planting Procedure for Small, Bare-root Seedlings (2009). Tree Planting Procedure for Small, Bare-root Seedlings.
- The growth, activity and distribution of the fruit tree root system (1983). The growth, activity and distribution of the fruit tree root system.
- Planting Procedures for Bare-root Tree Seedlings in Landscape Settings (2024). Planting Procedures for Bare-root Tree Seedlings in Landscape Settings.
- The growth, activity and distribution of the fruit tree root system (1983). The growth, activity and distribution of the fruit tree root system.
- Bare Root Liner Production Can Alter Tree Root Architecture (2009). Bare Root Liner Production Can Alter Tree Root Architecture.
- USDA Natural Resources Conservation Service (2024). USDA Natural Resources Conservation Service.