Key takeaways
- Layered vertical planting allows you to grow high yields of fruit, berries, and herbs on small residential lots.
- Dwarf and semi-dwarf rootstocks keep canopy trees manageable without shading out adjacent understory crops.
- Sheet mulching eliminates existing turf grass while building deep organic topsoil without tilling.
- Companion planting guilds provide natural pest control, pollinator forage, and nutrient accumulation.
- Designing around existing solar patterns and water flows prevents overcrowding and drainage issues.
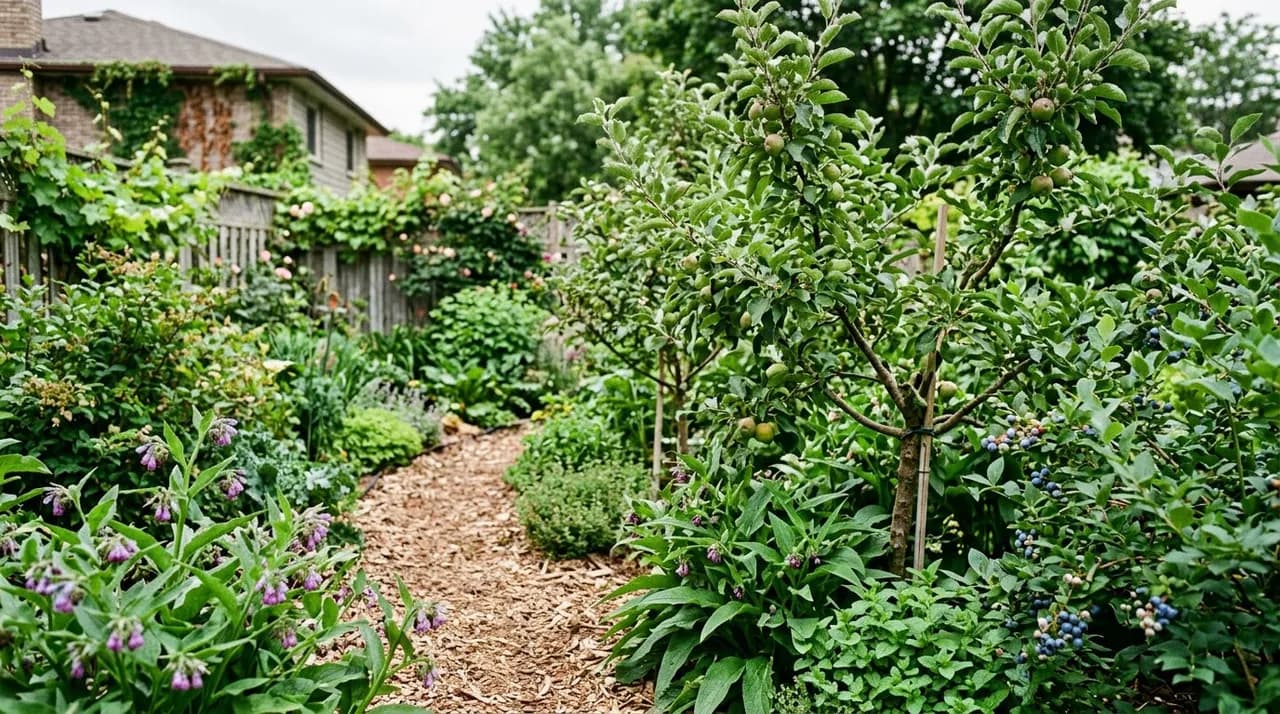
Quick answer: A backyard food forest is a multi-layered perennial gardening system designed to mimic the structure and resilience of a natural woodland edge on a residential scale. By stacking dwarf fruit trees, berry shrubs, perennial vegetables, root crops, ground covers, and climbing vines, you can produce diverse food harvests in a compact footprint with minimal ongoing inputs.
Traditional backyard gardens often rely on annual vegetables planted in straight rows, demanding annual tilling, frequent fertilizer applications, and heavy irrigation. A backyard food forest shifts the focus toward perennial agriculture, creating a self-sustaining ecosystem that builds soil fertility over time. Even on a modest urban parcel, integrating diverse plant layers maximizes sunlight capture and root zone utilization.
With careful spatial planning and rootstock selection, a food forest can fit on a quarter acre or along a city patio border, replacing unused lawn with productive edible plants.
What is a small food forest and how does it work?
A food forest mimics natural forest structure using distinct vertical layers. Instead of non-edible timber species, a residential forest garden selects fruit, nut, and berry cultivars matched to household food needs.
At the center of this design is vertical stacking. Sunlight filters through upper canopies to nourish lower shrubs and ground covers, while varied root depths extract water and minerals from different soil strata. Instead of fighting weeds, you occupy open niches with beneficial ground covers that protect the soil from erosion and moisture loss.
Over time, the planting develops biological self-regulation: fallen leaves and pruned cuttings provide mulch, while beneficial insects help suppress pest populations. For more background on these systems, see our guide on what is a food forest.
How do you plan a food forest on a quarter acre or small yard?
Planning a food forest on quarter acre lots or smaller spaces requires precise observation of your site's physical parameters before planting any trees. Begin by assessing sun exposure throughout the seasons. In the Northern Hemisphere, place your tallest canopy trees along the northern or northeastern boundaries so they do not cast heavy shade over smaller fruit bushes and vegetable beds.
Next, map your water drainage patterns. Notice where rainwater pools during heavy downpours and where the soil dries out quickly. Incorporating simple earthworks, such as shallow swales or organic mulch basins, captures runoff and routes it directly to deep tree roots.
In a small yard, keep access paths wide enough for a wheelbarrow, typically 3 feet (0.9 m). Divide the space into management zones: place frequently harvested herbs and salad greens near the back door, and keep larger, lower-maintenance nut and fruit trees along distant fence lines.
What are the layers in a mini food forest layout?
A full-scale agroforestry project may feature seven or more distinct layers, but a mini food forest layout typically consolidates these into five core tiers to prevent overcrowding in small yards:
- Small tree canopy (10 to 15 feet): Semi-dwarf or dwarf fruit trees such as apples, pears, plums, peaches, and figs.
- Shrub layer (3 to 8 feet): Berry bushes including blueberries, currants, gooseberries, elderberries, and hazelnut bushes.
- Herbaceous layer (1 to 3 feet): Deep-rooting accumulators and insectary plants like comfrey, yarrow, borage, and perennial echinacea.
- Ground cover layer (under 1 foot): Creeping plants such as alpine strawberries, creeping thyme, and clover that shade soil and retain moisture.
- Vine and vertical layer: Climbing edibles like hardy kiwi, passionfruit, and pole beans trained up trellises or sturdy tree trunks.
Selecting standard rootstock trees in a small backyard is a common mistake that leads to heavy shading and root competition. Dwarf rootstocks restrict mature height while allowing root systems to establish without damaging foundations or underground utility lines.
How do you prepare lawn and soil for planting?
Converting turf grass into planting beds is easily accomplished with sheet mulching, also known as lasagna gardening. Sheet mulching smothers grass in place and feeds earthworms without stripping topsoil or tilling buried weed seeds to the surface.
To implement this method:
- Mow the existing lawn down to ground level.
- Cover the ground with overlapping layers of thick, non-glossy cardboard or four to six layers of unprinted newsprint, wetting it thoroughly to eliminate gaps where grass could poke through.
- Spread 2 to 4 inches of compost or well-rotted manure directly over the paper barrier.
- Cap the area with 3 to 5 inches of coarse arborist woodchips or shredded leaves.
Over four to six months, soil organisms break down the turf and cardboard, leaving loose topsoil. For application rates and seasonal timing, see our guide on sheet mulching for soil moisture. To plant immediately, cut holes directly through the cardboard layer to set fruit tree root balls into the native soil beneath.
How do you build a supportive fruit tree guild?
In a backyard food forest, trees are rarely planted in isolated grass circles. Instead, they are surrounded by a community of multifunctional plants called a guild. Each member of the guild performs a specific ecological job:
- Dynamic accumulators: Plants with deep taproots, such as Russian comfrey or dandelion, pull subsoil minerals to their leaves. When cut back, these leaves become nutrient-dense mulch.
- Nitrogen fixers: Shrubby legumes like goumi berry (Elaeagnus multiflora) or false indigo work with soil bacteria to convert atmospheric nitrogen into plant-available fertility.
- Pollinator and predator attractors: Flowering perennials like sweet alyssum, fennel, dill, and aster provide nectar for parasitic wasps and hoverflies that control aphids and caterpillars.
- Grass suppressors: Bulbs like daffodils, garlic chives, and alliums planted in a ring along the tree's drip line stop invasive grass roots from stealing moisture.
For species combinations suited to specific fruit varieties, see our guide on fruit tree guild construction.
What is the realistic maintenance routine for a suburban food forest?
While backyard food forests require significantly less labor than conventional annual tilling, they are not zero-maintenance landscapes. Maintenance shifts from repetitive chores like weekly mowing to observational pruning and seasonal harvests.
In late winter, prune fruit trees to maintain an open canopy structure that lets sunlight reach understory berry bushes. During spring, chop back herbaceous accumulators such as comfrey two to three times, dropping the foliage directly around fruit tree drip lines to replenish organic matter.
Summer maintenance involves monitoring soil moisture and checking foliage for pest issues. In autumn, harvest remaining nuts and fruits, top up thin mulch with fallen leaves, and plant spring bulbs. For site preparation and initial planting steps, see our guide on how to start a food forest.