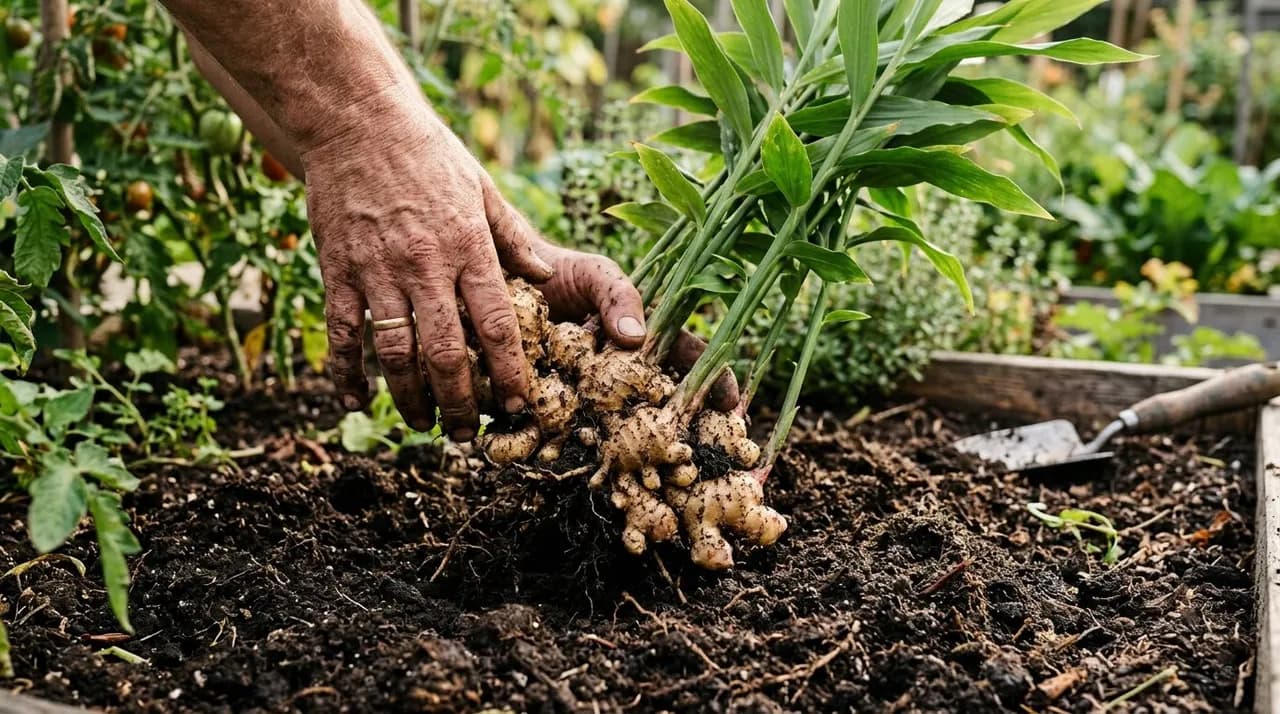
Key takeaways
- Select plump, unwrinkled ginger rhizomes with active green "growth eyes" and soak in warm water for 24 hours to remove commercial sprout inhibitors.
- Plant rhizomes horizontally with growth eyes pointing upward, buried 5 cm to 8 cm (2 to 3 in) deep in rich, loose, freely draining soil.
- Provide warm conditions (22°C to 30°C / 72°F to 86°F) and filtered, partial shade; ginger naturally thrives in tropical forest understory conditions.
- Hill up expanding rhizome crowns with 5 cm (2 in) of aged compost every 6 to 8 weeks to stimulate lateral rhizome expansion and prevent greening.
- Harvest tender "baby green ginger" after 4 to 5 months, or allow foliage to dry back naturally after 8 to 10 months for thick, pungent, mature rhizomes.
Quick answer: To grow ginger at home, soak healthy rhizomes in water overnight, then plant them 5 cm (2 in) deep in wide, shallow pots filled with rich, well-draining compost and coco coir. Keep the soil warm and moist in partial shade, hilling with compost as shoots expand, harvesting after 8 to 10 months.
Learning how to grow ginger (Zingiber officinale) brings one of the culinary world's most prized aromatic root crops to your home garden. Known for its warming pungency, zesty citrus undertones, and medicinal qualities, fresh homegrown ginger offers a crisp juiciness and thin, translucent skin that store-bought roots (often stored in refrigerated shipping containers for months) cannot match.
Ginger is an herbaceous tropical perennial native to the humid rainforest understories of Southeast Asia. It propagates from modified underground storage stems known as rhizomes instead of true seeds.
Because ginger requires an 8 to 10 month growing season with sustained warmth and humidity, gardeners across diverse climate zones must tailor their planting timelines, pot dimensions, and seasonal protections. Whether planting directly into garden beds in warm climates or cultivating in containers in cooler areas, basic care helps produce plump rhizomes.
Selecting seed rhizomes and preparing store-bought ginger
Starting your ginger crop begins with sourcing healthy rhizome planting stock:
+---------------------------------------------------------+
|                  [Ginger Rhizome Preparation]           |
|                                                         |
|    (Plump Store Rhizome)      (24-Hour Warm Water Soak) |
|         ------\                    [Water Bowl]       |
|        ( *   *   *)   ===>          (Hydrates Embryo &  |
|         /---/---/                    Removes Inhibitors)|
|                                                         |
|    (Cut into 5 cm Pieces)     (Callus for 48 Hours)     |
|       [*  ]  [ * ]    ===>        Dry Scab Forms on     |
|     (Active Eye Buds)             Cut Cuticles          |
+---------------------------------------------------------+
1. Growing ginger from store-bought rhizomes
While certified organic nursery stock is ideal, growing ginger from store bought rhizomes purchased at grocery stores or farmers' markets is widely successful:
- Look for plump, firm, heavy hands of ginger with smooth, shiny skin. Avoid shrivelled, mouldy, or soft pieces.
- Inspect the rhizome horns for small, rounded, pale-green or yellow growth buds ("eyes"), resembling the eyes on seed potatoes.
2. The 24-hour water soak
Commercial ginger is frequently treated with mild growth retardants to inhibit sprouting during supermarket storage:
- Submerge store-bought rhizomes in a bowl of lukewarm water (25°C / 77°F) for 24 hours.
- Soaking washes off surface residues and rehydrates dry tissue, awakening dormant growth buds.
3. Segmenting and callusing
- Cut large ginger hands into smaller 5 cm to 8 cm (2 to 3 in) pieces, ensuring each individual chunk contains at least one or two prominent growth eyes.
- Allow cut segments to sit on a clean kitchen counter for 48 hours at room temperature before planting. This allows the cut surfaces to form a dry, protective callus scab that prevents bacterial rot in damp soil.
To explore similar underground rhizome crops, read our complete guide on how to grow turmeric at home.
Soil formulation and container sizing: avoiding rhizome rot
Like all tropical rhizomatous crops, ginger demands a balance of high organic fertility and exceptional drainage.
Potting mix formulation
Ginger rhizomes rot quickly in heavy, cold, or saturated clay soils. Formulate a light, fertile, acidic to neutral mix (pH 6.0 to 6.8):
- 40% washed coco coir or peat moss: Retains uniform moisture without compacting.
- 40% mature organic compost or vermicompost: Delivers a continuous supply of mild nutrients and beneficial mycorrhizae.
- 20% coarse horticultural sand or perlite: Ensures fast gravitational drainage.
- For more on balancing potting media, see our overview of organic gardening soil and soil amendments demystified.
+---------------------------------------------------------+
|                  [Ginger Container Dimensions]          |
|                                                         |
|       (Lush Reed-Like Foliage & Stems)                  |
|             \ \ \ \ \ \ \ \ \ \ \ \                     |
|   ===========|===|===|===|===|===|===========           |
|   5 cm - 8 cm Compost Hilling Layer                     |
|   ---------------------------------------------------   |
|   <--- Horizontal Rhizome Expansion Zone --->           |
|   ---------------------------------------------------   |
|   30 cm - 40 cm Pot Depth / 45 cm - 60 cm Wide Pan      |
|   ====================================================  |
|               [Wide Fabric Grow Bag]                    |
+---------------------------------------------------------+
Container sizing for potted ginger
Growing ginger in pots allows growers to control temperature and moisture precisely:
- Ginger rhizomes spread horizontally just below the soil surface instead of growing deep down.
- Select wide, shallow containers instead of deep, narrow pots. Wide 30 to 45 litre (8 to 12 gallon) fabric grow bags or shallow rectangular planter boxes (30 cm / 12 in deep by 50 cm / 20 in wide) provide room for horizontal expansion.
For container layout ideas, review our guide on rooftop and patio container gardening.
Step-by-step planting and seasonal timing
Planting ginger correctly sets the foundation for vigorous pseudostem emergence:
+---------------------------------------------------------+
|                  [Planting Ginger Rhizomes]             |
|                                                         |
|   1. Fill container with 15 cm of rich potting soil     |
|   2. Lay rhizome flat horizontally; eyes pointing UP    |
|   3. Space pieces 15 cm - 20 cm (6 - 8 in) apart        |
|   4. Cover with 5 cm (2 in) of loose compost mix        |
|   5. Water lightly and keep warm in filtered shade      |
+---------------------------------------------------------+
Sowing depth and orientation
- Fill your container or raised bed with 15 cm (6 in) of pre-moistened potting soil.
- Lay callused rhizome pieces flat horizontally across the soil surface, positioning the green growth eyes pointing upward.
- Space multiple pieces 15 cm to 20 cm (6 to 8 in) apart to give lateral tubers room to expand.
- Cover the rhizomes with 5 cm to 8 cm (2 to 3 in) of loose potting soil or sifted compost. Press down gently.
- Water lightly until the soil is barely damp. Keep the soil warm (above 22°C / 72°F) until shoots emerge.
Regional climate calendars
In subtropical and tropical climates: Plant rhizomes outdoors in early spring at the start of the warm rainy season, choosing a position with dappled canopy shade.
In cool temperate climates: Pre-sprout rhizomes indoors in shallow seed trays over heating pads 4 to 6 weeks before your last expected spring frost, moving containers outdoors into warm, sheltered partial shade once outdoor night temperatures exceed 15°C (59°F).
The four ginger growing stages and hilling up
Understanding the distinct ginger growing stages helps you provide proper care at each phase:
+-------------------+--------------------+--------------------------------------------+
| Growth Stage      | Timeline           | Physiological Activity & Care Needs        |
+-------------------+--------------------+--------------------------------------------+
| Stage 1:          | Weeks 1 - 4        | Callused eyes swell; fine feeder roots     |
| Sprouting         |                    | establish in warm, moist soil              |
+-------------------+--------------------+--------------------------------------------+
| Stage 2:          | Months 2 - 4       | Slender, reed-like pseudostems shoot up;   |
| Shoot Emergence   |                    | bright green lanceolate leaves expand      |
+-------------------+--------------------+--------------------------------------------+
| Stage 3:          | Months 5 - 7       | Underground rhizomes branch horizontally;  |
| Rhizome Expansion |                    | apply regular 5 cm compost hilling layers  |
+-------------------+--------------------+--------------------------------------------+
| Stage 4:          | Months 8 - 10      | Foliage yellows and senesces; essential    |
| Maturation        |                    | oils and pungent gingerols concentrate     |
+-------------------+--------------------+--------------------------------------------+
Why hilling up is necessary
As ginger rhizomes expand during Stage 3, they naturally push upward toward the soil surface:
- If exposed to direct sunlight, developing rhizomes turn green, bitter, and fibrous.
- Every 6 to 8 weeks, top-dress the base of the stems with a fresh 5 cm (2 in) layer of rich organic compost or leaf mulch.
- Hilling up provides extra rooting volume, shields developing tubers from light, and supplies continuous organic nutrition. For organic mulching choices, review organic mulches from straw to wood and leaves.
Essential ginger plant care: sunlight, moisture, and harvesting
Regular care helps produce thick, healthy rhizomes:
1. Sunlight and humidity
- Partial shade: In hot summer conditions, intense direct sun bleaches and scorches leaves. Provide 2 to 3 hours of gentle morning sun or dappled light under deciduous trees.
- High humidity: In dry arid climates, mist the foliage on hot afternoons or cluster pots together to create a humid microclimate.
2. Watering discipline
- Keep soil consistently moist like a wrung-out sponge throughout the active vegetative phase (Stages 2 and 3).
- Never allow containers to dry out completely, but ensure drainage holes remain clear to prevent water stagnation.
- In autumn, when leaves begin to yellow, reduce watering significantly to initiate curing.
+---------------------------------------------------------+
|                  [Two Harvesting Methods]               |
|                                                         |
|   [Green Baby Ginger (Month 5)]                         |
|   - Pale pink tips, zero tough fiber, thin skin         |
|   - Band-harvest outer edges with fingers               |
|                                                         |
|   [Mature Cured Ginger (Month 9)]                       |
|   - Thick tan skin, robust heat, intense gingerols      |
|   - Full unpotting when leaves dry and fall flat        |
+---------------------------------------------------------+
3. Harvesting ginger: green vs. mature rhizomes
- Tender Baby Green Ginger (Month 4 to 5): Gently dig your fingers into the side of the container and snap off a plump lateral rhizome piece, re-covering the main plant. Baby ginger has soft, pale-pink scales, zero fibrous strings, and a mild, delicate heat.
- Mature Storage Ginger (Month 8 to 10): When pseudostem leaves yellow, wither, and collapse onto the soil, the plant has entered dormancy. Tip the entire container onto a tarp, brush away the soil, and separate the interconnected hands of ginger.
- Curing and storage: Wash rhizomes gently, trim green stems, and allow rhizomes to dry at room temperature for 3 to 4 days until the outer skin toughens. Store whole unpeeled ginger in a cool, dark, dry pantry for several months, or freeze whole hands for grating all year round.