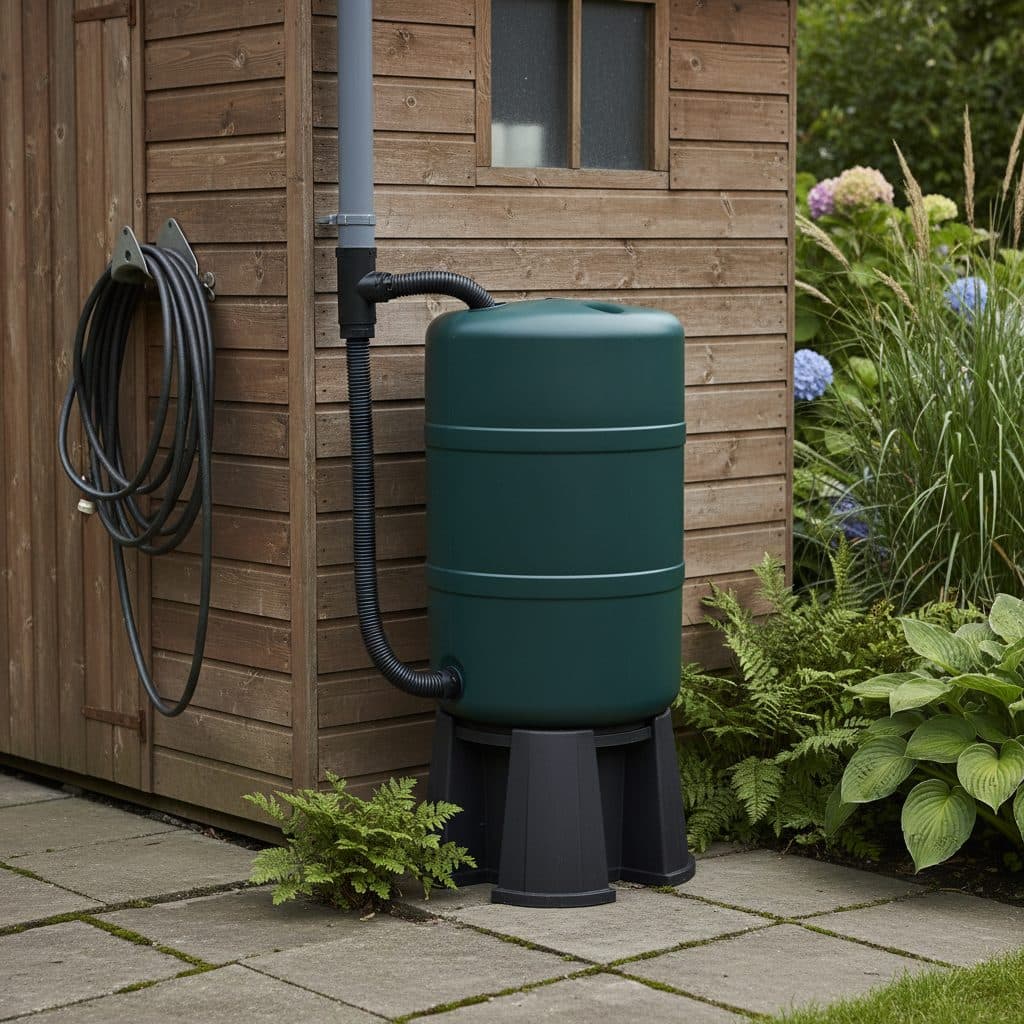
Key takeaways
- Installing a water butt captures untreated, chlorine-free rainwater ideal for allotment and garden irrigation.
- A downpipe diverter kit automatically channels rainwater into the butt while directing overflow down the drain once full.
- Placing the water butt on a sturdy, level stand provides necessary gravity clearance to fill a standard watering can.
- Linking multiple water butts in series with a connecting kit multiplies your total storage volume from a single roof.
- Fitting a tight lid and leaf trap prevents mosquito breeding, algae growth, and organic sludge accumulation.
Quick answer: To install a water butt, position a sturdy, level stand beside a rainwater downpipe, place the butt on top, and fit the bottom tap. Cut a section out of the downpipe at the water butt rim level, install a rainwater diverter, connect the flexible hose to the water butt inlet hole, and secure the lid tightly.
Harvesting rainwater is one of the most practical investments a British gardener or allotment holder can make. Mains tap water is chlorinated, and in hard-water areas it carries dissolved calcium and bicarbonate that gradually raise the pH of the root zone; lime-hating plants such as blueberries, rhododendrons and camellias resent it. Rainwater is naturally soft and slightly acidic. Learning how to install a water butt allows you to harvest naturally soft, ambient-temperature rainwater directly from your shed, greenhouse, or house roof.
During dry summer spells and regional hosepipe bans, an on-site rainwater reserve protects tender greenhouse crops, seedlings, and container displays. Installing a system requires only basic hand tools, taking less than an hour to set up a reliable gravity-fed water station that will function for years.
Choosing the right water butt and stand
Before drilling into downpipes, select equipment suited to your roof catchment area and garden layout.
+---------------------+-----------------------+---------------------------------------+
| Component           | Standard Size / Type  | Purpose                               |
+---------------------+-----------------------+---------------------------------------+
| Water Butt Barrel   | 100 to 250 Litres     | UV-stabilised rainwater reservoir     |
| Butt Stand          | 30 to 40 cm Height    | Elevation for watering can clearance  |
| Downpipe Diverter   | Standard 68mm round   | Channels rain, manages auto-overflow  |
| Linking Kit         | Flexible ribbed hose  | Connects multiple butts in series     |
| Debris Filter       | Fine mesh or leaf trap| Excludes moss, leaves, and grit       |
+---------------------+-----------------------+---------------------------------------+
Capacity considerations
Standard UK garden water butts range from compact 100-litre slimline models (ideal for tight side passages) to standard 200-litre or 250-litre barrels. If you have a large shed or garage roof, consider linking multiple barrels together. To calculate the exact yield your roof can capture, review the sizing rain barrels roof area formula.
The importance of a solid stand
Water is heavy: one litre of water weighs about one kilogram, meaning a full 200-litre water butt weighs over 200 kg once the barrel itself is counted.
A dedicated plastic water butt stand or a platform built from level paving slabs or concrete blocks is essential. Elevation serves two main purposes:
- It raises the bottom drain tap high enough (typically 30 cm off the ground) so you can easily slide a standard 10-litre watering can beneath the spout.
- It prevents the heavy base from settling unevenly into soft garden soil, which could tip the barrel and snap downpipe fittings.
Step-by-step installation with a downpipe diverter
A rainwater diverter is the key component of a water butt setup. Instead of running an open downpipe directly into the top of the barrel, a diverter kit cuts into the downpipe. It catches water trickling down the inside pipe walls and directs it through a flexible hose into the butt. Once the water butt fills to the diverter level, water automatically bypasses the hose and continues down the main drainage pipe, preventing messy overflow around your building foundations.
Tools required:
- Hacksaw or fine-toothed hand saw
- Cordless drill with 25 mm hole saw bit (or drill bit matching diverter grommet)
- Spirit level
- Measuring tape and pencil
- Safety glasses and work gloves
Installation steps:
- Prepare the base: Clear a level area directly adjacent to your chosen downpipe. Place your paving slabs or plastic stand on the ground and check with a spirit level in both directions to ensure complete flatness.
- Fit the tap: Screw the plastic drain tap into the pre-threaded hole at the base of the water butt. If the hole is unthreaded, push the tap through with the rubber washer on the outside and tighten the plastic locknut securely from the inside.
- Position the butt: Place the empty water butt onto the stand, rotating it so the tap faces outward for convenient access.
- Mark the diverter level: Measure the height of the water butt rim. Mark the downpipe at a point roughly 3 cm below the top rim of the water butt. This ensures water stops filling before it spills over the top lid.
- Cut the downpipe: Using a hacksaw, carefully cut out the required section of downpipe according to the diverter manufacturer's template (usually a 3 cm to 5 cm gap). Clean away any plastic burrs with sandpaper.
- Insert the diverter: Push the diverter unit into the gap in the downpipe, ensuring the rubber internal collection cup faces upwards to capture falling water.
- Drill the inlet hole: Using your hole saw bit, drill a hole in the upper side of the water butt, aligning with the diverter height. Insert the supplied rubber grommet.
- Connect the flexible hose: Push one end of the connecting hose onto the diverter outlet and push the other end through the rubber grommet into the water butt.
- Secure the lid: Lock the top lid tightly into place to ensure children, pets, and wildlife cannot fall in.
For higher-capacity homestead systems utilizing IBC totes or multi-tank arrays, see our guide on rainwater harvesting barrels and IBC totes.
Connecting two or more water butts together
If your roof generates more rainwater than a single barrel can hold, you can easily daisy-chain multiple water butts using a water butt linking kit.
+-----------------------------------------------------------------------------------+
|  [Downpipe] ---> [Diverter]                                                       |
|                     |                                                             |
|                     v (Inlet Hose)                                                |
|             +---------------+             +---------------+                       |
|             | Water Butt #1 | ===(Link)==>| Water Butt #2 |                       |
|             |  (Primary)    |             |  (Secondary)  |                       |
|             +---------------+             +---------------+                       |
+-----------------------------------------------------------------------------------+- Place both water butts side-by-side on level stands.
- The primary water butt connects directly to the downpipe diverter as described above.
- Drill a 25 mm hole near the top rim of both water butts on the facing sides.
- Insert the supplied threaded connectors and rubber washers, then connect the short flexible linking pipe between them.
- When the primary butt fills, water flows across the linking pipe into the secondary butt. When both are completely full, backpressure causes water in the primary butt to rise to the diverter level, automatically sending surplus rain down the storm drain.
How to keep water butt water clean and odour-free
Stagnant rainwater can occasionally develop unpleasant odours, algae growth, or mosquito larvae if neglected. Maintaining clean water is simple with basic preventative steps:
- Fit gutter guards: Gutter mesh or downpipe leaf traps prevent decomposing moss, twigs, and bird droppings from entering the diverter.
- Keep the lid dark and sealed: Algae requires light to grow. Ensure the lid fits tightly and that no light penetrates the barrel interior.
- Add a water butt treatment: A capful of a proprietary biological water butt treatment helps keep stored water from going stale. Excluding light and organic debris does far more than any additive.
- Drain down before winter frosts: In freezing winter conditions, expanding ice can split plastic taps and warp barrel bases. In late autumn, open the bottom tap or disconnect the diverter to drain the system if severe freezing is forecast.
Stored rainwater is not drinking water. Apply it to the soil instead of spraying it over leaves, and use mains water for seedlings, salad leaves and any crop eaten raw close to harvest.
To connect your stored rainwater to garden distribution networks, see our guide on drip irrigation for beginners and our advice on smart water garden efficiency.