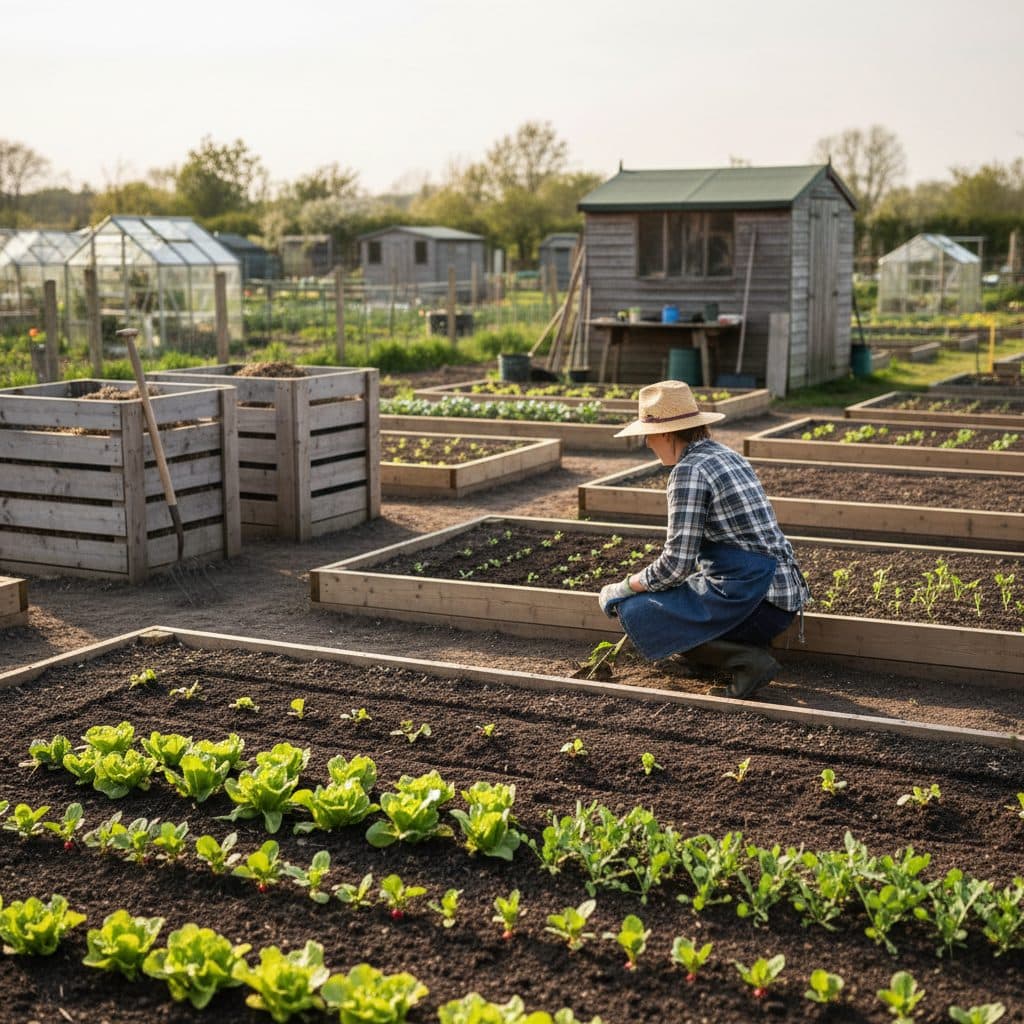
Key takeaways
- Start with a half plot (approximately 125 square metres / 5 rods) if available, which provides ample space for a family's vegetables without overwhelming your schedule.
- Tackle overgrown plots in manageable sections rather than attempting to dig the entire area at once.
- Use cardboard sheet mulching covered with 5 to 10 cm of compost to smother perennial weeds naturally without exhausting physical rotavating.
- Familiarize yourself with your council or allotment association tenancy agreement, especially rules regarding cultivation timelines and shed sizes.
- Invest in high-quality core hand tools: a forged digging fork, a spade, a Dutch hoe, a solid wheelbarrow, and a sturdy watering can.
- Prioritize high-reward, beginner-friendly first-year crops including first early potatoes, courgettes, runner beans, onions, and rainbow chard.
Quick answer: For beginners taking on a UK allotment, the secret to success is starting small, dividing the plot into clear zones, and using no-dig cardboard mulching to suppress weeds. Start with a half plot if possible, clear one quarter at a time, plant resilient starter crops like potatoes and courgettes, and build a dedicated compost heap.
Securing a council allotment in the United Kingdom is a major milestone for any home food grower. However, walking onto a newly assigned plot that has stood neglected for years, choked with couch grass, nettles, brambles, and field bindweed, can feel intimidating. Many enthusiastic beginners abandon their tenancies within the first twelve months simply because they try to clear the entire site in a single weekend and burn out.
Navigating allotments for beginners requires a structured, phased strategy. By understanding plot measurements, working with natural soil processes, choosing dependable first-year crops, and complying with local site bylaws, you can transform an overgrown patch of ground into a flourishing, productive vegetable garden.
+-------------------------------------------------------------+
|              UK ALLOTMENT PLOT SIZING BREAKDOWN             |
|                                                             |
|   FULL PLOT (Traditional 10 Poles / Rods / Perches):        |
|   - Area: ~250 square metres (approx. 25m x 10m)            |
|   - Time Commitment: 8 to 12 hours/week (rough guide)       |
|   - Ideal for: Experienced growers, large households        |
|                                                             |
|   HALF PLOT (Modern Standard 5 Poles / Rods):               |
|   - Area: ~125 square metres (approx. 12.5m x 10m)          |
|   - Time Commitment: 4 to 6 hours/week (rough guide)        |
|   - Ideal for: Beginners, working professionals, families   |
+-------------------------------------------------------------+
Choosing between a half plot and a full plot
Historically, British allotments were measured in "rods", "poles", or "perches" (a traditional English land measure equal to 5.029 metres). A traditional full plot measures 10 poles (roughly 250 square metres), traditionally described as enough ground to feed a family for much of the year — a rough historical rule of thumb rather than a measured figure.
Today, many local councils and allotment associations subdivide vacant tenancies into half plots of 5 poles (around 125 square metres). If you are new to vegetable growing, always request a half plot if one is available:
- Manageable workload: A half plot requires about four to six hours of maintenance per week during peak summer, compared to 8 to 12 hours for a full plot (as a rough guide, depending on season and plot condition).
- Lower establishment cost: You need half the amount of compost, seeds, netting, and timber.
- Compliance security: Most tenancy agreements set a cultivation requirement (a proportion of the plot that must be in use within a stated period), but the figure and the deadline are set by your council or site association. Read your own tenancy agreement, and ask the site secretary if the wording is unclear. Meeting this target on a half plot is far more achievable.
Phased plot clearing: how to avoid burnout
The biggest mistake new plot holders make is hiring a mechanical rotavator on day one. Rotavating through perennial weeds like bindweed, couch grass, and ground elder chops their underground rhizomes into hundreds of pieces, so that every fragment regrows as a new plant and the infestation spreads across the whole plot.
+-------------------------------------------------------------+
|               THE FOUR-QUARTER CLEARING WORKFLOW            |
|                                                             |
|   Quarter 1: Plant Immediately      Quarter 2: Mulch        |
|   Clear surface weeds, lay compost  Heavy cardboard + silage|
|   Plant first-year crops (potatoes) tarp to kill weeds      |
|   ================================  ========================|
|   Quarter 3: Sheet Mulched          Quarter 4: Covered      |
|   Covered for autumn sowing         Black woven weed fabric |
|   (Broad beans, garlic sets)        awaiting Year Two       |
+-------------------------------------------------------------+
The four-quarter zone strategy
- Zone 1 (Immediate Growing Zone - 25%): Focus your initial physical energy here. Cut down top growth with a strimmer or shears, dig out thick perennial weed roots with a fork, or set up two to three no-dig surface beds. Plant this quarter immediately to give yourself an early harvest.
- Zone 2 & Zone 3 (Suppression Zones - 50%): Cut grass and brambles down to ground level. Cover the entire surface with thick, overlapping brown corrugated cardboard (remove all plastic packing tape) and weigh it down with compost, woodchips, or heavy black silage plastic. This blocks light and starves weeds beneath while you work elsewhere.
- Zone 4 (Infrastructure Zone - 25%): Dedicate this area to your compost bays, a small timber tool shed, water collection butts, and a seating area.
For sustainable, chemical-free ground clearing methods, explore our practical guidance on sheet mulching with cardboard and non-toxic weed strategies in organic weed management.
Essential tools and site infrastructure
You do not need a shed full of expensive machinery to cultivate an allotment. A small collection of well-made hand tools is all that is required for daily plot maintenance.
Essential Tool | Primary Function | Buying Advice |
|---|---|---|
Digging Fork | Loosening soil, extracting deep taproots | Look for solid forged carbon steel with a secure ash handle |
Digging Spade | Edging beds, trenching, moving soil | Flat-bladed spade with comfortable D-handle |
Dutch Hoe | Severing annual weed seedlings at soil line | Long handle allows upright posture without back strain |
Wheelbarrow | Transporting manure, compost, and crops | Pneumatic tyre and heavy-gauge plastic or steel tub |
Watering Can (10L) | Targeted watering of young transplants | Metal or heavy plastic with a detachable brass rose |
Secateurs / Loppers | Pruning brambles, fruit bushes, and stems | Bypass secateurs with replaceable high-carbon blades |
+-------------------------------------------------------------+
|                 RECOMMENDED ALLOTMENT LAYOUT                |
|                                                             |
|   +-------------------------------------------------------+ |
|   | { Shed / Tool Storage }   { 3-Bay Compost System }    | |
|   |                                                       | |
|   | Bed 1: Potatoes & Roots   -- 1.2 m wide x 6 m long    | |
|   | ----------------------------------------------------- | |
|   | Bed 2: Brassicas & Greens -- 1.2 m wide x 6 m long    | |
|   | ----------------------------------------------------- | |
|   | Bed 3: Legumes & Corn     -- 1.2 m wide x 6 m long    | |
|   | ----------------------------------------------------- | |
|   | Bed 4: Courgettes & Squash-- 1.2 m wide x 6 m long    | |
|   |                                                       | |
|   | Perimeter Fruit Bushes: Raspberries / Currants        | |
|   +-------------------------------------------------------+ |
+-------------------------------------------------------------+
Establishing compost bays
Every allotment needs an active composting system. Build a two-bay or three-bay compost system using reclaimed wooden pallets tied together with wire. One bay receives fresh green weeds and crop residues, the second bay is actively decomposing, and the third holds mature, dark crumbly compost ready to top-dress your growing beds.
Reliable, high-yield crops for your first season
In your first year, prioritize vegetables that establish rapidly, suppress underlying weeds with broad canopies, and deliver dependable yields to maintain your motivation.
+-------------------------------------------------------------+
|              BEST FIRST-YEAR ALLOTMENT CROPS                |
|                                                             |
|   1. FIRST EARLY POTATOES (e.g. Swift, Rocket):             |
|   - Plant in April; harvest in June/July before blight      |
|   - Dense leafy canopy smothers remaining weeds             |
|                                                             |
|   2. COURGETTES (e.g. Defender, Black Beauty):              |
|   - 2 to 3 plants provide prolific continuous summer food   |
|   - Massive leaves shade the surrounding soil completely    |
|                                                             |
|   3. RUNNER BEANS & CLIMBING FRENCH BEANS:                  |
|   - Grow vertically on bamboo wigwams; huge yield per m²    |
|                                                             |
|   4. ONIONS & SHALLOTS (from sets):                         |
|  - Simple to plant in autumn or spring; store through winter|
|                                                             |
|   5. RAINBOW CHARD & SPINACH:                               |
|   - Cut-and-come-again harvesting from spring to late winter|
+-------------------------------------------------------------+
To prepare clean seedbeds that keep emerging crops free of annual weed competition, apply the stale seedbed technique described in stale false seedbed weed control.
Seasonal planning for year-round harvesting
An allotment does not shut down when summer finishes. By timing sowings across the seasons, you can enjoy fresh harvests throughout autumn and winter.
- Spring (March to May): Sow seeds indoors on sunny windowsills; plant early potatoes, onion sets, and root crops; erect cane bean supports.
- Summer (June to August): Water during dry spells; harvest courgettes, beans, and salad leaves; net brassica beds against cabbage white butterflies and pigeons.
- Autumn (September to November): Clear spent crops onto the compost heap; sow overwintering broad beans and garlic; harvest pumpkins and maincrop squash.
- Winter (December to February): Dig leeks and parsnips as needed; plan next season's seed orders; repair fences and timber bed edging.
To keep your allotment productive during the colder months, refer to our detailed selection in winter vegetables to grow in the UK and consider protected structures evaluated in polytunnel vs greenhouse.
Understanding council bylaws and allotment etiquette
To ensure a smooth, lasting tenancy, be aware of standard UK allotment rules and community customs:
- Cultivation inspections: Council site officers conduct regular inspections (typically in spring and midsummer). If a plot appears unworked, you will normally receive a written improvement or cultivation notice giving you a set period to bring the plot back into use. The length of that period is stated in your tenancy agreement — check it rather than assuming a standard.
- Water usage rules: Most allotment associations permit watering cans filled from on-site water troughs or rain butts, but strictly prohibit unattended hosepipes or automatic sprinklers.
- Bonfire bylaws: Some councils ban bonfires entirely, while others permit them only during specific winter months or after sunset. Always compost organic waste rather than burning.
- Structures and livestock: Check permitted shed and greenhouse dimensions before purchasing flat-pack kits. If you plan to keep hens or honeybees, check whether your tenancy agreement permits livestock and what site registration is required.