Key takeaways
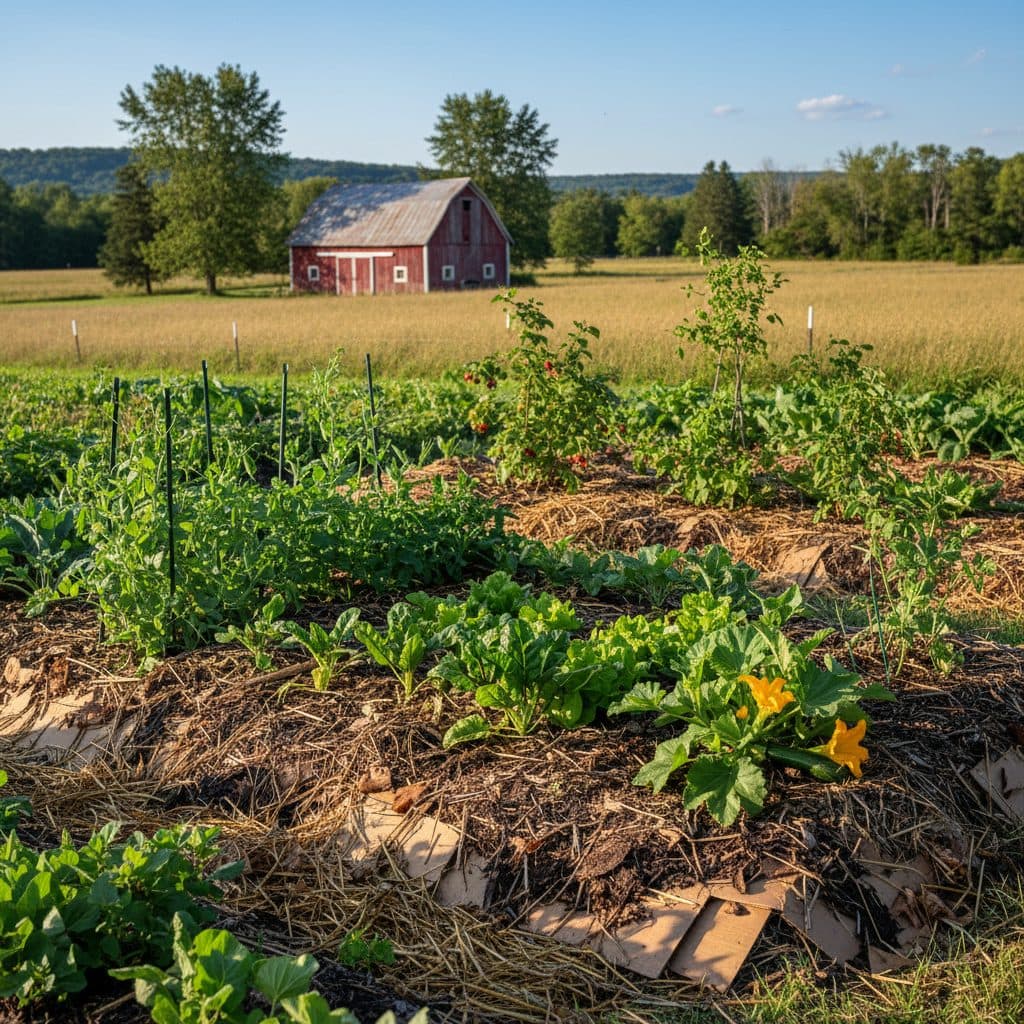
- Sheet mulching, also known as lasagna gardening, builds fertile soil layers directly over existing lawn or weeds without digging.
- This method sharply reduces weed growth, conserves soil moisture, and improves soil structure and organic matter content.
- Planning your sheet mulch bed involves assessing your site, understanding permaculture zones, and selecting appropriate plant guilds for your USDA zone.
- The layering process typically includes cardboard, nitrogen-rich ‘green’ materials, carbon-rich ‘brown’ materials, and a final top layer of compost or soil.
- Sheet mulching converts a lawn into a productive garden bed without digging, though building the layers is real work — plan on moving a lot of bulk material by wheelbarrow.
- Long-term benefits include reduced watering needs and greater biodiversity in your garden.
Quick answer: Sheet mulching, also known as lasagna gardening, is a no-dig method that transforms existing lawns or weeds into fertile planting beds by layering organic materials. This technique builds soil health, suppresses weeds, and conserves moisture, mimicking natural decomposition processes.
In many regions across the United States, converting a traditional lawn into a productive garden bed often begins with the arduous task of tilling. However, for growers in places like the humid subtropical climate of USDA zone 7b in North Carolina or the arid plains of USDA zone 5b in Colorado, there is a less labor-intensive and more soil-beneficial approach: sheet mulching, sometimes called lasagna gardening. This technique allows you to build a rich, fertile planting area directly on top of existing turf or weeds, eliminating the need for heavy machinery or extensive digging. It protects soil organisms, helping establish fertile garden beds that support diverse plants.
Sheet mulching is a practical application of permaculture principles, focusing on building soil health and creating resilient ecosystems. Layering organic materials suppresses unwanted vegetation, retains moisture, and supports soil microbes beneath the plants. This approach can convert a 200 square foot patch of grass into a productive vegetable bed or food forest over several months.
What is sheet mulching, or lasagna gardening?
Sheet mulching, often referred to as lasagna gardening, is a no-dig method for creating new garden beds by layering organic materials over an existing surface, such as a lawn or compacted soil. This technique mimics natural decomposition processes, gradually breaking down the layered materials into nutrient-rich soil. The initial layer typically consists of a weed barrier like corrugated cardboard, which smothers existing vegetation and prevents new weeds from sprouting through the new bed. This barrier smothers turf and most annual weeds within the first few months. Vigorous perennials (bindweed, bermudagrass, quackgrass, Japanese knotweed, horsetail) will find the seams and come through, so dig those out before starting instead of relying on cardboard to kill them.
The core concept: building soil from the top down
The core concept behind sheet mulching is to build soil fertility from the top down, much like how forest floors develop their rich humus layers. After the cardboard, alternating layers of ‘green’ (nitrogen-rich) and ‘brown’ (carbon-rich) materials are added, creating a balanced compost pile in place. Common ‘green’ materials include grass clippings and well-aged manure, while ‘brown’ materials often include straw, shredded leaves, and wood chips. If you use raw manure in a bed that will grow food, leave at least 120 days between application and harvest for crops whose edible part touches the soil, and 90 days for everything else — the intervals used in the USDA organic standards. Bury kitchen scraps deep in the stack or leave them out; scraps near the surface draw rodents. A typical bed might involve five to ten distinct layers, reaching an initial height of 18 to 24 inches, which will settle to about 6 to 8 inches over several weeks as decomposition begins. This process builds soil structure, improves water retention, and supports soil organisms, as the USDA Natural Resources Conservation Service notes in its soil health guidance.
- Cardboard barrier: Smothers existing grass and weeds.
- Green layers: Provide nitrogen for decomposition and plant growth.
- Brown layers: Offer carbon, structure, and long-term organic matter.
- Water: Activates decomposition and settles layers.
- Compost/soil: Final layer for immediate planting.
Why choose sheet mulching? Benefits for your garden and soil
Sheet mulching avoids the labor of tilling and improves soil health. Leaving soil undisturbed preserves networks of fungi and bacteria needed for nutrient cycling and plant vigor. Reduced soil disturbance maintains soil structure and active biology, supporting plant growth. Furthermore, the thick layers of organic material act as a sponge, significantly increasing the soil’s capacity to hold water and cutting how often you need to irrigate in dry climates.
Weed suppression and long-term soil fertility
One of the most appealing advantages for many growers is the effective suppression of weeds. The initial cardboard layer, combined with the subsequent thick organic layers, creates an environment where most weeds cannot thrive. This can cut down on weeding time by 75% or more in the first year alone. As the layers decompose, they continuously feed the soil, raising organic matter content season after season. This continuous amendment means less need for external fertilizers and a more self-sustaining system. For growers interested in creating a resilient garden ecosystem, understanding the principles of permaculture gardening is a natural next step, as sheet mulching aligns perfectly with its goals of working with natural processes. The USDA Natural Resources Conservation Service (2024) notes that increasing soil organic matter is essential for long-term agricultural sustainability across the US.
- Improved soil structure: Supports aeration and drainage.
- Increased water retention: Reduces the need for frequent watering.
- Effective weed control: Suppresses existing and new weed growth.
- Boosts soil biology: Supports beneficial microorganisms and earthworms.
- Long-term fertility: Continuously adds organic matter and nutrients.
Planning your sheet mulch bed with permaculture principles
Before layering, planning helps ensure your sheet mulch bed functions effectively within your landscape. Consider your site’s specific conditions, including sun exposure, drainage patterns, and prevailing winds. A thorough site assessment, as detailed in permaculture design principles, will help you determine the optimal size and shape for your bed. For instance, a south-facing slope in USDA zone 5 can maximize solar gain for heat-loving vegetables, while a partially shaded area might be better suited for a berry patch or a small food forest. Aim for beds that are no wider than 4 feet across, allowing easy access from both sides without compacting the soil.
Integrating zones and plant guilds
Incorporating permaculture zones into your planning helps organize your garden for efficiency. Zone one, for example, is the area closest to your home, ideal for frequently harvested plants like herbs and salad greens, requiring daily attention. Zone two might be a bit further out, perfect for perennial vegetables, fruit bushes, or a small chicken coop, needing attention a few times a week. When designing a food forest, consider plant guilds — groups of plants that support each other. For example, a fruit tree (like an apple in USDA zone 4-7) can be surrounded by nitrogen-fixing plants, dynamic accumulators, and groundcovers. This creates a mini-ecosystem where plants like clover and comfrey support the central tree, reducing the need for external inputs. For comfrey, plant only the sterile cultivar Symphytum × uplandicum ‘Bocking 14’ — seed-setting common comfrey (Symphytum officinale) sows itself around the garden and regrows from every root fragment left behind — and treat it as mulch instead of food or fodder, since its pyrrolizidine alkaloids are hepatotoxic. Sheet mulching provides an excellent foundation for these guilds, allowing for the establishment of a diverse system that can include 10 to 15 different species in a 100 square foot area. This approach is fundamental to a well-structured permaculture garden plan.
- Site assessment: Analyze sun, water, and wind patterns.
- Zone planning: Locate beds based on frequency of use and access.
- Plant guilds: Choose companion plants for mutual benefit.
- Access paths: Design paths for easy movement and minimal soil compaction.
- Water sources: Plan for efficient irrigation or rainwater harvesting.
Building your lasagna garden: a step-by-step guide
Once your planning is complete and materials are gathered, the actual construction of your sheet mulch bed is straightforward. Begin by thoroughly watering the area you intend to convert. This moistens the existing grass and soil, encouraging decomposition and providing initial hydration for the new layers. For a 100 square foot bed, you might use 10 to 15 gallons of water. Next, lay down a thick layer of overlapping cardboard to ensure no gaps. Remove all tape and labels from the cardboard first. Overlap each piece by at least 6 inches to create an impenetrable barrier for weeds, and wet it thoroughly after placement to help it settle and begin breaking down.
Layering ‘greens’ and ‘browns’ for optimal decomposition
After the cardboard, alternate layers of ‘green’ and ‘brown’ materials. Start with a 4 to 6 inch layer of nitrogen-rich ‘greens’ like fresh grass clippings, kitchen scraps, or manure. Follow this with an 8 to 12 inch layer of carbon-rich ‘browns’ such as straw, shredded leaves, or wood chips. The ideal carbon-to-nitrogen ratio for composting is around 30:1, so aim for roughly twice as much ‘brown’ material by volume as ‘green’ material. Repeat these layers until your bed reaches a height of 18 to 24 inches. Each layer should be watered as you go to promote microbial activity. Finish with a 3 to 4 inch layer of finished compost or good quality topsoil, which will be the immediate planting medium. This entire process for a 50 square foot bed can often be completed in a single afternoon, requiring about 3 to 4 hours of focused effort.
- Water existing area: Hydrates soil and aids decomposition.
- Lay cardboard: Overlap by 6 inches, wet thoroughly.
- Add ‘green’ layer: 4-6 inches of nitrogen-rich material.
- Add ‘brown’ layer: 8-12 inches of carbon-rich material.
- Repeat layers: Build to 18-24 inches, wetting each.
- Top with compost: 3-4 inches for planting.
Planting and nurturing your new food forest
Once your sheet mulch bed is built, it needs a few weeks to settle and for the initial decomposition to begin. Ideally, allow one to two months for the layers to meld, especially if you plan to plant directly into the top layer of compost. When you are ready to plant, simply dig a hole through the top compost layer and into the decomposing materials below, just large enough for your plant’s root ball. For larger plants or trees, you might need to cut through the cardboard layer with a utility knife to ensure roots can penetrate the original soil. Space your plants according to their mature size, typically allowing 12 to 18 inches between small vegetable starts and several feet for fruit bushes or trees in USDA zone 6.
Ongoing care and long-term success
Initial watering is essential after planting. Use a soil moisture meter to ensure the top few inches of soil remain consistently moist, especially during the first few weeks. As the bed matures, its improved water retention will reduce your watering frequency to perhaps once or twice a week, even in dry periods. To maintain fertility and suppress any emerging weeds, periodically add fresh layers of organic material — a 2-inch layer of wood chips or shredded leaves once or twice a year is often sufficient. This continuous top-dressing mimics a natural forest floor to ensure a steady supply of nutrients and maintaining the bed’s weed-suppressing properties. Over five years, this method builds a deep, dark, biologically active layer that holds water and feeds plants with far less external input.
- Allow settling time: One to two months for layers to integrate.
- Planting technique: Dig through compost into decomposing layers.
- Watering: Monitor moisture, especially during establishment.
- Top-dressing: Add 2-inch layers of organic material annually.
- Weed management: Pull any persistent weeds by hand.
Sheet Mulching vs. Traditional Tilling
Feature | Sheet Mulching (Lasagna Gardening) | Traditional Tilling |
|---|---|---|
Soil Disturbance | Minimal to none; preserves soil structure and microbial life. | High; interrupts soil structure, harms beneficial organisms. |
Weed Control | Excellent against turf and annual weeds; vigorous perennials still push through the seams. | Poor; brings dormant weed seeds to the surface, often increasing weed problems. |
Water Retention | High; organic layers act as a sponge, so beds need watering less often. | Low; exposes soil to evaporation, requiring more frequent watering. |
Soil Fertility | Continuously builds organic matter and nutrients. | Can deplete organic matter over time without constant amendment. |
Labor Intensity | Low initial effort for bed preparation, minimal ongoing weeding. | High initial effort for tilling, significant ongoing weeding. |
Time to Plant | Can plant immediately into top compost layer, or wait 1-2 months for settling. | Can plant immediately after tilling, but soil may need amendments. |
Weed Suppression: A well-constructed sheet mulch bed can reduce weed growth by over 80% in its first year, saving dozens of hours of weeding time.
Water Conservation: The thick organic layers in a sheet mulch bed can decrease water requirements by up to 50% compared to conventional tilled gardens, saving hundreds of gallons of water annually.
Frequently asked questions
How long does it take for a sheet mulch bed to be ready for planting?
While you can plant directly into the top layer of compost immediately, it is generally recommended to allow the bed to settle for one to two months. This allows initial decomposition to occur and the layers to integrate, leading to a more stable planting medium. For optimal results, some growers prepare beds in the fall for spring planting, giving it five to six months to mature.
What materials should I avoid in my sheet mulch layers?
Avoid using materials that are diseased, contain persistent weed seeds, or are chemically treated. For example, do not use glossy magazines or colored newspaper as these may contain heavy metals. Also, avoid invasive plant roots or seed heads, as they can regrow. Stick to clean, untreated organic materials.
Can I use sheet mulching to grow trees?
Yes, sheet mulching works well for establishing trees. Cut a generous hole through the cardboard so the root ball sits in the native soil. This provides stability and allows roots to penetrate deeper. The surrounding mulch layers will suppress weeds and retain moisture, greatly benefiting the young tree’s establishment for its first three to five years.
How often do I need to reapply layers to a sheet mulch bed?
For ongoing fertility and weed suppression, it is beneficial to add a fresh 1 to 2 inch layer of organic material annually, typically in the fall or spring. This replenishes nutrients and maintains the protective mulch barrier. Over five years, this practice steadily builds the bed’s organic matter content.
Is sheet mulching suitable for all climates?
Sheet mulching is adaptable to most climates across the US, from the temperate regions of USDA zone 6 to the warmer zones. In arid regions, its water-retention benefits are particularly valuable, reducing irrigation by up to 50%. In very wet areas, good drainage beneath the bed is needed to prevent waterlogging, which may require a slight mound at the base.