Key takeaways
- High nutrient solution temperatures (above 72°F) reduce dissolved oxygen and increase pathogen risk, especially in warm climates like Arizona.
- Frozen water bottles offer a low-cost, immediate cooling solution for small systems, typically requiring replacement every 4 to 6 hours.
- Dedicated hydroponic chillers provide precise, automated temperature control but involve higher upfront costs, often ranging from $300 to $500 for a small unit.
- Optimal nutrient solution temperatures generally range from 65°F to 72°F for most common hydroponic crops, supporting strong root development.
- Consider system size, ambient temperature, and budget when choosing a cooling method for your hydroponic setup, aiming for a consistent temperature.
- Insulating reservoirs and using reflective materials in grow tents can significantly reduce heat gain, potentially lowering cooling demand by 35%.
Quick answer: Maintaining a hydroponic nutrient solution at an optimal 65-72°F matters for plant health, nutrient uptake, and disease prevention. This can be achieved using low-cost frozen water bottles for small systems or dedicated hydroponic chillers for precise, automated temperature control.
In places like the Central Valley of California, where summer temperatures can regularly climb above 100°F, keeping a hydroponic system’s nutrient solution cool is essential for plant survival. Maintaining an ideal nutrient solution temperature, typically between 65°F and 72°F, is critical for root health, nutrient uptake, and preventing disease. Without proper temperature control, especially in a 20-gallon reservoir exposed to 90°F ambient air, dissolved oxygen levels can plummet, and harmful pathogens can thrive, leading to significant crop losses.
Many growers, from those in USDA zone 6 with a small indoor setup to larger operations in USDA zone 9, face the challenge of managing solution temperatures on a budget. This article explores two primary approaches: the low-cost, labor-intensive frozen bottle hack and the more automated, precise dedicated hydroponic chiller. We’ll break down the practicalities, costs, and effectiveness of each method, helping you decide how to best protect your plants and maintain that crucial 68°F sweet spot.
The critical need for cool nutrient solution
Maintaining the correct temperature in your hydroponic nutrient solution is one of the most fundamental aspects of successful soilless growing, particularly in warmer climates or during summer months. When solution temperatures rise above 72°F, several detrimental effects begin to occur. Most notably, the solubility of dissolved oxygen (DO) in water decreases significantly; for instance, water at 85°F holds significantly less oxygen than water at 68°F. This reduction in oxygen directly impacts root respiration and overall plant vigor, leading to stunted growth and reduced yields.
Beyond oxygen levels, elevated temperatures create an ideal breeding ground for anaerobic bacteria and fungal pathogens like pythium, commonly known as root rot. These pathogens thrive in warm, low-oxygen environments, quickly attacking plant roots and causing irreversible damage. A healthy root system, typically white and robust, can turn brown and slimy within days if temperatures consistently exceed 75°F. For growers in regions like Florida or Texas, where ambient temperatures can easily push reservoir temperatures past 80°F, active cooling is not optional. Ensuring your solution stays within the optimal 65°F to 72°F range is paramount for plant health and productivity, whether you’re growing lettuce or trying to time a cool-season crop like broccoli.
Why temperature matters for root health
The roots of your plants are the engine of your hydroponic system, responsible for absorbing water and nutrients. When the nutrient solution is too warm, root metabolism can become stressed, and their ability to absorb essential elements like nitrogen and phosphorus diminishes. This can lead to visible nutrient deficiencies even when the nutrient concentration is otherwise correct. Furthermore, warm water can accelerate the breakdown of certain nutrient compounds, altering the solution’s pH and requiring more frequent adjustments. For example, a system running at a higher temperature might require more frequent pH adjustments than one at an optimal temperature. This constant battle against high temperatures adds labor and can compromise the stability of your carefully balanced nutrient profile, impacting everything from leafy greens to fruiting plants.
- Reduced dissolved oxygen: Water holds less oxygen above 72°F.
- Increased pathogen risk: Fungi and bacteria thrive in warm, low-oxygen conditions.
- Stressed root metabolism: Roots struggle to absorb nutrients efficiently.
- Nutrient breakdown: Some compounds degrade faster at higher temperatures.
- pH instability: Warm solutions often require more frequent pH adjustments.
The frozen bottle hack: a budget approach
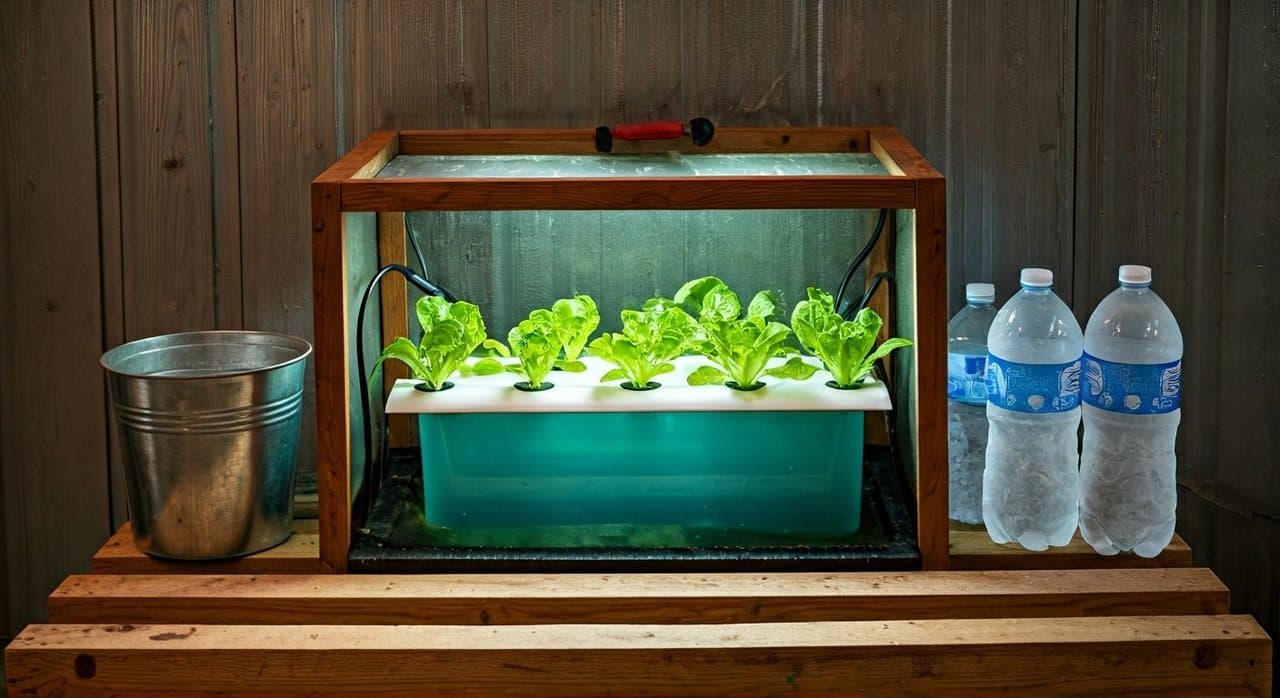
For many home growers with smaller systems, the frozen bottle hack is the first line of defense against rising nutrient solution temperatures. This method involves freezing plastic bottles filled with water and then submerging them directly into your reservoir. It’s a simple, virtually free solution that can provide immediate, albeit temporary, cooling. A single 2-liter frozen bottle can effectively lower the temperature of a 5-gallon reservoir for a few hours, depending on the ambient temperature and reservoir insulation. The concept of using frozen elements for cooling has historical roots, with early designs like “frozen” bottle stoppers appearing as far back as 1932 [1], demonstrating the long-standing appeal of this straightforward approach.
The primary advantages of this hack are its low cost and ease of implementation. You don’t need to purchase specialized equipment, and most households already have suitable plastic bottles. However, the frozen bottle hack comes with significant drawbacks. It’s highly labor-intensive, requiring you to constantly monitor temperatures and swap out melted bottles for fresh frozen ones, often every 4 to 6 hours in a warm environment like a garage in USDA zone 8. This inconsistency can lead to temperature fluctuations, which can stress plants almost as much as consistently high temperatures. Furthermore, there’s always a risk of bottles leaking, diluting your nutrient solution and throwing off your carefully balanced nutrient ratios. For a 10-gallon system, you might need 3-4 bottles in rotation, meaning a freezer full of bottles and a commitment to frequent changes.
Maximizing effectiveness with frozen bottles
To get the most out of your frozen bottle system, consider using larger bottles, such as 1-gallon milk jugs, for bigger reservoirs, as they have more thermal mass and will last longer. Insulating your reservoir with materials like foam board or reflective insulation can also significantly extend the cooling period of each bottle, potentially reducing the frequency of swaps. Placing bottles in a mesh bag can prevent them from floating away or bumping into delicate roots. While this method is a good stop-gap for a 20-gallon system or smaller, it quickly becomes impractical for larger setups, such as a 50-gallon system, which would require an unmanageable number of bottles and constant attention. Even for a small system, the commitment to regular bottle changes can be a significant chore during peak summer heat.
- Low initial cost: Uses readily available materials.
- Immediate cooling: Provides quick temperature reduction.
- No electricity needed: Operates without power consumption.
- Flexible for small systems: Suitable for reservoirs up to 10-15 gallons.
- Reduces heat spikes: Can mitigate sudden temperature increases.
Dedicated hydroponic chillers: precision and automation
For growers seeking consistent, precise temperature control with minimal daily effort, a dedicated hydroponic chiller is the superior option. These units operate much like a small refrigerator, using a refrigeration cycle to actively cool the nutrient solution to a set temperature. A quality chiller can maintain your reservoir at a steady 68°F, even when ambient temperatures in your grow room reach 90°F or higher. This level of stability matters for plant health and yield, especially for sensitive crops or in commercial operations. Absorption chillers, a type of refrigeration technology, have seen applications in various cooling systems since at least 2016 [3], which shows how established this technology is.
Chillers come in various sizes, rated by horsepower (HP) or BTU, to match different reservoir volumes. A 1/10 HP chiller, for example, is typically sufficient for a 20-gallon to 40-gallon reservoir, while a 1/4 HP unit can handle up to 100 gallons. The upfront cost is the most significant barrier, with small units having a significant upfront cost, and larger ones costing more. They also consume electricity; a 1/10 HP chiller will draw additional electricity when running, adding to your operational expenses. However, the benefits of automated temperature stability, reduced labor, and significantly lower risk of root diseases often outweigh these costs for serious growers. This investment ensures your plants are always in their ideal environment, leading to more predictable and higher-quality harvests.
Selecting the right chiller for your system
When choosing a chiller, consider your reservoir size, the maximum ambient temperature of your grow space, and your budget. It’s generally better to slightly oversize your chiller than to undersize it, as an undersized unit will run constantly, consuming more energy and potentially shortening its lifespan. Look for models with digital temperature controllers for precise settings and a durable construction. Some chillers also offer heating capabilities, providing a complete temperature management solution for year-round growing. For instance, a 50-gallon system in a grow tent like the Beylsion Grow Tent in USDA zone 7 might require a 1/4 HP chiller to maintain a consistent 68°F solution temperature, especially during summer peaks. While the initial outlay is higher, the long-term benefits of consistent growth and reduced plant loss often justify the investment.
- Precise temperature control: Maintains exact desired temperature.
- Automated operation: Requires minimal daily intervention.
- Scalable for larger systems: Available for reservoirs from 10 to 500+ gallons.
- Reduced disease risk: Consistent cool temperatures inhibit pathogens.
- Improved plant health: Supports optimal root function and nutrient uptake.
Beyond cooling: insulation and system design
Active cooling methods like chillers or frozen bottles matter, but preventing heat gain in the first place can significantly reduce the demand on your cooling system. This preventative approach is often the most cost-effective long-term strategy, especially for growers in warm climates like USDA zone 9. Insulating your reservoir is a simple yet highly effective step. Wrapping your reservoir with reflective insulation, such as Mylar or foam board with an R-value of 5 or higher, can reduce heat transfer from the ambient air. This means your chiller runs less often, or your frozen bottles last longer, saving both energy and labor. Even painting the exterior of your reservoir a light color can reflect sunlight and reduce heat absorption by several degrees Fahrenheit.
System design also plays a significant role. Placing your reservoir in a cooler part of your grow space, away from direct sunlight or heat-emitting equipment like grow lights, can make a noticeable difference. Ensuring good air circulation around the reservoir helps dissipate any accumulated heat. For indoor growers, using a reflective indoor grow tent can also contribute to a cooler environment, as these tents are designed to reflect light and heat back towards the plants, rather than allowing it to escape or warm the reservoir. For example, a 20-gallon reservoir in a well-insulated tent might only need a 1/10 HP chiller, whereas the same reservoir in an uninsulated space could require a 1/4 HP unit to maintain 68°F.
Hybrid approaches and long-term strategies
Many growers find success with a hybrid approach, combining elements of both passive and active cooling. For instance, a small 10-gallon system might use frozen bottles during the hottest 4-6 hours of the day, supplemented by a small, inexpensive chiller that kicks in only when temperatures exceed 72°F. This strategy balances initial cost with energy efficiency. For larger systems, investing in a properly sized chiller is usually the most reliable long-term solution, but it should always be paired with excellent insulation. The USDA Natural Resources Conservation Service (2024) emphasizes the importance of resource efficiency in agriculture [6], a principle that applies directly to minimizing energy use in hydroponic cooling. By thinking holistically about your system’s heat management, you can create a stable environment for your plants while managing your budget effectively, whether you’re growing gourmet mushrooms or leafy greens.
- Insulate reservoirs: Reduces heat transfer by 20-30%.
- Use reflective materials: Mylar or light-colored paint reflects heat.
- Optimize reservoir placement: Keep away from heat sources.
- Ensure air circulation: Helps dissipate heat around the tank.
- Consider a hybrid system: Combine methods for efficiency and budget.
Hydroponic Nutrient Solution Cooling Methods Comparison
Feature | Frozen Bottle Hack | Dedicated Hydroponic Chiller |
|---|---|---|
Initial Cost | Near $0 (uses existing bottles) | $300 – $800+ (for 1/10 to 1/4 HP unit) |
Operational Cost | Freezer electricity (minimal), labor | 150-300 watts (running), minimal labor |
Temperature Control | Inconsistent, fluctuates 5-10°F | Precise, maintains within 1-2°F |
Labor Required | High (swapping bottles every 4-6 hours) | Low (set-and-forget) |
System Size Suitability | Small (up to 15-20 gallons) | Small to large (20 to 500+ gallons) |
Risk of Leaks/Dilution | Moderate (bottles can leak) | Low (closed system) |
Lifespan | Indefinite (bottles) | 5-10 years (with proper maintenance) |
Optimal Range: Maintaining nutrient solution temperatures between 65°F and 72°F helps prevent root rot and keeps dissolved oxygen levels up.
Chiller Cost: A small hydroponic chiller represents a significant investment and can effectively cool a small to medium-sized reservoir.
Bottle Frequency: In warm conditions, frozen bottles in a small reservoir may need frequent replacement to maintain adequate cooling.
Frequently asked questions
What is the ideal temperature range for hydroponic nutrient solution?
The optimal temperature range for most hydroponic nutrient solutions is between 65°F and 72°F. Maintaining temperatures within this range ensures better dissolved oxygen for roots and minimizes the risk of pathogen growth, leading to healthier plants and better yields.
How often do I need to change frozen bottles in my reservoir?
The frequency of changing frozen bottles depends on your reservoir size, ambient temperature, and insulation. In warm conditions (e.g., 85°F ambient), a 2-liter bottle in a 5-gallon reservoir might need replacement every 4 to 6 hours to keep the solution below 75°F. Larger reservoirs or cooler environments will extend this duration.
Are hydroponic chillers expensive to run?
The operational cost of a hydroponic chiller varies by size and efficiency. A small 1/10 HP chiller, suitable for a 20-gallon to 40-gallon reservoir, typically consumes around 150 watts when actively cooling. This adds to your electricity bill, but the precise temperature control often leads to healthier plants and higher yields, offsetting the cost.
Can I use a regular aquarium chiller for hydroponics?
Yes, many aquarium chillers can be adapted for hydroponic use, especially for smaller systems up to 20 gallons. Ensure the chiller is rated for the volume of your reservoir and can maintain the desired temperature range of 65°F to 72°F. Always check the materials are safe for contact with nutrient solutions.
What are the risks of high nutrient solution temperatures?
High nutrient solution temperatures, typically above 75°F, significantly reduce dissolved oxygen levels, which can suffocate roots. This also creates an ideal environment for harmful pathogens like pythium, leading to root rot, stunted growth, and potential crop failure. Nutrient uptake can also decrease.
How can I reduce heat gain in my hydroponic reservoir without a chiller?
You can reduce heat gain by insulating your reservoir with foam board or reflective materials, which can lower heat transfer. Placing the reservoir in the coolest part of your grow space, away from direct light or heat sources, and ensuring good air circulation around it can also help maintain temperatures by several degrees Fahrenheit.
- An extractor for “frozen” bottle stoppers (1932). An extractor for “frozen” bottle stoppers.
- Leaks, Hacks, and Scandals (2018). Leaks, Hacks, and Scandals.
- Applications of Absorption Chillers and Heat Pumps (2016). Applications of Absorption Chillers and Heat Pumps.
- HTTP Hacks (2014). HTTP Hacks.
- Culture Hacks as Instruments for Personnel and Organizational Development (2023). Culture Hacks as Instruments for Personnel and Organizational Development.
- USDA Natural Resources Conservation Service (2024). USDA Natural Resources Conservation Service.