Key takeaways
- Humidity is a major challenge for solar dehydrators in regions like USDA Zone 8, often extending drying times significantly.
- Adding active airflow with a small 12-volt DC fan significantly improves drying efficiency, potentially reducing drying times.
- Proper dehydrator design includes a large solar collector, good insulation, and adjustable vents for optimal performance.
- Hybrid systems combining solar with a small electric fan offer reliable operation even on cloudy days, maintaining internal temperatures above 100°F.
- Monitoring temperature and relative humidity inside the dehydrator is crucial for preventing spoilage and ensuring food safety, aiming for 100°F to 140°F.
- Selecting moisture-resistant materials like marine-grade plywood and stainless steel hardware extends the dehydrator’s lifespan in humid environments.
Quick answer: To reliably solar dehydrate in humid climates, incorporate active airflow with a small 12-volt DC fan and consider a hybrid system with a backup fan to maintain consistent drying temperatures and prevent spoilage.
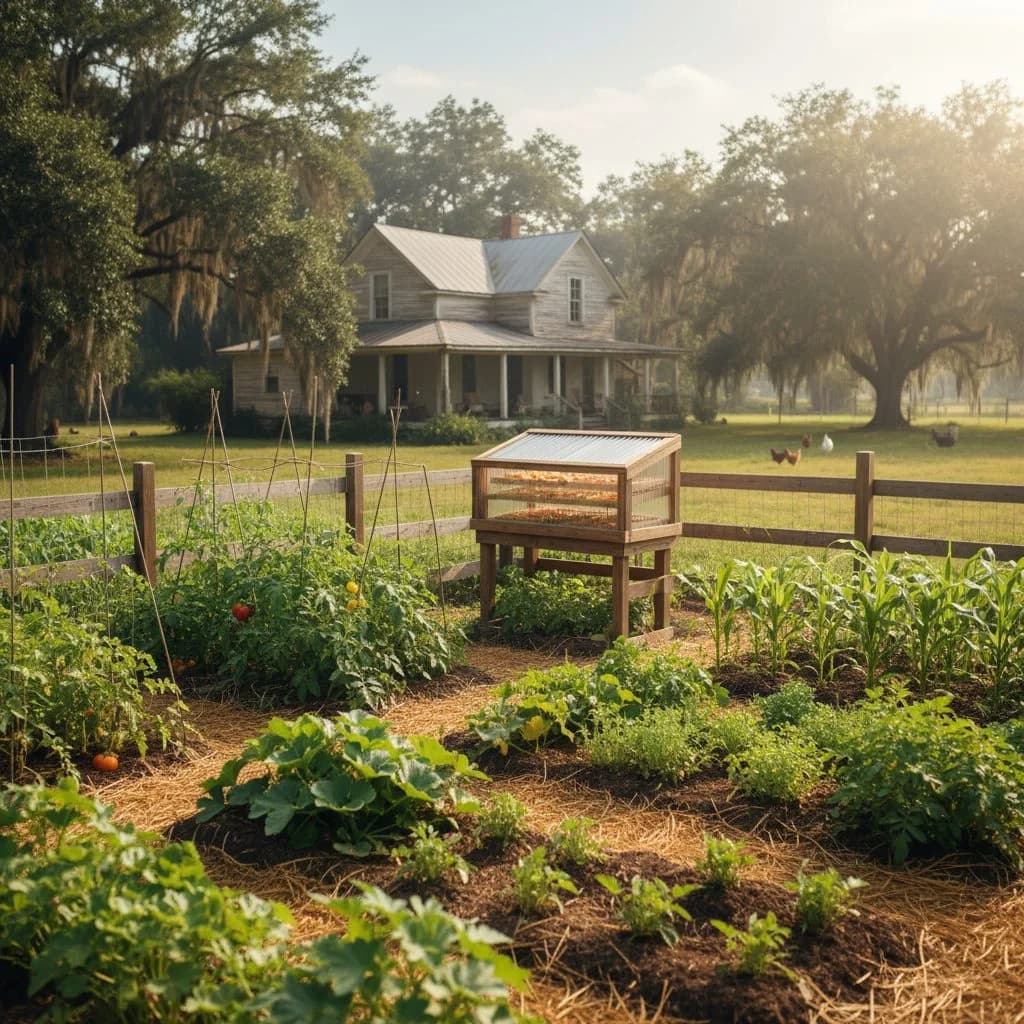
On our homestead in central Georgia, USDA zone 8a, we’ve learned that solar dehydrating isn’t as straightforward as it might seem in drier climates. With average summer humidity often hovering above 85% and dew points regularly exceeding 70°F, simply building a box and letting the sun do the work often leads to mold, not preservation. Our initial attempts to dry tomatoes and peaches sometimes took several days, far longer than often cited in drier regions, and some batches were lost entirely to spoilage.
However, with some thoughtful design modifications, including enhanced airflow and a small backup fan, we’ve achieved consistent success. This approach transforms a passive solar dehydrator into a reliable tool, even when the air feels thick enough to cut with a knife. We’ve found that incorporating a modest solar panel to power a small fan can make all the difference, ensuring our harvests of okra, peppers, and herbs dry efficiently and safely, regardless of the ambient moisture in the air.
The unique challenge of humidity in the Southeast
The US Southeast presents a distinct set of environmental hurdles for solar dehydration, primarily due to its persistent high humidity and warm temperatures. In states like Florida, Louisiana, and coastal South Carolina, relative humidity frequently exceeds 80% for extended periods during the growing season, which runs from April through October for many crops. This high moisture content in the air directly impedes the evaporative process essential for drying produce, as the air inside the dehydrator struggles to absorb additional water from the food. Research indicates that hot and humid climates, even in Southeast Asia, pose significant challenges for natural ventilation strategies due to high moisture content in the air [1].
Understanding dew points and drying rates
Beyond relative humidity, dew point levels determine drying speed. A dew point above 65°F, common across much of USDA zone 8 and 9, means there’s a substantial amount of moisture in the air, making it difficult for water to evaporate from your food. For instance, in August, cities like New Orleans, Louisiana, often experience average dew points above 72°F. This high moisture load can extend drying times significantly compared to arid regions, increasing the risk of bacterial growth and spoilage. We’ve observed that without proper airflow, produce like thinly sliced zucchini can take 48 hours to dry completely, where in a drier climate, it might finish in 18 hours.
- High ambient relative humidity, frequently over 80% during summer months.
- Elevated dew points, often above 70°F, indicating high moisture content in the air.
- Reduced evaporative potential, slowing down the drying process significantly.
- Increased risk of mold and bacterial growth on produce due to prolonged drying times.
- Challenges in maintaining a sufficient moisture gradient between food and air.
Fundamental principles of solar dehydration
Effective solar dehydration relies on three core principles: heat, airflow, and moisture removal. The sun provides the heat, raising the temperature inside the dehydrator to between 100°F and 140°F, which is ideal for evaporating water from food without cooking it. This temperature range deactivates enzymes and prevents spoilage, as temperatures below 90°F can encourage mold growth. A well-designed solar collector, often a simple insulated box with a transparent cover, captures solar radiation and converts it into thermal energy, increasing the air temperature by 30°F to 50°F above ambient.
The role of airflow in moisture removal
Airflow is the mechanism that carries away the moisture released from the food. As warm, dry air enters the dehydrator, it absorbs water vapor from the produce. This now-humid air must then be vented out, allowing fresh, drier air to enter and continue the process. Without adequate airflow, the air inside the dehydrator quickly becomes saturated with moisture, reaching 90% relative humidity or higher, which halts further drying. This is particularly problematic in humid climates where the incoming air already carries a substantial moisture load. Our experience shows that sufficient airflow per square foot of drying tray area is necessary for efficient moisture removal in humid conditions.
- Solar heat raises internal temperatures to 100°F to 140°F for efficient evaporation.
- Airflow carries away moisture-laden air, preventing saturation.
- A continuous supply of drier air is essential to maintain the drying gradient.
- Insufficient airflow leads to high internal humidity, stalling the drying process.
- Optimal airflow helps prevent mold and bacterial growth by reducing drying time.
Passive airflow design: harnessing natural forces
Passive solar dehydrators rely on natural convection, often called the ‘chimney effect,’ to create airflow. Warm air naturally rises, drawing cooler, denser air in from lower vents and expelling humid air through upper vents. For this to work effectively, the dehydrator needs a significant temperature differential between the intake and exhaust, and generously sized vents. We’ve found that intake vents should be positioned near the bottom of the solar collector, while exhaust vents should be at the very top of the drying chamber, ideally with sufficient vertical separation to maximize the chimney effect.
Optimizing vent size and location
Intake and exhaust vents require adequate total surface area. A good rule of thumb is to have a sufficient combined vent area relative to the drying tray surface. Adjustable vents are highly beneficial, allowing you to fine-tune airflow based on ambient conditions. On a hot, sunny day with low humidity (rare in the Southeast, but it happens), you might open them fully. On a humid, partly cloudy day, you might restrict them slightly to maintain internal heat, but never close them completely. Even with optimal passive design, in regions like coastal Alabama (USDA zone 9a), the natural chimney effect alone often isn’t enough to overcome persistent 90% humidity, leading to extended drying times of 3 days or more for peaches.
- Position intake vents at the bottom of the solar collector for cooler air entry.
- Locate exhaust vents at the top of the drying chamber for humid air exit.
- Ensure a vertical separation of at least 24 inches between intake and exhaust.
- Aim for a combined vent area of 1 square foot per 10 square feet of tray space.
- Install adjustable vents to control airflow based on weather conditions.
Active airflow: integrating a backup fan
When passive airflow is insufficient in high-humidity environments like the Southeast, adding an active airflow system with a backup fan helps keep air moving. A small, low-power DC fan can dramatically increase the rate of air exchange, pushing out humid air and drawing in drier air. We typically use a 12-volt DC fan, similar to those found in computer cooling systems, with a diameter of 4 to 6 inches. These fans are designed for continuous operation and consume very little power, often between 2 and 10 watts. This active air movement reduces drying times compared to purely passive designs, helping prevent spoilage when drying delicate fruits like berries or thinly sliced mangos.
Sizing and placement of the fan
For a typical homestead-sized dehydrator, a fan capable of moving a sufficient volume of air is usually adequate. The fan should be placed at the exhaust vent, pulling air through the dehydrator rather than pushing it in. This creates a slight negative pressure, ensuring that all incoming air passes over the solar collector and through the food. Placing the fan at the exhaust also helps prevent moisture from condensing on the fan motor itself. On our farm, we found a fan powered by a small solar panel for a shed is enough to keep humidity levels inside our dehydrator low even when ambient humidity is high. This hybrid approach is supported by research into solar hybrid air-conditioning systems for humid climates, which showed benefits from combining solar energy with active components [2].
- A 12-volt DC fan, 4 to 6 inches in diameter, is ideal for active airflow.
- Aim for a fan moving 50 to 100 CFM for 15-20 square feet of trays.
- Position the fan at the exhaust vent to pull air through the dehydrator.
- Active airflow can reduce drying times by 30% to 50% in humid conditions.
- Ensure the fan is rated for continuous operation and low power consumption.
Powering the fan: small-scale solar solutions
To truly achieve off-grid reliability for your dehydrator fan, a dedicated small-scale solar power system is the most practical solution. This typically involves a small solar panel, a charge controller, and a 12-volt deep-cycle battery. For a 5-watt fan running 12 hours a day, you’ll need approximately 60 watt-hours of energy daily. A suitably sized solar panel, positioned to receive several peak sun hours per day (common in the Southeast), can generate sufficient watt-hours, providing a comfortable surplus. This surplus charges the battery and maintains operation during cloudy periods common in humid climates [3].
Sizing your solar array and battery
When selecting your components, consider the fan’s wattage and how many hours you expect it to run. A 10-watt fan operating for 16 hours requires 160 watt-hours per day. To calculate battery capacity, aim for a few days of autonomy to cover cloudy periods. A battery with sufficient amp-hour capacity would be a good starting point. A small charge controller will efficiently manage the power flow from your panel to your battery, protecting it from overcharging or deep discharge, extending its lifespan.
- A 20-watt solar panel is often sufficient for powering a 5-10 watt fan.
- Calculate daily energy needs based on fan wattage and run time (e.g., 10W x 16h = 160 Wh).
- Size your battery for 2-3 days of autonomy (e.g., 320 Wh or 30 Ah for a 12V system).
- Use a small 10-amp charge controller to protect the battery.
- Ensure the solar panel is positioned for maximum sun exposure, typically facing south at a 30-45 degree angle.
Building your dehydrator: materials and construction
Sturdy dehydrator construction is necessary in the humid conditions of the Southeast. Materials must withstand high moisture, temperature fluctuations, and UV exposure. For the main structure, marine-grade plywood or treated lumber offers good durability, though we prefer untreated cedar or cypress for the drying chamber itself to avoid chemical leaching into food. The solar collector should be insulated with rigid foam insulation to prevent heat loss, helping to maintain internal temperatures above ambient. The glazing for the collector should be clear polycarbonate or tempered glass, as these materials offer excellent light transmission and UV resistance, and are long-lasting.
Designing for durability and efficiency
For drying trays, food-grade stainless steel mesh or fiberglass window screen stretched over wooden frames are excellent choices. Avoid galvanized steel or aluminum screens, as they can react with acidic foods. The overall footprint of our most successful dehydrator is about 3 feet wide by 2 feet deep, with a solar collector measuring 3 feet by 3 feet, angled at 45 degrees. This angle helps capture maximum sunlight during the summer months in USDA zone 8. All joints should be sealed with silicone caulk to prevent moisture intrusion, and stainless steel hardware should be used throughout to resist corrosion. This attention to detail ensures the dehydrator remains effective and safe for many years, even with daily use during the harvest season, which can last 6 months or more in the Deep South.
- Use marine-grade plywood or treated lumber for the exterior structure.
- Insulate the solar collector with at least R-5 rigid foam insulation.
- Glaze the collector with clear polycarbonate or tempered glass for durability.
- Construct drying trays from food-grade stainless steel mesh or fiberglass screen.
- Seal all joints with silicone caulk and use stainless steel hardware.
Operation and monitoring for consistent results
Once your solar dehydrator is built and equipped with active airflow, regular monitoring maintains consistent, safe results. Load your produce in a single layer on the drying trays, ensuring adequate space for air circulation around each piece. Overloading can impede airflow and extend drying times, increasing the risk of spoilage. For most fruits and vegetables, an internal dehydrator temperature of 100°F to 140°F is ideal. Temperatures below 90°F are too low and can encourage mold, while temperatures above 160°F can cook the food, degrading nutrients and flavor. We use a simple digital thermometer with an external probe to monitor the temperature inside the drying chamber, checking it every 2 to 3 hours during peak drying times.
Testing for dryness and storage
Monitoring internal humidity is also beneficial, especially in the Southeast. A small hygrometer can help you ensure the relative humidity inside the dehydrator stays at an optimal level. If it consistently rises above this, you may need to increase fan speed or adjust vent openings. The most important step is knowing when your food is truly dry. For most fruits, they should be leathery and pliable, with no sticky spots. Vegetables should be brittle and snap when bent. For example, dried apples should feel like soft leather, not rubbery, and have a low moisture content. Store dried foods in airtight containers in a cool, dark place, where they can last for many months. Proper drying eliminates the need for refrigeration, reducing household energy consumption.
- Load produce in a single layer, allowing for ample air circulation.
- Maintain internal dehydrator temperatures between 100°F and 140°F.
- Monitor internal humidity, aiming for levels below 60% relative humidity.
- Test food for dryness: fruits should be leathery, vegetables brittle.
- Store dried produce in airtight containers in a cool, dark place for optimal shelf life.
Maintenance and troubleshooting in humid environments
Even with a well-designed and actively ventilated solar dehydrator, regular maintenance and troubleshooting are essential, especially when operating in the challenging humid conditions of the Southeast. Inspect your dehydrator monthly during the drying season for any signs of mold growth on the interior surfaces, particularly in corners or shaded areas. If mold is present, clean affected areas with a solution of 1 part bleach to 10 parts water, ensuring thorough rinsing and drying before reuse. We’ve found that even a small patch of mold can quickly spread, compromising an entire batch of food.
Common issues and their solutions
One common issue is inconsistent drying, where some pieces of food dry faster than others. This often indicates uneven airflow or temperature distribution. Try rotating your drying trays every 4 to 6 hours to ensure even exposure. If drying times are still excessively long (e.g., more than 36 hours for thin slices of fruit), check your fan’s operation and ensure vents are clear of obstructions. A weak fan or blocked vents can reduce airflow by 50% or more. Another problem can be condensation on the glazing, which reduces solar gain. This usually points to high internal humidity that the fan isn’t adequately removing; consider increasing fan speed or adding more exhaust capacity. In regions like USDA zone 7b, where average annual rainfall can exceed 50 inches, elevating the dehydrator 6 to 12 inches off the ground prevents moisture from wicking out of the soil into the structure.
- Inspect the dehydrator monthly for mold and clean with a bleach solution if found.
- Rotate drying trays every 4 to 6 hours to ensure even drying.
- Verify fan operation and clear all vents of obstructions if drying times are long.
- Address condensation on glazing by increasing fan speed or exhaust capacity.
- Elevate the dehydrator 6 to 12 inches off the ground in high-rainfall areas.
High Dew Points: In humid regions like Florida, dew points can remain above 70°F for much of the summer, significantly hindering natural moisture evaporation.
Fan Efficiency Boost: Adding a small 12-volt DC fan can increase drying speed by 30% to 50% compared to passive designs, especially when ambient humidity exceeds 80%.
References
- Window-Opening Behaviour in Hot and Humid Climates of Southeast Asia (2018). Window-Opening Behaviour in Hot and Humid Climates of Southeast Asia.
- Solar hybrid air-conditioning design for buildings in hot and humid climates (2013). Solar hybrid air-conditioning design for buildings in hot and humid climates.
- Strategies to Improve Solar Fraction in an Adsorption Cooling System Based on Metal Organic Frameworks in Humid and Dry Climates: A Case Study for Southeast and (2016). Strategies to Improve Solar Fraction in an Adsorption Cooling System Based on Metal Organic Frameworks in Humid and Dry Climates: A Case Study for Southeast and.
- Humid Climates (2023). Humid Climates.
- Humid climates (2023). Humid climates.
- USDA Natural Resources Conservation Service (2024). USDA Natural Resources Conservation Service.