Key takeaways
- Ensure produce is dried to the correct moisture content, typically 15-20% for most fruits and 8-10% for vegetables, to prevent spoilage.
- Conditioning dried produce for one to two weeks stabilizes moisture levels, preventing mold and ensuring even drying.
- Use airtight containers like glass jars or vacuum-sealed bags, stored in a cool, dark place below 60°F, to extend shelf life.
- Pre-treat dried goods by freezing at 0°F for 48 to 72 hours to eliminate potential insect eggs and larvae.
- Regularly inspect stored produce for signs of moisture, mold, or insect activity, and re-dry or discard as needed.
- Consider the energy implications of drying and storage, integrating off-grid solar solutions for dehydrators and climate control.
Quick answer: Properly storing home-dried apples involves drying to 15-20% moisture, conditioning for 1-2 weeks, freezing at 0°F for 48-72 hours, and then packaging in airtight containers in a cool, dark place.
In the arid climates of USDA zones 7 and 8, like much of Arizona or parts of Southern California, drying produce has been a reliable method for food preservation for generations. Homesteaders often dry a significant portion of their harvest, from apples to zucchini, to ensure food security through the winter months. However, simply removing water isn’t enough for true long-term storage; proper conditioning and packaging are critical steps that often get overlooked, leading to spoilage or pest infestation.
A well-preserved harvest can last for years, providing nutrient-dense food when fresh options are scarce. For instance, a bushel of fresh apples, weighing around 42 pounds, might yield only about 6 pounds of dried fruit, a significant reduction. Maximizing the shelf life of this concentrated food requires attention to detail, from initial drying to the final storage conditions in your off-grid home or root cellar.
Understanding moisture content and its role in preservation
Achieving the correct moisture content is the foundational step for successful long-term storage of home-dried produce. If produce is too moist, it can quickly develop mold, rendering it unsafe for consumption within a few weeks. Conversely, if it’s too dry, it can become brittle, losing flavor and texture. For most fruits, such as apples or peaches, the ideal moisture content for storage is between 15% and 20%. Research from 2015 confirmed that measuring this content is important for optimal preservation of dried apple produce [1]. Vegetables, like carrots or green beans, typically require an even lower moisture content, often in the range of 8% to 10%.
Why proper drying matters for off-grid homesteads
On an off-grid homestead, every calorie and every preserved item represents a significant investment of time and energy, whether from solar dehydrators or passive solar drying racks. Losing a batch of dried tomatoes due to improper moisture levels isn’t just a minor inconvenience; it’s a loss of food security and wasted effort. Many homesteaders in regions like the Pacific Northwest, where humidity can be a challenge, find that using a controlled dehydrator powered by a solar panel array is more reliable than open-air drying. This control allows for consistent drying temperatures, often between 125°F and 140°F, ensuring the desired moisture percentage is met.
- Mold prevention: Excess moisture is the primary cause of mold growth.
- Bacterial inhibition: Low moisture levels stop bacterial reproduction.
- Enzyme deactivation: Drying slows down enzymatic reactions that cause spoilage.
- Pest deterrence: Insects prefer higher moisture environments for breeding.
The conditioning process: stabilizing your harvest
Once your produce feels dry to the touch, the next important step is conditioning. This process allows any residual moisture to equalize throughout the batch, preventing pockets of higher moisture that could lead to mold. For example, if you’ve dried 5 pounds of sliced peaches, some pieces might be slightly drier than others. Conditioning helps distribute this moisture evenly. To condition, place the cooled, dried produce loosely in clean, airtight containers, such as glass jars or food-grade plastic bins. Fill the containers about two-thirds full to allow for air circulation.
How to condition dried goods effectively
Store these containers in a cool, dry place, ideally at temperatures between 60°F and 70°F, for one to two weeks. Each day, shake the containers to redistribute the contents and check for any condensation inside the container. If you see condensation, it indicates the produce is still too moist and needs further drying. This step is particularly important for fruits like apricots or figs, which can have varying moisture levels even after thorough drying. Johnson’s Seed Annual of 1921 also covered proper handling for various garden vegetables suitable for drying, including beans and squash [5].
- Equalize moisture: Distributes residual moisture evenly across all pieces.
- Prevent mold: Eliminates high-moisture pockets that foster mold growth.
- Identify under-dried produce: Reveals if further drying is necessary before long-term storage.
- Improve texture: Can result in a more consistent and pliable product.
Pre-treatment and packaging for long-term storage
After conditioning, your dried produce is ready for its final storage. However, a critical pre-treatment step can prevent significant losses from insect infestation. Even the cleanest drying environments can harbor insect eggs. Freezing the dried produce at 0°F for a period of 48 to 72 hours will kill any potential insect eggs or larvae. This simple step, recommended since at least 1943 for preventing insect damage in home-dried fruits, can save an entire harvest from being destroyed within weeks [2]. After freezing, allow the produce to return to room temperature before packaging.
Choosing the right containers for your homestead
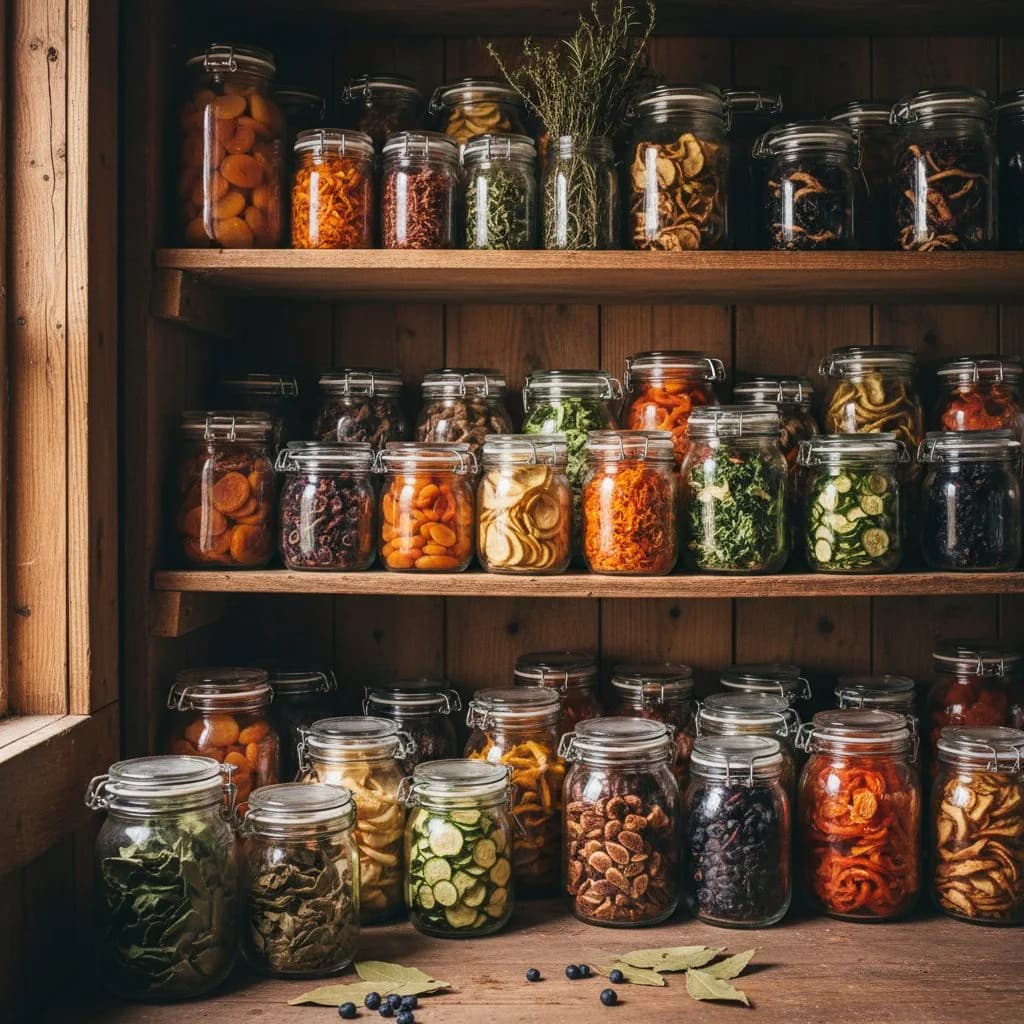
For packaging, airtight containers are paramount. Glass canning jars, like those commonly used since the early 20th century, are excellent choices, offering a clear view of the contents and a reliable seal. Johnson’s seeds that produce catalog from 1928 even referenced methods of storing various garden vegetables, implying the use of sturdy containers [3]. Mylar bags with oxygen absorbers are another highly effective option, especially for very long-term storage, as they create an oxygen-free environment that further inhibits spoilage and insect activity. Vacuum-sealed bags also work well, removing most of the air and reducing the volume of stored food significantly, which is a significant advantage in smaller off-grid living spaces.
- Glass jars: Durable, reusable, and provide a visual check on contents.
- Mylar bags: Excellent for long-term, oxygen-free storage with absorbers.
- Vacuum-sealed bags: Reduce volume and remove air, good for medium-term.
- Food-grade buckets: Suitable for larger quantities, often with Mylar bag liners.
Optimal storage environment and ongoing monitoring
The storage environment plays a critical role in maintaining the quality and extending the shelf life of your dried produce. A cool, dark, and dry location is ideal. Temperatures should ideally remain below 60°F, as higher temperatures can degrade nutrients and flavors over time. Light exposure can also cause nutrient loss and color changes, so opaque containers or storage in a dark pantry or cellar are best. Humidity is another enemy; a relative humidity below 15% is optimal to prevent moisture reabsorption and subsequent spoilage. For homesteads in humid regions like the Southeast, a dedicated, climate-controlled storage area, possibly powered by off-grid solar power, might be necessary.
Signs of spoilage and how to respond
Even with the best preparation, it’s important to regularly monitor your stored produce. Inspect jars or bags every few months for any signs of trouble. Look for condensation inside containers, which indicates moisture reabsorption and a risk of mold. Any visible mold, a musty smell, or changes in color or texture are clear indicators of spoilage, and the affected produce should be discarded. If you find insects, despite pre-treatment, the entire batch should be re-frozen or discarded. The USDA Natural Resources Conservation Service emphasizes sustainable practices, which include minimizing food waste through proper preservation [6].
- Cool temperatures: Below 60°F slows degradation and extends shelf life.
- Darkness: Prevents nutrient loss and color changes from light exposure.
- Low humidity: Essential to prevent reabsorption of moisture and mold growth.
- Pest-free: A clean, sealed environment deters rodents and insects.
Rehydrating and using your preserved harvest
When it’s time to use your home-dried produce, rehydration is usually the first step, though some items like dried fruit snacks can be eaten as-is. Most dried vegetables and fruits will need to soak in water for 30 minutes to several hours, or even overnight, depending on their density and how dry they are. For example, a cup of dried carrots might require 2 cups of water and an hour of soaking to return to a usable texture. The rehydration ratio is often 1:1 or 1:2 parts dried produce to water, but this can vary. Using warm water can speed up the process significantly compared to cold water.
Integrating dried foods into your off-grid kitchen
Dried foods are incredibly versatile in an off-grid kitchen. They take up significantly less space than fresh or canned goods, making them ideal for small pantries or for packing on trips. Consider making a hearty stew with rehydrated dried potatoes, carrots, and green beans, all from your own garden. Dried apples can be rehydrated for pies or sauces, or simply eaten as a snack. The ability to store a large volume of food in a compact form is a major advantage for homesteaders aiming for self-sufficiency. Industrial processes like spray drying for flavors, researched as early as 1955, show the long-standing value of concentrated food forms [4].
- Soups and stews: Rehydrated vegetables add depth and nutrients.
- Baked goods: Dried fruits can be used in breads, muffins, and pies.
- Trail mix: Dried fruits make excellent, lightweight snacks.
- Sauces and purees: Rehydrated tomatoes or peppers can form bases for sauces.
Storage Methods for Dried Produce: Pros and Cons
Method | Pros | Cons |
|---|---|---|
Glass Jars | Reusable, visible contents, good seal, lasts 1-2 years. | Breakable, susceptible to light, takes up space. |
Mylar Bags + O2 Absorbers | Longest shelf life (5+ years), light/oxygen barrier, durable. | Not reusable, contents not visible, requires heat sealer. |
Vacuum-Sealed Bags | Space-saving, good oxygen barrier, lasts 2-3 years. | Puncture risk, requires vacuum sealer, not always reusable. |
Food-Grade Buckets (with liners) | Bulk storage, durable, rodent-proof, lasts 3-5 years. | Large footprint, contents not visible, requires lifting. |
Moisture Control: Maintaining a moisture content between 15% and 20% for fruits is crucial for preventing mold and extending shelf life by several years.
Pest Elimination: Freezing dried produce at 0°F for 48 to 72 hours can eliminate potential insect eggs and larvae, protecting your harvest.
Optimal Temperature: Storing dried goods below 60°F can preserve flavor and nutrients for significantly longer than storage at room temperature.
References
- Moisture content measurement in dried apple produce through visible wavelength hyperspectral imaging (2015). Moisture content measurement in dried apple produce through visible wavelength hyperspectral imaging.
- Preventing insect damage in home-dried fruits (1943). Preventing insect damage in home-dried fruits.
- Johnson’s seeds that produce : 1928 [catalog] / (1928). [Johnson’s seeds that produce : 1928 \catalog] /.
- Spray Dried Flavors (1955). Spray Dried Flavors.
- Seeds that produce : 1921 Johnson’s seed annual / (1921). Seeds that produce : 1921 Johnson’s seed annual /.
- USDA Natural Resources Conservation Service (2024). USDA Natural Resources Conservation Service.