Key takeaways
- Biochar needs “charging” or inoculation to function optimally in soil, acting as a microbial habitat.
- Compost tea, vermicompost leachate, or nutrient-rich liquids are effective charging agents.
- A 2-week soaking period is often sufficient for biochar to absorb nutrients and microbes, especially at temperatures between 60°F and 75°F.
- Charged biochar can improve soil structure, increase water retention by 15-30%, and increase nutrient availability for plants.
- Applying 5-10% biochar by volume to your garden beds can significantly improve soil health and reduce fertilizer needs by 10-20%.
- Regular soil testing, perhaps every 2-3 years, helps monitor the long-term impact of biochar and adjust nutrient applications.
Quick answer: Biochar needs to be ‘charged’ or inoculated with nutrient-rich liquids like compost tea or vermicompost leachate to become an effective microbial habitat, improving soil structure, water retention, and nutrient availability for plants.
In the fertile agricultural valleys of California’s Central Valley, where growers manage hundreds of acres of specialty crops, the concept of soil health is paramount. For home gardeners across the United States, from the humid subtropics of Florida (USDA Zone 9) to the colder plains of Montana (USDA Zone 4), improving soil fertility is a constant pursuit. Biochar, a charcoal-like substance made from organic matter, offers a compelling solution, but it’s not a magic bullet straight out of the bag.
Many experienced growers understand that biochar needs a little help to reach its full potential in the garden. This process, often called ‘charging’ or ‘inoculation,’ involves saturating the biochar with nutrients and beneficial microbes before it ever touches your soil. When properly charged, biochar can become a powerhouse for plant growth, improving soil structure, water retention, and nutrient cycling for decades, potentially increasing crop yields by 10-20% in the first few seasons.
Why biochar needs a ‘charge’ before soil application
Biochar is essentially a highly porous carbon material, created by heating biomass in a low-oxygen environment, a process known as pyrolysis. This process leaves behind a material with an incredibly high surface area, often ranging from 200 to 400 square meters per gram, as noted in studies on biochar properties [2]. While this structure makes it excellent for holding water and nutrients, fresh biochar is largely inert and ’empty.’ If added directly to soil without charging, it can act like a sponge, initially absorbing available nutrients, particularly nitrogen, from the surrounding soil. This temporary nutrient tie-up can actually hinder plant growth in the first one to two growing seasons, leading to a temporary nitrogen deficit for young plants.
the empty sponge effect and microbial colonization
Imagine biochar as a brand-new, uninhabited apartment complex. It has plenty of rooms and spaces, but no residents or furniture. When you ‘charge’ biochar, you’re essentially filling those apartments with essential nutrients and a bustling community of beneficial microorganisms. These microbes, such as bacteria and fungi, break down organic matter and make nutrients available to plant roots. Without this initial colonization, the biochar might take months or even years to naturally acquire a robust microbial population from the soil, delaying its benefits. A well-charged biochar, however, can immediately begin supporting soil life and nutrient cycling, potentially reducing the need for synthetic fertilizers by 10-15% over time.
- High surface area: Provides extensive habitat for microbes.
- Porous structure: Retains water and dissolved nutrients efficiently.
- Cation exchange capacity: Holds onto positively charged nutrient ions.
- Nutrient buffering: Helps stabilize soil pH, often by 0.5 to 1.0 unit.
- Long-term stability: Persists in soil for hundreds of years, sequestering carbon.
Choosing your charging method and materials
Selecting the right material to charge your biochar is a critical step, influencing the nutrient profile and microbial diversity it will bring to your garden. The best charging agents are rich in both nutrients and beneficial microorganisms. For many home growers in regions like the Pacific Northwest (USDA Zone 8) or the Mid-Atlantic (USDA Zone 7), compost tea is a popular and effective choice. It’s made by steeping finished compost in water, creating a liquid teeming with beneficial bacteria and fungi. A typical compost tea can contain billions of microorganisms per milliliter and a balanced array of macro and micronutrients.
popular charging liquids and their benefits
Another excellent option is vermicompost leachate, the liquid that drains from a worm bin. This dark, nutrient-rich liquid is packed with microbes from worm castings and can significantly enhance soil biology. For those with access to livestock, a diluted manure slurry (e.g., from cattle or chickens) can also be highly effective. Always dilute manure slurries at a ratio of at least 1:10 with water to prevent burning plants and ensure proper microbial balance. Even a simple solution of **fermented soybean meal** mixed with water can serve as a nutrient-rich charging liquid, offering a slow-release nitrogen source, which is particularly beneficial for heavy feeders like corn or squash. You can find high-quality fermented soybean meal organic fertilizer at agripure.org/shop/fermented-soybean-meal-organic-fertilizer.
- Compost tea: Diverse microbial populations, balanced nutrients.
- Vermicompost leachate: Rich in humic acids and worm-derived microbes.
- Diluted manure slurry: High in nitrogen, phosphorus, and potassium.
- Liquid organic fertilizers: Targeted nutrient delivery, often NPK ratios like 5-1-1.
- Fish emulsion: Provides readily available nitrogen and trace minerals.
The charging process: a step-by-step guide
Once you’ve selected your biochar and charging liquid, the actual inoculation process is straightforward but requires patience. For a typical garden application, you might work with 5-gallon buckets of biochar. First, choose a non-reactive container, such as a plastic barrel or a large tote, that can comfortably hold your biochar and charging liquid. Ensure the container is clean to avoid introducing unwanted pathogens. For every 1 part of biochar, aim for 1 to 2 parts of liquid by volume. So, if you have 5 gallons of biochar, you’ll need 5 to 10 gallons of your chosen charging solution.
soaking, stirring, and monitoring for optimal results
Pour the biochar into the container, then add your charging liquid, ensuring the biochar is fully submerged. For compost tea or vermicompost leachate, maintain an aerobic environment by stirring daily or using an aquarium air pump with an air stone. This aeration prevents anaerobic conditions, which can lead to foul odors and less beneficial microbial communities. Let the biochar soak for a minimum of 7 days, with 14 days being ideal for thorough saturation and microbial colonization. During this period, the biochar’s internal pores will absorb the liquid and its dissolved nutrients, and microbes will begin to establish themselves within its structure. Maintain the liquid temperature between 60°F and 75°F for optimal microbial activity. You can monitor the moisture levels of your biochar and soil with a simple soil moisture meter.
- Choose a non-reactive container: Plastic barrels or large tubs work well.
- Maintain a 1:1 to 1:2 biochar-to-liquid ratio: Ensure full submersion.
- Aerate daily for compost tea: Prevents anaerobic conditions.
- Soak for 7 to 14 days: Allows for thorough absorption and colonization.
- Monitor temperature: Keep between 60°F and 75°F for microbial health.
Applying charged biochar to your garden beds
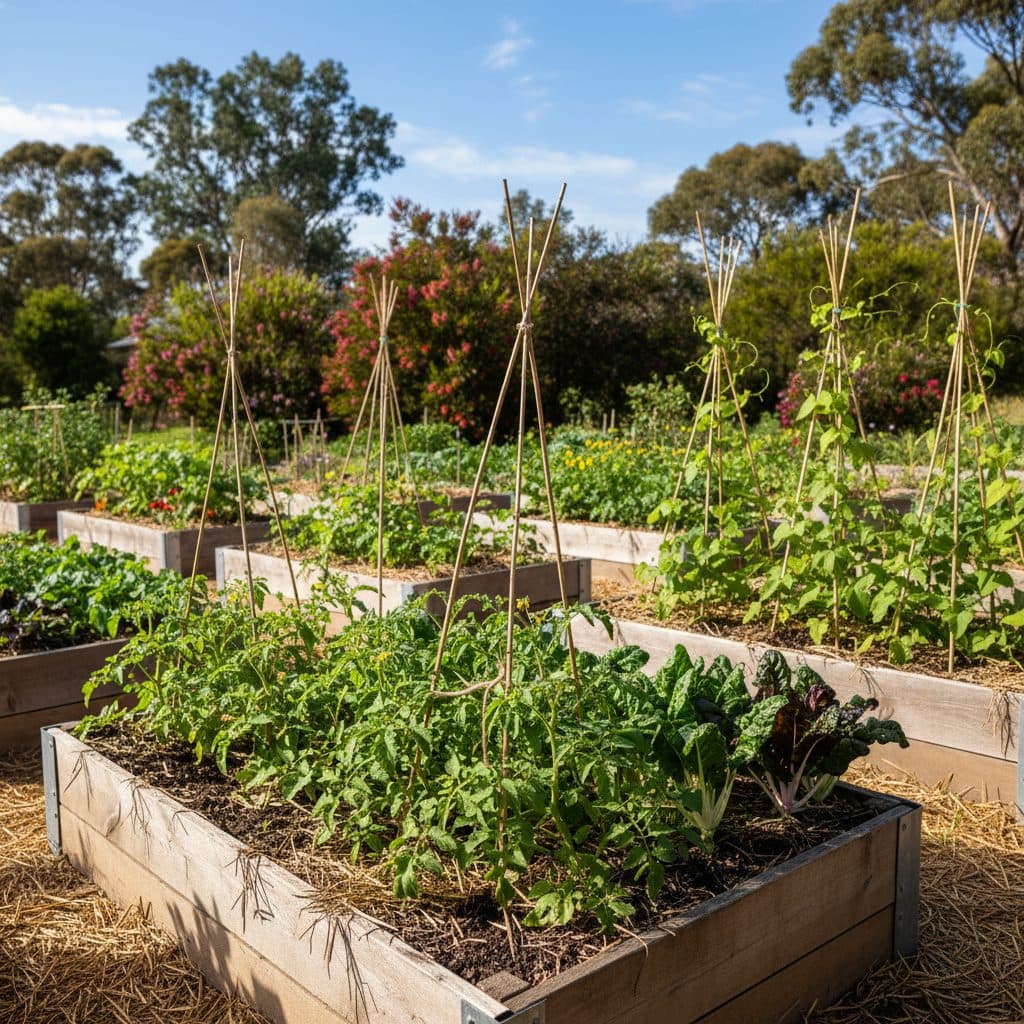
Once your biochar is fully charged, it’s ready to be incorporated into your garden soil. The goal is to distribute it evenly within the root zone of your plants. For new garden beds or before planting, a common recommendation is to incorporate biochar at a rate of 5-10% by volume in the top 6 inches of soil. For a 100 square foot garden bed, this typically translates to about 100-200 pounds of charged biochar, depending on its density. This initial application can provide lasting benefits for many growing seasons, potentially reducing the need for annual fertilizer applications by 10-20%.
incorporation methods and long-term benefits
You can spread the charged biochar over the soil surface and then lightly till it in using a garden fork or broadfork to a depth of 4 to 6 inches. For established beds, you can top-dress around existing plants, gently working it into the top inch or two of soil. Biochar’s stability means it won’t break down quickly; studies suggest it can persist in soil for hundreds, even thousands, of years, contributing significantly to carbon sequestration [4]. This long-term presence improves soil structure, enhances water retention (especially in sandy soils, by up to 30%), and provides a stable home for beneficial microbes. Regular soil testing, perhaps every 2-3 years, can help you monitor the effectiveness of your biochar application and adjust other soil amendments, like those for plants for clay soil, as needed.
- New beds: Incorporate 5-10% biochar by volume into the top 6 inches.
- Established beds: Top-dress and gently work into the top 1-2 inches.
- Mix thoroughly: Ensure even distribution for maximum benefit.
- Focus on root zones: Where plants will directly access its benefits.
- Combine with compost: Biochar works synergistically with other organic matter.
Water Retention Boost: Biochar’s porous structure can increase water retention in sandy soils by up to 30%, reducing irrigation needs by 15% in dry regions like Arizona (USDA Zone 9).
Nutrient Reduction: A 5% biochar amendment in garden beds can reduce the need for nitrogen fertilizer by 15% over five growing seasons, saving growers an average of 10-20 dollars per 100 square feet.
Frequently asked questions
How much biochar should I use in my garden?
For most garden beds, aim for 5-10% biochar by volume in the top 6 inches of soil. This translates to approximately 10-20 pounds of biochar per 100 square feet, providing significant long-term benefits.
How long does biochar last in soil?
Biochar is remarkably stable, with scientific estimates suggesting it can persist in soil for hundreds, even thousands, of years. This long-term presence makes it a one-time amendment with lasting effects.
Can I use uncharged biochar directly in my garden?
While you can, uncharged biochar might initially absorb nutrients from your soil, potentially causing a temporary nitrogen deficit for plants in the first one to two growing seasons. Charging it first ensures immediate benefits and avoids this nutrient tie-up.
What’s the best liquid for charging biochar?
Compost tea or vermicompost leachate are excellent choices, providing a diverse microbial community and essential nutrients. Diluted manure slurry (at least a 1:10 ratio) is also effective, offering a strong nutrient boost.
How often should I apply biochar to my garden?
Biochar is a long-term soil amendment; a single application at 5-10% soil volume can provide benefits for decades. Annual reapplication is generally not necessary, making it a sustainable choice for your soil.
What temperature is best for charging biochar?
For optimal microbial activity during the charging process, maintain the liquid temperature between 60°F and 75°F. Temperatures outside this range can slow down microbial colonization or even harm beneficial organisms.
References
- Reduction of carbon release for growing Chinese mustard and Chinese kale by adding biochar into soil (2013). Reduction of carbon release for growing Chinese mustard and Chinese kale by adding biochar into soil.
- Table 1: Physical and chemical properties of soil and biochar before the experimentation. (2023). Table 1: Physical and chemical properties of soil and biochar before the experimentation..
- Effect of Adding Banana Peel Biochar on the Growth of Vignaradiata in Heavy Metal Contaminated Soil (2023). Effect of Adding Banana Peel Biochar on the Growth of Vignaradiata in Heavy Metal Contaminated Soil.
- Assessing the potential of urban soil for carbon sequestration by adding wheat straw pellets or wheat straw biochar (2020). Assessing the potential of urban soil for carbon sequestration by adding wheat straw pellets or wheat straw biochar.
- Adenylate energy charge of a glucose-treated soil without adding a nitrogen source (2002). [Adenylate energy charge of a glucose-treated soil without adding a nitrogen source](https://doi.org/10.1016/s0038-0717(02)00075-5).
- USDA Natural Resources Conservation Service (2024). USDA Natural Resources Conservation Service.