Key takeaways
- Passive composting requires minimal turning and maintenance, relying on natural decomposition over 6 to 24 months.
- A carbon-to-nitrogen ratio of 25:1 to 30:1 is ideal for efficient microbial breakdown in a cold compost pile.
- Locate your pile in a shaded, well-drained area, preferably 3 ft by 3 ft by 3 ft for optimal conditions.
- Expect lower temperatures (below 100°F) compared to active composting, resulting in a slower decomposition process.
- Regular moisture checks, aiming for a damp sponge consistency, support microbial activity.
- While slower, passive composting effectively recycles organic waste into nutrient-rich humus, improving soil structure.
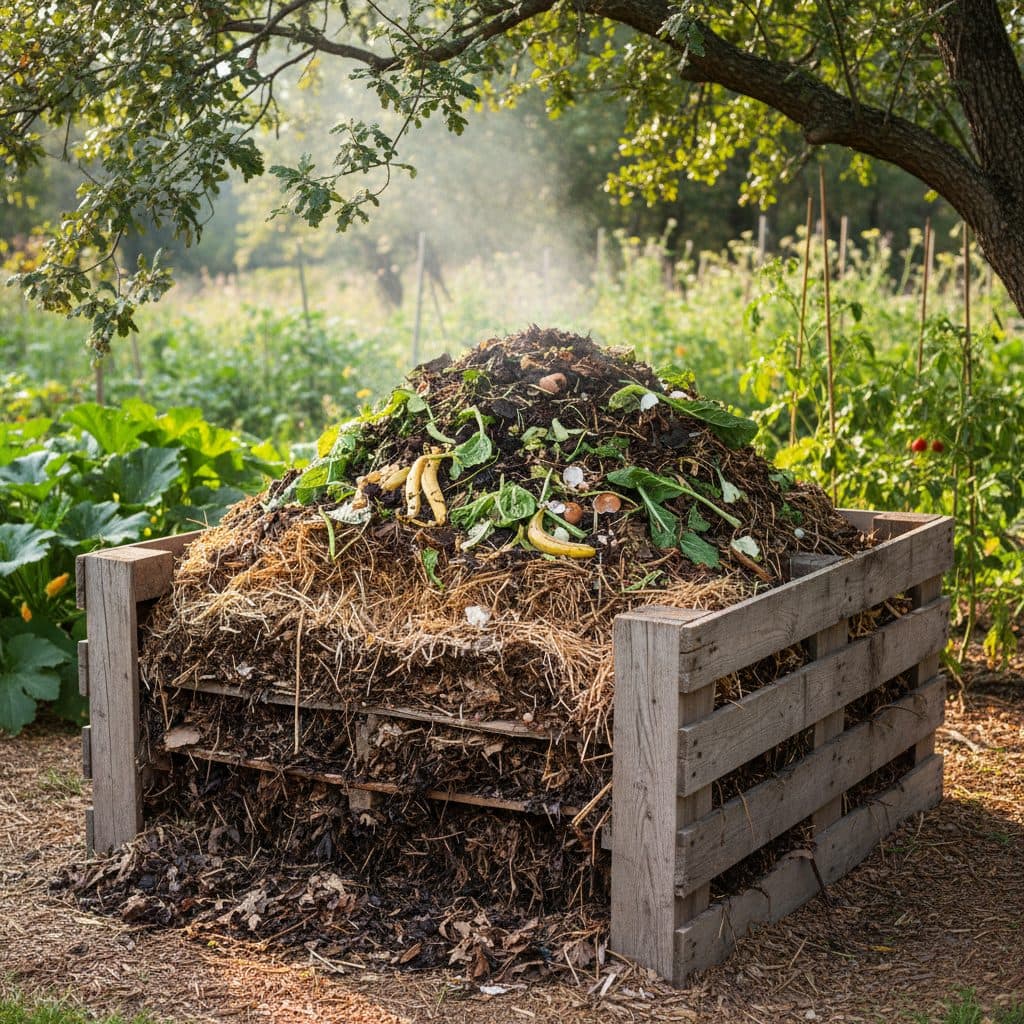
Quick answer: Cold composting, also known as passive composting, is a low-effort method where organic materials are piled and left to decompose naturally over 6 to 24 months with minimal human intervention. It relies on ambient temperatures and a balanced carbon-to-nitrogen ratio to create nutrient-rich humus.
For many gardeners across the United States, from the humid summers of USDA zone 7 to the colder winters of zone 4, the idea of creating rich, dark compost is appealing. However, the traditional image of active composting—with its frequent turning, precise moisture management, and hot temperatures—can feel like a significant chore. This often leads to organic waste ending up in landfills, contributing to an estimated 24% of municipal solid waste in 2018, according to the Environmental Protection Agency.
But there’s another way: cold, or passive, composting. This method prioritizes minimal effort, allowing nature to do the heavy lifting with little intervention from you. While it takes longer—often 6 to 24 months for finished compost—it’s a viable strategy for those who want to improve their soil without adding another demanding task to their gardening routine, offering a practical solution for gardeners with limited time or physical capacity, as noted in a 2023 study on perceived effort [1].
What is passive composting?
Passive composting, sometimes called cold composting, is a method where organic materials are simply piled up and left to decompose over time with minimal human intervention. Unlike active composting, which aims for rapid decomposition through high temperatures, frequent turning, and precise carbon-to-nitrogen ratios, passive systems operate at lower temperatures, typically below 100°F. This slower process relies on a diverse range of microorganisms, fungi, and invertebrates to break down materials, taking anywhere from six months to two years to produce finished compost, depending on the climate in your USDA zone, the size of your pile, and the materials used.
the core difference: temperature and effort
The primary distinction lies in the internal temperature of the pile and the amount of labor required. Active composting piles can reach temperatures between 130°F and 160°F, which helps kill weed seeds and pathogens quickly. Passive piles, however, rarely reach these high temperatures, meaning weed seeds and some pathogens might survive. This approach is particularly suited for gardeners in regions like the Pacific Northwest (USDA zone 8b), where consistent moisture aids decomposition, or in drier areas like parts of Arizona (USDA zone 9a), where maintaining moisture might require occasional watering. The ‘economy of effort’ is a core principle here, reducing the physical demands on the gardener [4].
- Minimal turning: No regular turning is required, saving significant physical effort.
- Lower temperatures: Decomposition occurs at ambient or slightly elevated temperatures.
- Longer timeline: Finished compost can take 6 to 24 months to develop.
- Less monitoring: No need for daily temperature or moisture checks.
- Diverse microbes: A wider range of microbial life contributes to the breakdown [2].
The science behind the slow decay
Even without the high heat of an active pile, decomposition in a passive system is a biological process driven by microorganisms. Bacteria, fungi, and other decomposers break down organic matter, releasing nutrients and creating humus. The key to this process is the balance of carbon-rich (brown) materials and nitrogen-rich (green) materials. An ideal carbon-to-nitrogen (C:N) ratio for composting is around 25:1 to 30:1. If your pile leans too heavily on carbon, decomposition will be very slow; too much nitrogen, and it might become smelly and anaerobic. For example, dry leaves have a C:N ratio of about 50:1, while fresh grass clippings are closer to 19:1.
managing the carbon-to-nitrogen ratio
While passive composting is low-effort, a basic understanding of the C:N ratio helps ensure success. You don’t need to measure precisely, but aiming for roughly two parts brown materials to one part green materials by volume is a good starting point. This balance provides the necessary energy (carbon) and protein (nitrogen) for the microbial populations to thrive. In a humid climate like Florida (USDA zone 9b), a slightly higher carbon ratio might be acceptable due to faster moisture retention, whereas in arid regions of California (USDA zone 10a), ensuring adequate green material and moisture will be more critical. Consider adding materials like fermented soybean meal to boost nitrogen if you find your pile too brown.
- Brown materials: Dried leaves, straw, wood chips, shredded paper, cardboard.
- Green materials: Grass clippings, food scraps (vegetable and fruit), coffee grounds, fresh plant trimmings.
- Avoid: Meat, dairy, oily foods, diseased plants, pet waste, as these can attract pests and introduce pathogens.
- Size matters: Smaller pieces break down faster; shredding materials can reduce decomposition time by 30%.
- Moisture: Essential for microbial activity; aim for the dampness of a wrung-out sponge.
Setting up your passive compost pile
The beauty of passive composting is its simplicity, but a good start can make a big difference. First, choose an appropriate location in your garden. A shaded spot is ideal, as direct sun can dry out the pile too quickly, especially in hot climates like central Texas (USDA zone 8a). Ensure the area is well-drained to prevent waterlogging, which can lead to anaerobic conditions and unpleasant odors. Aim for a pile size of at least 3 ft by 3 ft by 3 ft to allow for sufficient mass to retain moisture and generate some internal warmth, even if it’s not reaching active composting temperatures. This minimum size helps insulate the core of the pile.
layering for success, not perfection
While strict layering isn’t necessary, building your pile with alternating layers of brown and green materials can help achieve a better C:N balance from the outset. Start with a base of coarser brown material, like small branches or straw, about 6 in deep, to ensure good airflow. Then, add layers of green materials (e.g., kitchen scraps, grass clippings) and brown materials (e.g., leaves, shredded cardboard), each about 4 to 6 in thick. Wet each layer as you add it to achieve the damp sponge consistency. This initial layering helps kickstart the microbial activity. For gardeners in colder regions like Minnesota (USDA zone 4a), starting a pile in late spring allows for maximum decomposition before winter’s deep freeze.
- Location: Shaded, well-drained area, away from structures.
- Size: Minimum 3 ft x 3 ft x 3 ft for effective decomposition.
- Base layer: Coarse brown material for drainage and aeration, about 6 inches.
- Layering: Alternate 4-6 inch layers of greens and browns.
- Moisture: Water each layer until damp; a soil moisture meter can help monitor.
What to expect and common challenges
Once your passive compost pile is built, the primary expectation is patience. Decomposition will occur slowly, and you won’t see the rapid volume reduction or steam associated with active piles. Over time, the pile will shrink by 50% or more as materials break down. The finished product will be dark brown, crumbly, and have an earthy smell, resembling rich soil. This process can take anywhere from six months to two years, with warmer regions like southern California (USDA zone 10b) often seeing faster results than colder areas like northern Michigan (USDA zone 4b). The final compost is a soil amendment that improves soil structure and nutrient retention.
troubleshooting common issues
Even with a low-effort system, you might encounter a few common issues. If your pile smells foul, it’s likely too wet and anaerobic, or has too much nitrogen. Add more dry, brown materials and fluff it gently with a pitchfork to introduce air. If decomposition seems stalled, the pile might be too dry or lack sufficient nitrogen. Add water, or incorporate more green materials like fresh grass clippings. Pests like rodents can be an issue if you add meat or dairy; stick to vegetable scraps and cover them with a layer of brown material at least 6 in deep. Remember, the goal is progress, not perfection, and even a slow pile will eventually yield results. For more persistent issues, consider consulting resources from the USDA Natural Resources Conservation Service [6].
- Slow decomposition: Normal for passive piles; expect 6-24 months.
- Foul odor: Too wet or too much nitrogen; add browns, aerate slightly.
- No activity: Too dry or not enough nitrogen; add water or greens.
- Pests: Avoid meat/dairy; bury food scraps under 6 inches of brown material.
- Uneven breakdown: Some larger pieces may remain; simply screen them out or return them to the next pile.
Using your finished cold compost
Once your passive compost has fully matured, it’s ready to enrich your garden soil. Finished compost, often referred to as ‘black gold,’ is a stable, humus-rich material that significantly improves soil structure, water retention, and nutrient availability. You can spread it as a top dressing around plants, incorporate it into new garden beds, or mix it into potting mixes. For instance, adding a 1 to 2 inch layer of compost to vegetable beds in New England (USDA zone 5b) each spring can boost yields by 15% to 20% over several seasons. The slow release of nutrients from passive compost is particularly beneficial for long-term soil health.
applications and benefits
The benefits of using your own compost extend beyond just providing nutrients. It helps to suppress plant diseases, reduces the need for synthetic fertilizers, and can even help balance soil pH. For example, soils in the Midwest (USDA zone 5a) with a pH of 6.0 can be gently buffered towards a more neutral 6.5-7.0 range with consistent compost application. When planting new trees or shrubs, mixing one part compost with two parts native soil in the planting hole provides a gentle nutrient boost without overwhelming young roots. Regular application of compost also improves the soil’s ability to hold moisture, which is especially helpful during dry spells in places like the central plains (USDA zone 6a).
- Top dressing: Spread a 1-2 inch layer over garden beds and around plants.
- Soil amendment: Incorporate 2-4 inches into new or existing garden beds.
- Potting mix: Mix 10-20% compost into your homemade potting blends.
- New plantings: Use a 1:2 compost-to-soil ratio for planting holes.
- Mulch: Apply a 2-3 inch layer around trees and shrubs to retain moisture and suppress weeds.
Cold (Passive) vs. Hot (Active) Composting
Characteristic | Cold (Passive) Composting | Hot (Active) Composting |
|---|---|---|
Effort Level | Low — minimal turning, less monitoring | High — frequent turning, strict monitoring |
Decomposition Time | 6-24 months | 2-4 months |
Temperature | Ambient to below 100°F | 130-160°F |
Weed Seed/Pathogen Kill | Unlikely to kill most | Effectively kills most |
Ideal C:N Ratio | Flexible, 25:1 to 30:1 is good | Strictly 25:1 to 30:1 |
Odor Potential | Low, if balanced | Low, if managed well; high if anaerobic |
Compost Volume Reduction: A well-maintained passive compost pile will typically reduce its volume by 50% to 75% over 12 to 18 months as organic materials break down.
Microbial Diversity: Passive composting supports a broader range of microbial species, with populations reaching up to 10^9 cells per gram of compost [2].
Frequently asked questions
How long does cold composting typically take?
Cold composting usually takes a minimum of six months to produce usable compost, but it can extend up to 24 months, especially in colder climates like USDA zone 3 or if materials are very coarse.
Can I add food scraps to a passive compost pile?
Yes, you can add vegetable and fruit scraps to a passive compost pile. It’s best to bury them under at least 6 inches of brown material to deter pests and ensure proper decomposition, contributing to a healthy C:N ratio.
Do I need to turn a passive compost pile?
No, regular turning is not required for a passive compost pile, which is a key benefit for low-effort gardeners. Occasional aeration, perhaps once every 3-4 months, can speed up the process slightly, but it’s not essential.
Will passive composting kill weed seeds and pathogens?
Passive composting typically does not reach high enough temperatures (above 130°F) to reliably kill most weed seeds or plant pathogens. For this reason, avoid composting diseased plants or weeds that have gone to seed.
What is the ideal size for a passive compost pile?
An ideal size for a passive compost pile is at least 3 ft by 3 ft by 3 ft. This volume helps the pile retain enough moisture and warmth to support microbial activity, even if it doesn’t reach hot composting temperatures.
How do I know when my cold compost is ready?
Your cold compost is ready when it is dark brown, crumbly, and has an earthy smell, with most of the original materials no longer recognizable. This usually occurs after 6 to 24 months of decomposition.
References
- Investigating the effect of a passive trunk exoskeleton on local discomfort, perceived effort and spatial distribution of back muscles activity (2023). Investigating the effect of a passive trunk exoskeleton on local discomfort, perceived effort and spatial distribution of back muscles activity.
- Micro flora dynamics in passive composting of food waste (2020). Micro flora dynamics in passive composting of food waste.
- What Influences Home Gardeners’ Food Waste Composting Intention in High-Rise Buildings in Dhaka Megacity, Bangladesh? An Integrated Model of TPB and DMP (2022). What Influences Home Gardeners’ Food Waste Composting Intention in High-Rise Buildings in Dhaka Megacity, Bangladesh? An Integrated Model of TPB and DMP.
- ECONOMY OF EFFORT: A PASSIVE PRINCIPLE (1993). ECONOMY OF EFFORT: A PASSIVE PRINCIPLE.
- THE CHALLENGES THESE GARDENERS FACE (2023). THE CHALLENGES THESE GARDENERS FACE.
- USDA Natural Resources Conservation Service (2024). USDA Natural Resources Conservation Service.