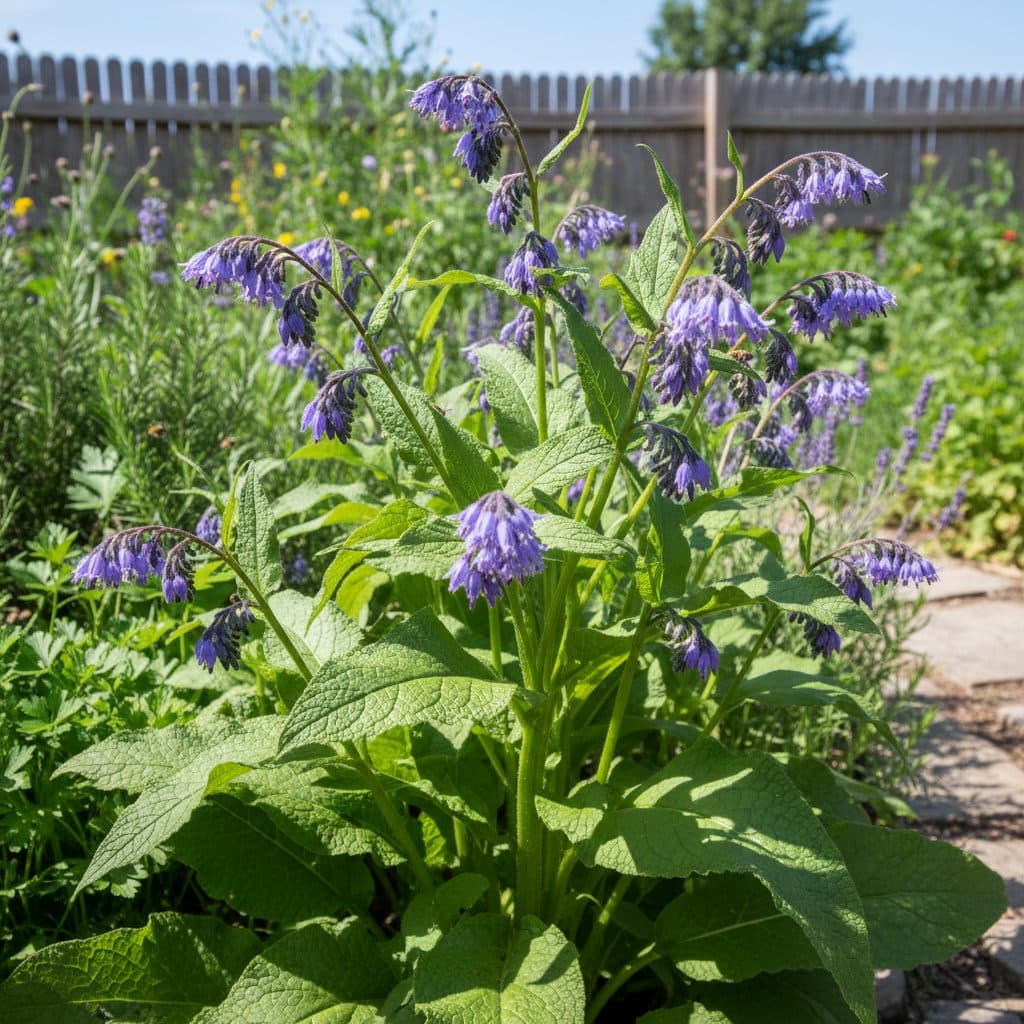
Key takeaways
- Comfrey thrives in USDA zones 3-9 and offers multiple benefits for the garden. Plant the sterile Bocking 14 cultivar of Russian comfrey (Symphytum x uplandicum) instead of seed-setting common comfrey (Symphytum officinale): Bocking 14 does not self-sow, so it spreads only where you dig or disturb its roots.
- Propagating from root cuttings is highly effective when done correctly in fall or early spring.
- A single mature comfrey plant can provide enough root material to start 10 to 20 new plants, offering significant cost savings.
- Root cuttings should be 2 to 6 inches long and at least 1/2 inch in diameter for optimal establishment.
- Proper soil preparation, consistent moisture, and adequate sunlight (at least 6 hours daily) are necessary for successful growth.
- Comfrey roots contain allantoin, a compound studied in the context of topical wound and bruise preparations [4].
Quick answer: Propagating comfrey from root cuttings involves taking 2-6 inch sections from a mature plant’s roots during dormancy (fall/early spring) and planting them in prepared soil with consistent moisture and sunlight. This method can yield 10-20 new plants from a single parent.
In many parts of the United States, from the humid Southeast to the cooler Pacific Northwest, comfrey is a hardy and productive plant for the home garden. This perennial herb, hardy across USDA zones 3 through 9, offers a wealth of uses, from enriching garden soil with its deep-mining nutrients to providing beneficial components for topical applications. While you can buy comfrey plants, propagating them from root cuttings is a simple, cost-effective method to expand your stock, turning one mature plant into a dozen or more new ones.
Propagating comfrey from root cuttings has a high success rate when performed during dormancy, yielding multiple new crowns from a single parent plant without the expense of nursery stock.
Understanding comfrey: a versatile garden plant
Comfrey, in both common (Symphytum officinale) and Bocking 14 form, is a perennial herb known for its deep taproot system, which reaches far deeper than most garden vegetables root. This deep reach allows it to draw up nutrients like potassium, phosphorus, and calcium from lower soil strata, making it an excellent accumulator for nutrient-poor gardens. In regions like the Midwest, where clay soils can be dense, comfrey’s roots help break up compaction, improving soil structure over several years. A mature comfrey plant typically grows 2 to 3 feet tall and 2 feet wide, producing abundant foliage suitable for compost or mulch.
the benefits of growing comfrey
Beyond its soil-enriching properties, comfrey has a long history of use in traditional medicine, dating back over 2,000 years. Its roots and leaves contain allantoin, a compound studied in topical preparations [4]. Gardeners often use comfrey leaves to create a nutrient-rich liquid fertilizer, diluted at a 10:1 ratio for feeding fruiting plants like tomatoes or peppers. For those interested in expanding their medicinal herb garden, comfrey is a foundational plant that offers both practical garden benefits and potential home apothecary applications.
- Soil enrichment: Comfrey leaves decompose rapidly, adding organic matter and nutrients to the soil.
- Pest deterrent: Its coarse leaves can deter some common garden pests.
- Pollinator attraction: Bell-shaped flowers attract bees and support garden pollinators.
- Medicinal uses: Historically used in poultices and salves for external application to unbroken skin only. Comfrey’s pyrrolizidine alkaloids are hepatotoxic and it is not taken internally.
- Cost savings: Propagating from root cuttings is a free way to expand your plant stock.
Choosing your parent plant and timing
Selecting a healthy, mature comfrey plant is the first step toward successful propagation. Look for a plant that is at least two to three years old, with a robust root system and vigorous top growth. This ensures the parent plant has sufficient energy reserves to recover from root harvesting and that the cuttings will be strong. In a typical garden in Ohio or Pennsylvania, a plant that has been established for three seasons will likely have a root crown several inches in diameter, providing ample material for dozens of cuttings.
when to take root cuttings
The optimal time for taking comfrey root cuttings is during the plant’s dormant period. This usually means late fall after the first hard frost, or very early spring before new growth begins to emerge. In USDA zone 6, this window typically falls between November and March. During dormancy, the plant’s energy is stored in its roots, increasing the success rate of propagation. Research on other root-propagated plants, like trembling aspen, also indicates that the phenological period of the donor plant significantly impacts cutting success [1]. Aim to work on a day when the soil is workable (not frozen solid or waterlogged), ideally with temperatures above 35°F.
- Late fall: After the first hard frost, typically in November or December in northern states.
- Early spring: Before new leaves emerge, often in March or April in temperate zones.
- Dormancy: Ensures the plant’s energy is concentrated in its roots for better cutting viability.
- Soil temperature: Work when soil is not frozen, ideally above 35°F for easier digging.
- Plant age: Select a parent plant that is at least two to three years old for best results.
Essential tools and preparing the site
Before you begin digging, gather the necessary tools. A sharp spade or a sturdy garden fork is essential for carefully excavating the parent plant’s root ball without causing excessive damage. You will also need a sharp, clean knife or pruning shears for making precise cuts on the roots, reducing the risk of disease. A bucket of water can be useful for rinsing soil from the roots to better see what you are doing. For planting the cuttings, prepare a well-draining potting mix or amend your garden soil with compost, aiming for a pH between 6.0 and 7.0.
site preparation for new plants
Choose a planting site that receives at least six hours of direct sunlight daily. Comfrey tolerates some shade but performs best with ample sun, especially in cooler climates like those found in USDA zone 5. Ensure the soil is rich in organic matter and drains well to prevent root rot. If you are planting directly into the garden, dig a trench or individual holes about 6 inches deep. For container planting, select pots that are at least 8 inches in diameter to accommodate initial root growth. Using a 3-in-1 soil meter can help you assess soil pH, moisture, and light levels accurately before planting.
- Spade or garden fork: For careful excavation of the parent plant.
- Sharp knife or shears: To make clean, precise cuts on root sections.
- Bucket of water: For rinsing soil from roots to identify viable sections.
- Potting mix or compost: To amend garden soil for optimal drainage and nutrient content.
- Gloves: To protect hands during digging and handling plant material.
Taking comfrey root cuttings
Once you have your tools and the ideal timing, carefully excavate a portion of the parent comfrey plant. You do not need to dig up the entire plant; focus on the outer edges of the root ball, where younger, more vigorous roots are often found. Gently loosen the soil around the plant to a depth of 6 to 8 inches, then lift a section of the root system. Aim for roots that are at least 1/2 inch to 1 inch in diameter, as these tend to have more stored energy for successful propagation. Avoid very thin, fibrous roots, which have a lower success rate.
making the cuts
With your selected root sections, clean off any excess soil. Using your sharp knife or shears, cut the roots into pieces that are 2 to 6 inches long. It is a good practice to make a straight cut on the end that was closer to the crown of the parent plant and a diagonal cut on the end that was further away (the bottom). This helps you remember which way is up when planting. For instance, if you have a 4-inch cutting, ensure the top is clearly distinguishable. Place the cuttings in a bucket of slightly moist soil or peat moss if you cannot plant them immediately; they can store well for several days this way, similar to methods used for blackberry root cuttings [2].
- Excavate carefully: Lift sections of the root ball from the outer edges, not the center.
- Select strong roots: Choose roots that are 1/2 to 1 inch in diameter for best results.
- Cut to length: Make cuttings 2 to 6 inches long, with at least one node on each piece.
- Distinguish top from bottom: Use a straight cut for the top and a diagonal cut for the bottom of each cutting.
- Handle gently: Minimize damage to the root surface to prevent disease entry.
Planting your comfrey root cuttings
With your root cuttings prepared, it is time to plant them. Whether you are using pots or a prepared garden bed, the principle is the same: plant the cuttings horizontally or vertically, with the top (straight-cut end) just below the soil surface. If planting horizontally, lay the 2- to 6-inch cutting about 2 to 3 inches deep. If planting vertically, orient the straight-cut end upwards and bury the cutting so the top is 1 to 2 inches below the soil line. Spacing is important; if planting in a bed, give each cutting at least 12 to 18 inches of space, as comfrey plants can grow quite large.
soil and initial watering
Use a well-draining soil mix, ideally one that is 50% compost and 50% perlite or sand, especially for container planting. This prevents waterlogging, which can lead to rot. After planting, water thoroughly to settle the soil around the cuttings. The goal is consistent moisture, but not soggy conditions. For example, in a warm spring in USDA zone 7, you might need to water every 2 to 3 days initially. A soil moisture meter can be a helpful tool to ensure optimal hydration without overwatering. New shoots typically emerge within 3 to 6 weeks, depending on soil temperature and moisture levels.
- Plant horizontally or vertically: Lay 2-6 inch cuttings 2-3 inches deep, or plant vertically with the top 1-2 inches below soil.
- Ensure proper orientation: The straight-cut end should face upwards if planting vertically.
- Adequate spacing: Provide 12 to 18 inches between cuttings in garden beds.
- Well-draining soil: Use a mix rich in organic matter, such as 50% compost.
- Thorough initial watering: Settle the soil around the cuttings immediately after planting.
Establishing new plants: watering and light
After planting, consistent care is vital for establishing your new comfrey plants. Watering is the most important factor. The soil should remain consistently moist, but never waterlogged. Overwatering can quickly lead to root rot, especially in cooler temperatures. Aim to provide about 1 inch of water per week, either through rainfall or irrigation. In drier climates, like parts of California or Arizona, you might need to water every other day during the first month, especially if temperatures exceed 80°F. Check the soil moisture regularly by hand or with a soil moisture meter.
light and protection
Comfrey thrives in full sun, meaning at least six hours of direct sunlight per day. While it can tolerate partial shade, growth is less vigorous and leaf production drops noticeably. In areas with intense summer sun, such as Texas or Florida, some afternoon shade can be beneficial to prevent scorching, particularly for young plants. Protect newly emerging shoots from late frosts in spring by covering them with a light cloth if temperatures are expected to drop below 30°F. Once established, comfrey is quite hardy and generally requires minimal intervention, often growing 1 to 2 feet in its first season.
- Consistent moisture: Keep soil consistently moist, providing about 1 inch of water per week.
- Avoid waterlogging: Ensure good drainage to prevent root rot, especially in heavy soils.
- Full sun exposure: Provide at least six hours of direct sunlight daily for optimal growth.
- Afternoon shade (hot climates): Protect young plants from intense sun in regions with high summer temperatures.
- Frost protection: Cover new shoots if late spring frosts are predicted below 30°F.
Long-term care and sustainable harvesting
Once comfrey plants are established (usually after their first full growing season), they become remarkably self-sufficient. In USDA zone 6, a plant started from a root cutting in spring can reach 2 feet tall by late summer. They rarely require supplemental fertilization due to their deep root system, which continually brings up nutrients from the subsoil. However, an annual top-dressing of 1 to 2 inches of compost in early spring can further boost vigor and soil health. Comfrey is effectively permanent once planted. Every root fragment left in the soil will sprout a new plant, including pieces snapped off while digging cuttings, so digging cuttings will itself leave new plants behind in the parent bed. Site it where you genuinely want it for good, or grow it in a sunken container.
harvesting and uses
You can begin harvesting comfrey leaves in the second year after planting, or once the plant has reached at least 18 inches in height. Harvest the outer leaves by cutting them about 2 inches above the ground, leaving the central crown to continue growing. You can typically get three to four harvests per season in regions with a long growing season, such as the Southeast. The harvested leaves are excellent for making comfrey tea (a liquid fertilizer), adding to compost piles, or using as a cover crop or mulch around other plants. For topical use only, the roots are generally harvested in fall or early spring. Comfrey contains pyrrolizidine alkaloids, which are hepatotoxic: the FDA asked manufacturers to remove oral comfrey products from the US market in 2001, so never eat comfrey, brew it as a drinking tea, or feed it to livestock, and do not apply it to broken skin or open wounds.
- Minimal fertilization: Established comfrey rarely needs extra fertilizer due to deep nutrient access.
- Annual compost: A 1-2 inch layer of compost in spring improves vigor and soil structure.
- Strategic placement: Plant where spread is desired or can be managed, as it can grow 2-3 feet wide.
- Harvesting frequency: Obtain 3-4 leaf harvests per season from established plants.
- Root harvest timing: For medicinal purposes, harvest roots in fall or early spring for peak potency.
Comfrey propagation methods: root cutting vs. seed
Feature | Root Cuttings | Seed Propagation |
|---|---|---|
Success Rate | High | Variable (50-70%), can be lower |
Time to Maturity | 1-2 years for full production | 2-3 years for full production |
Genetic Fidelity | Identical to parent plant | Variable, may not be true to type |
Cost | Free (from existing plant) | Cost of seeds (typically $3-$5 per packet) |
Effort | Moderate digging and cutting | Requires careful seed starting and thinning |
Yield from one plant | 10-20 new plants from a mature specimen | Limited by seed count, but can be hundreds |
Root Vigor: Thicker root sections, roughly 1/2 to 1 inch in diameter, carry more stored energy and establish far more reliably than thin, fibrous roots.
Nutrient Accumulator: Comfrey’s taproot reaches well below the shallow layer most vegetables root in, making its leaves a useful source of potassium and other minerals for compost and plant teas.
Frequently asked questions
What is the best time of year to take comfrey root cuttings?
The best time to take comfrey root cuttings is during the plant’s dormant period, typically in late fall after the first hard frost or in early spring before new growth emerges. In USDA zone 6, this often means between November and March, when soil temperatures are above 35°F.
How long should comfrey root cuttings be?
Comfrey root cuttings should generally be between 2 and 6 inches long. Cuttings that are at least 1/2 inch in diameter tend to have higher success rates due to greater stored energy reserves, often leading to new shoots within 3 to 6 weeks.
Can I propagate comfrey from stem cuttings?
While some plants can be propagated from stem cuttings, comfrey is most reliably propagated from root cuttings. Stem cuttings of comfrey root poorly and unreliably, which is why root propagation is the preferred and far more efficient method.
How much sun does comfrey need to thrive?
Comfrey thrives in full sun, requiring at least six hours of direct sunlight per day for optimal growth and leaf production. In very hot climates, such as those in USDA zone 8 or 9, some afternoon shade can prevent leaf scorch, but overall sun exposure should remain high.
When can I start harvesting leaves from new comfrey plants?
You should wait until the second year after planting to begin harvesting leaves from new comfrey plants. This allows the plant to fully establish its deep root system, supporting strong regrowth in future seasons.
References
- Propagating trembling aspen from root cuttings: impact of storage length and phenological period of root donor plants (2009). Propagating trembling aspen from root cuttings: impact of storage length and phenological period of root donor plants.
- PROPAGATING BLACKBERRY BLACK GEM BY ROOT CUTTINGS (2025). PROPAGATING BLACKBERRY BLACK GEM BY ROOT CUTTINGS.
- Figure 4: The root dry mass of cuttings from different sites across sampling events. (2023). Figure 4: The root dry mass of cuttings from different sites across sampling events..
- Comfrey root and bone healing (1995). Comfrey root and bone healing.
- Skin Microbiota Metabolism of Natural Products from Comfrey Root ( Symphytum Officinale L.) (2023). Skin Microbiota Metabolism of Natural Products from Comfrey Root ( Symphytum Officinale L.).
- USDA Natural Resources Conservation Service (2024). USDA Natural Resources Conservation Service.