Key takeaways
- Cob ovens offer a low-cost, durable outdoor cooking solution using readily available natural materials.
- Proper site selection, including drainage and sun exposure, affects oven longevity and performance.
- A well-built foundation and insulation layer are essential to prevent moisture damage and maximize heat retention.
- The cob dome’s thermal mass, typically 6-10 inches thick, allows it to hold cooking temperatures for hours.
- Gradual curing over 2-4 weeks with small fires prevents cracking and ensures the oven’s structural integrity.
- With basic tools and local materials, a functional cob oven can be constructed for less than $500.
Quick answer: A cob pizza oven can be built for under $500 using natural materials like clay-rich soil, sand, and straw. This durable, heat-retaining outdoor cooking solution requires a stable foundation, proper insulation, and gradual curing to ensure longevity and performance.
In the high desert of Eastern Oregon, where summer days reach 90°F and nights can dip to 40°F, outdoor cooking extends the season and reduces indoor heat. A cob pizza oven, built from local soil, sand, and straw, provides a durable, heat-retaining structure perfect for baking sourdough, roasting vegetables, or firing pizzas in 90 seconds. This guide outlines how a homesteader in USDA Zone 6 or similar climates can construct a functional cob oven for under $500, using materials often sourced directly from their land or nearby. Building with local clay, sand, and straw keeps costs low while creating an efficient cooking setup.
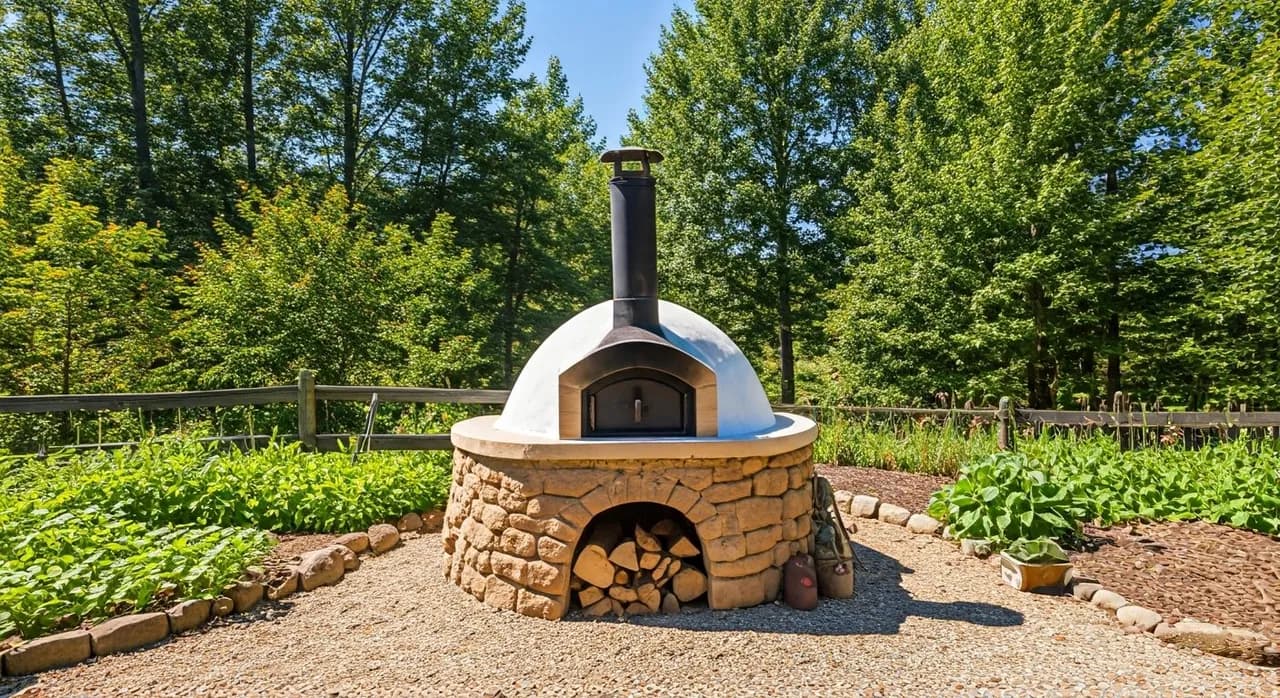
Cob construction uses clay, sand, and straw to form a durable cooking appliance without specialized masonry tools. The process involves several distinct stages, from preparing a stable foundation to curing the finished dome, each requiring careful attention to detail and a hands-on approach that many homesteaders appreciate. A completed oven can be very heavy, demonstrating its substantial construction.
Why a cob oven for your homestead?
Many homesteaders in regions like the Appalachian foothills or the arid Southwest are turning to natural building materials for their durability and low cost. Cob, a mixture of clay-rich soil, sand, and straw, has been used for millennia to construct homes and ovens across the globe [4]. For an outdoor pizza oven, cob offers exceptional thermal mass, meaning it absorbs and retains heat for extended periods. Once heated to 700-900°F, a well-built cob oven can maintain baking temperatures for several hours, allowing for multiple batches of pizza or slow roasting after the initial high-heat cooking. This thermal property makes it a highly efficient cooking tool, reducing the need for constant fuel input compared to thin-walled ovens.
The primary materials for a cob oven are often found directly on your property or can be purchased affordably. A typical oven project might require one to two cubic yards of sand, 50-100 pounds of powdered clay if your soil lacks sufficient clay content, and several bales of straw. Cob construction reduces reliance on manufactured materials and uses local inputs [3]. In USDA Zone 7, where rainfall averages 40-50 inches annually, protecting the cob structure from moisture is essential. The total material cost for a substantial oven can be a fraction of the price of a prefabricated brick oven, making it an accessible project for many homestead budgets. Local sourcing and simple materials make cob building practical on a homestead budget.
Benefits of a cob oven
- Low material cost: Often under $500 for all components.
- Excellent thermal mass: Retains heat for 4-6 hours after firing.
- Durable construction: Can last for decades with proper maintenance.
- DIY accessibility: Requires basic tools and hands-on labor.
- Natural aesthetics: Blends well into a homestead landscape.
Site selection and foundation
Choosing the right location for your cob oven is the first critical step, influencing its performance and longevity. Consider a spot that receives ample sunlight to aid in curing and drying, especially important in humid regions like the Southeast, where annual rainfall can exceed 60 inches. Good drainage is non-negotiable; water is the enemy of cob. The EPA recommends managing stormwater runoff to prevent foundation issues, suggesting a slope away from structures [2]. Avoid low-lying areas where water might pool after heavy rain. Proximity to your outdoor cooking area and wood storage is also practical, perhaps within 20 feet of your primary outdoor kitchen to minimize steps. Site selection for outdoor structures benefits from considering sun exposure and wind patterns, which can influence drying times and heat retention [5].
The foundation must be sturdy and provide excellent drainage. A typical foundation begins with a trench dug 18-24 inches deep, extending at least 6 inches beyond the oven’s footprint, filled with compacted gravel. This base prevents moisture wicking up into the oven structure, which can compromise its integrity over time. On top of the gravel, a dry-stacked stone or concrete block base provides a stable, level platform, raising the oven hearth to a comfortable working height, usually 36-42 inches from the ground. In USDA Zone 5, where frost heave is a concern so your foundation extends below the frost line, often 30-40 inches deep, is critical to prevent structural damage. This foundational work sets the stage for a durable oven that will serve your homestead for many years.
Foundation checklist
- Sunny location: Aids drying and curing.
- Excellent drainage: Prevents moisture damage [2].
- Level ground: Ensures structural stability.
- Comfortable height: Typically 36-42 inches for the hearth.
- Proximity to resources: Wood storage, prep area.
Building the oven floor and thermal mass
With a solid foundation in place, the next step is to build the oven floor and the initial thermal mass layer. This stage is critical for heat retention and cooking performance. First, an insulation layer is applied directly to the top of your foundation base. A common and effective insulation material is a mixture of clay, sand, and lightweight aggregate like perlite, vermiculite, or even glass bottles, forming a “light cob” or “rubble trench” layer. This layer should be 4-6 inches thick and thoroughly compacted. In colder climates, such as USDA Zone 4, increasing this insulation layer can significantly improve heat retention during winter use, potentially extending cooking time.
On top of the insulation, the hearth (the actual cooking surface) is constructed. This typically involves a layer of firebricks laid flat in a sand bed, or set with a thin layer of cob mortar. The firebricks, usually 1.25-2.5 inches thick, are chosen for their ability to withstand high temperatures and their thermal stability. Lay them tightly with minimal gaps to create a smooth, durable cooking surface. The hearth should be perfectly level and extend slightly beyond the planned dome footprint, perhaps 2-3 inches, to provide a landing area for pizzas. This entire assembly, from insulation to hearth, creates the thermal core where your food will cook efficiently.
Hearth construction materials
- Insulation layer: 4-6 inches of light cob or perlite/vermiculite mix.
- Sand bed: 1-2 inches for leveling firebricks.
- Firebricks: 1.25-2.5 inches thick, high-temperature resistant.
- Cob mortar: Optional, for setting firebricks if not using a sand bed.
- Measuring tape: For laying out the 28-32 inch internal diameter.
Constructing the cob dome
The heart of your cob oven is the dome, which forms the cooking chamber and provides the bulk of the thermal mass. Before building the dome, create a sand form representing the internal shape of your oven. This form, typically a hemisphere or a catenary arch shape, should have an internal diameter of 28-32 inches for a family-sized oven, which can accommodate two 12-inch pizzas. Cover the sand form with damp newspaper to prevent the cob from sticking, using 5-10 sheets for effective separation. The cob mix requires a balanced ratio: one part clay to two parts sand, with straw added for tensile strength and to prevent cracking [1]. The consistency should be firm enough to hold its shape but pliable enough to mold, similar to stiff cookie dough.
Begin applying the cob directly over the newspaper-covered sand form, building up the walls in layers. Each layer should be 4-6 inches thick, allowing it to firm up slightly before adding the next. The overall thickness of the dome should be 6-10 inches to provide sufficient thermal mass for heat retention [4]. In regions like the Pacific Northwest, where humidity is high, allowing each layer to dry partially for 1-2 days before adding the next can prevent slumping. As you build, remember to integrate the oven door arch, which should be proportioned to the dome’s internal height to ensure proper airflow and heat retention. This stage is where the oven truly takes shape, becoming a functional, heat-retaining structure.
Cob dome construction steps
- Build sand form: Create a hemisphere 28-32 inches in diameter.
- Cover with newspaper: Prevents cob from sticking to sand.
- Mix cob: Use a 1:2 clay:sand ratio with straw [1].
- Apply cob layers: Build 4-6 inch layers, drying between.
- Shape dome: Aim for 6-10 inches thick for thermal mass [4].
Finishing and curing
Once the cob dome is complete, the sand form inside is carefully removed, leaving the hollow cooking chamber. This is also the time to refine the oven’s exterior, smoothing any rough spots and applying a final “finish coat” of finer cob or a lime plaster. This outer layer, typically 0.5-1 inch thick, provides additional weather protection and aesthetic appeal. In areas with harsh winters, like Minnesota, a thicker finish coat or a protective roof over the oven can extend its lifespan significantly, perhaps by 5-10 years. A small chimney or flue, 4-6 inches in diameter and 2-3 feet tall, should be installed near the front of the oven, directly above the door opening, to help draw smoke out effectively.
Curing is perhaps the most critical stage for the oven’s longevity. It involves a series of small, slow fires over 2-4 weeks to gradually dry out the cob [4]. Starting with very small fires, burning for 1-2 hours, allows moisture to escape slowly, preventing large cracks that could compromise the oven’s structure. Over subsequent days, gradually increase the fire size and duration, allowing the oven to cool completely between firings for the first week. In a humid climate, such as Florida, this curing process might take closer to four weeks, while in arid Arizona, it can be completed in two. Rushing the curing process can lead to significant cracking and structural weakness.
Curing best practices
- Start small: Use kindling and small sticks for the first few fires.
- Increase gradually: Slowly build fire size and duration over 2-4 weeks [4].
- Monitor for cracks: Address any significant cracks with fresh cob.
- Ensure ventilation: Allow smoke and moisture to escape.
- Protect from rain: Cover the oven during curing if rain is expected.
Firing and maintenance
Once fully cured, your cob oven is ready for its inaugural firing. The goal is to heat the entire thermal mass of the dome to cooking temperature, typically 700-900°F for Neapolitan-style pizza. Start with a moderate fire, gradually adding larger pieces of hardwood like oak or maple. The flames should lick the top of the dome. You’ll know the oven is ready when the interior walls turn white, indicating the soot has burned off. This usually takes 1-2 hours of sustained heat. In a region like the Northeast, where winter temperatures can drop below 20°F, preheating might take an additional 30 minutes to reach optimal temperatures.
After the dome is white-hot, rake the coals to one side or remove them entirely, depending on your cooking method. The residual heat in the 6-10 inch thick cob walls will continue to radiate, cooking pizzas quickly. For longer cooking tasks, like roasting bread or slow-cooking stews, the oven will retain usable heat for 4-6 hours. Regular maintenance is key to a long-lasting oven. Inspect the exterior for any cracks, especially after significant temperature fluctuations, and patch them with fresh cob or a lime plaster. A simple roof structure over the oven, costing perhaps $50-$100 in materials, can significantly extend its life by protecting it from rain and snow. Regular inspection and routine plaster maintenance protect the earthen dome over many seasons.
Oven maintenance tips
- Inspect regularly: Check for cracks after heavy use or weather changes.
- Patch cracks: Use a small amount of fresh cob or lime plaster.
- Protect from moisture: A simple roof extends lifespan by 5-10 years.
- Clean hearth: Scrape ash and debris after each use.
- Store wood dry: Use seasoned hardwood for efficient burning.
Cob oven vs. traditional brick oven
Feature | DIY cob oven | Prefabricated brick oven |
|---|---|---|
Material cost | $100 – $500 | $1,500 – $5,000+ |
Construction time | 2-4 weeks (active build + curing) | 1-2 weeks (installation) |
Thermal mass | Excellent (6-10 in thick walls) | Good (3-5 in thick walls) |
Aesthetics | Organic, customizable | Formal, often modular |
DIY skill level | Moderate, hands-on | Low (assembly) to High (custom build) |
Cob Mix Ratio: A typical cob mix uses clay-rich soil and sand, reinforced with straw [1].
Oven Temperature: A well-fired cob oven can reach high temperatures, cooking pizzas quickly [4].
Foundation Depth: Digging a foundation trench and filling it with gravel ensures proper drainage [2].
Curing Time: Gradual curing with small fires prevents cracking and ensures oven longevity [4].