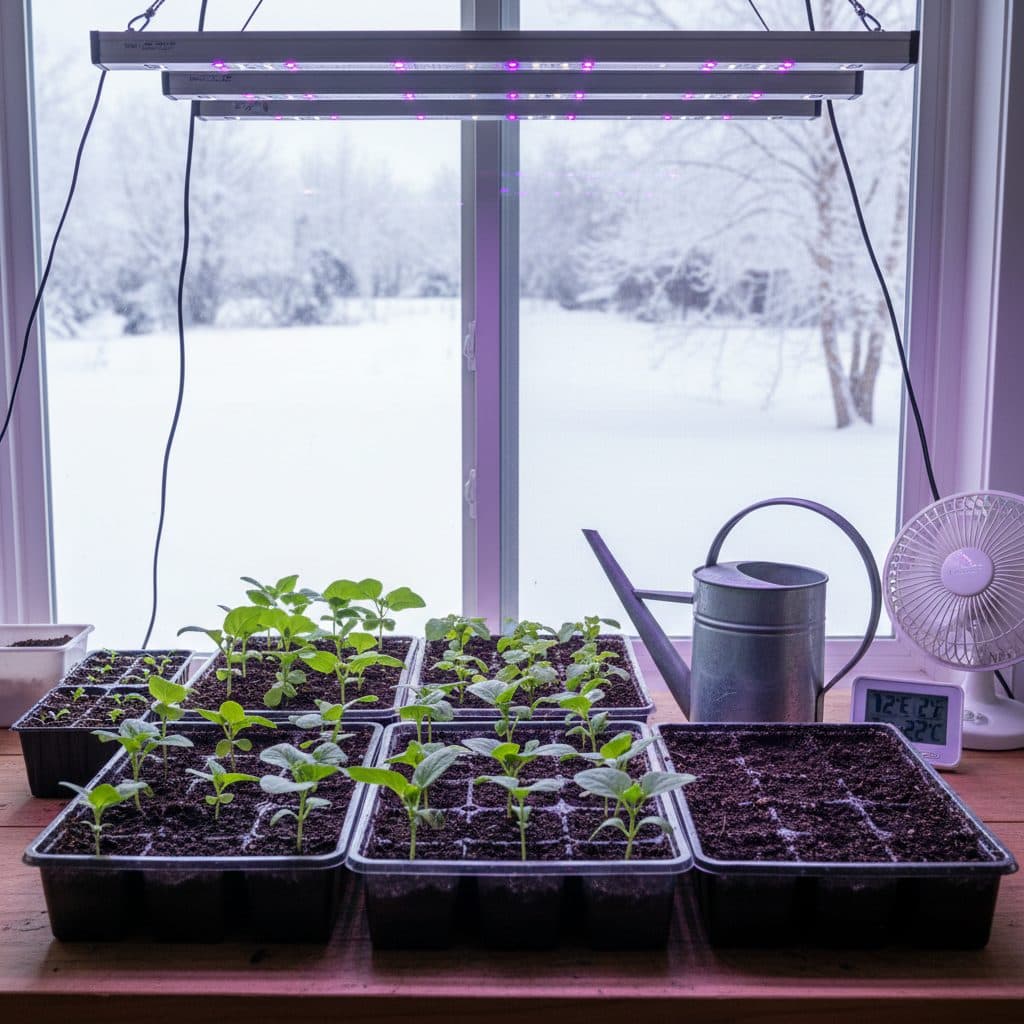
Key takeaways
- Ensure proper seed depth and consistent moisture — the two things most often behind a tray that never sprouts.
- Provide strong, close light sources (2-4 inches above seedlings) to prevent leggy, weak stems.
- Maintain good air circulation and use sterile starting mix to avoid damping-off disease and white mold.
- Diagnose yellowing by checking for overwatering, nutrient deficiencies, or incorrect pH levels, aiming for a pH of 6.0-6.8.
- Address stalled growth by considering pot size, nutrient availability, and maintaining consistent temperatures between 65-75°F.
Quick answer: To improve seed germination rates and prevent common failures, ensure proper seed depth, consistent moisture, strong light, good air circulation, and sterile starting mix. Addressing issues like leggy stems, damping-off, and stalled growth leads to healthier seedlings.
In the fertile valleys of California, where many growers start their season indoors, the promise of a bountiful harvest begins with tiny seeds. Yet, even experienced hands in USDA zone 9 can face frustrating setbacks when those seeds fail to thrive. Seed starting, while rewarding, presents a handful of common challenges that can derail a season before it even truly begins. Recognizing these issues early can save weeks of effort and dozens of dollars in wasted supplies.
Understanding the five most frequent seed-starting mistakes can significantly improve success rates for growers from Florida to Washington State. This article will walk through the five most common failures and provide concrete steps to fix them, helping you cultivate strong seedlings ready for your garden beds.
No germination: the silent disappointment
One of the most disheartening experiences for any grower is waiting for seeds to sprout, only to find nothing. This common issue is frequent with older seed and usually boils down to a few key factors. Seed viability declines with age at very different rates depending on species and storage conditions, so old seed is worth testing before it takes up tray space. The primary culprits are usually seed viability, improper planting depth, or inconsistent moisture and temperature.
checking seed viability and planting conditions
To maximize your chances, always start with fresh, high-quality seeds, ideally purchased within the last 12 months. Plant seeds at the correct depth, typically two to three times their diameter, which for many small vegetable seeds means about one-quarter to one-half inch deep. For example, lettuce seeds need only a thin layer of soil, around one-eighth inch, to germinate effectively. Maintain consistent soil moisture, keeping the seed-starting mix damp but not waterlogged, and aim for a soil temperature between 65°F and 75°F for most common vegetables. A heating mat can increase soil temperature by 10-15°F, which matters most for warm-season crops started in a cool space, like a basement in USDA zone 5.
- Test old seeds by placing ten on a damp paper towel; if fewer than seven sprout within the germination window given on the seed packet, they have low viability.
- Ensure seed-starting mix is light and well-draining, with a pH between 6.0 and 7.0 for optimal root development.
- Cover seed trays with a clear dome to maintain humidity, which can keep soil moisture consistent for up to 48 hours.
- Provide bottom heat for warm-season crops like tomatoes and peppers, aiming for 80-85°F soil temperature.
- Avoid burying tiny seeds too deeply; some, like snapdragons, require light to germinate.
Leggy stems: reaching for the light
When seedlings stretch tall and thin, with pale, weak stems, they are said to be ‘leggy.’ This is a classic sign of insufficient light, a problem common for indoor growers in regions with shorter daylight hours, such as the Pacific Northwest during winter. Leggy seedlings often struggle to support themselves and are more susceptible to damage and disease, which makes transplanting them noticeably riskier.
providing adequate light and air circulation
The solution to leggy seedlings is straightforward: more light. Seedlings need intense, direct light for 12-16 hours a day. Fluorescent shop lights (T5 or T8 bulbs) or LED grow lights are excellent choices. Position the light source very close to the seedlings, typically two to four inches above the tops of the plants. As the seedlings grow, adjust the light upwards to maintain this distance. For example, a 4-foot LED fixture can effectively illuminate a tray of 72 cells. Also, good air circulation, provided by a small fan running for a few hours daily, helps strengthen stems and lowers humidity around the plants, which discourages fungal problems.
- Use full-spectrum LED grow lights for 14-16 hours daily to mimic natural sunlight.
- Keep lights 2-4 inches above the seedling canopy, moving them up as plants grow.
- Introduce a gentle breeze with a small fan for 1-2 hours twice a day to strengthen stems.
- Consider ‘potting up’ leggy seedlings deeper into larger containers to provide support for their elongated stems.
- Harden off seedlings gradually over seven to ten days before transplanting outdoors in USDA zone 6.
White mold and damping-off: the fungal threat
Fuzzy white growth on the surface of the mix is usually a harmless saprophytic mold feeding on organic matter rather than damping-off itself, but it flags the wet, still, warm conditions that damping-off pathogens need. Those conditions can wipe out an entire tray of seedlings in a single day, especially in humid indoor setups in places like the Gulf Coast. Damping-off causes young seedlings to rot at the soil line and collapse, a problem that can take out most of a tray before you notice it.
sterilizing and improving air circulation
Preventing white mold and damping-off starts with sterilization and proper environmental control. Always use a fresh, sterile seed-starting mix, which typically contains no soil and is pasteurized to kill pathogens. Avoid reusing old potting mix, which can harbor fungal spores. Ensure good air circulation around your seedlings; a small oscillating fan will dry the surface of the mix between waterings and strengthen stems. Water from the bottom when possible, or water gently from the top to avoid splashing soil onto seedling stems. For example, set the tray in a shallow reservoir, let the mix wick water up for 15 to 30 minutes, then pour off whatever is left rather than leaving the tray standing in it. Maintaining a consistent temperature of 68-72°F and relative humidity below 70% also helps deter fungal growth.
- Use fresh, sterile seed-starting mix for every new batch of seeds.
- Ensure adequate spacing between seedlings to promote airflow and reduce humidity.
- Water seedlings from the bottom or use a gentle stream to avoid disturbing the soil surface.
- Run a small fan for several hours daily to keep air moving over the trays.
- Consider applying a biological fungicide, such as those containing Bacillus subtilis, as a preventative measure.
Yellowing seedlings: a cry for help
Yellowing leaves on young seedlings are a clear indicator that something is amiss. This common issue can stem from several causes, including nutrient deficiencies, overwatering, or incorrect pH levels. For instance, seedlings of White Lupin (Lupinus albus) are particularly sensitive to iron deficiency, which manifests as yellowing between the leaf veins. Diagnosing the exact cause requires careful observation of the plant and its environment.
diagnosing nutrient and water issues
If your seedlings are yellowing, first check your watering habits. Overwatering is a frequent culprit, as it deprives roots of oxygen, leading to yellow leaves and stunted growth. Allow the top half-inch of soil to dry out before watering again. If watering seems correct, consider nutrient deficiency. Most seed-starting mixes contain very few nutrients, designed for germination, not prolonged growth. After the first true leaves appear, usually around two to three weeks, begin feeding with a diluted liquid fertilizer, such as a 1:4 dilution of a 5-1-1 fish emulsion, every seven to ten days. Ensure the pH of your potting mix is between 6.0 and 6.8, as this range allows for optimal nutrient uptake. A pH meter can confirm this. If the mix reads outside that range, start over with fresh seed-starting mix rather than trying to correct pH in a tray that is already sown.
- Reduce watering frequency if soil remains soggy; aim for a consistent moisture level.
- Begin fertilizing at quarter strength after true leaves emerge; a fish emulsion around 5-1-1 is nitrogen-heavy, so alternate it with a balanced feed if seedlings will sit in their cells for several weeks.
- Check soil pH with a test kit; adjust if it falls outside the 6.0-6.8 range.
- Ensure adequate drainage holes in all seed trays and pots to prevent waterlogging.
- Consider the color of the yellowing: overall yellowing suggests nitrogen deficiency, while yellowing between veins often indicates iron or magnesium issues.
Stalling growth: stuck in neutral
Sometimes, seedlings sprout successfully and look healthy for a few weeks, then simply stop growing. This ‘stalling’ can be frustrating, as plants seem to be in suspended animation, failing to develop new true leaves or gain height. This issue can delay transplanting by two to three weeks and leaves you with a weaker plant going into the ground. Common causes include being rootbound, nutrient lockout, or temperature stress, especially in fluctuating environments like a garage in USDA zone 4 during early spring.
repotting and temperature management
If your seedlings have stalled, carefully examine their roots. If you see a dense mat of roots circling the bottom of the cell or pot, they are rootbound and need to be repotted into a larger container. Moving a seedling from a one-inch cell to a three-inch pot can stimulate new growth within three to five days. Ensure your fertilizer regimen is appropriate; too much fertilizer can cause nutrient lockout, where plants cannot absorb nutrients despite their presence. Always dilute fertilizers to a quarter or half strength for young seedlings, such as a 2-1-2 formulation at 50% strength. Maintain consistent ambient temperatures between 65°F and 75°F, and avoid drafts or sudden temperature drops, which can shock young plants. For example, a drop of 15°F overnight can significantly slow metabolic processes for 24-48 hours.
- Repot rootbound seedlings into containers one to two inches larger in diameter.
- Ensure consistent, appropriate fertilization; avoid over-fertilizing which can burn roots.
- Monitor ambient air temperature to stay within the 65-75°F range, using a thermometer.
- Check for pest infestations, as unseen pests can stress plants and hinder growth.
- Provide sufficient light (14-16 hours) even for stalled plants, as energy production is key to recovery.
Common Seed-Starting Problems and Solutions
Problem | Symptoms | Primary Cause | Solution |
|---|---|---|---|
No Germination | No sprouts after 7-14 days | Old seeds, incorrect depth, low temperature | Use fresh seeds, proper depth (0.25-0.5 in), 65-75°F soil temp |
Leggy Stems | Tall, thin, pale stems, weak | Insufficient light | Provide 14-16 hours of light, 2-4 inches from seedlings |
White Mold/Damping-Off | Fuzzy white growth, collapsing seedlings | Excess moisture, poor air circulation, non-sterile mix | Sterile mix, fan for airflow (2-4 hrs/day), bottom watering |
Yellowing | Leaves turning yellow, stunted | Overwatering, nutrient deficiency, incorrect pH | Allow soil to dry slightly, dilute fertilizer (1:4), check pH (6.0-6.8) |
Stalling Growth | Seedlings stop growing, no new leaves | Rootbound, nutrient lockout, temperature stress | Repot to larger container (3-inch), adjust fertilizer, maintain 65-75°F |
Light Distance: Position grow lights 2-4 inches above seedlings to prevent leggy growth and produce stockier stems.
Soil Temperature: Maintaining a consistent soil temperature of 65-75°F is what most common vegetable seeds need to germinate evenly.
Frequently asked questions
How often should I water my seedlings?
The frequency depends on humidity and seedling size, but generally, water when the top one-half inch of soil feels dry to the touch. For a typical 10×20 inch tray, this might mean every 1-3 days, keeping the mix damp but not waterlogged so fungal problems have less to work with.
What is the best type of light for seed starting?
Full-spectrum LED grow lights or T5 fluorescent fixtures are excellent choices, providing the necessary light spectrum and intensity. Position them 2-4 inches above your seedlings for 14-16 hours daily to get compact, strong growth with thicker stems.
When should I start fertilizing my seedlings?
Begin fertilizing only after your seedlings have developed their first set of true leaves, typically two to three weeks after germination. Use a diluted liquid fertilizer, at one-quarter to one-half strength (e.g., 1:4 ratio), once every seven to ten days to avoid nutrient burn.
How do I know if my seedlings are rootbound?
Gently tip a seedling out of its cell or pot to inspect the roots. If you see a dense, tangled mass of roots circling the bottom and sides of the soil plug, your seedling is rootbound. Repotting into a container one to two inches larger in diameter will encourage new growth within a week.
Can I reuse seed-starting mix?
It is not recommended to reuse seed-starting mix, as it can harbor disease pathogens like those causing damping-off, and its nutrient content is depleted. Using fresh, sterile mix for each new batch of seeds removes the pathogen reservoir old mix carries and gives you a clean start.