Key takeaways
- Cure freshly dug potatoes for 10 to 14 days in a dark, humid room at 10°C to 15°C (50°F to 60°F) to thicken skins and heal minor surface wounds.
- Store cured tubers long-term in complete darkness at 4°C to 7°C (39°F to 45°F) with 85% to 90% relative humidity and good ventilation.
- Never store potatoes below 3°C (38°F); cold temperatures convert starch into reducing sugars, causing an unpleasant sweet taste and browning when cooked.
- Store potatoes away from onions - onions need dry air and potatoes need damp air, and the moisture the two exchange shortens the life of both.
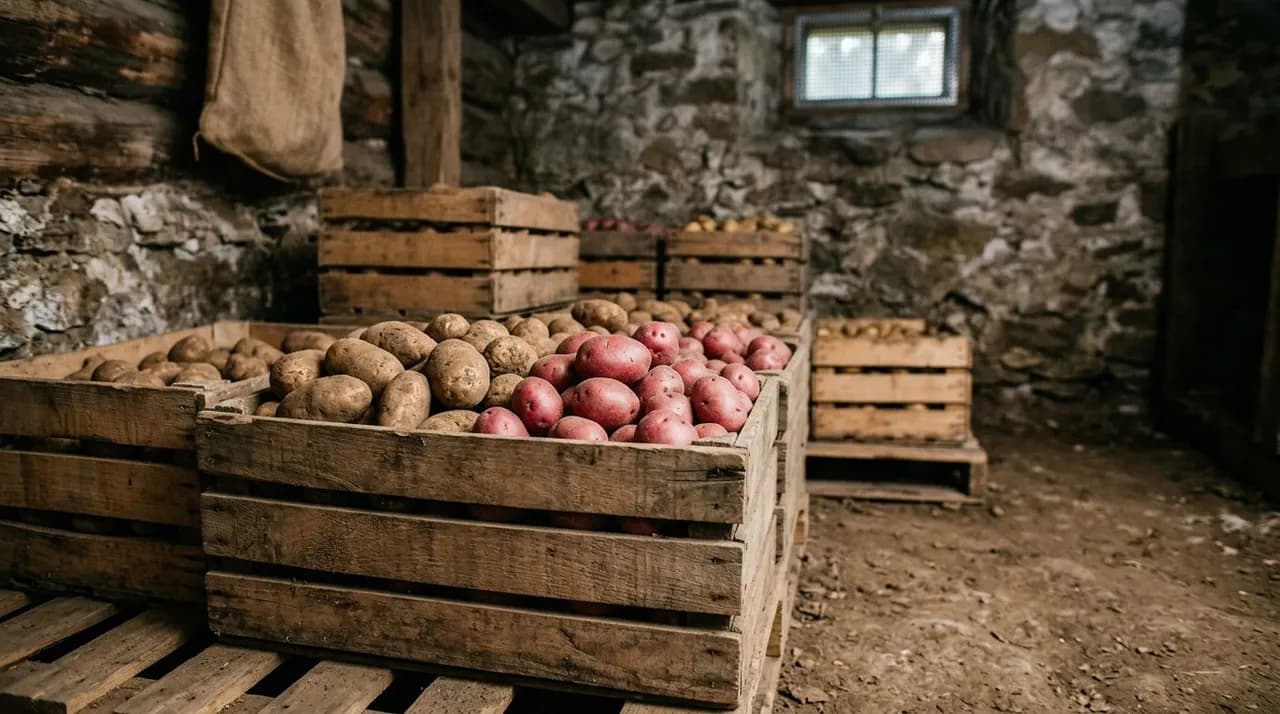
- Store in breathable containers such as wooden slatted crates, wire baskets, or burlap sacks; never seal potatoes in airtight plastic bags.
Quick answer: To store potatoes long term, cure freshly harvested tubers for 10 to 14 days in a dark, humid room at 10°C to 15°C (50°F to 60°F). After curing, move them to a dark, well-ventilated root cellar or cold room maintained at 4°C to 7°C (39°F to 45°F) and 85% to 90% humidity to keep them firm for months.
Harvesting a heavy crop of homegrown potatoes (Solanum tuberosum) is one of the most satisfying milestones of the gardening season. However, successfully preserving that harvest through a long northern or Canadian winter requires understanding tuber biology and post-harvest physiology.
Potatoes are living organisms that continue to respire and lose moisture after harvest. If stored in warm, dry household air, tubers shrivel and sprout within weeks. Conversely, exposure to light turns them green and toxic, while freezing temperatures ruin their texture and flavor. To understand crop cultivation prior to storage, see our guide on how to grow potatoes.
Curing followed by cold storage keeps homegrown potatoes firm and usable from autumn through to the following spring.
Harvesting potatoes for long-term storage
Proper handling during harvest is the foundation of successful long-term storage:
[ Step 1: Wait for Dieback ] --> [ Step 2: Dig on Dry Day ] --> [ Step 3: Brush Loose Soil ]
Vines turn brown & die down      Use garden fork carefully      Never wash tubers with water
Wait 10-14 days in ground        Discard punctured potatoes     Keep dry and shaded
1. Timing the harvest
For long-term storage, grow late-season maincrop varieties (such as Russet Burbank, Kennebec, Katahdin, or German Butterball). Allow the aboveground foliage (haulms) to die back naturally in late summer or early autumn. Once the vines turn brown and wither, leave the tubers undisturbed in the ground for an additional 10 to 14 days. This underground resting period sets the skin, allowing it to toughen and adhere tightly to the tuber flesh.
2. Digging and handling techniques
Harvest on a clear, dry day when the soil is workable and not waterlogged:
- Insert a broad garden fork or spade 12 to 18 inches away from the plant stem to avoid piercing tubers.
- Gently lift the root clump and sift through loose soil by hand.
- Handle potatoes gently, as bruised tubers develop internal black spots and become entry points for bacterial soft rot.
- Set aside any potatoes that are cut, nicked, or punctured during harvest for immediate kitchen use; never place damaged tubers into long-term storage.
3. The golden rule: never wash storage potatoes
Do not wash potatoes with water after harvest. Excess moisture on the skin encourages fungal and bacterial decay during curing. Instead, let freshly dug tubers air-dry in a shaded, well-ventilated spot for two to three hours, then gently brush away excess dry clods of dirt using your hands or a soft brush.
The essential curing process: healing skins and wounds
Curing is a conditioning phase that thickens the potato skin (periderm) through suberization:
+-----------------------------------------------------------------------+
|                       POTATO CURING PROTOCOL                          |
+-------------------+---------------------------------------------------+
| PARAMETER         | OPTIMAL CONDITIONS                                |
+-------------------+---------------------------------------------------+
| Duration          | 10 to 14 days                                     |
| Temperature       | 10°C to 15°C (50°F to 60°F)                       |
| Humidity          | 85% to 90% Relative Humidity                      |
| Light Level       | Complete darkness                                 |
| Ventilation       | Gentle, continuous air movement                   |
+-------------------+---------------------------------------------------+
Why curing is mandatory
During curing, the potato develops a thick, corky outer skin and produces suberin, a natural waxy substance that seals minor scrapes and harvest abrasions. This protective barrier prevents moisture loss and blocks pathogens from entering the flesh during winter storage.
How to cure potatoes at home
- Spread tubers in a single or double layer in shallow cardboard boxes, slatted wooden trays, or on breathable burlap sacks.
- Place the boxes in a dark, humid, well-ventilated space maintained between 10°C and 15°C (50°F and 60°F). Ideal locations include an unheated basement, insulated garage, or root cellar.
- Maintain high humidity (85% to 90%) by placing damp burlap sacks over the boxes or placing shallow pans of water nearby.
- Keep the curing area in total darkness. Cover boxes with clean cardboard or breathable cloth to block any stray light.
- After 10 to 14 days, inspect the tubers. Skins should feel tough, dry, and firm.
Optimal winter storage conditions: temperature, humidity, and airflow
Once cured, potatoes transition into their permanent winter resting environment:
1. Temperature management (4°C to 7°C / 39°F to 45°F)
Temperature control is the single most important factor determining storage life:
- Ideal Range: Maintain temperatures steadily between 4°C and 7°C (39°F and 45°F). In this range, tuber respiration drops to a baseline minimum, keeping potatoes dormant and preventing sprout growth for 5 to 8 months.
- The Chilling Sweetening Danger (<3°C / 38°F): Never store potatoes below 3°C or allow them to freeze. Chilling injury causes enzymes to convert complex starches into reducing sugars (glucose and fructose). This process, known as cold-induced sweetening, ruins the potato's cooking texture, imparts an unpleasant sweet flavor, and causes tubers to turn dark brown or black when fried or roasted.
- Warm Temperatures (>10°C / 50°F): Storing potatoes at room temperature accelerates respiration, causing tubers to break natural dormancy, sprout, soften, and lose moisture rapidly.
2. Relative humidity (85% to 90%)
Potatoes consist of approximately 80% water. Storing them in dry air (such as standard heated indoor air with 30% to 50% humidity) causes moisture to evaporate through the skin, resulting in wrinkled, rubbery tubers. High humidity keeps them crisp and turgid. For dedicated storage cellar principles, see our guide on root cellaring for no-power food storage.
3. Total darkness (preventing solanine greening)
Exposure to even modest amounts of light stimulates potatoes to produce chlorophyll, turning the skin and outer flesh green. Along with chlorophyll, the tuber synthesizes toxic glycoalkaloids, primarily solanine and chaconine. Solanine imparts a bitter taste and can cause gastrointestinal illness. Keep storage containers covered and dark at all times.
4. Ventilation and container selection
Potatoes require continuous airflow to disperse heat and carbon dioxide generated by respiration:
- Best Containers: Slatted wooden crates, wire mesh baskets, breathable burlap / jute sacks, or heavy cardboard boxes with ventilation holes punched along the sides.
- Prohibited Containers: Never store potatoes in sealed plastic bags, airtight plastic totes, or solid containers without air holes. Trapped condensation creates a stagnant environment that triggers bacterial soft rot.
Storage Factor | Recommended Range | Consequence of Failure |
|---|---|---|
Temperature | 4°C to 7°C (39°F to 45°F) | Sprouting if >10°C; sweetening if <3°C |
Humidity | 85% to 90% RH | Shrivelling if <70%; mold if condensation pools |
Light Level | 100% Total Darkness | Chlorophyll and toxic solanine accumulation |
Airflow | Breathable crates / sacks | Bacterial rot in airtight plastic |
Preventing sprouting and segregation from onions and apples
A common mistake in home pantries is storing potatoes directly alongside onions or tree fruit:
[ Keep The Bins Apart ]
Onions: dry air (~65% RH)  vs  Potatoes: damp air (85-90% RH) -----> stored together, both spoil faster
Apples / Pears -----> Emit Ethylene -----> Not a sprouting trigger, but raises tuber sugars and darkens fry color- Onions and fruit: Keep potatoes in a separate bin from onions. The two want opposite conditions: onions store best in dry air (around 65% relative humidity) and potatoes in damp air (85% to 90%), so side by side each spoils the other faster. Apples and pears do give off ethylene, but ethylene does not trigger sprouting; low doses are used commercially to suppress it. What ethylene does do is raise the sugars in the tuber and darken it when fried, so give fruit its own corner as well.
- Variety Dormancy Periods: Different potato varieties have varying natural dormancy lengths. Long-dormant storage types (such as Kennebec, Burbank, Katahdin, and Elba) store significantly longer than early and midseason varieties such as Red Norland, Warba, or Yukon Gold. Eat shorter-storing varieties first.
- Alternative Preservation: For surplus potatoes that cannot fit into cold storage, consider pressure canning as outlined in our walkthrough on canning potatoes. If field diseases threaten your crop during the season, explore our diagnosis guide for potato blight.
Routine inspection and troubleshooting common storage issues
Inspect your potato storage bins every two to three weeks through winter:
- The Single Spoiled Tuber Rule: A single rotting potato can release moisture and bacterial exudates that rot an entire crate within days. Immediately remove and discard any tuber that feels soft, leaks liquid, or emits an unpleasant odor.
- Handling Early Sprouts: If small sprouts begin to emerge in late winter as dormancy breaks, snap them off cleanly with your fingers. The potato remains completely safe and delicious to eat as long as the tuber flesh remains firm.
- Green Spots: If small patches of green skin appear from minor light exposure, peel away all green skin and green flesh deeply before cooking. If greening extends deep into the flesh, discard the tuber.