Key takeaways
- Microgreens offer a rapid, high-value crop with harvests in 7-21 days, ideal for small spaces.
- Initial home setups can start with under $200, yielding 1-2 lbs per week from 2 square feet.
- Scaling involves optimizing vertical space, automating environmental controls, and consistent production cycles.
- Target sales channels include farmers’ markets, local restaurants, and direct-to-consumer subscriptions.
- Margins depend on seed cost, local prices and how much of each crop you actually sell rather than compost — model the numbers for your own market before you count on a monthly figure.
- Consistent quality and reliable supply build a loyal customer base in any US region.
Quick answer: To scale microgreens for income, start with a small home setup, then optimize vertical space, automate environmental controls, and establish consistent production cycles. Target sales channels like farmers’ markets, restaurants, and direct-to-consumer subscriptions to achieve $500-$1,000+ monthly.
In a small apartment in Portland, Oregon, a grower started with just two 10×20 in trays of radish microgreens, yielding about 12 ounces of produce every 10 days. This modest beginning, requiring an initial investment of under $150 for seeds, trays, and a basic light, demonstrates the accessible entry point for microgreens cultivation. Many home gardeners across USDA zones 5-9 are discovering that these nutrient-dense seedlings can be more than just a kitchen garnish; they represent a tangible opportunity for a small market-garden side income.
The journey from a hobbyist growing a few trays to a small-scale producer supplying local markets involves thoughtful planning and incremental scaling. This guide will walk you through the practical steps, from understanding the unique characteristics of microgreens to establishing efficient production cycles and identifying profitable sales channels, helping you turn a 2 square foot operation into a consistent revenue stream, potentially generating $500 or more per month.
Understanding microgreens and their market potential
Microgreens are young vegetable greens, typically 1-3 inches tall, harvested after the cotyledon leaves have fully developed, with or without the emergence of a first true leaf. Unlike sprouts, which are germinated in water and eaten whole, microgreens are grown in soil or a substrate and only the stems and leaves are harvested. This distinction is important for food safety and market acceptance. A typical microgreen crop, such as broccoli or radish, is ready for harvest in 7-14 days, offering a much faster turnaround than most garden vegetables. For instance, a tray of sunflower microgreens can be ready in 8-12 days, while cilantro may take 14-21 days.
why microgreens are a good side hustle
The market for microgreens has seen steady growth, driven by consumer demand for fresh, local, and nutrient-dense foods. In urban centers like New York City or Los Angeles, a pound of specialty microgreens can retail for $30-$50. Even in smaller markets, such as those in rural Iowa, prices often range from $20-$35 per pound, making them a high-value crop per square foot. They require minimal space, making them ideal for indoor cultivation in a spare room or a garage in USDA zone 7, where outdoor growing might be limited by climate. A 2 square foot area can consistently produce 1-2 pounds of microgreens per week, depending on the variety and growing conditions. This high yield-to-space ratio, coupled with rapid growth cycles, means a small investment can generate significant returns. They also use far less water than field-grown crops for the same amount of edible leaf.
- High market value: Retail prices often exceed $20 per pound.
- Rapid growth cycle: Harvests typically occur within 7-21 days.
- Minimal space requirements: Ideal for urban or small home setups.
- Consistent demand: Sought by restaurants, farmers’ markets, and health-conscious consumers.
- Relatively low startup costs: Basic equipment can be acquired for under $200.
Setting up your home microgreens operation
Starting a microgreens setup at home requires a few key components, but it doesn’t need to be expensive. You’ll need growing trays, a suitable growing medium, quality seeds, and a light source. Standard 10×20 in trays are common, often costing $2-$5 each. For a growing medium, a blend of coco coir and vermiculite, or a fine seed-starting mix, works well, providing good drainage and moisture retention. A 50-liter bag of coco coir can cost around $25 and last for many cycles. You can find detailed instructions on setting up your first trays at how to grow microgreens at home, which covers varieties and a 10-day harvest plan.
essential equipment for starting out
For lighting, basic LED shop lights or fluorescent T5 bulbs are sufficient. A 4-foot LED fixture can be purchased for $30-$50 and provides adequate light for 2-4 trays. You’ll need to provide 12-16 hours of light per day, so a simple timer, costing about $10, is essential. Maintaining a consistent temperature between 65-75°F and a humidity level of 40-60% is ideal for most varieties, from radish to basil. While not strictly necessary for a small start, a simple 3-in-1 soil meter can help monitor moisture and light levels. Quality seeds are paramount; purchasing from reputable suppliers ensures high germination rates, often 90% or higher, which is critical for dense, even stands. A 1-pound bag of organic broccoli seeds might cost $15-$25 and yield many trays.
- Growing trays: Standard 10×20 in trays, often with drainage holes.
- Growing medium: Coco coir, peat moss, or specialized seed-starting mix.
- High-quality seeds: Source from reputable suppliers for good germination.
- Light source: LED shop lights or T5 fluorescent fixtures, 12-16 hours daily.
- Spray bottle and watering can: For gentle, even watering.
Scaling up production for market
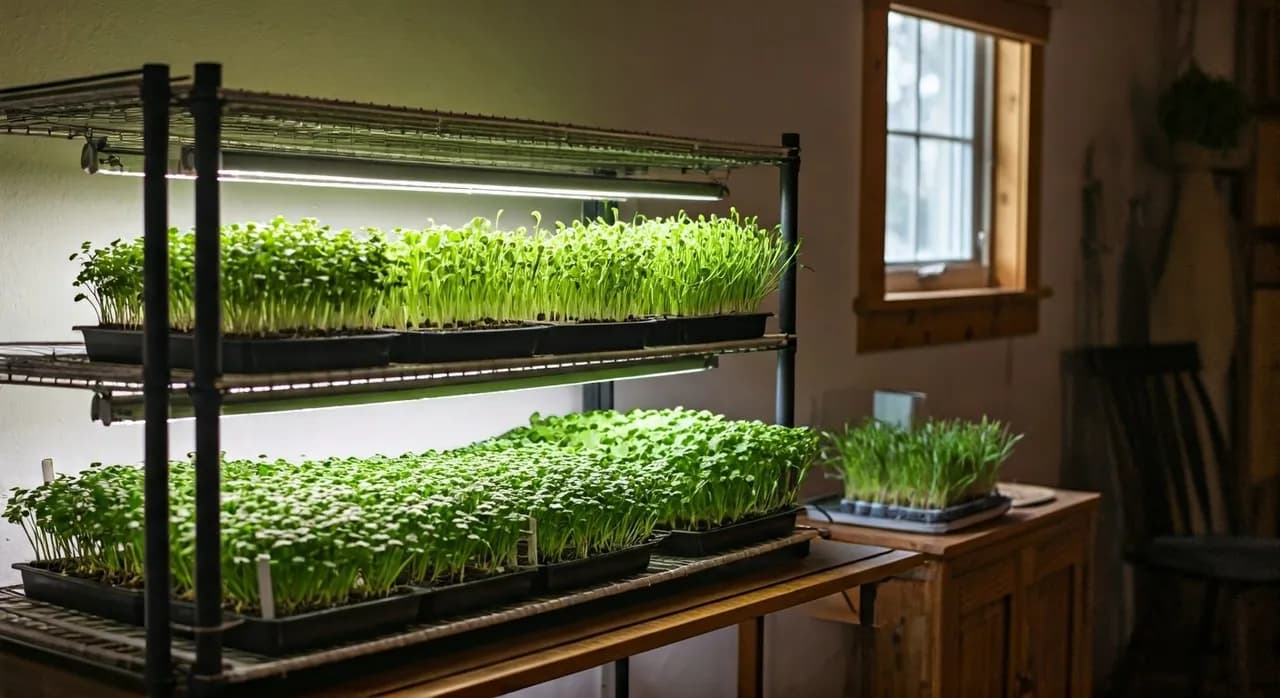
To transition from a home hobby to a market-garden side income, you need to scale production efficiently. This often means moving from a few trays to a multi-shelf system. A 4-foot wide, 5-shelf metal shelving unit, costing around $80-$120, can hold 8-10 trays per shelf, accommodating 40-50 trays in total. Each shelf will need its own dedicated lighting, bringing the total light investment to $150-$250 for a full unit. Use a staggered planting schedule: plant 5-10 trays every 2-3 days to keep a continuous harvest of fresh microgreens and avoid gluts and shortages. For example, if you aim for 10 pounds of microgreens per week, you’ll need to plant enough trays to yield approximately 1.5-2 pounds daily.
optimizing space and automation
Vertical farming techniques help maximize yield in a small footprint. A 4×2 ft footprint can hold a 5-tier rack. What it yields per week depends on variety, tray count and how tightly you can stagger sowings, so work it out from your own tray weights rather than from a headline figure. Consider a simple automation setup for lighting: smart plugs on a timer, or a basic home-automation controller for more advanced environmental control if you’re technically inclined. This ensures consistent light cycles and can reduce daily labor by 1-2 hours. Maintaining optimal growing conditions (65-75°F air temperature, 40-60% humidity, and consistent watering) is paramount for healthy growth and preventing issues like mold. For a small operation, bottom watering is often preferred, as it keeps the delicate foliage dry and reduces disease risk, using 1-2 cups of water per tray every 1-2 days. Rotating varieties like broccoli, radish, and arugula, which mature quickly, with slower ones like cilantro and basil, can help maintain a diverse and steady supply for customers.
- Vertical shelving units: Maximize growing area in a small footprint.
- Staggered planting: Ensure a continuous supply of fresh microgreens.
- Consistent environmental control: Maintain stable temperature, humidity, and light cycles.
- Efficient watering methods: Bottom watering or gentle misting to prevent disease.
- Variety rotation: Offer a diverse selection while managing different growth times.
Business basics and sales channels
Once you have a consistent supply of microgreens, the next step is to establish your business and find sales channels. For a small operation, a simple business name, a basic logo, and a clear pricing structure are good starting points. Sort out business registration before you start selling. Requirements for business registration, sales tax collection and food handling are set at state and local level and are not keyed to any single national revenue threshold. Cottage food laws in most states cover only shelf-stable, non-hazardous items such as baked goods, jams and dry mixes, and generally do not cover fresh cut greens. What a microgreens grower actually needs varies widely by state and county — some treat small growers as exempt farms, others require produce-safety registration or a food establishment license — so confirm your own situation with your state department of agriculture before you sell anything. Pricing your microgreens correctly is vital; research local farmers’ market prices in your area, such as those in rural Georgia or urban California, to ensure you are competitive yet profitable. A good starting point is $25-$35 per pound, depending on the variety and your local market demand.
reaching your customers
Farmers’ markets are an excellent entry point, offering direct interaction with customers and immediate feedback. Set up a simple display, perhaps with samples, and clearly label your varieties. Selling 5-10 pounds of microgreens at a Saturday market can gross $125-$350 at those prices, but that assumes you sell everything you bring, which a new stall rarely does, and it is before stall fees. Restaurants and cafes are another lucrative channel; approach local chefs with samples and a price sheet. Many chefs appreciate fresh, local produce and are willing to pay a premium for quality. Consider offering a weekly subscription service directly to consumers, delivering 4-8 ounces of mixed microgreens for $10-$15 per week. This provides a predictable income stream and builds customer loyalty. Packaging is also important; clear, clamshell containers (often 6-8 oz capacity) protect the delicate greens and allow customers to see the product, costing about $0.20-$0.30 per container. Aim for a profit margin of at least 50% after seed, medium, and packaging costs.
- Farmers’ markets: Direct sales, customer interaction, and immediate feedback.
- Local restaurants/cafes: Consistent orders, higher volume potential.
- Direct-to-consumer subscriptions: Predictable income, customer loyalty.
- Community Supported Agriculture (CSA) programs: Partner with existing CSAs to offer microgreens as an add-on.
- Online sales: Local delivery or pickup options through a simple website.
Microgreens vs. Sprouts: Key Differences
Feature | Microgreens | Sprouts |
|---|---|---|
Growing Medium | Soil or soilless substrate | Water only |
Harvested Part | Stems and cotyledon leaves | Entire plant (seed, root, stem) |
Growth Time | 7-21 days | 2-7 days |
Light Required | Yes, after germination | No, often grown in darkness |
Typical Height | 1-3 inches | 0.5-2 inches |
Food Safety Risk | Lower, as roots are not consumed | Higher, due to warm, moist conditions and whole consumption |
High Yield Density: A single 10×20 in tray can yield 8-16 ounces of microgreens, translating to 1-2 pounds per 2 square feet of growing area per week.
Startup cost: A basic setup runs roughly $150-$250 for trays, medium, seed and a light. How quickly that comes back depends entirely on whether you have buyers lined up before you sow.
Frequently asked questions
What are the most profitable microgreen varieties to grow?
Fast-growing varieties like radish, broccoli, and arugula are highly profitable due to their quick turnaround (7-10 days) and consistent demand. Specialty greens like cilantro and basil, though slower (14-21 days), can command higher prices, sometimes $35-50 per pound.
How much space do I need to start a microgreens business?
You can start with as little as 2 square feet, yielding 1-2 pounds per week. To generate a consistent $500+ monthly income, you’d likely need 20-40 square feet of growing space, often achieved with vertical shelving units.
What are the typical startup costs for a small microgreens operation?
A basic home setup can cost $150-$250 for trays, seeds, growing medium, and a simple light. Scaling to a multi-shelf system for market sales might require $500-$1,000 for additional lights, shelving, and a larger seed inventory.
How often do I need to water microgreens?
Microgreens typically need watering once every 1-2 days, depending on humidity and temperature. Bottom watering, where trays sit in a shallow reservoir of water for 15-30 minutes, is often recommended to keep foliage dry and prevent fungal issues.
Can microgreens be grown outdoors?
While microgreens can be grown outdoors in mild climates (USDA zones 8-10) with some shade, indoor cultivation offers better control over environmental factors like temperature and pests, leading to more consistent yields and quality, especially in regions with fluctuating weather.
What is the shelf life of harvested microgreens?
When harvested properly and stored in airtight containers in a refrigerator at 34-38°F, most microgreens can maintain freshness for 7-14 days. Proper drying before packaging is essential to extend their shelf life.
References
- Growing Techniques for Microgreens (2015). Growing Techniques for Microgreens.