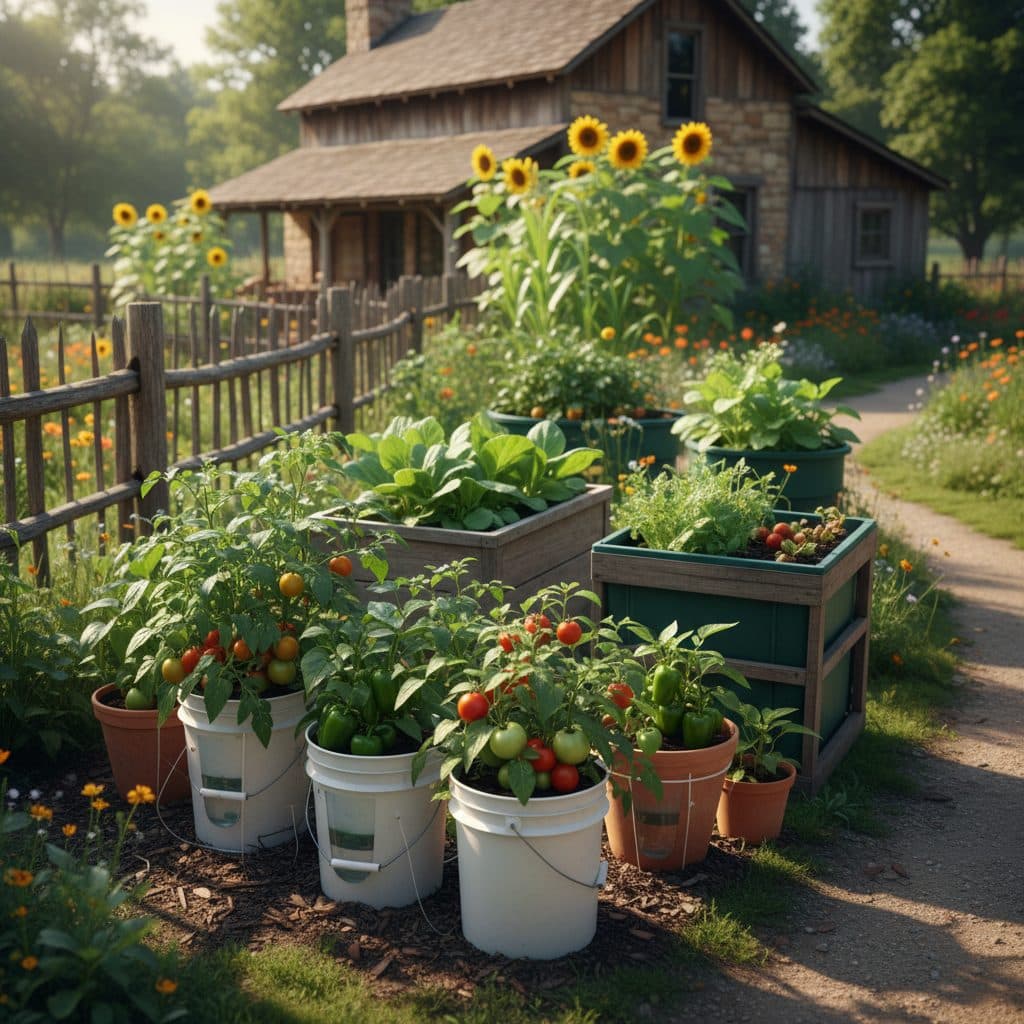
Key takeaways
- Self-watering planters significantly reduce watering frequency, saving time and ensuring consistent moisture for plants.
- DIY self-watering systems, often made from repurposed materials, can cost under $15 per unit and are suitable for many common vegetables.
- Commercial self-watering planters offer durability, aesthetic appeal, and specialized features, with prices ranging from $20 to over $100.
- Both DIY and commercial options can improve plant health by preventing overwatering and underwatering, leading to better yields.
- Consider your budget, gardening scale, and desired aesthetics when choosing between building or buying a self-watering system.
- Growers in arid regions like Arizona commonly turn to self-watering setups to cut how much water evaporates before it reaches the roots.
Quick answer: Self-watering planters provide consistent moisture to plant roots via a reservoir and wicking system, reducing water use and decreasing watering frequency. They improve plant health, save labor, and are suitable for various US container gardens.
In the arid regions of the US, like Arizona and Southern California, efficient water use is not just a preference — it’s a necessity. Even in wetter climates, busy growers across USDA zones 3 through 10 are looking for ways to reduce daily gardening chores while keeping their plants thriving. Self-watering planters, a concept with roots dating back to at least 1877, offer a compelling solution by providing a consistent water supply directly to plant roots, minimizing waste and effort.
Whether you’re tending a small balcony garden in a bustling city or managing a large rooftop farm in a suburban area, understanding the costs and performance of self-watering systems is crucial. This article compares building your own self-watering setup versus purchasing a commercial unit, helping you decide which approach best suits your budget, gardening style, and the specific needs of your container vegetables.
The enduring appeal of self-watering planters
Self-watering planters, also known as sub-irrigated planters (SIPs), operate on a simple yet effective principle: a reservoir of water sits below the growing medium, and a wicking system draws moisture up to the plant roots as needed. This capillary action ensures consistent hydration, preventing the common problems of overwatering or underwatering that plague many container gardeners. The basic technology has been around for a long time, with patents for self-watering flower pots appearing as early as 1877, demonstrating its long-standing utility for growers across various climates.
how self-watering systems work
At its core, a self-watering system consists of a water reservoir, a growing medium, and a wicking mechanism. Water is stored in the bottom chamber, typically separated from the soil by a perforated barrier. A wicking element — often a piece of fabric, a wicking basket, or even the soil itself — extends from the soil into the water, drawing moisture upwards. This creates a consistent moisture zone in the root area, which can be particularly beneficial for thirsty plants like tomatoes or cucumbers. Many systems also include an overflow drain to prevent root rot during heavy rains, and a fill tube for easy reservoir replenishment, often holding 1-5 gallons of water depending on the planter size. This design substantially reduces how often you need to water compared to traditional top-down watering.
- Water reservoir: Holds a supply of water, typically 1 to 5 gallons.
- Wicking system: Draws water from the reservoir to the plant roots.
- Perforated barrier: Separates the soil from the water, preventing saturation.
- Fill tube: Allows for easy refilling of the water reservoir. Cap it or cover it with fine mesh between fills — an open tube into standing water is a mosquito breeding site.
- Overflow drain: Prevents overwatering and root rot, crucial for plant health.
The tangible benefits for US growers
For home gardeners and small-scale urban farmers across the US, self-watering planters offer several practical advantages. The most significant is water conservation. Commercial container nurseries that move from overhead irrigation to sub-irrigation report substantial water savings, and the same principle — delivering water to the root zone instead of spraying it over a whole growing area — applies at home, though nursery figures should not be read as a prediction for a balcony planter. This efficiency is particularly valuable in states experiencing drought, like California or Texas, where water restrictions are common.
improved plant health and reduced labor
Beyond water savings, self-watering systems contribute to healthier plants and less work for the grower. By providing a steady, consistent moisture level, they help prevent the stress caused by fluctuating soil moisture, which can lead to issues like blossom end rot in tomatoes or stunted growth in peppers. This consistent hydration allows plants to focus energy on fruit and foliage production, often resulting in higher yields. For growers with busy schedules or those who travel, these systems can extend watering intervals from daily to once every 3-7 days, freeing up valuable time. This is especially useful for rooftop gardens in USDA zone 7, where high sun exposure can dry out traditional containers quickly. Consider using a soil moisture meter to fine-tune your watering schedule even further.
- Water conservation: Reduces water usage, saving money and resources.
- Consistent moisture: Prevents plant stress from over or under-watering.
- Reduced labor: Decreases watering frequency, often from daily to weekly.
- Healthier plants: Promotes stronger growth and higher yields, especially for thirsty vegetables.
- Nutrient retention: Less leaching of nutrients compared to top-watering.
Building your own self-watering system
That work on tangible benefits sets up what follows here.
For the resourceful grower, building a DIY self-watering planter is an accessible and cost-effective option. Many common household items can be repurposed, keeping material costs minimal, often under $15 per unit. The most popular method involves using two plastic containers, like two 5-gallon buckets or storage totes, one nested inside the other. This approach is particularly favored by growers in areas like the Pacific Northwest, where rain can be abundant, making the overflow drain a critical feature.
common diy methods and materials
A simple DIY SIP can be constructed from two 5-gallon buckets. Drill several 0.5-inch holes in the bottom of one bucket for drainage and to allow water to wick up. This bucket will hold your soil. Invert a smaller container, like a 1-gallon nursery pot, in the bottom of the second, intact 5-gallon bucket to create a platform for the first bucket. The reservoir only reaches the soil if you give it a wick, so cut a 3-4 inch hole in the center of the inner bucket’s base and push a perforated plastic cup packed with damp potting mix down through it until it rests on the floor of the outer bucket, with its open top sitting inside the soil column. Then drill a 0.5-inch overflow hole in the side of the intact bucket just below the level of the inner bucket’s base, so the water line never rises into the soil. Add a PVC pipe section, typically 1.5 inches in diameter and 12 inches long, as a fill tube. The total material cost for this setup, assuming you buy new buckets, might be $10-15. If you’re using salvaged materials, it could be less than $5. This method is excellent for growing single large plants like zucchini or a small cluster of bush beans in USDA zone 6.
- Two containers: Often 5-gallon buckets or storage totes, one nested inside the other.
- Drill: For creating drainage holes and overflow ports, typically 0.5 to 2 inches.
- PVC pipe: For the fill tube, usually 1.5 inches in diameter and 12 inches long.
- Wicking material: Can be a wicking basket, fabric strips, or even the soil itself.
- Basic hand tools: A utility knife or a lightweight garden hand trowel for assembly.
Commercial options and what to expect
For those seeking convenience, durability, or a more polished aesthetic, commercial self-watering planters offer a wide range of choices. These units are typically made from UV-stabilized plastic, terracotta, or even glazed ceramic, designed for years of outdoor use in various climates, from the humid Southeast to the sunny Southwest. Prices can vary significantly, starting from around $20 for a small plastic unit to over $100 for larger, more decorative, or specialized systems. Many commercial designs are optimized for specific plant types or growing conditions, such as deeper reservoirs for long-term watering.
features and considerations for buying
Commercial self-watering planters often come with integrated wicking systems, larger water reservoirs (some holding up to 10 gallons), and more robust construction than DIY alternatives. Look for features like clear water level indicators, which make it easy to see when a refill is needed without disturbing the plant. Some systems, like those designed for vertical gardening, may include multiple planting pockets and a shared reservoir, ideal for herbs or strawberries on a small patio in USDA zone 8. While the initial investment is higher, the longevity and often superior design can justify the cost for many growers. For example, a high-quality resin planter might cost $40-60 and last for 7-10 years, offering a good return on investment over time compared to replacing cheaper pots every few seasons. When considering commercial options, think about the size of your plants and the overall aesthetic of your space.
- Material durability: UV-stabilized plastic, terracotta, or glazed ceramic for longevity.
- Integrated wicking: Pre-designed systems for optimal water delivery.
- Water level indicator: Clear visibility of reservoir levels for easy monitoring.
- Aesthetic variety: Wide range of colors, shapes, and finishes to match any decor.
- Specialized designs: Options for vertical gardens, hanging baskets, or large vegetable crops.
Choosing the right system for your garden
Those commercial options and habits matter here as well.
Deciding between a DIY and a commercial self-watering planter ultimately depends on your specific gardening goals, budget, and available time. If you enjoy hands-on projects and want to minimize upfront costs, a DIY system is an excellent choice. For instance, a square-foot garden setup using repurposed totes can grow a significant amount of produce for a family of four in a small footprint, costing less than $50 for several units. This approach is common in community gardens in urban centers like Chicago or Seattle, where resourcefulness is valued.
cost vs. performance and specific needs
DIY systems, while inexpensive (often $5-15 per planter), may require more effort to build and might not offer the same aesthetic appeal or long-term durability as commercial options. They perform exceptionally well for most common vegetables, like bush beans, peppers, or determinate tomatoes. Commercial planters, costing $20-100+, provide convenience, often better aesthetics, and specialized features like larger reservoirs or integrated trellises. They are a good investment for growers who prioritize durability, a uniform look, or specific plant requirements, such as a large indeterminate tomato plant in a 20-gallon SIP. Regardless of your choice, the core benefit of consistent moisture and reduced watering frequency remains. For beginners, a simple DIY system can be a great entry point into vegetable gardening for beginners, allowing experimentation without a large financial commitment. Remember to consider the plant’s water needs; a thirsty cucumber in USDA zone 9 will benefit more from a larger reservoir than a drought-tolerant herb.
- Budget: DIY options are typically $5-15, commercial options $20-100+.
- Time commitment: DIY requires assembly time, commercial is ready-to-use.
- Aesthetics: Commercial planters often offer more refined designs.
- Durability: Commercial systems generally last longer, 5-10 years compared to 2-5 for DIY.
- Plant size: Larger plants may benefit from the greater reservoir capacity of some commercial units.
DIY vs. commercial self-watering planters: a quick comparison
Feature | DIY Self-Watering Planter | Commercial Self-Watering Planter |
|---|---|---|
Typical Cost (per unit) | $5 – $15 (using repurposed materials) | $20 – $100+ (depending on size/material) |
Durability/Lifespan | 2 – 5 years (repurposed plastic) | 5 – 10 years (UV-stabilized plastic, ceramic) |
Aesthetic Appeal | Functional, often utilitarian | Wide range of styles, often more decorative |
Assembly Required | Yes, significant construction time (1-2 hours) | Minimal to none (ready to use) |
Water Reservoir Size | Typically 1 – 5 gallons (e.g., 5-gallon bucket) | Varies widely, some up to 10 gallons |
Best For | Budget-conscious growers, experimental setups, common vegetables (e.g., peppers, bush beans) | Convenience, long-term use, specific plant needs, aesthetic integration (e.g., large tomatoes, herbs, flowers) |
Water savings: Commercial container nurseries that switch from overhead irrigation to sub-irrigation report meaningful reductions in water use.
Historical roots: The concept of self-watering flower pots was documented as early as 1877, showing its long-standing effectiveness in gardening.
DIY cost: A basic DIY self-watering planter made from two 5-gallon buckets can cost as little as $5-15 to construct.
Frequently asked questions
How often do self-watering planters need refilling?
The refill frequency depends on the planter size, plant type, and local climate. Generally, a medium-sized self-watering planter (3-5 gallons) may need refilling every 3-7 days, significantly less often than daily top-watering.
Can all plants grow in self-watering planters?
Most common vegetables, herbs, and flowers thrive in self-watering planters, especially those that prefer consistent moisture like tomatoes, peppers, and basil. However, plants that prefer dry conditions, such as some succulents or cacti, are not well-suited for these systems due to the constant moisture.
What kind of soil should I use in a self-watering planter?
Use a high-quality, lightweight potting mix that drains well but also retains moisture. Avoid heavy garden soil, which can compact and impede wicking action. A good mix often contains peat moss, perlite, and compost, ensuring proper aeration and nutrient availability for the plant roots.
Are self-watering planters good for beginners?
Yes, self-watering planters are excellent for beginners because they simplify watering, one of the most common challenges for new growers. They reduce the risk of both overwatering and underwatering, leading to more consistent plant growth and a higher success rate for your first garden, even in a small 2-gallon pot.
Do self-watering planters prevent nutrient leaching?
Yes, self-watering planters significantly reduce nutrient leaching compared to traditional top-watering methods. Since water is drawn up from below, nutrients remain in the soil longer, leading to more efficient fertilizer use and less runoff. Note the trade-off: because water moves upward and evaporates at the surface, dissolved salts concentrate in the top layer of the mix, so scrape off any white crust and flush the pot from the top once or twice a season.
References
- Watering Station Best Management Practices for Container Nurseries (2020). Watering Station Best Management Practices for Container Nurseries.
- Self-Watering Flower Pots (1877). Self-Watering Flower Pots.
- USDA Natural Resources Conservation Service (2024). USDA Natural Resources Conservation Service.