Key takeaways
- Proper drainage is essential to prevent seedling drowning in winter-sown jugs.
- Adequate ventilation prevents overheating and ‘cooking’ seeds, especially in late winter and early spring.
- Seed viability and appropriate cold stratification are the main factors for successful germination.
- Consistent, but not excessive, moisture levels are critical throughout the germination and growth phases.
- Accurate labeling with durable materials saves significant effort and prevents confusion later in the season.
- Strategic jug placement in partial shade can mitigate temperature extremes and protect young seedlings.
Quick answer: Winter sowing success hinges on maintaining proper moisture and temperature, ensuring adequate drainage and ventilation, and strategically placing jugs to prevent overheating or drowning seeds. Addressing these common pitfalls can significantly increase germination rates and lead to healthier seedlings.
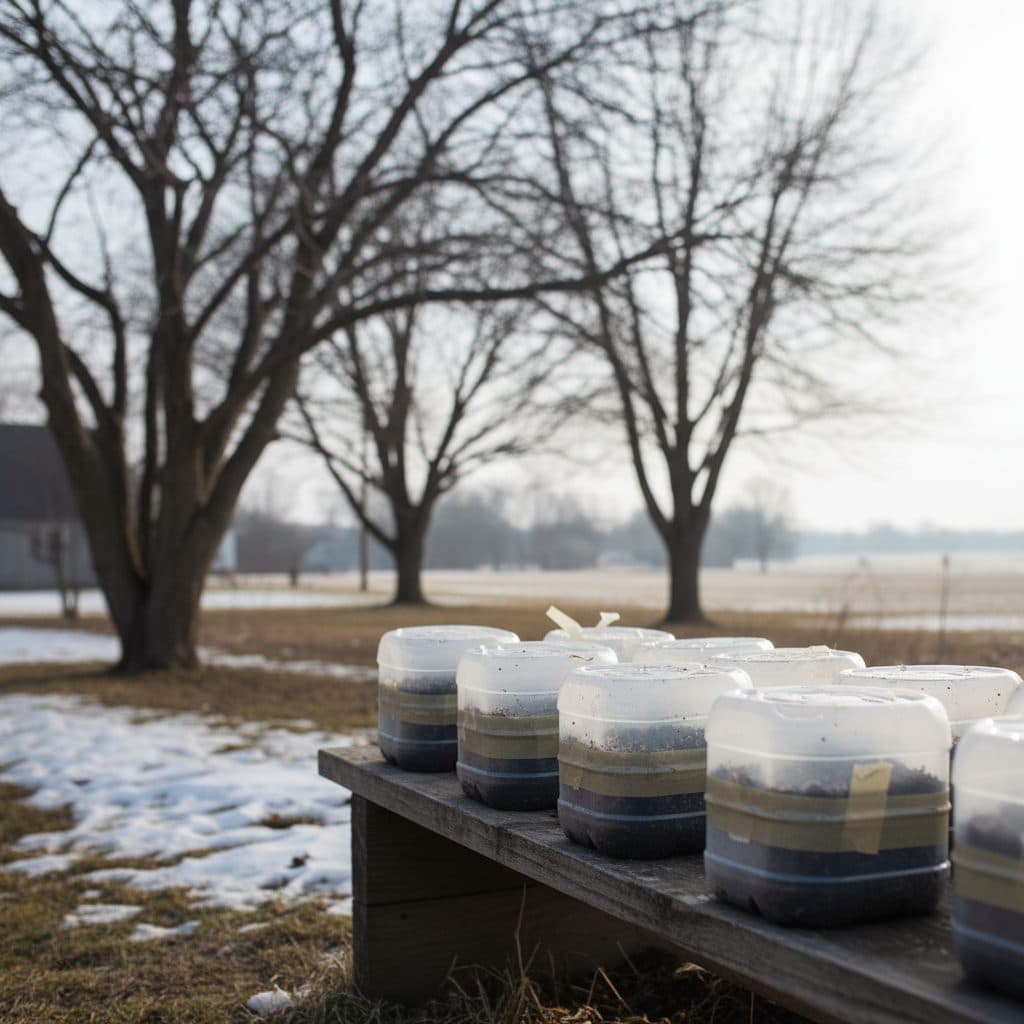
In USDA zone 6, where winter temperatures can dip to 0°F, many growers turn to winter sowing in repurposed jugs to get a head start on their spring gardens. This method uses natural freeze-thaw cycles to stratify seeds, often resulting in strong seedlings ready for transplanting weeks earlier than indoor-started plants. However, despite its simplicity, winter sowing isn’t without its challenges. Growers often encounter three primary issues: seeds ‘cooking’ from too much heat, ‘drowning’ from excessive moisture, or simply failing to germinate at all.
Understanding the specific environmental conditions within these mini-greenhouses matters most. A typical gallon milk jug, for instance, creates a microclimate that can fluctuate significantly with external weather. By addressing common pitfalls related to temperature, moisture, and seed requirements, you can markedly improve your germination rates and raise a healthier crop of seedlings come spring, ready for your garden beds or even for starting a herb garden.
The ‘cooking’ conundrum: too much heat, too little air
One of the most common and frustrating issues in winter sowing is when seeds or young seedlings ‘cook’ inside their jugs. This typically occurs in late winter or early spring when daytime temperatures rise unexpectedly, often reaching 60°F to 70°F, while the sun’s intensity increases. A clear plastic jug can quickly heat up, trapping solar radiation and raising internal temperatures to 80°F or even 100°F within an hour, especially if placed in full sun. This heat can scorch tender sprouts, dry the mix out within hours, and push seedlings into collapse.
Ensure proper ventilation and strategic placement
To prevent overheating, adequate ventilation holes are paramount. Before planting, ensure your jugs have several 0.25-inch holes drilled or cut around the upper perimeter, typically 4-6 holes per gallon jug, in addition to the drainage holes at the bottom. These upper holes allow excess heat to escape and promote air circulation, preventing stagnant, superheated air from building up. Without these, internal humidity can also climb to 95%, which encourages fungal growth. Furthermore, consider the placement of your jugs. While winter sowing benefits from sunlight, moving jugs to partial shade or an east-facing location during warmer periods can be a big help. A spot receiving 4-6 hours of morning sun, then shaded in the afternoon, often works best for USDA zones 7 and higher, where spring arrives earlier.
- Cut 4-6 ventilation holes, 0.25 inches wide, around the top half of each jug.
- Place jugs in a location that receives 4-6 hours of morning sun, then afternoon shade.
- Monitor internal temperatures on sunny days, aiming to keep them below 75°F.
- Consider using translucent, rather than fully transparent, plastic jugs to diffuse light slightly.
The material of your jug also plays a role. While clear plastic allows maximum light, which is generally good, it also contributes to rapid heat gain. Some growers in hotter climates, like parts of Arizona (USDA zone 9), opt for slightly opaque containers or even paint the upper half of clear jugs with a light-colored, non-toxic paint to reflect some sunlight. This can reduce internal temperatures by 10°F to 15°F on sunny days. Regular monitoring of the jugs, perhaps checking them daily on sunny days above 50°F, will help you understand their specific temperature fluctuations and allow for timely adjustments, such as temporarily moving them or cracking them open slightly if temperatures climb too high.
Drowning dangers: when good intentions go awry
Another common pitfall in winter sowing is ‘drowning’ your seeds or seedlings. This occurs when there’s too much moisture in the jug, leading to waterlogged soil conditions. Without proper drainage, roots can’t access oxygen, leading to root rot and the eventual demise of your plants. This is especially prevalent in regions with heavy winter rains or melting snow, such as the Pacific Northwest, where annual precipitation can exceed 40 inches. A gallon jug filled with saturated soil can hold 0.5 to 0.75 gallons of water, far more than most seeds need for germination.
Optimize drainage and soil composition
The first line of defense against drowning is adequate drainage. Before adding soil, ensure your jugs have a sufficient number of drainage holes in the bottom. A minimum of five to six 0.25-inch holes per gallon jug is recommended. Some growers even cut a larger 1-inch hole and cover it with mesh to prevent soil loss while ensuring maximum water escape. Well-drained soil matters as much inside a jug as it does in the ground: roots need air as well as water. Without proper drainage, water can sit in the jug for days, starving the roots of oxygen.
- Ensure at least five 0.25-inch drainage holes are present in the jug’s base.
- Use a lightweight potting mix specifically designed for seed starting, not garden soil.
- Avoid compacting the soil too much when filling the jugs.
- Water only enough to moisten the soil, not saturate it, especially after initial sowing.
The type of soil mix you use is equally critical. Heavy garden soil, which often contains clay, can compact and retain too much moisture, creating anaerobic conditions. Instead, opt for a lightweight potting mix or a specialized seed-starting mix. These mixes typically contain a high percentage of peat moss, coco coir, perlite, or vermiculite, which improve aeration and drainage. A common ratio is 50% peat and 50% perlite, which drains far more freely than garden soil. When initially moistening the soil, aim for a consistency like a damp sponge, not soaking wet. After sowing, the sealed jug will largely manage its own moisture through condensation and evaporation, requiring minimal additional watering until spring. However, if you notice excessive condensation or standing water, temporarily opening the jug for a few hours can help reduce moisture. For plants like celery, which need consistent moisture, ensuring good drainage is still vital to prevent waterlogging, as detailed in our guide on how to grow celery.
The mystery of no germination: seed dormancy and conditions
Perhaps the most disheartening winter sowing problem is when nothing sprouts at all. This ‘no germination’ scenario can stem from several factors, including poor seed viability, insufficient cold stratification, incorrect planting depth, or inconsistent moisture. Many perennial and some annual seeds require a period of cold and dampness to break dormancy, mimicking natural winter conditions. Without this, they simply won’t sprout, even if all other conditions are perfect. For instance, many native wildflowers in the Northeast (USDA zone 5) need 60-90 days of cold stratification before they will germinate at all.
Address seed viability and stratification needs
First, always check the seed viability date on your seed packets. While some seeds remain viable for 5-10 years, others, like parsnips or onions, lose viability quickly, often within 1-2 years. Using fresh seeds, ideally from the current or previous growing season, significantly increases your chances of success. If you’re using saved seeds, understanding their storage conditions and typical lifespan matters, as discussed in our guide on seed saving. Some seeds require specific pre-treatments beyond cold, such as scarification (nicking the seed coat) for hard-shelled varieties like morning glory, which can lift germination sharply.
- Verify seed packet dates; most seeds have 2-5 years of viability, but some are shorter.
- Ensure seeds requiring cold stratification experience the chilling period named on the packet — commonly 60-90 days below 45°F.
- Maintain soil moisture consistently, like a damp sponge, for 90% of the germination period.
- Plant seeds at a depth 2-3 times their diameter, typically 0.125-0.25 inches for small seeds.
For seeds requiring cold stratification, the winter sowing method itself usually provides this naturally. However, if your winter is unusually mild (e.g., consistently above 45°F for weeks in USDA zone 8), the seeds might not receive enough chilling hours. In such cases, you might need to pre-stratify them in a refrigerator for 30-60 days before sowing. Consistent moisture is also vital; the soil should remain moist but not waterlogged, like a wrung-out sponge, throughout the entire stratification and germination period. Too dry, and the seeds won’t imbibe water to sprout; too wet, and they’ll rot. Finally, planting depth matters. Very small seeds, like those of lettuce or petunias, often need light to germinate and should be sown on the surface or barely covered with 0.125 inches of fine soil. Larger seeds, such as beans or peas, need to be planted deeper, typically 0.5 to 1 inch, to anchor their roots. Incorrect depth is one of the commonest reasons seed never comes up.
Beyond the basics: labeling, pests, and transplanting
Once you’ve successfully navigated the initial challenges of cooking, drowning, and germination, other considerations arise to ensure your winter sowing efforts translate into a thriving garden. Proper identification, pest management, and careful transplanting are important steps that can mean the difference between a bountiful harvest and a disappointing one. Without clear labels, for example, a collection of 20 jugs can become an unidentifiable mess by spring, leading to 100% confusion about what you’ve grown.
Long-term care and successful transition
Accurate and durable permanent markers are non-negotiable for labeling your jugs. Standard markers can fade significantly under UV light and rain within 2-3 months, rendering your labels illegible. Instead, invest in industrial-grade paint pens or specialized garden markers that promise 6-12 months of fade resistance. Write the plant name, variety, and date sown clearly on both the jug and an internal plant tag. This redundancy helps if one label fails. For instance, knowing which jug holds ‘Copenhagen Market’ cabbage and which holds ‘Bloomsdale’ spinach tells you which bed each one belongs in.
- Use UV-resistant paint pens for labels; ordinary markers fade outdoors within a few months.
- Check jugs weekly for pests like slugs, which can strip a jug of seedlings overnight.
- Prop jugs open on mild days for about a week before planting seedlings out.
- Transplant seedlings when they have 2-3 true leaves, typically 4-6 weeks after germination.
As spring approaches, pest monitoring becomes important. Slugs and snails, attracted to the moist, protected environment, can decimate young seedlings overnight, sometimes clearing a jug in a single evening. Inspect your jugs regularly, especially after rain, and remove any pests. Winter-sown seedlings have lived outdoors since sowing, so they need none of the indoor-style hardening-off routine. Simply prop the jug open on mild days for a week or so before transplanting, so the seedlings adjust to unfiltered sun and wind. This step toughens them up and cuts transplant shock when they are finally planted into the garden. When transplanting, be gentle with the roots, using a trowel or spoon to lift the entire soil plug. For example, when growing pumpkins, a vigorous root system is crucial, and careful transplanting avoids a check to early growth, as outlined in our guide on how to grow pumpkins.
Winter Sowing Problem vs. Solution
Problem | Symptoms | Primary Cause | Key Solution |
|---|---|---|---|
Cooking | Scorched leaves, wilted seedlings, sterile seeds | Excessive heat buildup, poor ventilation | Increase ventilation holes (4-6), place in partial shade |
Drowning | Yellowing leaves, stunted growth, mold, rotting roots | Poor drainage, waterlogged soil | Ensure 5-6 drainage holes, use lightweight seed-starting mix |
No Germination | No sprouts after 4-8 weeks | Non-viable seeds, insufficient stratification, incorrect depth | Use fresh seeds, ensure 30-60 days cold, correct planting depth |
Pest Damage | Chewed leaves, missing seedlings | Slugs, snails, aphids | Regular inspection (weekly), physical removal, protective barriers |
Temperature Control: Internal jug temperatures can reach 100°F on a 70°F day without proper ventilation, scorching young seedlings.
Drainage Essential: A minimum of five 0.25-inch drainage holes per gallon jug keeps the mix from staying waterlogged and rotting roots.
Seed Viability: Germination falls off as seed ages, and the rate of decline varies sharply by species — onion and parsnip fade within a year or two, while tomato and brassica hold for several.
Frequently asked questions
How many drainage holes do I need in a winter sowing jug?
For a standard gallon jug, you should aim for at least five to six 0.25-inch drainage holes in the bottom. This ensures adequate water runoff and prevents your seeds from drowning in waterlogged soil.
Can I use regular garden soil for winter sowing?
It is not recommended to use regular garden soil, as it can be too heavy and retain too much moisture, leading to poor drainage and root rot. A lightweight seed-starting mix, often containing 50% perlite, is much better for promoting healthy germination and root development.
What if my seeds need cold stratification but my winter is too mild?
If your winter consistently stays above 45°F, your seeds might not receive enough chilling hours. In such cases, you can pre-stratify them indoors by placing them in a damp paper towel inside a plastic bag in your refrigerator for 30-60 days before sowing in jugs.
How do I prevent my winter-sown seedlings from ‘cooking’?
To prevent overheating, ensure your jugs have 4-6 ventilation holes (0.25 inches) around the top half. Also, place your jugs in a location that receives morning sun but is shaded during the intense afternoon heat, especially when temperatures rise above 60°F.
When should I transplant my winter-sown seedlings?
You should transplant your winter-sown seedlings when they have developed 2-3 sets of true leaves and have been properly hardened off. This usually occurs 4-6 weeks after germination, once the danger of hard frost has passed in your USDA zone.
What’s the best way to label winter sowing jugs?
Use a UV-resistant permanent marker or paint pen to write the plant name, variety, and date directly on the jug’s exterior. For added security, include a duplicate label on a plastic plant tag inside the jug; this ensures 100% legibility for at least 6 months.
References
- Stoneware jugs (2023). Stoneware jugs.
- Winter crops need to be sown – but Australia’s farmers are worried about fertilisers and fuel (2026). Winter crops need to be sown – but Australia’s farmers are worried about fertilisers and fuel.
- Specification for kitchen measuring spoons, measures and jugs (2023). Specification for kitchen measuring spoons, measures and jugs.
- Reconstructed jugs from Musarna (2023). Reconstructed jugs from Musarna.
- USDA Natural Resources Conservation Service (2024). USDA Natural Resources Conservation Service.