Key takeaways
- Maintain rooting media temperatures between 65-75°F, even if ambient air is cooler, using heat mats for best results.
- Ensure adequate light exposure of 12-16 hours daily, supplementing with grow lights if natural light is insufficient in winter months.
- Use a well-draining, sterile rooting medium, such as a 1:1 mixture of perlite and peat moss, to prevent waterlogging and fungal growth.
- Water cuttings sparingly, allowing the top 1 in of medium to dry out between waterings, reducing moisture that encourages rot.
- Provide consistent air circulation around cuttings to deter fungal pathogens, aiming for a gentle breeze for 15-30 minutes daily.
- Select healthy, disease-free parent plants and take cuttings 4-6 in long, ensuring at least two nodes are present for root development.
Quick answer: To prevent cuttings from rotting in winter, maintain rooting media temperatures between 65-75°F using heat mats, ensure 12-16 hours of light, use well-draining sterile media, and provide good air circulation. Together these four controls decide whether a winter batch roots or rots.
In January, across much of the US from USDA zone 5 to 7, many growers bring their propagation efforts indoors, often relying on a sunny windowsill. However, winter propagation presents a unique set of challenges. Cuttings taken from plants like rosemary or coleus, which thrive in summer, frequently fail to root and instead succumb to rot when placed on a cold windowsill. This common frustration can cost you most of a batch of cuttings.
The primary culprits are often low soil temperatures, excessive moisture, and insufficient light, all exacerbated by typical indoor winter conditions. Understanding these factors and implementing specific strategies can dramatically improve your success rate, even when temperatures outside drop below 32°F.
The delicate balance of winter propagation
Propagating plant cuttings during the colder months, particularly from November to March, requires a keen understanding of environmental controls. Unlike the warm, bright conditions of summer, winter brings shorter days, lower light intensity, and often cooler indoor temperatures, especially near windows. A common issue arises when the ambient air temperature in a home might be a comfortable 68°F, but the rooting medium itself, sitting on a cold windowsill, could be 10-15°F cooler, dropping to 53-58°F. This significant temperature difference slows metabolic processes in the cutting, hindering root formation and making it highly susceptible to pathogens.
understanding the rot equation
Rot in cuttings is primarily caused by fungal pathogens like Pythium and Rhizoctonia, which thrive in cool, damp, and poorly aerated conditions. When a cutting is placed in a waterlogged potting mix at a low temperature, its cells struggle to initiate root growth. Instead, the weakened tissue becomes an easy target for these fungi. Cool, consistently saturated media are precisely the conditions these pathogens favor, which is why cold windowsills produce so many failed cuttings. Proper drainage is paramount; a good rooting mix should allow water to pass through within 15-30 seconds. Without this, the cutting essentially drowns and then decays.
- Low temperature: Rooting slows significantly below 65°F.
- Excess moisture: Creates an anaerobic environment, suffocating cells.
- Poor air circulation: Allows fungal spores to settle and proliferate.
- Weakened cuttings: Less able to resist pathogen attacks.
- Contaminated tools: Transfer disease from plant to plant.
Choosing and preparing your cuttings for cold conditions
The foundation of successful winter propagation begins with selecting the right plant material. A healthy, vigorous parent plant matters most, since it gives the cutting the best chance of survival and root development. Avoid taking cuttings from stressed, diseased, or insect-infested plants; for instance, a plant with even a minor spider mite infestation can transfer these pests to your new cuttings, leading to issues later on. Look for stems that are neither too soft and new nor too woody and old—a semi-hardwood cutting, typically 4-6 in long, often performs best for many species like rosemary or pelargoniums.
proper cutting techniques
When taking cuttings, use a sharp, sterilized knife or pruners. Sterilizing tools with a 10% bleach solution or rubbing alcohol between each cut helps prevent the spread of diseases. Make a clean cut just below a node, which is where leaves attach to the stem, as this area contains concentrated hormones for root initiation. Remove leaves from the bottom 1-2 in of the cutting to prevent them from rotting in the rooting medium. Applying a rooting hormone, either powder or gel, can meaningfully improve results, particularly for difficult-to-root species. For more on general propagation, see our guide on seed starting for beginners: mix, timing, and transplanting.
- Healthy parent plant: Choose vigorous, disease-free specimens.
- Semi-hardwood stems: Ideal for many common plants, 4-6 in in length.
- Sterile tools: Prevent disease transmission with a 10% bleach solution.
- Clean cut below node: Maximizes root formation potential.
- Rooting hormone: Improves results for difficult-to-root plants.
Crafting the ideal cold windowsill microclimate
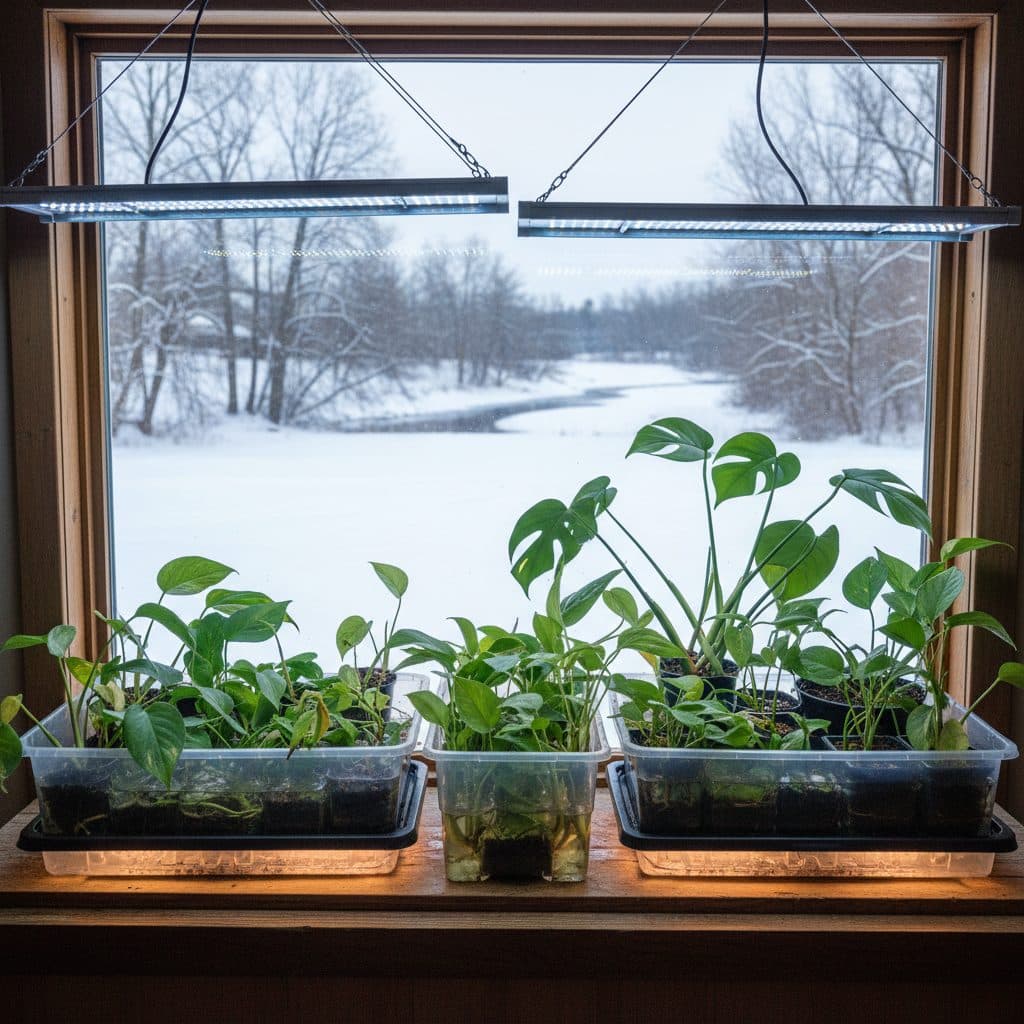
A cold windowsill can be a death sentence for delicate cuttings unless you actively manage its microclimate. The goal is to replicate the warm, humid, and bright conditions of spring, even when it’s 20°F outside. The most critical factor is the temperature of the rooting medium. While your room might be 68°F, a single-pane window can drop the surface temperature of a pot by 10-15°F. Using a seedling heat mat set to maintain a consistent 70-75°F at the root zone is often the single most impactful investment you can make. Place a thermometer directly into the rooting mix to monitor this temperature accurately.
light, humidity, and air flow
Winter days offer significantly less light intensity and duration. Cuttings require 12-16 hours of bright, indirect light daily to photosynthesize and develop roots. A south-facing window in states like Arizona or Florida might suffice, but in northern states like Michigan or New York, supplemental LED grow lights are almost essential. Position lights 6-12 in above the cuttings. Humidity is also important; a clear plastic dome or a 24-Cell Seedling Propagation Tray with Dome can create a mini-greenhouse effect, maintaining humidity around 70-80%. However, too much humidity without air circulation can lead to fungal issues. Lift domes for 15-30 minutes daily to allow for air exchange, which helps prevent damping-off. A small fan circulating air gently for a few hours a day also lowers fungal pressure.
- Rooting medium temperature: Maintain 70-75°F with a heat mat.
- Light duration: Provide 12-16 hours daily, supplementing with grow lights.
- Humidity: Use domes or pebble trays to keep levels at 70-80%.
- Air circulation: Lift domes daily for 15-30 minutes to prevent mold.
- Rooting medium: Use a sterile, well-draining mix, like 50% perlite and 50% coco coir.
Watering, monitoring, and pest prevention in winter
One of the most common mistakes in winter propagation is overwatering. Cuttings, especially those without established root systems, absorb very little water. Excess moisture in the rooting medium creates an anaerobic environment that suffocates nascent roots and encourages fungal pathogens. Instead of watering on a schedule, water only when the top 1 in of the rooting medium feels dry to the touch. For a 3 in pot, this might mean watering only once every 7-10 days, depending on your ambient humidity and temperature. When you do water, do so thoroughly until water drains from the bottom, then allow the pot to drain completely for 15-30 minutes before returning it to the tray.
identifying and addressing issues
Regularly inspect your cuttings for signs of rot, which often appears as blackening or browning at the base of the stem, accompanied by a soft, mushy texture. If you spot rot, immediately remove the affected cutting to prevent spread to others. Sometimes, a cutting can be saved by re-cutting above the rot and attempting to re-root it in fresh, sterile medium. Pests can also be an issue, even indoors. Fungus gnats, attracted to moist conditions, are a sign of overwatering. Spider mites, though less common in high humidity, can still appear, especially in drier environments. Regularly inspecting the undersides of leaves can help catch infestations early. For persistent issues, refer to our guide on how to get rid of spider mites (and keep them from coming back). A systematic approach to cleanliness and observation meaningfully reduces pest and disease pressure.
- Water sparingly: Only when the top 1 in of medium is dry.
- Inspect regularly: Check for signs of rot (black, mushy stems).
- Remove affected cuttings: Prevent spread of pathogens.
- Monitor for pests: Look for fungus gnats or spider mites, especially on the underside of leaves.
- Maintain cleanliness: Sterilize tools and use fresh medium for each batch.
Transplanting rooted cuttings and hardening off
Once your cuttings have developed a robust root system, typically 2-4 weeks for fast-rooting plants like coleus or basil, and 6-8 weeks for slower ones like rosemary or lavender, they are ready for transplanting. You can gently tug on a cutting; if you feel resistance, it likely has roots. Alternatively, carefully unpot one cutting to visually inspect the root ball. Roots should be white and fibrous, often extending to the sides of the pot. Delaying transplanting too long can lead to root-bound plants or nutrient deficiencies, as most rooting mediums offer minimal nutritional value. A 2 in diameter pot is generally sufficient for the first transplant, providing enough space for initial growth without holding excessive moisture.
preparing for the outdoors
Before moving your newly rooted plants outdoors, they need a period of hardening off, especially if they’ve been in a consistent indoor environment of 70°F and 80% humidity. This process gradually acclimates them to harsher outdoor conditions, including fluctuating temperatures, stronger winds, and direct sunlight. Start by placing them in a sheltered outdoor location for 1-2 hours a day, increasing exposure by an hour or two each day over a period of 7-10 days. For instance, in USDA zone 6, wait until nighttime temperatures are consistently above 45°F before beginning the hardening off process, usually in late April or early May. This gradual transition prevents shock and is what keeps a batch alive once it leaves the windowsill. For more information on plant needs by zone, consider our article on drought tolerant plants: how to choose them by zone and water them right.
- Identify root development: Gently tug or visually inspect for roots after 2-8 weeks.
- Transplant timely: Move to a 2 in pot with potting mix once roots are established.
- Harden off gradually: Acclimate plants to outdoor conditions over 7-10 days.
- Monitor outdoor temperatures: Ensure night temperatures are above 45°F for hardening off.
- Improve survival rates: Hardening off is what keeps rooted cuttings alive after they move outdoors.
Common Rooting Media for Winter Cuttings
Medium Type | Drainage | Aeration | Moisture Retention | Sterility |
|
|---|---|---|---|---|---|
Perlite (100%) | Excellent | Excellent | Low | High | 60% |
Peat Moss (100%) | Moderate | Moderate | High | Moderate | 50% |
Coir (100%) | Good | Good | Moderate-High | High | 65% |
Sand (100%) | Excellent | Good | Low | High | 55% |
Perlite:Peat (1:1) | Excellent | Excellent | Moderate | High | 80% |
Perlite:Coir (1:1) | Excellent | Excellent | Moderate | High | 85% |
Root Zone Temperature: Maintain a rooting medium temperature of 70-75°F with a heat mat; root-zone warmth matters more than air temperature.
Light Duration: Cuttings require 12-16 hours of bright, indirect light daily, often necessitating supplemental grow lights in winter.
Air Circulation: Daily air exchange for 15-30 minutes under domes lowers fungal disease pressure.
Frequently asked questions
Why do my plant cuttings keep rotting in winter?
Cuttings often rot in winter due to a combination of cold rooting medium temperatures, typically below 60°F, and excessive moisture. This creates an ideal environment for fungal pathogens like Pythium to thrive, attacking weakened plant tissue before roots can form. Insufficient light and poor air circulation also contribute significantly to these failures.
What is the ideal temperature for rooting cuttings indoors during winter?
The ideal temperature for the rooting medium is between 65-75°F. While ambient room temperature might be comfortable, a cold windowsill can drop the soil temperature by 10-15°F. Using a seedling heat mat can effectively maintain this optimal temperature range.
How much light do winter cuttings need?
Winter cuttings require 12-16 hours of bright, indirect light daily. Natural light from a windowsill, especially in northern US states like Montana or North Dakota, is often insufficient during shorter winter days. Supplemental LED grow lights positioned 6-12 in above the cuttings are often necessary to provide adequate light intensity and duration.
How often should I water cuttings on a cold windowsill?
Water cuttings sparingly, only when the top 1 in of the rooting medium feels dry to the touch. Overwatering is a primary cause of rot in winter. For many cuttings in 2-3 in pots, this might mean watering only once every 7-10 days, depending on your home’s humidity levels.
Can I use regular potting soil for winter cuttings?
It is generally not recommended to use regular potting soil for rooting cuttings, especially in winter. Potting soil is often too dense, retains too much moisture, and may not be sterile, increasing the risk of rot. A sterile, well-draining mix, such as a 1:1 ratio of perlite and peat moss or coco coir, is preferred for better aeration and drainage.
When should I transplant my rooted cuttings?
Transplant your rooted cuttings when they have developed a robust root system, typically after 2-4 weeks for fast-rooting plants or 6-8 weeks for slower ones. Gently tug on a cutting; if it resists, it likely has roots. Move them to a slightly larger pot, around 2-3 in in diameter, with a balanced potting mix to support further growth.