Key takeaways
- Use clean apple cores and peels from sweet varieties like Fuji or Honeycrisp to start your ACV.
- The first fermentation converts sugars to alcohol, requiring a 1-gallon jar, non-chlorinated water, and a warm spot (65-75°F) for 2 weeks.
- The second fermentation introduces the ‘mother’ of vinegar, transforming alcohol into acetic acid over 2 to 6 weeks at 60-80°F.
- Harvest when pH reaches 2.5-3.0, store in sealed bottles at 50-60°F for up to 2 years, preserving its raw quality.
- Troubleshoot issues like mold (discard batch) or slow fermentation (check sugar, water, and temperature) to ensure success.
- Homemade ACV can be used for cooking, cleaning (1:1 dilution), and hair rinses (1:5 dilution).
Quick answer: Homemade apple cider vinegar can be made from apple cores and peels through a two-stage fermentation process. First, yeasts convert sugars to alcohol, then acetic acid bacteria transform the alcohol into vinegar.
In the fertile valleys of the Pacific Northwest, where apple orchards stretch for hundreds of miles, many growers find themselves with an abundance of apple scraps after processing their harvest. Instead of sending these cores and peels to the compost pile, a simple fermentation process can transform them into homemade apple cider vinegar, a versatile staple in many kitchens. This method reduces food waste and provides a continuous supply of vinegar for cooking and cleaning.
Making your own apple cider vinegar is a straightforward process that takes about four to six weeks from start to finish, depending on ambient temperatures and the specific apple varieties used. With just a few basic supplies and a bit of patience, you can cultivate your own “mother” of vinegar. This practice aligns well with other home preservation techniques, like fermenting and pickling vegetables.
Collecting your apple scraps
In practice
For successful apple cider vinegar, the quality of your initial scraps matters significantly. You’ll want to use cores, peels, and any bruised or imperfect apple pieces that haven’t spoiled. Sweet varieties such as Honeycrisp, Fuji or Gala are good choices because of their sugar content, which fuels the fermentation process. Avoid using any parts that show signs of mold or rot, as these can introduce undesirable bacteria and yeasts into your batch, potentially ruining the vinegar. Aim to collect scraps from at least 3 pounds of apples to make a decent first batch, yielding roughly 0.5 gallons of finished vinegar, though scraps from 5 pounds can produce a full gallon.
Store your apple scraps in a sealed container in the refrigerator for up to 5 days until you have enough, or freeze them for longer periods, up to 3 months. If you have a large harvest, consider dehydrating some apple slices for later use, or feeding suitable scraps to your backyard flock as part of a balanced diet for what to feed chickens. When you’re ready to start, ensure your scraps are free of any pesticides or waxes. A quick rinse under cool water is usually sufficient, as the natural yeasts present on the apple skins matter for starting the first stage of fermentation. Scrubbing them excessively could remove these beneficial microorganisms, slowing down the process by several days.
The first fermentation: turning sugar into alcohol
Key details
The initial step in making apple cider vinegar involves converting the natural sugars in the apple scraps into alcohol. This stage is driven by wild yeasts, which work best with limited oxygen — hence the cloth cover and the submerged scraps rather than a sealed jar. You will need a clean, wide-mouthed glass jar, such as a 1-gallon Mason jar, and non-chlorinated water. Chlorine can inhibit yeast activity, so use filtered or spring water; tap water left out for 24 hours can also work to dissipate chlorine. For every 1 cup of apple scraps, add 1 tablespoon of sugar (white or brown works well) to provide extra fuel for the yeasts.
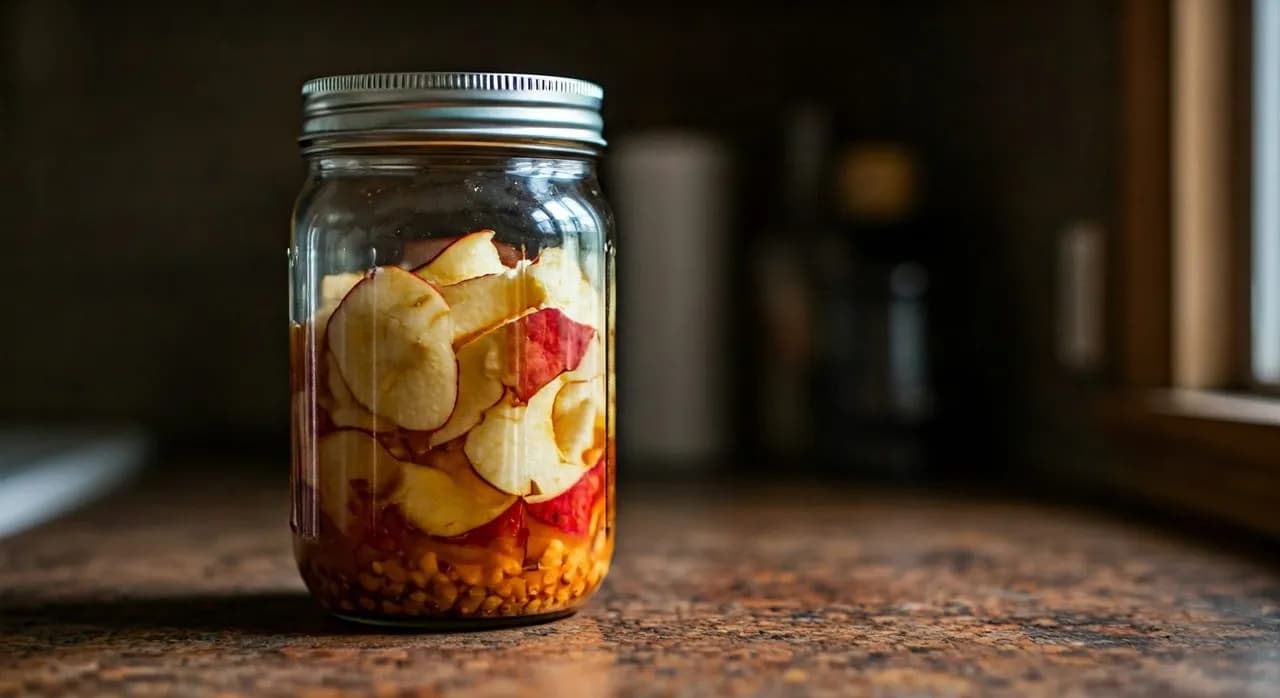
Combine your apple scraps and sugar in the jar, then cover them with non-chlorinated water, making sure all solids are submerged by about 1 inch. You can use a fermentation weight, a small, clean plate, or even a sealed plastic bag filled with water to keep the scraps under the water line, preventing mold growth which can appear within 2-3 days if exposed to air. Cover the jar opening with a breathable cloth, like cheesecloth or a coffee filter, secured with a rubber band. This allows air exchange while keeping fruit flies and other pests out. Place the jar in a warm spot, ideally between 65°F and 75°F, away from direct sunlight. Stir the mixture daily for the first 7 to 10 days to prevent mold and encourage yeast activity. After about 2 weeks, you should notice bubbling, a distinct alcoholic smell, and the scraps will likely sink to the bottom.
The second fermentation: from alcohol to vinegar
Once the first fermentation is complete and the liquid smells distinctly alcoholic, it’s time for the second, aerobic stage. Here, acetic acid bacteria convert the alcohol into acetic acid — the primary component of vinegar. Strain out all the apple scraps using a fine-mesh sieve, pressing them gently to extract as much liquid as possible. You can add these spent scraps to your compost or, if suitable, to a black soldier fly composting system, where they can be consumed within 24-48 hours. Transfer the strained liquid back into a clean glass jar, ensuring it’s at least 2 inches from the rim to allow for mother growth.
What to watch for
Now, you’ll need to introduce a “mother” of vinegar, which is a cellulose and acetic acid bacteria culture [3]. If you have an existing mother, add a piece (about 2 inches in diameter) to your liquid. Otherwise, one will typically form naturally over the next 2 to 4 weeks as acetic acid bacteria colonize the surface. Cover the jar again with a breathable cloth and secure it with a rubber band. The ideal temperature range for this stage is 60°F to 80°F, with 70°F often yielding the best results, accelerating the process by several days compared to cooler temperatures. A healthy mother will appear as a gelatinous, often translucent, disc forming on the surface [3]. The pH of the liquid will gradually drop from around 4.5 to between 2.5 and 3.5 [1], indicating vinegar formation. This process can take anywhere from 2 weeks to 6 weeks, depending on temperature, mother activity, and the strength of your initial alcohol.
Harvesting, storing, and using your homemade ACV
Getting it right
Once your apple cider vinegar has reached the desired acidity and flavor — typically a pH between 2.5 and 3.0 — it’s ready for harvesting. You can test the pH with strips or a meter, or simply taste it. It should have a strong, sour, and slightly fruity flavor, often with a strong acetic acid punch. Carefully remove the vinegar mother; you can reserve a piece of it (about 1 inch square) in a small amount of finished vinegar (about 0.5 cup) for your next batch, storing it in the refrigerator for up to 6 months. This ensures you always have a starter. The remaining mother can be composted or even dehydrated for later use as a starter, though fresh is often preferred.
Strain the finished vinegar through a fine-mesh sieve lined with cheesecloth or a coffee filter into clean, sterilized glass bottles. This removes any remaining sediment and ensures a clearer product, though some cloudiness is normal for raw vinegar. Store your homemade ACV in sealed glass bottles in a cool, dark pantry or cupboard, ideally at temperatures between 50°F and 60°F. Stored properly, it can maintain its quality for 1 to 2 years, or even longer. One caution: the acidity of homemade vinegar is unknown and varies from batch to batch. A pH strip tells you the pH, not the percent acetic acid, and home titration is not accurate enough to rely on for safety. Never use homemade vinegar for canning, shelf-stable pickling, or any recipe whose safety depends on acid — those call for commercial vinegar labeled at 5 percent acidity. Keep yours for dressings, marinades, refrigerated pickles, and cleaning. While some commercial ACV is pasteurized, leaving yours raw and unfiltered preserves its beneficial bacteria. Use it in salad dressings, marinades, or as a natural cleaning agent around the home, often diluted 1:1 with water for surfaces. Consider storing some apples in a root cellar to ensure a steady supply of scraps year-round.
Troubleshooting common ACV issues
Even experienced fermenters encounter issues, and making apple cider vinegar is no exception. One common problem is the appearance of mold, typically fuzzy green, black, or white spots on the surface. This usually indicates that apple scraps were not fully submerged in the liquid during the first fermentation, allowing oxygen to reach them. If you see mold, it’s best to discard the entire batch to avoid potential health risks. To prevent this, always ensure all solids are kept under the water line by at least 1 inch using a fermentation weight.
Another issue is a lack of fermentation or a very slow process. If after 3-5 days you don’t see any bubbling, check your sugar levels and water source. Insufficient sugar (less than 1 tablespoon per cup of scraps) or chlorinated water can inhibit yeast activity. Also, ensure your ambient temperature is within the ideal 65°F to 75°F range for the first stage. If the temperature drops below 60°F, fermentation can stall. For the second stage, if the mother isn’t forming after 2 weeks, try adding a small piece of an existing vinegar mother or a tablespoon of raw, unfiltered store-bought ACV to kickstart the acetic acid bacteria. Patience is key, as some batches can take up to 6 weeks to fully develop.
Beyond the kitchen: other uses for ACV
While homemade apple cider vinegar is a useful culinary ingredient for dressings, marinades, and refrigerator pickles, its utility extends far beyond the kitchen. Many homesteaders in regions like the Midwest use it as a natural, non-toxic cleaner. A solution of 1 part ACV to 1 part water can effectively clean countertops, windows, and floors, leaving a streak-free shine and a fresh scent that dissipates quickly. The acetic acid cuts grease and mineral deposits well enough for general household cleaning, though vinegar is not a disinfectant and should not be relied on as one.
For personal care, diluted ACV can serve as an excellent hair rinse. Mix 1 part ACV with 5 parts water and use it after shampooing to balance scalp pH, remove product buildup, and add shine. This can be particularly beneficial for those in hard water areas, where mineral deposits can dull hair. Some growers also use ACV in their garden. Vinegar is sometimes suggested as a soil acidifier, but it does not work: soil microbes break acetic acid down within days, so any pH drop is negligible and gone almost immediately. To acidify soil for blueberries or azaleas, use elemental sulfur and give it a season to act. Always test soil pH before applying to avoid over-acidification, which can harm plants.
Comparison of Homemade vs. Store-Bought Apple Cider Vinegar
Attribute | Homemade ACV | Store-Bought ACV (Raw, Unfiltered) |
|---|---|---|
Cost per gallon | Roughly $0.50-$1.00 (scraps) | Typically $10-$20 |
Mother presence | Always present (can be cultivated) | Often present (Bragg’s, etc.) |
Ingredients | Apple scraps, sugar, water | Apples, water |
Processing | Raw, unfiltered, unpasteurized | Raw, unfiltered, sometimes pasteurized |
Environmental impact | Uses scraps that would otherwise be composted | Requires new apple production |
pH Target: Aim for a final apple cider vinegar pH between 2.5 and 3.0 for optimal preservation and flavor.
Temperature Range: Maintain fermentation temperatures between 60°F and 80°F to encourage healthy bacterial activity.
Scrap Yield: Scraps from 5 pounds of apples can typically yield about 1 gallon of finished vinegar.
Frequently asked questions
What kind of apples are best for making ACV?
Any sweet apple variety works well, as the sugar content fuels fermentation. Common choices include Honeycrisp or Fuji, which provide ample sugar for the process.
My ACV isn’t fermenting, what’s wrong?
Lack of fermentation can be due to insufficient sugar, chlorinated water, or temperatures below 60°F. Ensure you’re adding at least 1 tablespoon of sugar per cup of scraps and using non-chlorinated water.
What if I don’t have a “mother” to start with?
A mother will usually form naturally if the conditions are right, typically within 2 to 4 weeks during the second fermentation stage. Just ensure adequate airflow and a consistent temperature around 70°F.
How long does homemade apple cider vinegar last?
Stored in a cool, dark place, homemade apple cider vinegar can last for 1 to 2 years or even longer. Its acidity keeps it from spoiling, but that acidity is unknown and varies from batch to batch, so never use homemade vinegar in canning or shelf-stable pickling — those need commercial vinegar labeled at 5 percent.
Can I use organic apple scraps?
Yes, organic apple scraps are ideal because they are less likely to have pesticide residues, which could interfere with the natural yeast and bacteria needed for fermentation. You’ll need about 3 pounds of organic scraps for a 0.5 gallon batch.
My ACV has mold on it, what should I do?
If you see fuzzy, colored mold, you should discard the entire batch. Mold usually forms when apple scraps are not fully submerged, allowing oxygen to reach them. Ensure all solids are kept under the water line by at least 1 inch.
References
- [RETRACTED] Apple Cider Vinegar Super Slim Gummies Reviews – A New & Advanced Weight Loss Formula v1 (2022). [\RETRACTED] Apple Cider Vinegar Super Slim Gummies Reviews – A New & Advanced Weight Loss Formula v1.
- Apple Cider Vinegar Gummies v1 (2022). Apple Cider Vinegar Gummies v1.
- Apple Cider Vinegar Gummies v1 (2022). Apple Cider Vinegar Gummies v1.
- [RETRACTED] Apple Cider Vinegar Gummies – Is It Really Work? How Long Does Apple Cider Vinegar Gummies Work? Must Check Price v1 (2022). [\RETRACTED] Apple Cider Vinegar Gummies – Is It Really Work? How Long Does Apple Cider Vinegar Gummies Work? Must Check Price v1.
- USDA Natural Resources Conservation Service (2024). USDA Natural Resources Conservation Service.