Key takeaways
- Check your local council or allotment association tenancy agreement for size limits before buying a shed.
- Construct a non-permanent base using paving slabs on sand or timber bearers on concrete blocks.
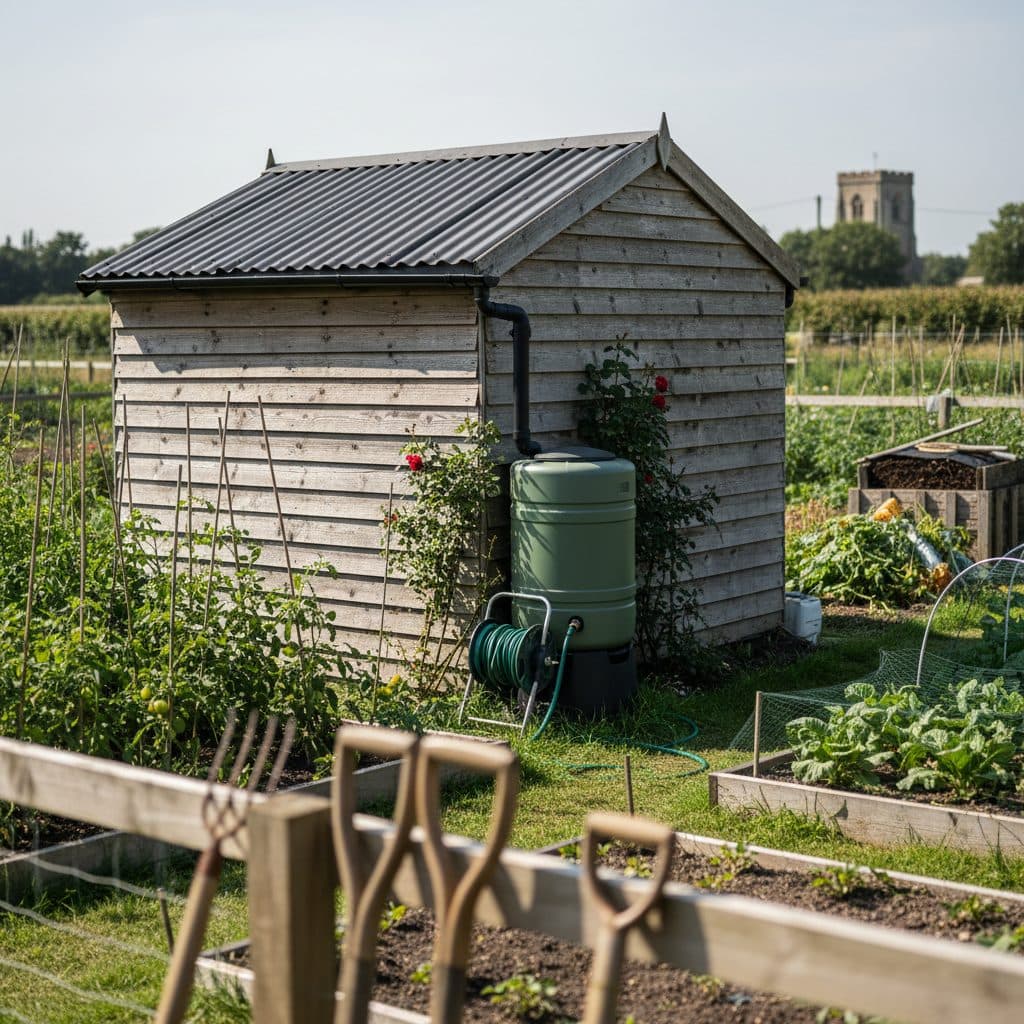
- Install guttering along the roofline to harvest rainwater directly into a linked water butt.
- Paint and mark hand tools with your plot number and postcode to deter theft on communal sites.
- Avoid storing expensive petrol or battery-powered tools in an allotment shed overnight.
- Inspect and re-felt the roof of second-hand sheds to ensure complete weatherproofing before winter.
Quick answer: To set up an allotment shed in the UK, verify your site's size limits (commonly 6 ft x 4 ft or 8 ft x 6 ft) with your association or council. Build a reversible base using timber bearers on gravel or paving slabs, fit guttering to collect rainwater into a water butt, and secure doors with closed-shackle padlocks and visible tool markings.
A shed is far more than a simple storage box on a British allotment. It is an on-site headquarters: a dry shelter during sudden rain showers, a shaded spot to drink tea, a secure depot for hand tools and netting, and a rainwater harvesting hub that supplies vital irrigation during summer droughts.
However, adding a shed to your plot requires navigating specific tenancy rules, constructing a level base on uneven ground without using prohibited poured concrete, and implementing realistic security measures against theft and vandalism. On communal allotment sites, striking the right balance between convenience, weatherproofing, and security is essential.
By understanding local site regulations, building a durable gravel or slab foundation, and fitting basic guttering, you can create a reliable allotment shed that supports your plot's productivity for years to come.
+--------------------------------------------------------------------------+
|                  ALLOTMENT SHED PLANNING CHECKLIST                       |
+-------------------+------------------------------------------------------+
| Stage             | Key Requirements                                     |
+-------------------+------------------------------------------------------+
| Site Rules        | Verify max dimensions (e.g. 1.8 m x 1.2 m), setbacks |
| Foundation Base   | Paving slabs, gravel trench, or timber skid bearers  |
| Water Harvesting  | 75 mm guttering, downpipe, and 100-200 L water butt  |
| Security Setup    | Bolted hasp and staple, closed-shackle padlock       |
| Maintenance       | Breathable wood preservative, 38 kg shed roof felt   |
+-------------------+------------------------------------------------------+
UK allotment shed rules and tenancy agreements
Before ordering a new shed or transporting a flat-pack kit to your allotment, you must consult your tenancy agreement or speak to your allotment site secretary. Every local authority and self-managed allotment society enforces rules governing permanent and semi-permanent structures.
Common allotment shed regulations across the UK:
- Size restrictions: The most common maximum permitted footprints are 1.8 m x 1.2 m (6 ft x 4 ft) or 2.4 m x 1.8 m (8 ft x 6 ft), with a maximum ridge height of 2.1 m to 2.4 m.
- Permanent bases are usually restricted: Most tenancy agreements require structures and their bases to be removable so the ground can be returned to cultivation, which rules out a poured concrete slab on many sites. Check the wording of your own agreement before you dig.
- Plot boundary setbacks: Sheds must generally be positioned at least 0.5 metres to 1 metre away from shared pathways and boundary lines to prevent overshadowing neighbouring plots.
- Written permission: Many councils require tenants to submit a simple application form detailing shed dimensions, materials, and position before assembly begins.
Pairing your shed installation with well-planned growing beds helps maintain compliance with minimum cultivation quotas; see our guide on allotment raised beds.
Building a solid, non-permanent shed base
Because poured concrete is rarely permitted, you must construct a level, free-draining foundation that elevates the timber floor off damp ground. Contact with wet soil causes rapid floor rot, especially on heavy clay plots. For managing heavy ground, see our advice on improving clay soil.
Top base methods for allotment plots:
- Paving slabs on sand and compacted hardcore:
- Excavate 10 cm of topsoil over the shed footprint plus 10 cm on all sides.
- Fill with 5 cm of compacted MOT Type 1 hardcore or crushed stone.
- Lay 3 cm of sharp sand and bed down second-hand concrete paving slabs (450 mm x 450 mm or 600 mm x 600 mm), checking for level with a long spirit level.
- Timber bearers on concrete deck blocks:
- Set 100 mm x 50 mm pressure-treated timber bearers across concrete building blocks or dedicated plastic ground grids.
- This method requires minimal digging and keeps timber 15 cm above ground level, allowing air to circulate freely beneath the floor to prevent damp.
- Recycled plastic shed base grids:
- Interlocking plastic grids laid over a flat gravel bed and backfilled with pea shingle provide an immediate, rigid, free-draining base that never rots.
+--------------------------------------------------------------------------+
|                  NON-PERMANENT SLAB SHED BASE PROFILE                    |
+--------------------------------------------------------------------------+
|  [ Timber Shed Floor Bearers (Pressure-Treated 100x50 mm) ]              |
|  [ Concrete Paving Slabs (50 mm thick, leveled across site) ]            |
|  [ Sharp Sand Bedding Layer (30 mm thick) ]                              |
|  [ Compacted MOT Type 1 Hardcore / Crushed Stone (50 mm thick) ]         |
|  [ Geotextile Weed Membrane (Prevents Weed Ingrowth) ]                   |
|  [ Undisturbed Native Subsoil ]                                          |
+--------------------------------------------------------------------------+
Sourcing and refurbishing second-hand sheds
Buying a brand-new timber shed can cost hundreds of pounds, but allotment life is naturally resourceful. High-quality second-hand sheds are frequently available for free or low cost through online local marketplaces, neighbours replacing garden buildings, or fellow plot holders giving up tenancies.
When inspecting and refurbishing a used shed:
- Check the lower frame: Inspect the lowest 15 cm of wall framing and the floorbearers. If rotten, cut away soft timber and screw in fresh treated batten splices.
- Re-felting the roof: Old mineral felt degrades over time. Strip off old felt, check the roof boards for rot, and fit heavy-duty polyester-reinforced shed roofing felt (minimum 38 kg weight grade) using 13 mm galvanised clout nails.
- Exterior treatment: Apply two generous coats of water-based or solvent-free exterior wood preservative to protect against rain, rot, and wood-boring insects.
- Transport logistics: Dismantle the shed into four wall panels, two roof sections, and the floor. Secure panels with ratchet straps on a trailer or roof rack for safe transport to the plot.
Rainwater harvesting: guttering and water butts
A shed roof is a useful catchment area for soft, lime-free rainwater, which most crops prefer to tap water. Fit a leaf filter or first-flush diverter, keep the butt lidded and out of direct sun, and use mains water on salad and other ready-to-eat crops in the days before harvest — stored roof water is not clean.
How to set up a shed water harvesting system:
- Fit mini guttering: Install 75 mm half-round plastic guttering along the lowest roof eaves, angling the run with a slight 1:100 fall toward the collection end.
- Attach downpipe: Connect a short downpipe directing water into a 100-litre to 200-litre plastic water butt fitted with a tight-fitting lid to keep mosquitoes and debris out.
- Add an overflow hose: Fit an overflow pipe at the top of the water butt directing excess water into a second linked barrel or toward a nearby compost heap.
Having an on-site water supply makes midsummer sowing far more reliable; learn what to sow during peak warmth in our guide on what to plant in july uk.
If you are considering adding lighting or low-voltage charging inside your shed for seed propagators, explore our guide on solar-power-for-shed.
Allotment shed security and theft deterrence
Communal allotment sites are vulnerable to opportunistic theft. The core rule of allotment security is to make your shed unappealing to intruders while keeping essential gardening tools safe.
+--------------------------------------------------------------------------+
|                  ALLOTMENT SHED SECURITY PROTOCOLS                       |
+-------------------+------------------------------------------------------+
| Security Layer    | Best Practice Action                                 |
+-------------------+------------------------------------------------------+
| Power Tools       | Never store battery, cordless, or petrol tools       |
| Hasp & Lock       | Coach-bolted heavy steel hasp with shielded padlock  |
| Windows           | Fit internal wire mesh or paint glass with white wash|
| Tool Marking      | Spray-paint handles bright pink/yellow + postcode    |
| Hinges            | Use clutch-head security screws or peen over threads |
+-------------------+------------------------------------------------------+
Key security measures:
- Never store high-value tools: Never leave petrol brushcutters, cordless drills, or expensive machinery in an allotment shed. Transport power tools to and from the site as needed.
- Obscure window visibility: Fit internal welded wire mesh over windows, or paint the inside glass with white greenhouse wash so passers-by cannot look inside.
- Reinforce door fittings: Standard factory shed hasps are easily pried open with a crowbar. Replace them with a heavy-duty hardened steel hasp and staple secured with coach bolts that pass entirely through the door frame, backed by wide steel washers on the inside.
- Use closed-shackle padlocks: Fit a closed-shackle padlock where the shackle is protected by thick steel shoulders, making bolt-cutter attacks extremely difficult.
- Mark your hand tools: Paint the wooden handles of forks, spades, and rakes with bright, distinct paint (such as day-glo pink or yellow) and burn or etch your plot number and postcode into the timber. Marked tools are much harder to sell on and are easily identified if they turn up on site or with the police.
To manage natural wildlife sheltering around sheds, see our non-toxic advice in humane-rodent-control-garden-shed.