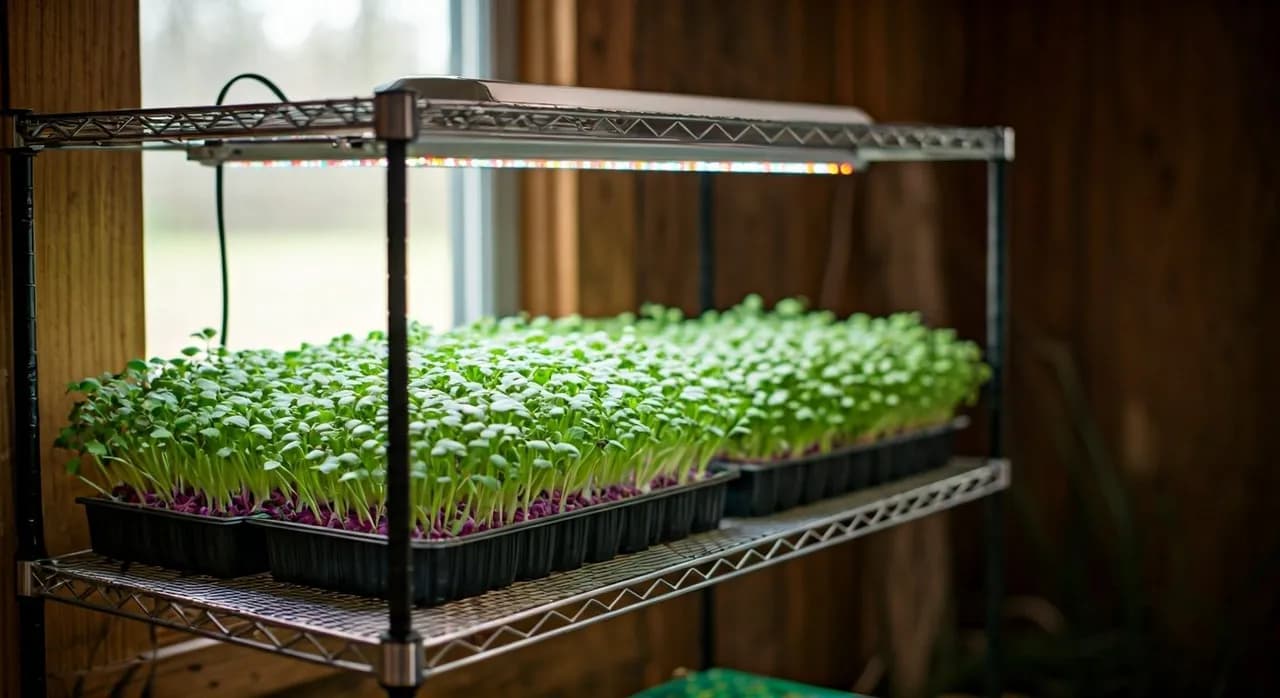
Key takeaways
- Select shallow trays, 1.5 to 2 inches deep, with drainage holes for optimal root development.
- Choose between soil-based growing for nutrient density or hydroponic mats for cleanliness and ease of use.
- Provide 16 to 18 hours of artificial light daily, ideally with a color temperature of 6,500K.
- Maintain consistent temperatures between 65 and 75°F and humidity levels around 40 to 60%.
- Plan for a typical harvest window of seven to fourteen days after seeding, depending on the variety.
- Use a blackout period of three to five days to encourage taller, more uniform growth.
Quick answer: To grow microgreens, select shallow trays with drainage, use soil or hydroponic mats, and provide 16-18 hours of 6,500K artificial light daily. Maintain 65-75°F and 40-60% humidity for a 7-14 day harvest.
In many parts of the United States, from USDA zone 5 to zone 9, growing microgreens offers a way to harvest fresh, nutritious produce year-round, regardless of outdoor conditions. This guide focuses on setting up a basic system that can yield a harvest in as little as seven to fourteen days. We’ll cover the essential components: trays, growing media (soil or hydroponic mats), and lighting, so you can start growing quickly and efficiently, even if you’re working with a small space like a 2-foot by 4-foot shelf unit.
Getting started with microgreens doesn’t require a large investment or extensive gardening experience. A typical starter setup might cost around $100 to $200 for trays, lights, and growing media, providing a consistent supply of greens for a family of four. By understanding the specific needs of these young plants, you can cultivate a productive indoor garden that delivers fresh flavor and nutrients right to your kitchen, often carrying more of some nutrients, weight for weight, than the mature crop.
Choosing the right trays and containers
Selecting appropriate trays is the first step in setting up your microgreens operation. Most growers utilize shallow trays, typically 1.5 to 2 inches deep, which are sufficient for the short root systems of microgreens. These trays often come in two types: those with drainage holes and those without. You’ll need both – a tray with holes nested inside a solid tray to catch excess water and prevent spills, especially important when growing indoors on shelves or countertops.
Standard tray sizes and materials
Standard tray dimensions are often 10 inches by 20 inches, providing about 200 square inches of growing space per tray. These trays are typically made from durable plastic, which can withstand repeated use and sanitization. For smaller setups, 5-inch by 5-inch or 10-inch by 10-inch trays are available, allowing you to grow a wider variety of microgreens in a limited area, such as a 2-foot wide kitchen counter. Always ensure your trays are food-safe and easy to clean; pathogens carried over from one planting to the next can spoil a tray and contaminate greens you eat raw.
- 10-inch by 20-inch trays: Standard size, maximizing space under grow lights.
- 1.5 to 2 inches deep: Optimal depth for microgreen root development.
- Food-grade plastic: Ensures safety and durability for repeated use.
- Drainage holes: Essential for preventing root rot in the growing tray.
- Solid bottom trays: Used as catch trays to manage water runoff.
Soil vs. hydroponic mats: choosing your growing medium
The choice between soil and hydroponic mats is a fundamental decision for any microgreen grower. Each method has distinct advantages and disadvantages, impacting factors like nutrient delivery, cleanliness, and cost. Soil-based growing, often using a fine-textured potting mix, provides a familiar environment for seeds and can offer a broader spectrum of nutrients for the developing plants. Many growers in states like California and Florida prefer soil for its buffering capacity and natural nutrient content.
Understanding substrate options
For soil, a sterile, fine-grain seed-starting mix is recommended, typically applied at a depth of 0.5 to 1 inch. This prevents soil-borne diseases and provides a consistent medium for germination. Hydroponic mats, conversely, are typically made from natural fibers like hemp, coco coir, or rockwool. These mats offer a sterile, soilless environment, reducing the risk of pests and diseases and making cleanup significantly easier. A 10-inch by 20-inch hemp mat, for example, holds far less water than a tray of soil, so mats dry out faster and need topping up more often. Substrate choice mainly affects how evenly moisture reaches the seed, which in turn drives germination consistency.
- Soil-based media: Offers natural nutrients and moisture retention.
- Hydroponic mats: Provides a sterile, clean growing environment.
- Coco coir mats: Excellent water retention, often used for hydroponic setups.
- Hemp mats: Biodegradable and easy to handle, good for beginners.
- Rockwool: Inert, provides good aeration, but less common for microgreens.
Essential lighting for vigorous growth
Microgreens, like all plants, require light for photosynthesis, a process that converts light energy into chemical energy for growth. Since most beginner setups are indoors, artificial lighting is essential. Fluorescent shop lights or LED grow lights are the most common and cost-effective options. A typical 4-foot LED grow light consuming 40 watts can cover two 10-inch by 20-inch trays effectively, providing the necessary intensity without excessive heat.
Light spectrum and duration
The ideal light spectrum for microgreens is broad-spectrum, often labeled as ‘daylight’ or 6,500K (Kelvin). This mimics natural sunlight and supports robust growth. Plants need 16 to 18 hours of light per day, followed by a 6 to 8-hour dark period. Consistent light cycles are vital, so using a simple timer, available for about $10, is highly recommended. Positioning the lights 4 to 6 inches above the trays ensures adequate light intensity without burning the delicate seedlings. Without sufficient light, plants become leggy and pale, and yields drop. For more on controlled environment growing, see Hydroponic strawberries: year-round berries without soil.
- LED grow lights: Energy-efficient and long-lasting, ideal for indoor setups.
- 6,500K color temperature: Mimics natural daylight for optimal growth.
- 16 to 18 hours per day: Recommended light duration for most microgreens.
- 4 to 6 inches above trays: Ensures proper light intensity without scorching.
- Mechanical timer: Automates light cycles for consistency.
Environmental control and watering techniques
Maintaining the right environment is as critical as choosing the right equipment. Microgreens thrive in consistent conditions, typically with temperatures between 65 and 75°F. Cooler or fluctuating temperatures noticeably slow both germination and growth. Humidity levels should ideally be maintained between 40 and 60%, especially during germination. A small fan can help with air circulation, preventing fungal issues like damping-off, which can wipe out an entire tray of seedlings within 24 hours.
Watering for success
Proper watering is key to healthy microgreen development. During the initial blackout period, misting the seeds two to three times a day helps maintain surface moisture for germination. Once the seeds sprout and are exposed to light, bottom watering is generally preferred. This involves pouring a shallow amount of water into the solid bottom tray, letting the growing medium wick it up, and tipping out whatever is still standing once the medium is damp — the tray should never sit in water. This method prevents fungal diseases on the leaves and ensures roots receive adequate hydration. How often a tray needs topping up depends on room temperature, humidity and how densely it is sown. For more on watering, consider a Soil Moisture Meter.
- Consistent temperature: Maintain 65 to 75°F for optimal growth.
- Moderate humidity: Aim for 40 to 60% relative humidity.
- Good air circulation: Use a small fan to prevent mold and mildew.
- Bottom watering: Preferred method after germination to prevent foliar diseases.
- Misting: Essential during the blackout period for seed hydration.
Harvesting and post-harvest care
Knowing when and how to harvest your microgreens ensures you get the best flavor and nutritional value. Most microgreens are ready for harvest between seven and fourteen days after seeding, once they have developed their first true leaves, which appear after the initial cotyledons. Varieties like radishes and mustards can be ready in as little as seven days, while basil or cilantro might take up to twenty-one days. The goal is to harvest before the plants become too mature, as their flavor can intensify and become less palatable after this point.
Techniques for a clean harvest
To harvest, use a sharp, clean knife or scissors to cut the stems just above the growing medium. This method provides a clean cut and minimizes contamination from the soil or mat. Avoid pulling the plants, as this can disturb the roots of neighboring seedlings and introduce debris. After harvesting, gently rinse the microgreens in cool water to remove any lingering debris or seed hulls, then spin or blot them completely dry — greens stored damp turn slimy within a day or two. Store them in an airtight container in the refrigerator, where they can maintain freshness for five to seven days. Because microgreens are eaten raw, buy seed sold specifically for sprouting or microgreens, wash your hands before handling the crop, and refrigerate promptly after cutting. A clean cut also keeps more of the stem usable and leaves less debris to rinse out. For general microgreen growing tips, visit How to grow microgreens at home: setup, varieties, and a 10-day harvest.
- Seven to fourteen days: Typical harvest window after seeding.
- First true leaves: Indicator that microgreens are ready for harvest.
- Sharp knife or scissors: Ensures a clean cut just above the medium.
- Gentle rinse: Removes debris and seed hulls before storage.
- Airtight container: Keeps harvested microgreens fresh for five to seven days.
Comparison of Soil-Based vs. Hydroponic Mat Growing for Microgreens
Feature | Soil-Based Growing | Hydroponic Mat Growing |
|---|---|---|
Setup Cost (Starter) | ~$100 (soil, trays, seeds) | ~$120 (mats, trays, seeds) |
Cleanliness | Moderate (some soil residue) | High (no soil, minimal mess) |
Nutrient Delivery | Natural, complex | Requires added nutrients (optional for microgreens) |
Pest/Disease Risk | Slightly higher (soil-borne) | Lower (sterile medium) |
Watering Method | Bottom watering, occasional top misting | Bottom watering, consistent moisture |
Harvest Cleanliness | May require more rinsing | Generally cleaner, less rinsing |
Typical Yield | Consistent, high quality | Consistent, high quality |
Light Duration: Microgreens do best with 16 to 18 hours of artificial light daily; shorter cycles give paler, leggier growth.
Temperature Range: Maintain an indoor temperature between 65 and 75°F for consistent germination and growth; cooler rooms slow both.
Frequently asked questions
How much light do microgreens need daily?
Microgreens typically require 16 to 18 hours of artificial light per day. This extended period supports strong photosynthesis and rapid growth, often leading to a harvest within 10 days. A simple timer can automate this cycle efficiently.
What is the best temperature for growing microgreens?
The ideal temperature range for most microgreens is between 65 and 75°F. Maintaining this consistent temperature helps ensure uniform germination and prevents slow growth, which can extend the harvest time by several days.
Can I reuse my microgreen trays?
Yes, you can reuse microgreen trays. After each harvest, clean and sanitize the trays thoroughly with a 10% bleach solution or food-grade hydrogen peroxide to prevent the spread of pathogens and ensure a healthy environment for your next crop.
How deep should the growing medium be in the trays?
For soil-based growing, a depth of 0.5 to 1 inch of fine-grain seed-starting mix is generally sufficient. Hydroponic mats are typically 0.25 to 0.5 inches thick. These shallow depths support the short root systems of microgreens effectively.
What is bottom watering for microgreens?
Bottom watering involves adding water to the solid tray underneath the growing tray, allowing the growing medium to absorb moisture from below. This method helps prevent fungal diseases on the leaves and ensures consistent hydration for the roots, and works best when you add small amounts as the medium dries rather than leaving the tray standing in water.
How long does it take to harvest microgreens?
Most microgreens are ready for harvest between seven and fourteen days after seeding. Faster-growing varieties like radish can be harvested in about seven days, while others like basil might take up to 21 days to reach their optimal size and flavor.
References
- Setup of an Extraction Method for the Analysis of Carotenoids in Microgreens (2020). Setup of an Extraction Method for the Analysis of Carotenoids in Microgreens.