Key takeaways
- Constructing a DIY solar dehydrator from salvaged materials can reduce costs by 70% or more compared to commercial units.
- Optimal drying temperatures for most produce range from 100°F to 140°F, which a well-designed solar unit can achieve.
- Effective airflow matters, requiring approximately one square foot of vent opening for every 10 square feet of drying surface.
- A typical DIY solar dehydrator with 15-20 square feet of drying area can process 10-20 pounds of produce in one to two days.
- Food-grade mesh — stainless steel, food-safe nylon, or teflon-coated fiberglass — provides excellent air circulation and is the durable choice for drying trays.
- The principles of resourcefulness, like those seen during World War II scrap drives, underpin sustainable food preservation projects.
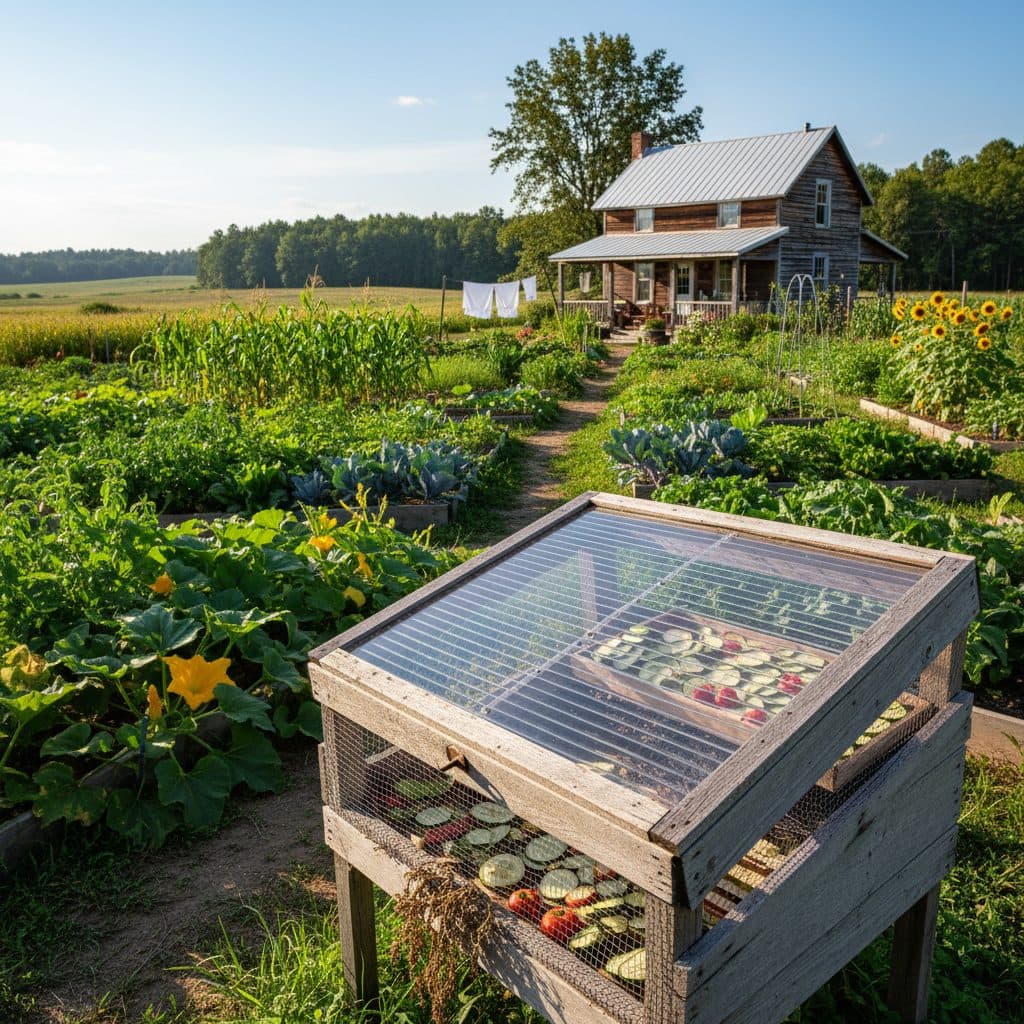
Quick answer: A solar food dehydrator can be built from scrap lumber and materials like fiberglass window screen and reclaimed polycarbonate, utilizing passive solar design to dry produce efficiently without electricity.
In many parts of the United States, from the fertile valleys of California to the humid summers of USDA zone 7 in the Southeast, gardeners often face a bounty that outstrips immediate consumption. This seasonal surplus, if not preserved, can lead to significant waste. An estimated 30 to 40 percent of the US food supply goes uneaten somewhere between the field and the plate, representing real money and resources lost. Building a solar food dehydrator offers a practical, low-cost solution to extend the shelf life of your harvest, turning fresh produce into shelf-stable staples like dried apples, tomatoes, or herbs.
This article will guide you through constructing a functional solar food dehydrator primarily from scrap lumber and window screen. By repurposing materials, you can significantly reduce the project’s cost, often spending less than $50 for hardware and a transparent cover. This approach not only saves money but also honors a tradition of resourcefulness, echoing the scrap drives of World War II, when communities pooled salvaged metal, paper and rubber for the war effort. With a bit of effort, you can transform discarded materials into a valuable tool for year-round food security.
Why build a solar dehydrator from salvaged materials
The decision to build a solar dehydrator, especially from salvaged materials, stems from a blend of practicality and a commitment to resourcefulness. Many commercial dehydrators, while effective, can cost upwards of $200 and consume electricity, adding to utility bills. A DIY solar unit, however, operates entirely on sunlight, making it free to run after the initial build. The electricity it saves is modest: a 500-watt dehydrator costs well under a dollar for a ten-hour run, so the real saving is the price of the appliance you did not buy.
the financial and environmental benefits
Beyond the immediate financial savings, using scrap materials like untreated framing lumber, discarded plywood, or reclaimed window frames significantly reduces the project’s environmental footprint. During World War II, for example, massive scrap drives were organized across the US, collecting salvaged metal, paper, and rubber to be repurposed for the war effort [1]. This historical precedent highlights the value of reusing materials rather than purchasing new ones. For your dehydrator, this means you might spend as little as $30-$50 on new hardware, hinges, and a polycarbonate sheet, rather than hundreds on a factory-made appliance. You can learn more about general food drying techniques at agripure.org/articles/dehydrating-food.
- Cost savings: Reduce build expenses by 70% or more compared to commercial units.
- Energy independence: Operate without electricity or a power bill.
- Resourcefulness: Utilize materials that might otherwise go to a landfill.
- Extended harvest: Preserve fruits, vegetables, and herbs for up to one year.
- Reduced food waste: Put a dent in the share of your harvest that would otherwise be thrown out.
Key design principles and material selection
A successful solar dehydrator relies on three fundamental principles: a heat collector, a drying chamber, and effective airflow. The collector, typically a sloped, glazed box, captures solar radiation and converts it into heat. The drying chamber houses the trays of produce, and proper airflow carries the warm, moist air out, drawing in fresh, drier air. Early solar dehydrator designs from the 1970s, like those studied in [2], demonstrated that achieving internal temperatures of 100-140°F is critical for efficient drying.
choosing your materials wisely
For the frame and exterior, use untreated scrap lumber: two-by-fours, plywood, or pallet wood stamped HT (heat treated). Keep pressure-treated wood out of the build entirely. The whole chamber is a food-contact space, and warm, moist air passes over every interior surface before it reaches the trays, so keeping it just away from the food is not enough. Pallets stamped MB were fumigated with methyl bromide and should never be used. The transparent cover for the collector can be reclaimed glass panes from old windows or a sheet of polycarbonate (often available as scrap from construction sites or sign shops). Polycarbonate is generally more durable and safer than glass for this application, resisting breakage. For the drying trays, use stainless steel mesh, food-grade nylon or polypropylene mesh, or teflon-coated fiberglass. Ordinary vinyl-coated fiberglass window screen is not sold as a food-contact material, and galvanized steel screen leaches zinc and cadmium onto acidic foods, so keep both out of the build. You’ll need about 15-20 square feet of screen for a moderately sized unit. Consider the principles of passive solar design when planning your build, which emphasizes maximizing solar gain and natural ventilation.
- Frame: Salvaged two-by-fours or plywood for structural integrity.
- Glazing: Reclaimed window glass or polycarbonate sheets for the collector.
- Trays: Fiberglass window screen for safe, efficient drying surfaces.
- Insulation: Old denim scraps or rigid foam board for the collector’s back and sides.
- Fasteners: Screws, hinges, and latches, which may be purchased new for durability.
Construction steps for your solar dehydrator
Building your solar dehydrator involves a few main stages: constructing the collector box, the drying chamber, and the trays, then integrating them for optimal airflow. Start by cutting your scrap lumber to create a sloped collector box, typically 2 feet wide by 3 feet long, angled to roughly match your latitude (30 to 45 degrees across most of the continental US). This angle maximizes sun exposure during peak drying seasons. The collector should have an intake vent at the bottom and an outlet at the top connecting to the drying chamber. Size both to about one square foot of opening for every 10 square feet of tray area: for a 15 to 20 square foot unit that means roughly 1.5 to 2 square feet each, or an intake around 8 inches by 30 inches. Cover both openings with insect screen.
assembling the drying chamber and trays
The drying chamber, usually a vertical box, sits directly above the collector’s outlet. It should be roughly 2 feet wide, 2 feet deep, and 3 feet tall, providing ample space for 5-7 drying trays. Construct a frame for the chamber using two-by-two or one-by-two lumber. Inside, create ledges or runners every 4-6 inches to support the drying trays. Each tray can be made by building a simple frame from one-by-one lumber and stapling food-grade mesh across it. Ensure a 1-inch gap around the edges of the screen within the frame to allow for unrestricted air circulation. Paint the interior of the collector box a flat black to maximize heat absorption, which can raise internal temperatures 30-50°F above ambient air on a sunny day [5]. Use a paint rated for high temperature, and let the box bake empty in full sun for a couple of days before its first load — fresh paint off-gasses into the same air stream that will pass over your food. Finally, install a hinged door on the drying chamber for easy access to your produce, sealing it with weatherstripping to prevent heat loss and pest entry.
- Build collector box: Construct a sloped, insulated box, 2 ft x 3 ft, with a clear cover.
- Paint interior black: Apply flat black paint to the collector’s interior for maximum heat absorption.
- Construct drying chamber: Build a vertical box, approximately 2 ft x 2 ft x 3 ft, to hold trays.
- Fabricate trays: Create 5-7 frames, 20 in x 20 in, covered with fiberglass screen.
- Install vents: Size the intake at the collector’s bottom and the exhaust at the chamber’s top to roughly 1.5 to 2 square feet each, and screen both against insects.
Operating and optimizing your solar dehydrator
Once your solar dehydrator is built, proper operation ensures efficient drying and high-quality preserved food. Position the dehydrator in a location that receives full, unobstructed sunlight for at least 8-10 hours a day, ideally facing south in the Northern Hemisphere. In USDA zone 6, this means placing it in an open area, away from tall trees or buildings that cast shadows. The angle of your collector, set at 30-45 degrees, is designed to capture maximum sun exposure during the summer and early fall, when most produce is harvested.
monitoring temperature and airflow
For optimal drying, the internal temperature should consistently range between 100°F and 140°F. Temperatures below 100°F can lead to spoilage, while those above 140°F can cook the food, reducing nutrient content and flavor. Do not use a solar unit for meat or jerky: it cannot hold a temperature steadily enough to make them safe. Use a simple oven thermometer placed inside the drying chamber to monitor temperatures. On a sunny 90°F day, a well-designed unit can reach 130-150°F [5]. If temperatures get too high, slightly prop open the drying chamber door to increase airflow and cool the unit. Conversely, if it’s too cool, ensure vents are clear and the unit is fully exposed to the sun. Proper airflow is paramount; studies comparing solar dehydrators with open-air drying report substantially shorter drying times [4]. Rotate trays every 4-6 hours to ensure even drying. Most fruits and vegetables will dry in 1-2 days, depending on thickness and humidity. For instance, thinly sliced apples might be ready in 18 hours, while thicker tomato slices could take 36 hours.
- South-facing placement: Position for maximum sun exposure, especially in USDA zone 6.
- Monitor temperature: Use a thermometer to maintain 100-140°F inside the chamber.
- Ensure airflow: Keep intake and exhaust vents clear for continuous air exchange.
- Rotate trays: Shift trays every 4-6 hours for uniform drying of all produce.
- Check for dryness: Food is dry when pliable but not sticky, or brittle when snapped. Pasteurize solar-dried food before storing it (freeze at 0°F for 48 hours, or heat it in a 160°F oven for 30 minutes) to kill insect eggs picked up outdoors.
Cost savings: Building a DIY dehydrator can save over 75% compared to commercial units, which often start at $200, reducing your initial investment to under $50.
Drying capacity: A 15-20 square foot drying area can process 10-20 pounds of sliced produce in 24-48 hours, depending on sun intensity and humidity.
Temperature range: Optimal drying temperatures of 100°F to 140°F can be consistently achieved in a well-built solar dehydrator on a sunny day.
Frequently asked questions
What temperature is best for dehydrating food in a solar unit?
Optimal drying temperatures for most produce range between 100°F and 140°F. Maintaining this range ensures efficient moisture removal without cooking the food, as confirmed by experimental studies on solar dehydrators [4].
What materials are safe for drying trays in a DIY dehydrator?
Food-grade fiberglass window screen or stainless steel mesh are recommended for drying trays. Avoid galvanized metals, as they can leach zinc into your food, especially with acidic items like tomatoes or apples.
How long does it typically take to dry food in a solar dehydrator?
Drying times vary significantly, from 12 hours for thin herbs to 2-3 days for thicker fruits like peach slices or large tomato pieces. Factors include humidity, sun intensity, and the thickness of the food slices.
Can a solar dehydrator be used effectively in colder months or climates?
Solar dehydrators are most effective when ambient temperatures are above 70°F and with at least 8 hours of direct sunlight. In colder months or regions like USDA zone 4, their efficiency decreases, often requiring longer drying times or supplemental heat.
What is the typical capacity of a homemade solar dehydrator?
A typical DIY unit with 15-20 square feet of drying surface can handle 10-20 pounds of sliced produce per batch. This capacity is sufficient for preserving a significant portion of a home garden’s yield.
How much does it cost to build a solar dehydrator from scrap materials?
Using primarily salvaged lumber and window screen, a basic functional unit can cost under $50. This budget typically covers new hardware such as hinges, latches, screws, and a transparent polycarbonate sheet for the collector.
References
- War, Scrap, and Recycling (2022). War, Scrap, and Recycling.
- Solar heated fruit dehydrator (1978). Solar heated fruit dehydrator.
- The War Economy of Scrap (2022). The War Economy of Scrap.
- Experimental studies on solar dehydrator, greenhouse dehydrator and open drying (2016). Experimental studies on solar dehydrator, greenhouse dehydrator and open drying.
- FABRICATION OF SOLAR DEHYDRATOR (2020). FABRICATION OF SOLAR DEHYDRATOR.
- USDA Natural Resources Conservation Service (2024). USDA Natural Resources Conservation Service.