Key takeaways
- Rocket stoves use small diameter wood fuel efficiently, often reducing consumption by 80% compared to open fires.
- You can build a functional rocket stove from readily available materials like bricks, tin cans, or salvaged metal ducts.
- Proper insulation, typically with perlite or wood ash, is necessary for maintaining high internal temperatures up to 1,800°F.
- Rocket stoves produce significantly less smoke and harmful emissions than traditional open fires, improving air quality.
- Regular maintenance, including ash removal and checking for cracks, ensures long-term performance and safety.
- Consider a brick design for permanent outdoor kitchens or a tin-can version for portability on a homestead.
Quick answer: A DIY rocket stove can be built from materials like bricks or tin cans, using a design that creates a highly efficient, hot flame with minimal fuel and smoke. This off-grid cooking solution is ideal for homesteaders seeking resilient and efficient cooking methods.
For homesteaders in regions like the Pacific Northwest or the humid Southeast, where a power outage can last for days, reliable cooking methods are essential. An off-grid kitchen benefits from cooking systems that function without utility lines or bottled gas supplies. A rocket stove is a prime example of such a system, offering a simple yet powerful solution for cooking without electricity or complex fuel sources.
These stoves, known for their high efficiency, can reduce fuel wood consumption by 80% compared to a traditional open fire, making them a practical choice for daily use or emergency preparedness [1]. Whether you are in USDA zone 6 planning a permanent outdoor setup or in USDA zone 9 needing a portable option for a remote cabin, building your own rocket stove is a straightforward project that delivers substantial benefits in fuel economy and cooking performance.
Understanding the rocket stove principle
A rocket stove operates on a principle of highly efficient combustion, achieving temperatures up to 1,800°F within its combustion chamber. This design relies on a vertical feed tube and an insulated burn tunnel, which creates a strong draft, pulling air into the fire and directing hot gases through a heat exchanger [2]. The result is a nearly complete burn of fuel wood, producing minimal smoke and soot compared to an open fire, which often wastes 90% of its energy.
For instance, a traditional open fire might require 10 pounds of wood to boil a gallon of water, while a well-built rocket stove can achieve the same task with just two pounds of wood, a significant 80% reduction in fuel [1]. This efficiency is particularly useful in areas like the Appalachian Mountains, where firewood is abundant but labor-intensive to gather. The design minimizes heat loss and maximizes the transfer of thermal energy to your cooking pot, making it ideal for boiling water, frying, or simmering stews for a family of four.
The science of efficient combustion
The core of a rocket stove’s efficiency lies in its ability to create a hot, concentrated flame within a small area. As wood burns in the feed tube, the heat rises into the insulated burn tunnel, drawing in fresh air from below. This continuous airflow, known as the chimney effect, ensures a consistent supply of oxygen to the flame, promoting a more complete combustion of wood gases [2]. This process reduces the emission of hazardous air pollutants, such as carbon monoxide and fine particulate matter, by up to 90% compared to basic three-stone fires [4].
- Fuel is fed vertically into a combustion chamber.
- An insulated burn tunnel directs hot gases.
- The chimney effect creates a strong, consistent draft.
- High temperatures ensure near-complete combustion of wood.
- Heat is concentrated directly onto the cooking surface.
Building a permanent brick rocket stove
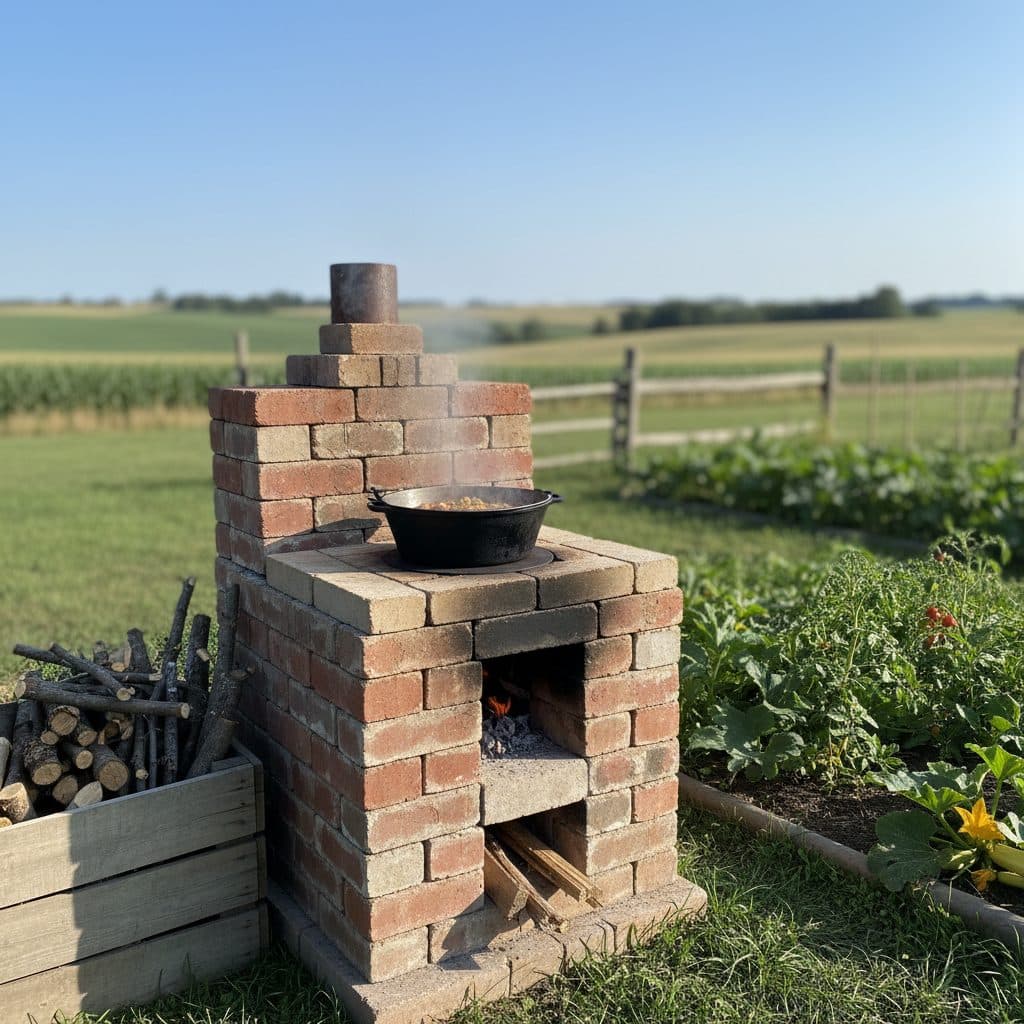
For homesteaders in USDA zone 5 or warmer climates, a permanent brick rocket stove provides a stable, efficient cooking platform for an outdoor kitchen. This type of stove, when built correctly, can last for decades with minimal maintenance, lasting extreme weather from 100°F summer days to 0°F winter nights. You will need about 50 to 70 firebricks or standard red bricks, depending on the desired size, and a refractory mortar mix that can withstand temperatures above 2,000°F [3].
A well-constructed brick stove, measuring roughly 24 in long by 12 in wide and 18 in high, gives a substantial cooking surface and can easily support heavy cast-iron pots for large batch cooking. Mortared joints between bricks must be tight to prevent heat leaks and maintain the chimney draft. For those interested in expanding their off-grid capabilities, a permanent rocket stove can complement a DIY solar panel system, offering diverse cooking options.
Materials and construction steps
Start by laying a stable, level foundation of concrete or compacted gravel, at least 24 in by 24 in, to support the weight of the bricks and prevent settling over time. Use firebricks for the internal combustion chamber and heat riser, as they are designed to withstand extreme heat without cracking [3]. Standard red bricks can be used for the outer shell, providing structural integrity and additional insulation. The refractory mortar should be applied thinly, about 1/4 in thick, to create strong bonds.
- Gather 50-70 firebricks or standard bricks.
- Acquire refractory mortar and a trowel.
- Ensure a level foundation, at least 24 in by 24 in.
- Construct the burn tunnel and heat riser with firebricks.
- Insulate the burn tunnel with perlite or wood ash, filling gaps up to 3 in wide.
Once the main structure is complete, allow the mortar to cure for at least 48 hours before the first low-heat burn. Curing strengthens the mortar and prevents cracking when the stove reaches its operating temperature of 1,500°F or more. A well-built brick rocket stove can reduce particulate matter emissions by 70% compared to open fires while aiding cleaner air around your homestead [5].
Constructing a portable tin-can rocket stove
For homesteaders who need a cooking solution that can move from the garden to a remote campsite, a tin-can rocket stove offers portability and quick construction. This design is particularly useful in areas like the high desert of Arizona, where moving your cooking setup to avoid harsh sun or wind is practical. You can build a functional stove in an afternoon using common household items, making it an excellent option for emergency preparedness or temporary outdoor cooking needs.
The primary materials are two large tin cans, such as a 10-gallon paint can and a 1-gallon coffee can, along with a smaller food can for the feed tube. This type of stove can boil one liter of water quickly using only a handful of twigs, demonstrating its efficiency for small-scale tasks. Its compact size, often around 12 in tall and 10 in in diameter, makes it easy to store and transport, fitting perfectly into a vehicle for off-grid adventures or a fully off-grid living setup.
Step-by-step assembly with common cans
Begin by gathering your cans: one large outer can (e.g., a 5-gallon metal bucket or a 10-gallon paint can), one medium inner can (e.g., a 1-gallon coffee can), and one smaller can (e.g., a 28-ounce tomato can) for the fuel feed. The outer can will form the body, while the inner can creates the burn tunnel. Cut a 3 in by 3 in opening near the bottom of the outer can for the air intake and fuel feed. Insert the inner can so it’s centered, and then cut a corresponding opening in the inner can.
- Collect one large, one medium, and one small tin can.
- Cut a 3 in x 3 in opening in the outer can for air and fuel.
- Cut a matching opening in the inner can.
- Position the small can as the fuel feed tube.
- Fill the cavity between the cans with perlite or wood ash for insulation.
Next, position the smallest can horizontally, extending through the openings in both larger cans, to be the fuel feed tube. This tube should be roughly 6 in long. Fill the space between the inner and outer cans with an insulating material like perlite, vermiculite, or even dry wood ash, packing it tightly to prevent heat loss. A 10-pound bag of perlite, costing about $15, is usually sufficient for several such stoves. This insulation allows the internal combustion chamber to reach temperatures of 1,200°F to 1,500°F so efficient burning.
Fueling your rocket stove: efficient wood choices
A rocket stove's efficiency depends on fuel choice as well as burner design. Small diameter wood, typically 1 to 2 inches in thickness, is ideal for these stoves, allowing for continuous feeding and consistent heat. In regions like the forests of New England, fallen branches from oak, maple, or birch trees are excellent choices, providing a high BTU output and burning cleanly. Avoid using treated lumber or painted wood, as these can release toxic fumes and damage the stove’s internal components.
Dry, seasoned wood is essential. Green wood, with its high moisture content (often 30% or more), burns inefficiently, producing excessive smoke and creosote, which can clog the stove and reduce its performance. Aim for wood with a moisture content below 20% for optimal burning. A cord of seasoned hardwood, if properly stored, can fuel a rocket stove for several months of daily cooking for a small family, costing significantly less than propane or electricity over time.
Preparing your wood fuel
To prepare wood for your rocket stove, focus on smaller, consistent pieces. Cut branches or split logs into lengths of 6 to 12 inches so they fit easily into the fuel feed tube. For example, a 1-inch diameter branch can be fed continuously, providing steady heat for 15 to 20 minutes before needing more fuel. Storing wood in a dry, covered area, preferably off the ground, will help it season properly and prevent moisture absorption, which is especially important in humid climates like Florida.
- Use small diameter wood, 1 to 2 inches thick.
- Cut wood into 6 to 12 inch lengths.
- Ensure wood is dry and seasoned (under 20% moisture).
- Avoid treated or painted wood to prevent toxic fumes.
- Store wood in a dry, covered location, off the ground.
The continuous feeding method of a rocket stove means you don’t need to load large amounts of wood at once, reducing the amount of smoke produced during startup and refueling. This method also maintains the high temperatures needed for efficient cooking. Studies show that rocket stoves can reduce indoor air pollution by 80% to 90% compared to traditional open fires, significantly improving air quality in enclosed spaces or outdoor kitchens [5].
Safety and maintenance for long-term use
Operating any wood-burning appliance requires attention to safety, and a rocket stove is no exception. Always use your rocket stove outdoors or in a very well-ventilated area, at least 10 feet away from flammable structures like wooden sheds or dry brush, especially in fire-prone regions like California. The exterior of the stove, particularly the pot support and top surfaces, can reach temperatures exceeding 400°F, so always use heat-resistant gloves and long-handled utensils when cooking.
Routine cleaning keeps a rocket stove drafting well and burning cleanly over time. After every few uses, or when you notice a decrease in draft, remove any accumulated ash from the combustion chamber and burn tunnel. A small metal scoop or a stiff brush works well for this task. Neglecting ash removal can reduce the stove’s efficiency over time, as it restricts airflow and insulation effectiveness.
Routine checks and care
Periodically inspect your stove for cracks in the mortar (for brick stoves) or corrosion in the metal (for tin-can stoves). Small cracks in brick stoves, especially after extreme temperature cycles from 100°F to 0°F, can be repaired with refractory cement so the stove maintains its structural integrity and insulation. For tin-can stoves, check for rust, particularly around the bottom, and apply a high-temperature rust-resistant paint if necessary to extend its life by several years.
- Always operate outdoors or in a well-ventilated space.
- Keep at least 10 feet clear of flammable materials.
- Use heat-resistant gloves and long utensils.
- Remove ash from the combustion chamber after every 3-5 uses.
- Inspect for cracks or corrosion regularly and repair promptly.
Proper storage during off-season periods, especially for portable tin-can models, can significantly extend its lifespan. Store the stove in a dry, covered area, perhaps a shed or garage, to protect it from rain and snow. Covering the top opening with a lid or tarp will prevent debris and moisture from entering the burn tunnel. By following these simple maintenance steps, your DIY rocket stove can provide reliable cooking for 5 to 10 years or more, a useful asset for any homestead aiming for self-sufficiency, complementing systems like solar livestock water heaters.
Beyond cooking: other uses for your rocket stove
While primarily designed for cooking, the efficient heat generation of a rocket stove makes it versatile for other homestead tasks, especially when off-grid. In cooler climates, such as the northern reaches of Minnesota, a larger brick rocket stove can be adapted to provide supplemental space heating for a small workshop or greenhouse. By channeling the exhaust gases through a metal duct system, you can capture additional warmth, effectively raising ambient temperatures by 10°F to 20°F in a 100 square foot space.
Another practical application is water heating. A coiled copper pipe placed around the heat riser or within a modified pot support can preheat water for washing dishes or even a rudimentary shower. This setup can raise the temperature of 5 gallons of water quickly, significantly reducing the energy needed for full heating. This capability is particularly useful for homesteads relying on off-grid and hybrid solar systems, where electricity for water heating can be a significant draw.
Drying and sterilizing applications
The consistent, clean heat from a rocket stove is also excellent for drying herbs, fruits, and vegetables. A simple drying rack placed above the pot support, far enough from the direct flame to prevent scorching, can process several pounds of produce in a few hours. For example, sliced apples can be dried to a leathery texture in a few hours, preserving your harvest without electricity.
- Supplemental space heating for small structures.
- Preheating water for washing or showering.
- Drying herbs, fruits, and vegetables efficiently.
- Sterilizing tools or canning jars with concentrated heat.
- Melting small amounts of wax or metal for crafts.
The high temperatures can be utilized for sterilizing tools or canning jars. By placing metal tools or empty glass jars on the pot support, the intense heat can effectively sanitize them, reaching temperatures above 212°F needed for food preservation and kitchen hygiene. This reduces reliance on electric sterilizers or boiling water on an electric range, saving energy and increasing self-sufficiency for tasks like preparing for a large harvest in USDA zone 8.
Comparison of Brick vs. Tin-Can Rocket Stoves
Feature | Brick Rocket Stove | Tin-Can Rocket Stove |
|---|---|---|
Portability | Low (Permanent fixture) | High (Easily moved, weighs 10-20 lbs) |
Construction Time | 1-2 days (plus curing) | 2-4 hours |
Material Cost | $50-$150 (bricks, mortar) | $10-$30 (cans, perlite) |
Durability | Very High (Decades with care) | Medium (3-5 years, prone to rust) |
Cooking Capacity | Large pots, all-day cooking | Small to medium pots, single meals |
Heat Retention | Excellent (Thick insulation) | Good (Perlite insulation) |
Best Use Case | Permanent outdoor kitchen, heavy use | Portable camping, emergency backup |
Fuel Savings: Rocket stoves can reduce fuel wood consumption by 80% compared to open fires, using significantly less wood for the same cooking task [1].
Reduced Emissions: These stoves can cut hazardous air pollutant emissions, improving air quality around cooking areas [4].
High Temperatures: The insulated combustion chamber can reach internal temperatures of 1,200°F to 1,800°F so efficient and complete fuel burning [2].
References
- Design and Performance Evaluation of Rocket Stove for Cleaner Cooking in Rural Ethiopia (2020).
- Build a Rocket (2018).
- Building with Brick (2023).
- Hazardous Air Pollutants Found in Cooking Stove Gas (2022).
- Chronic Obstructive Pulmonary Disease Among the Users of Improved Cooking Stove and Traditional Cooking Stove (2021).
- USDA Natural Resources Conservation Service (2024).