Key takeaways
- An A-frame level costs under $20 to build and provides accurate contour lines over short distances.
- Contour lines slow water runoff, increasing soil moisture by up to 35% in arid regions like the Southwest.
- Cheap laser levels offer precision for longer distances, useful for larger earthworks spanning hundreds of feet.
- Proper contouring reduces erosion, protecting valuable topsoil on slopes over 5 degrees in agricultural areas.
- Water harvesting earthworks like swales and wicking beds thrive on accurate contour to maximize water infiltration.
- Even in USDA zone 7, contouring can extend irrigation intervals by several days, reducing water consumption by 20%.
Quick answer: You can find contour for water retention using either a simple, homemade A-frame level or an affordable laser level. These tools help identify level lines across your property to guide the placement of earthworks like swales and wicking beds, which slow water movement and increase infiltration.
In many regions of the United States, from the dry plains of Kansas to the sloping vineyards of California, managing water effectively matters for successful growing. For growers in USDA zone 6, where summer droughts can be common, capturing and retaining every drop of rainfall can mean the difference between a thriving garden and a struggling one. Understanding the contour of your land is the first step in designing effective water harvesting systems, such as swales, ollas, and wicking beds, which can reduce your irrigation needs by 30% or more.
This article will walk you through two practical, budget-friendly methods for finding contour: building and using a simple A-frame level, or employing an affordable laser level. Both tools allow you to identify level lines across your property, guiding the placement of earthworks that slow water movement, increase infiltration, and build soil moisture. With these techniques, even a beginner can turn their yard into a more water-resilient, productive space, potentially saving hundreds of gallons of water each season.
The critical role of contour in water harvesting
Water is a precious resource, especially in areas experiencing prolonged dry spells, such as the American Southwest, where annual rainfall might be less than 15 inches. When rain falls on sloped land, it tends to run off quickly, carrying away valuable topsoil and nutrients. This rapid runoff can reduce effective water absorption by the soil to less than 50% of precipitation. By identifying and working with the natural contours of your land, you can design systems that catch and store this water, making it available for your plants over longer periods [6].
Understanding water flow and passive irrigation
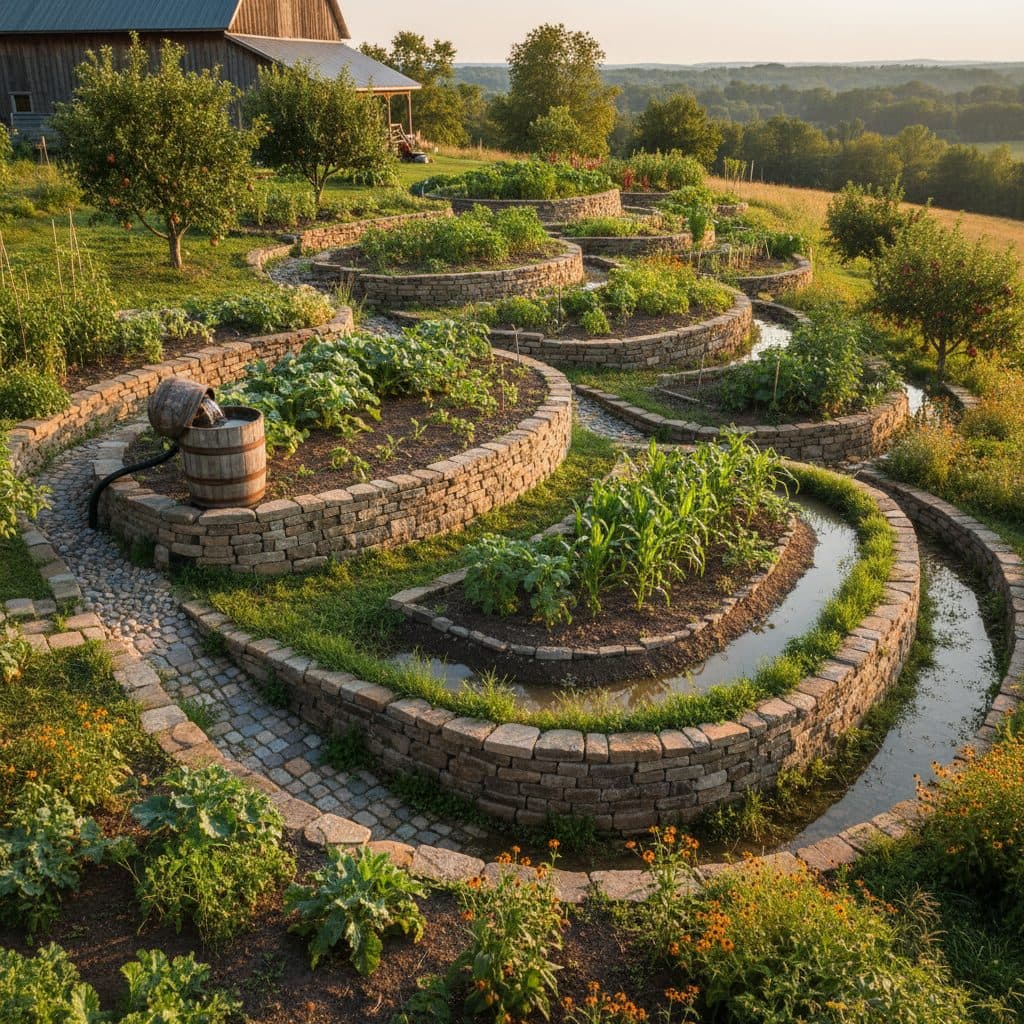
Contour lines are imaginary lines connecting points of equal elevation across a landscape. When you build earthworks along these lines—like swales, terraces, or berms—you create barriers that slow water movement, allowing it more time to increase infiltration into the soil. This passive irrigation approach can boost soil moisture levels by 35% in dryland farming systems, according to studies in similar arid environments. It also helps to prevent erosion, protecting your soil structure and fertility for years to come. For example, a properly contoured swale in a USDA zone 8 orchard can reduce runoff by 80% during a 1-inch rain event.
- Slows runoff velocity by up to 90% on a 10-degree slope.
- Increases soil moisture content by 20-40% in the root zone.
- Reduces soil erosion by keeping topsoil in place.
- Supports deeper plant root growth, improving drought tolerance.
- Recharges groundwater tables over time, benefiting local ecosystems.
Building your own A-frame level for under twenty dollars
A traditional A-frame level is a simple, yet highly accurate, tool for finding contour lines, especially on smaller properties or for specific garden beds. It’s a method that has been used for centuries, proving its reliability. You can construct one from readily available materials for less than $20, making it an accessible option for any grower. The basic design involves three pieces of wood forming an ‘A’ shape, with a string and weight (a plumb bob) hanging from the apex [1].
Materials and construction steps
To build your A-frame, you will need two pieces of wood, each about 6 feet long, for the legs, and one piece about 4 feet long for the crossbar. Pine 2x4s work well and typically cost under $5 each at a local hardware store. You will also need about 5 feet of string, a small weight (like a fishing sinker or a heavy nut) for the plumb bob, and a marker. The total cost for these materials is usually under $15. Once assembled, the key is to calibrate your level accurately, so the plumb bob shows a level line when the feet are on even ground. This calibration process is critical for achieving precise results when marking your future earthworks or even setting up a simple irrigation system.
- Two 6-foot wooden legs (e.g., 2x4s).
- One 4-foot wooden crossbar.
- Screws or nails for assembly.
- 5 feet of string.
- A small, heavy weight for the plumb bob.
Using the A-frame level to mark contour lines
Once your A-frame level is built and calibrated, marking contour lines is a straightforward process. This method is particularly effective for small to medium-sized plots, such as a backyard garden in USDA zone 5 or a small market farm. The accuracy of an A-frame level is generally within 1 inch over a 12-foot span, making it ideal for precision earthworks like wicking beds or terraced gardens. Begin by identifying a starting point for your first contour line, perhaps at the highest elevation of the area you wish to contour.
Step-by-step contour marking
To mark your contour, place one leg of the A-frame at your establish a starting point. Keeping that leg stationary, pivot the A-frame until the plumb bob’s string aligns precisely with the center mark you made on the crossbar. This indicates that both feet of the A-frame are at the same elevation. Mark the level point where the second leg rests with a stake or flag. Then, move the first leg to this newly marked point and repeat the process. Continue this ‘walking’ method across your land, marking points every 4 feet or so. Once you have a series of points, you can connect the dots with a string or a garden hose to visualize your contour line. Repeat this process for additional contour lines, moving uphill or downhill in 6-inch or 1-foot increments to create a series of parallel contours.
- Place one leg at a starting point, like a fixed tree or fence post.
- Pivot the A-frame until the plumb bob aligns with the center mark.
- Mark the ground where the second leg rests, typically with a flag or spray paint.
- Move the first leg to the new mark and repeat the process across the desired area.
- Connect the marked points to visualize the contour line, which can be hundreds of feet long.
When to use a cheap laser level for larger projects
While an A-frame level is excellent for smaller areas, its short span of 4 feet makes it time-consuming for larger projects, such as contouring a 1-acre field for a commercial farm in USDA zone 9. For these situations, a cheap laser level, often available for under $100, offers significant advantages in speed and precision over greater distances. These devices project a perfectly level beam of light, allowing a single person to mark contour points much faster and with less physical effort [2].
Types and applications of laser levels
There are two main types of affordable laser levels suitable for contouring: line lasers and rotary lasers. A line laser projects a single horizontal or vertical line and is typically accurate within 1/8 inch at 30 feet. A rotary laser, while slightly more expensive (starting around $75), spins to project a 360-degree level plane, offering accuracy over hundreds of feet—up to 200 feet or more with a detector. This makes rotary lasers particularly useful for establishing long swales or terraces for solar-powered irrigation systems. When using a laser level, you’ll need a measuring rod or staff with a receiver to detect the laser beam at various points. For example, a rotary laser can help map a 500-foot contour line in less than an hour, a task that might take several hours with an A-frame. While some advanced contour detection relies on complex algorithms [4], these basic tools are sufficient for most growers.
- Line lasers project a visible line, ideal for short-range leveling up to 50 feet.
- Rotary lasers project a 360-degree plane, suitable for large areas up to 200 feet.
- Self-leveling features reduce setup time to under five minutes.
- Requires a receiver and measuring staff for outdoor use in bright conditions.
- Battery life typically lasts 10-20 hours on a single charge.
Comparing A-frame and laser levels for contouring
Feature | A-frame level | Cheap laser level |
|---|---|---|
Cost | Under $20 | $50 – $150 |
Range | Short (4-6 ft increments) | Long (up to 200+ ft) |
Accuracy | High (within 1 inch over 12 ft) | High (within 1/8 inch over 30 ft) |
Ease of use | Simple, two-person recommended | Simple, one-person possible with receiver |
Setup time | 5-10 minutes | 2-5 minutes |
Best for | Small gardens, precise beds, slopes under 10 degrees | Large fields, long swales, commercial projects |
Water Savings: Implementing contour-based earthworks can reduce irrigation water consumption by 20-40% in dry climates, saving hundreds of gallons annually for a 1,000 square foot garden.
Erosion Control: On slopes greater than 5 degrees, contouring can decrease soil loss from erosion by over 75%, preserving 1 inch of topsoil over a decade.
Frequently asked questions
How accurate does my contouring need to be for effective water harvesting?
For most home gardens and small farms, an accuracy of within 1-2 inches over a 10-foot span is sufficient for creating effective water harvesting earthworks like swales or wicking beds. More precise projects, such as building a level terrace for a greenhouse, might require accuracy within 1/2 inch, which a well-calibrated A-frame or laser level can provide.
Can I use these methods on very steep slopes, like those over 20 degrees?
While both A-frame and laser levels can technically be used on steep slopes, working on grades over 20 degrees presents significant challenges and safety concerns. For such steep terrain, it’s often more practical to implement smaller, more frequent terraces or consult with a professional land designer to ensure stability and prevent erosion, which can be severe on such grades, leading to over 10 tons of soil loss per acre annually.
What is the ideal spacing between contour lines for swales?
The ideal spacing between contour lines for swales depends on your slope’s steepness and soil type, but a common practice is to place them every 1 to 3 feet of vertical drop. For example, on a gentle 5% slope, swales might be 20-30 feet apart horizontally, while on a steeper 15% slope, they might be 6-10 feet apart. This spacing ensures adequate water capture and infiltration without oversaturating the soil.
How long does it take to contour a typical backyard garden?
Contouring a typical backyard garden, say 1,000 square feet, with an A-frame level can take anywhere from 2 to 4 hours, depending on the complexity of the terrain and your experience. Using a cheap laser level could reduce this time to 1-2 hours for the same area, especially if you have a helper to hold the measuring staff. This time investment can lead to years of reduced irrigation needs.
Are there any specific safety considerations when using these tools?
When using an A-frame level, ensure stable footing on uneven terrain to prevent falls, especially on slopes greater than 10 degrees. For laser levels, always wear appropriate eye protection to shield your eyes from the laser beam, even with low-power devices, as direct exposure can cause temporary vision impairment. Also, be mindful of tripping hazards from stakes or string lines in your work area.
References
- Multiple contour finding and perceptual grouping using minimal paths (2023). Multiple contour finding and perceptual grouping using minimal paths.
- A New Dynamic Approach for Finding the Contour of Bi-level Images (1994). A New Dynamic Approach for Finding the Contour of Bi-level Images.
- Reclaiming the Story and Finding the Frame (2019). Reclaiming the Story and Finding the Frame.
- Automatic frame-to-frame contour detection in echocardiograms using motion estimation (2023). Automatic frame-to-frame contour detection in echocardiograms using motion estimation.
- Perspective, Empathy, and Activism (2019). Perspective, Empathy, and Activism.
- USDA Natural Resources Conservation Service (2024). USDA Natural Resources Conservation Service.