Key takeaways
- Taro (Colocasia esculenta) is a high-yielding, nutrient-dense pan-tropical root crop cultivated for starchy corms and edible leaves.
- Distinguish between wetland (dasheen) types that thrive in standing water and upland (eddoe) types suited for garden beds and containers.
- Requires a warm growing season of 7 to 9 months (210 to 270 days) with temperatures consistently above 20°C (68°F).
- Set cormels in a 10 cm to 15 cm (4 to 6 in) trench and backfill with only 5 cm (2 in) at first, hilling up as the shoot grows; plant huli 10 cm (4 in) deep.
- Always cook all parts of the plant thoroughly by boiling or roasting for at least 30 minutes until the acridity is gone.
Quick answer: To grow taro successfully, plant healthy corms or rooted crowns in rich, compost-heavy soil in full sun or light shade, ensuring abundant moisture throughout the 7-to-9 month warm growing season. Harvest swollen subterranean corms in late autumn as outer leaves begin to yellow and die back.
Taro (Colocasia esculenta) is one of the world's oldest cultivated staple crops, known as kalo in Hawaii, dasheen and eddoe in the Caribbean, cocoyam in West Africa, and arbi across South Asia. This perennial aroid is grown for its starchy underground corms and edible, heart-shaped leaves.
Taro yields well for the space it takes up. Unlike annual vegetables that suffer in heavy rainfall or soggy ground, taro thrives in moisture-saturated soil and suits garden swales, pond margins, rain gardens, and boggy ground where other root crops would rot.
One caution before you plant: taro is a declared or listed weed in some warm regions — parts of the southern United States, Australia and New Zealand among them — because it escapes along waterways. Check your local list before planting it anywhere connected to a creek, drain or natural wetland; a lined pot or a closed pond is the safe option if it is restricted where you are.
Taro can be grown in tropical garden beds, along permaculture swales, or in patio containers across temperate zones, provided the plants receive steady heat, rich organic matter, and consistent moisture.
Botanical characteristics and cultivar types
To select the right planting stock, understand the growth habit and primary cultivar groups of Colocasia esculenta:
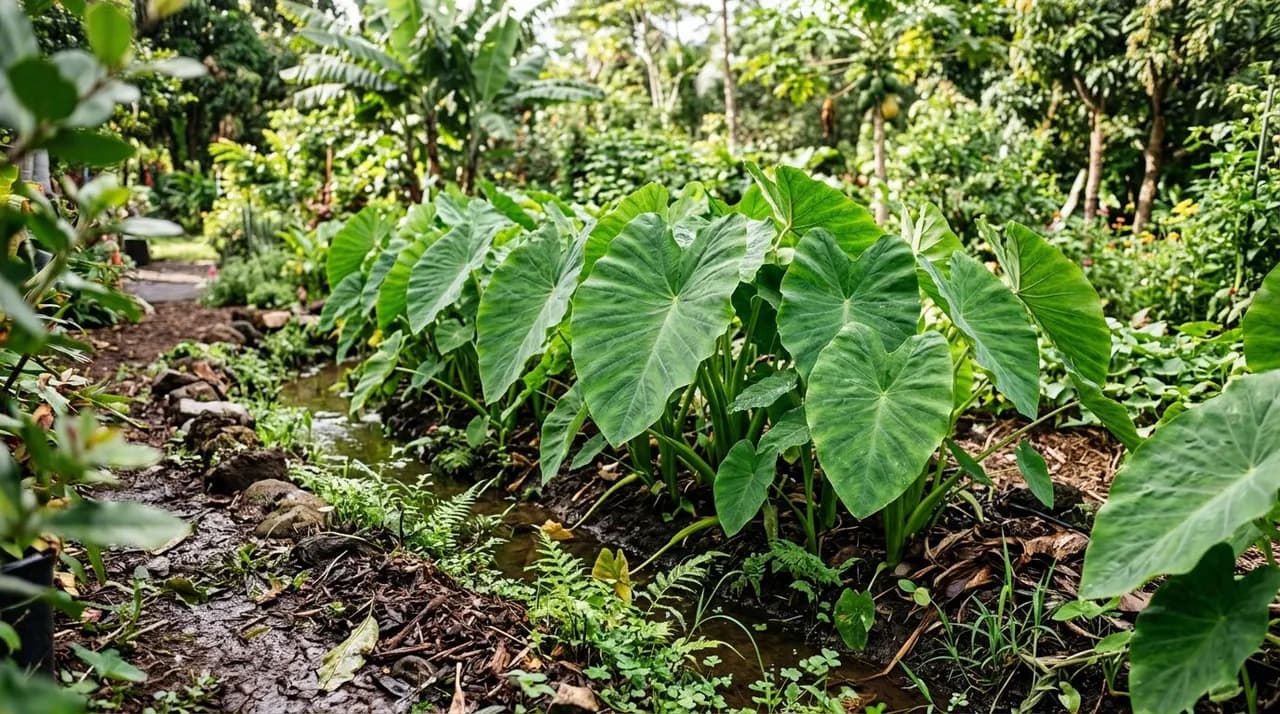
- Growth Habit: Taro produces large, peltate (shield-shaped) leaves with smooth, velvety surfaces that naturally shed water droplets. Thick succulent petioles emerge directly from an underground swollen stem called a corm.
- 1. Dasheen / Wetland Taro (Colocasia esculenta var. esculenta): Produces one massive central corm weighing 1 kg to 3 kg (2 to 6.5 lbs) surrounded by only a few small side cormels. This variety is naturally adapted to flooded wetland paddies, swale bottoms, and standing shallow water.
- 2. Eddoe / Upland Taro (Colocasia esculenta var. antiquorum): Has a smaller central corm surrounded by a cluster of tennis-ball-sized lateral cormels (eddoes or arbi). This type excels in well-drained garden loams, raised beds, and standard container pots.
For gardeners designing functional water-harvesting earthworks, see how wetland edibles stabilize aquatic margins in our guide to wet feet edible crops for water harvesting.
Climate, temperature, and sunlight requirements
Taro is native to the warm, humid regions of tropical and subtropical Asia:
- Thermal Requirements: Optimal vegetative growth occurs between 22°C and 32°C (72°F to 90°F). Sustained temperatures below 10°C (50°F) cause leaf chill damage and stall root expansion.
- Growing Season Length: Taro requires a frost-free growing period of 7 to 9 months (210 to 270 days) from planting to full corm maturation.
- Sunlight: In humid tropical zones, taro thrives in full, unfiltered sunlight (6 to 8 hours daily). In hot, arid, or windy climates with low humidity, light afternoon shade protects the massive leaves from moisture stress and edge scorch.
In cool temperate climates: Where summers are short, start corms indoors in pots on heat mats 4 to 6 weeks before your last spring frost. Move containers outdoors to the sunniest, most sheltered patio microclimate once outdoor temperatures stay safely above 15°C (59°F), and bring them indoors or into a greenhouse before the first autumn freeze.
In subtropical and tropical climates: Plant corms in late winter or early spring just ahead of seasonal monsoon rains to take advantage of natural humidity and long summer warmth.
To understand how taro fits into diverse multi-layered canopy designs, explore what is a food forest.
Soil preparation and moisture management
Taro is a heavy-feeding, moisture-loving crop that demands rich soil biology to produce massive starchy corms:
- Soil Texture and Fertility: Incorporate liberal quantities of well-rotted manure, aged compost, or leaf mould into the top 30 cm (12 in) of soil. Taro prefers a slightly acidic to neutral pH between 5.5 and 6.5.
- Moisture Requirements: Taro cannot tolerate drought. In upland beds, water deeply and consistently, keeping the soil constantly moist like a wrung-out sponge. Apply a 10 cm (4 in) layer of coarse organic mulch (woodchips, straw, or leaves) around the base to conserve moisture and keep soil temperatures stable.
- Permaculture Swales: Plant taro along the moist base or interior terrace of rainwater harvesting swales where seasonal runoff gathers. Discover companion plantings for earthworks in our guide on swale berm planting with nitrogen fixers and fruit trees.
Planting methods: cormels and huli
You can propagate taro using two distinct methods:
1. Planting whole cormels (seed taro)
Select firm, healthy cormels (roughly the size of an egg, weighing 50 to 100 grams) with visible growth eyes at the pointed tip.
- Dig a planting trench or hole 10 cm to 15 cm (4 to 6 in) deep.
- Place the cormel upright with the sprout or growth tip pointing toward the sky.
- Backfill with 5 cm (2 in) of compost-rich soil, leaving the remaining trench to be filled in gradually as the shoot grows (hilling up).
- Space plants 45 cm to 60 cm (18 to 24 in) apart within rows, with 90 cm (36 in) between adjacent rows.
2. Planting crowns (huli)
The traditional Pacific island propagation method utilizes the top vegetative crown of an existing harvested plant:
- Cut the top 1 cm to 2 cm (0.5 to 1 in) of the mature corm, keeping 15 cm to 20 cm (6 to 8 in) of the leaf stalks (petioles) attached, and trim away the large leaf blades.
- Plant this crown directly into moist garden soil at a depth of 10 cm (4 in). Roots and new centre leaves will emerge within 7 to 14 days.
Growing taro in containers
Urban gardeners without ground space or those living in cold climates can easily grow taro in large containers:
- Container Selection: Use a large plastic tub, heavy grow bag, or half-barrel holding a minimum of 40 to 60 litres (about 10 to 15 US gal) of volume.
- Water Management in Pots: Because taro loves moisture, you can use containers without bottom drainage holes (or with drainage holes drilled 5 cm to 10 cm / 2 to 4 in up from the base), creating a shallow permanent water reservoir at the bottom of the pot.
- Potting Medium: Blend 50% rich organic compost, 30% quality potting loam, and 20% coco coir or sand.
For additional perennial salad and root greens suitable for container gardens, explore our overview of perennial edible greens by zone.
Critical kitchen safety: neutralizing calcium oxalate
Every part of the raw taro plant (including the corms, stems, and leaves) contains microscopic, needle-sharp crystals of calcium oxalate known as raphides:
- The Raw Danger: If eaten raw or undercooked, these needle-like crystals pierce the soft tissues of the mouth, tongue, and throat, causing severe burning sensations, intense swelling, and difficulty swallowing.
- Skin Irritation: Peeling raw taro corms can cause contact dermatitis and itching on sensitive skin. Always wear kitchen gloves or wash hands immediately with soap and warm water after peeling.
- Why cooking works: Boiling and roasting destroy the cells that fire the crystals and break down the irritant compound they carry, and boiling leaches soluble oxalate into the water — which is why you discard it. The calcium oxalate itself is not destroyed by heat, so cooked taro is still a high-oxalate food; anyone prone to kidney stones should treat it accordingly.
- Cooking Guidelines: Always boil, steam, roast, or bake peeled taro corms for a minimum of 30 to 45 minutes until the flesh is fork-tender throughout. Boil young, tender leaves in salted water for 20 to 30 minutes, discarding the cooking water before using the greens in stews, curries, or coconut milk dishes.
Harvesting and storing taro root
Harvesting at the right time yields firm, starchy corms instead of watery ones:
- Maturity Signs: Taro reaches harvest readiness 7 to 9 months after planting. The vigorous vegetative growth slows down, the massive upper leaves stop expanding, and the lower outer leaves begin to yellow, dry out, and collapse.
- Lifting the Corms: Use a sturdy garden fork to loosen the soil in a wide circle 30 cm (12 in) away from the base of the plant to avoid puncturing the subterranean tubers. Gently pry the root cluster upwards, grasping the base of the stems to lift the entire mass.
- Separating the Harvest: Shake off excess soil. Snap the smaller side cormels (eddoes) away from the main central corm. Cut off the leafy stems 2 cm above the top of the corm, saving the crown for your next planting cycle.
- Curing and Storage: Do not wash corms intended for long-term storage; washing introduces moisture that promotes fungal rot. Allow harvested corms to air-dry in a warm, shaded, well-ventilated location for 2 to 3 days. Store unwashed corms in a cool, dry, dark pantry (10°C to 15°C / 50°F to 59°F) for several weeks, or cook and freeze peeled corms for year-round culinary use.
By providing fertile soil, generous water, and adequate seasonal warmth, taro gives you both leaves and a starchy root crop from the same plant.