Key takeaways
- Use specialized composting worms (Eisenia fetida and Perionyx excavatus) rather than standard garden earthworms.
- Prepare bedding using hydrated coco coir, shredded unprinted cardboard, and aged compost to a damp-sponge moisture level.
- Protect worm farms from extreme Australian summer heat; position in dense shade and use frozen water bottles during 40°C heatwaves.
- Feed in moderation using chopped vegetable scraps, coffee grounds, and crushed eggshells; avoid citrus, onions, dairy, meat, and dog feces.
- Dilute fresh "worm juice" leachate with water until it resembles weak tea (~1:10 ratio) before applying to garden beds and container plants.
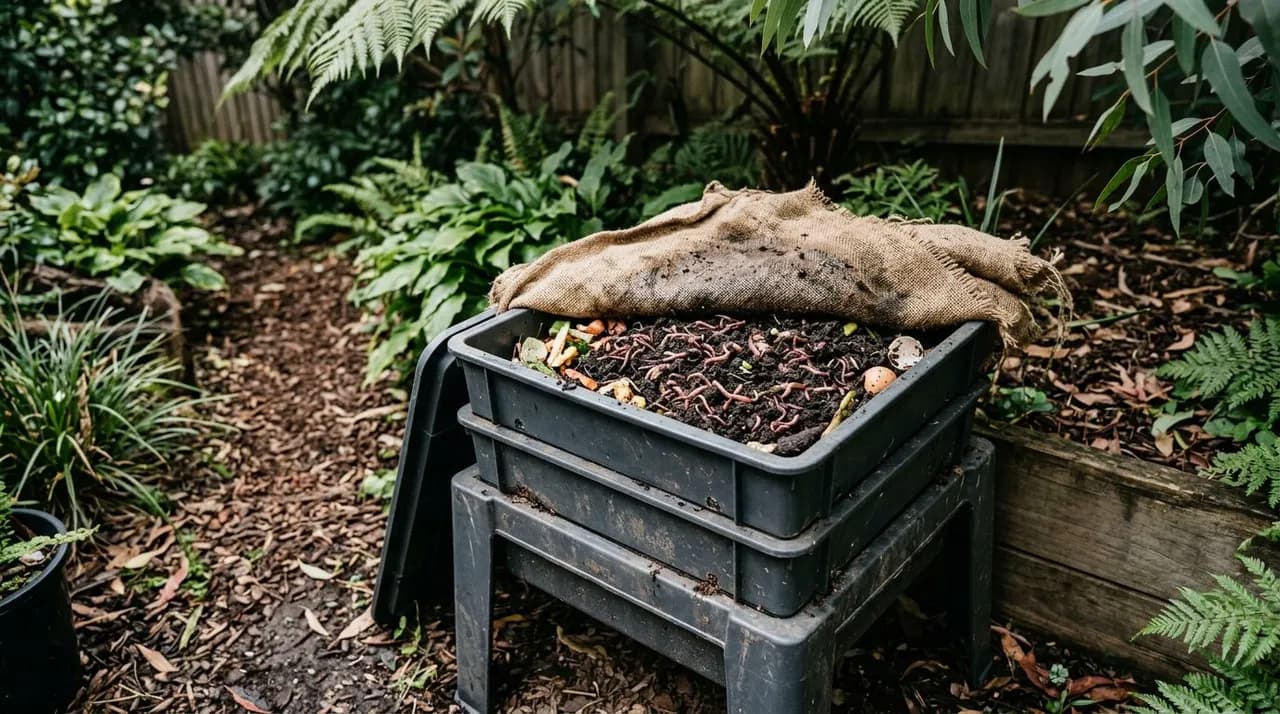
Quick answer: To start a worm farm in Australia, set up a multi-tiered bin in a shaded, sheltered spot with 10 to 15 cm of moist coco coir and shredded cardboard bedding. Introduce 1,000 to 2,000 compost worms (such as red wrigglers), cover with a damp hessian blanket, and feed finely chopped kitchen scraps in small amounts.
Setting up a backyard worm farm is one of the most efficient, space-saving methods for turning kitchen food scraps into nutrient-rich organic fertiliser for your Australian veggie patch. Vermicomposting utilizes specialized surface-dwelling compost worms to rapidly break down raw kitchen waste, transforming organic matter into living, biologically active humus.
In Australian conditions, managing a worm farm requires specific adaptations. Fierce summer heatwaves, drying winds, and periods of high humidity can create lethal conditions for worms if bins are left exposed to direct sunlight.
By mastering bedding preparation, implementing summer cooling strategies, and understanding worm feeding biology, you can divert household waste from landfill while generating premium worm castings and liquid worm juice for your garden.
Selecting the right worms: composting worms vs garden earthworms
A common beginner mistake is attempting to populate a worm farm with standard earthworms dug from the garden lawn:
+-----------------------------------------------------------------------+
|                 COMPOST WORMS VS DEEP GARDEN EARTHWORMS               |
+-------------------+-----------------------+---------------------------+
| CHARACTERISTIC    | COMPOSTING WORMS      | GARDEN EARTHWORMS         |
+-------------------+-----------------------+---------------------------+
| Species           | *Eisenia fetida*      | *Aporrectodea* spp. and other earthworms |
| Common Names      | Red Wriggler, Tiger   | Garden or pasture earthworm |
| Habitat Layer     | Top 10-15 cm mulch    | Deep subterranean burrows |
| Food Source       | Fresh decaying matter | Mineral soil & dead roots |
| Temperature Range | 15°C to 25°C (stress above 30°C) | Cool subsoil (10°C-18°C) |
| Reproduction Rate | Rapid colony expansion| Slow, solitary breeding   |
+-------------------+-----------------------+---------------------------+
The best Australian composting species
- Red Wrigglers (Eisenia fetida): The most resilient and adaptable composting worm worldwide. They are comfortable at 15°C to 25°C, tolerate conditions up to about 30°C, and suffer rapid mortality above 35°C.
- Tiger worms (Eisenia fetida): the same species as the red wriggler; the banded segments are where the name comes from, and Australian worm packs often use the two names interchangeably. (Eisenia hortensis, the European nightcrawler or 'super red', is a larger, different worm sometimes included in blends.)
- Indian Blues (Perionyx excavatus): Commonly blended into commercial Australian live worm packs. They process food scraps exceptionally fast in warm, humid subtropical climates, though they may become restless during sudden storm barometric drops.
Start a standard multi-tier domestic bin with a minimum starter colony of 1,000 to 2,000 live composting worms (roughly 500 grams of biomass).
Setting up the bin and preparing moist bedding
Proper bedding provides a dark, humid, oxygenated buffer that cushions worms from temperature extremes:
[ Tier 3: Fresh Feeding ] ----> Vegetable scraps buried in corners under hessian
[ Tier 2: Active Working] ----> Decomposing bedding + dense worm population
[ Tier 1: Collector Base] ----> Sump with drainage tap for liquid worm juice
1. Choosing a worm farm system
The multi-tier stacking bin design is the most practical for home gardeners. As worms process food in the lower working tray, they migrate upward through perforated mesh floors into higher trays to follow fresh food scraps, leaving finished castings behind in the lower tier for easy harvest.
2. Preparing the bedding material
- Hydrate Coco Coir: Soak a compressed coco coir peat block in a bucket of rainwater until fully expanded. Coco coir provides an ideal, neutral-pH bedding structure that retains moisture without compacting.
- Blend Carbon Materials: Mix the expanded coir with equal parts shredded unprinted cardboard, aged compost, or torn newspaper strips.
- Moisture Test (The Squeeze Test): Squeeze a handful of bedding firmly. It should feel like a well-wrung sponge, yielding only two or three drops of water between your knuckles. If water streams out, the mix is too wet; add dry shredded cardboard. If no drops appear, mist with water.
- Bedding Depth: Layer the prepared bedding 10 to 15 cm deep in the first working tray over the drainage mesh.
3. The damp hessian worm blanket
Always place a natural, breathable worm blanket (an unbleached jute hessian sack, coir mat, or several sheets of damp newspaper) directly over the top of the bedding. The blanket traps moisture, blocks stray light, and encourages worms to feed right up to the surface layer.
To explore foundational indoor and outdoor worm systems, consult our guide to vermicomposting at home.
Feeding guidelines: what to feed and what to avoid
Worms consume the microscopic bacteria and fungi decomposing soft organic matter rather than tough whole food chunks:
+-----------------------------------------------------------------------+
|                    WORM FARM FEEDING PROTOCOL                         |
+-----------------------------------+-----------------------------------+
|            YES (CHOPPED FINE)     |            NO (DO NOT ADD)        |
+-----------------------------------+-----------------------------------+
| - Fruit and vegetable trimmings   | - Citrus peels (lemons, oranges)  |
| - Coffee grounds and paper filters| - Onions, garlic, shallots, leeks |
| - Crushed, dried eggshells        | - Chillies and capsicum seeds     |
| - Tea leaves and herbal tea bags  | - Meat, bones, oils, dairy items  |
| - Shredded plain cardboard        | - Dog and cat feces / pet waste   |
+-----------------------------------+-----------------------------------+
Feeding best practices
- Chop Scraps Finely: Finely diced or blended vegetable scraps expose more surface area for microbial colonization, allowing worms to process the food far more rapidly.
- Feed in Pockets: Do not cover the entire surface with a thick layer of food waste. Deposit food in one corner or pocket of the tray, burying it slightly under the bedding to prevent attracting vinegar flies. Rotate feeding locations around the tray each week.
- Add Calcium (Crushed Eggshells): Worms have calciferous glands to aid digestion and require calcium to produce cocoons. Regularly sprinkle finely crushed eggshells or a pinch of agricultural lime over the bedding to balance acidity and supply calcium.
Managing extreme Australian summer heat
High heat is the number one cause of worm colony loss in Australia. Composting worms are comfortable at 15°C to 25°C, become stressed above 30°C, and suffer rapid mortality when internal bin temperatures exceed 35°C:
[ Extreme Heat Protocol (35°C-45°C Days) ]
1. Move bin into deep southern shade or indoors into a laundry/garage
2. Place frozen 2-litre plastic water bottles directly on the bedding
3. Keep the hessian worm blanket soaking wet throughout the afternoon
4. Leave the drainage tap open with a bucket underneath to avoid drowning
Proactive summer survival strategies
- Shaded Location: Never place a plastic worm farm in direct sun. Position the bin on the cool southern side of the house, under dense evergreen tree canopies, or inside an insulated garage or laundry during hot months.
- The Frozen Bottle Technique: During severe 40°C heatwaves, place two frozen 2-litre plastic water bottles on top of the bedding beneath the damp hessian blanket. The melting ice cools the air above the bedding, creating a cool micro-refuge where worms cluster to survive.
- Airflow and Drainage: Ensure the bottom drainage tap remains open at all times with a collection bucket underneath. Closed taps can cause warm anaerobic liquid to pool in the base, cooking the lower colony.
Harvesting and using worm castings and worm juice
Your worm farm produces two organic soil conditioners:
1. Solid worm castings (vermicompost)
- Harvesting: When the bottom tray is filled with dark, crumbly, sweet-smelling castings with few visible food scraps, move the tray to the top of the stack under bright light for a few days. Worms will move downward away from the light into the lower tray, allowing you to scrape off pure castings.
- Application: Mix castings at a 10% to 20% ratio into seed-raising potting mixes, or top-dress 2 to 3 handfuls around heavy-feeding vegetables like tomatoes and capsicums before mulching with sugar cane mulch.
2. Liquid worm juice (leachate)
- Quality Check: Fresh, aerobic leachate draining from a healthy bin should have an earthy, neutral smell. If the liquid smells sour or foul, the bin is overfed and anaerobic; discard smelly leachate onto non-edible lawns.
- Application: Dilute odorless worm juice with clean water until it reaches the color of weak tea (roughly 1 part worm juice to 10 parts water). Apply to the soil around vegetable roots and fruit trees to supply beneficial microbes and soluble trace elements.
- Companion Garden Care: For seasonal fruit planting timelines, see our calendar on when to plant tomatoes in Australia. To protect your backyard lemon trees, explore our guide on citrus gall wasp control.