Key takeaways
- Insulate your outdoor worm bin with at least 6-12 inches of straw, leaves, or wood chips to maintain internal temperatures above 40°F.
- Reduce feeding frequency to once every two to three weeks during winter, providing high-carbon materials like shredded cardboard and aged manure.
- Ensure adequate moisture, aiming for 60-80% moisture content in the bedding, and consider a moisture meter for accuracy.
- Monitor bin temperature regularly; a soil thermometer can help ensure the core stays above 32°F for worm survival.
- Choose a sheltered location, such as against a south-facing wall or under a dense evergreen, to protect the bin from prevailing winds and extreme cold.
- Introduce biochar into the bedding at a 5-10% ratio by volume to improve insulation and microbial activity, aiding winter resilience.
Quick answer: To keep an outdoor worm bin alive through a USDA Zone 3 winter, insulate it with 6-12 inches of straw, reduce feeding to every 2-3 weeks, and ensure consistent temperatures above 32°F by choosing a sheltered location.
In northern Vermont, where winter temperatures can drop to -20°F for weeks, maintaining an outdoor vermicompost system presents a significant challenge. Many growers in USDA zones 3 through 5 face similar conditions, where the ground freezes several feet deep, threatening the survival of red wigglers (Eisenia fetida) and European nightcrawlers (Lumbricus terrestris). However, with careful planning and specific strategies, it is entirely possible to keep a worm bin active and productive through the coldest months, even when ambient temperatures hover below 0°F.
Successful winter vermicomposting relies on understanding the worms’ needs: consistent temperatures above 32°F, adequate moisture, and a steady, but reduced, food supply. This article will outline practical, field-tested methods for insulating, feeding, and managing your outdoor worm bin, ensuring your composting efforts continue year-round and contribute to your garden’s fertility come spring. We’ll focus on tangible steps, from material choices to monitoring techniques, that have proven effective for growers across the northern US, from Minnesota to Maine.
Choosing the right location and preparing your bin for cold
These takeaways points carry into this section, too.
Selecting an optimal site for your outdoor worm bin is the first critical step in ensuring its winter survival. A sheltered location can significantly mitigate the impact of freezing temperatures and harsh winds, potentially raising the ambient temperature around the bin by 5-10°F. Placing the bin against a south-facing wall of a building or under the dense canopy of an evergreen tree provides natural protection and can capture solar gain during daylight hours, which helps maintain warmth when outside temperatures drop below 20°F. Elevating the bin on an elevated platform or a few bricks can also prevent direct contact with frozen ground, reducing heat loss from below.
Protecting from prevailing winter winds
Beyond solar exposure, protection from prevailing winter winds is paramount. Wind chill can rapidly draw heat away from the bin, making it harder for the worms to maintain their core temperature of 40-50°F. Consider constructing a simple windbreak using straw bales stacked two high, creating a barrier that is at least 3 feet tall on the north and west sides of the bin. This can reduce wind speed by up to 75% directly around the bin. Also, make sure the bin itself is sturdy, preferably made of wood or a thick plastic, with walls at least one inch thick to provide some inherent thermal mass and insulation, which is more effective than thin-walled containers in USDA zone 4 conditions.
- Choose a south-facing wall for maximum solar gain.
- Position under dense evergreens for wind protection.
- Elevate the bin at least 6 inches off the ground.
- Build a windbreak on north and west sides, 3 feet high.
- Ensure bin walls are at least one inch thick.
Layering up: effective insulation materials and techniques
That work on choosing right location sets up what follows here.
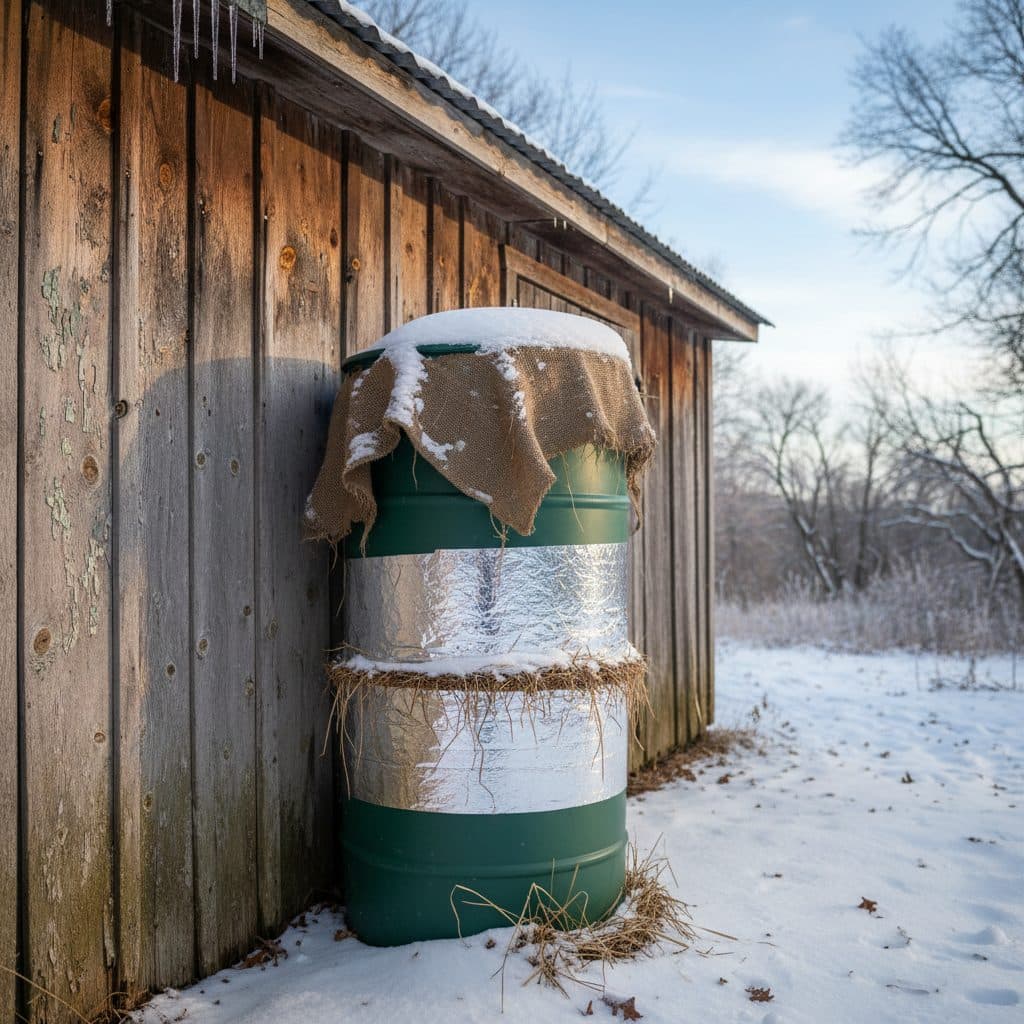
Once your bin is optimally located, the next step is to add substantial insulation to trap metabolic heat generated by the worms and microbial activity. A minimum of 6-12 inches of insulation on all sides, including the top and bottom, is necessary for zones 3-5, especially when temperatures consistently drop below 20°F. Materials like shredded leaves, straw, and wood chips are excellent choices due to their high R-value and affordability. For instance, a 12-inch layer of dry straw can provide an R-value of approximately 30, significantly slowing heat transfer from the bin’s interior to the frigid exterior.
Applying insulation effectively
To apply insulation effectively, completely encase the worm bin. Start by placing a 6-inch layer of straw or wood chips beneath the bin if it’s not already elevated. Then, pack straw bales or bags of shredded leaves tightly around the sides, creating a perimeter that is at least 12 inches thick. On top, place a thick layer of straw or a heavy blanket, covered with a tarp to keep it dry. This multi-layered approach helps maintain the internal bin temperature above 40°F, even when ambient air drops to 0°F or lower, as observed in parts of northern Michigan. Regular checks, perhaps once every two weeks, are important to ensure the insulation remains dry and intact.
- Use shredded leaves, straw, or wood chips for insulation.
- Apply a minimum of 6-12 inches of material on all sides.
- Ensure insulation is dry to maximize R-value.
- Cover top insulation with a waterproof tarp.
- Check insulation integrity every two weeks.
Adjusting feeding and moisture for dormant worms
This builds directly on layering up.
During colder months, worms become less active, reducing their metabolic rate and, consequently, their food consumption. Overfeeding a worm bin in winter can lead to anaerobic conditions, foul odors, and even attract pests, jeopardizing the entire colony. Reduce feeding frequency to once every two to three weeks, providing smaller quantities of food scraps, about 25-35% of your typical summer volume. Focus on high-carbon materials like shredded newspaper, cardboard, and aged manure, which break down slower and help maintain the 30:1 carbon-to-nitrogen ratio essential for healthy decomposition. Avoid introducing large amounts of fresh, high-nitrogen kitchen scraps, as these can ferment and heat up too quickly, or freeze solid in the bin.
Maintaining optimal moisture levels
Moisture management is equally critical; worms breathe through their skin and require a consistently moist environment, ideally between 60-80% moisture content. In winter, bins can dry out due to wind and cold, or become waterlogged from snowmelt if not properly sheltered. Use a 3-in-1 Soil pH, Moisture & Light Meter to regularly check the bedding. If the bedding feels dry, add a small amount of warm water, perhaps 0.5 to one gallon, slowly over a few days. Conversely, if it’s too wet, introduce more dry, shredded cardboard or newspaper. A healthy winter bin in Ohio’s zone 5 should feel like a damp sponge, not soggy, preventing both dehydration and freezing of the bedding.
- Feed once every two to three weeks.
- Reduce food volume by 25-35% compared to summer.
- Prioritize shredded cardboard, newspaper, and aged manure.
- Avoid fresh, high-nitrogen food scraps.
- Maintain 60-80% bedding moisture.
Keeping tabs on your colony and boosting resilience with biochar
Those adjusting feeding and habits matter here as well.
Even with robust insulation, monitoring the internal temperature of your worm bin is essential for ensuring the colony’s survival in USDA zones 3-5. A soil thermometer inserted into the core of the bedding can provide accurate readings, allowing you to react if temperatures drop too low. Aim to keep the core temperature between 40-50°F, which is the optimal range for red wigglers to remain active, albeit at a slower pace. Temperatures below 32°F for extended periods will likely kill the worms, while temperatures above 60°F during brief warm spells can indicate too much decomposition and potential overheating. Check the temperature weekly, especially during cold snaps below 10°F, as advised by experienced growers [3].
Integrating biochar for enhanced performance
Adding biochar to your worm bin bedding can improve its resilience to cold and its overall performance. Biochar, a stable form of carbon, can be added at a rate of 5-10% by volume to the bedding material. Its porous structure provides additional insulation, helping to buffer temperature fluctuations, and creates microhabitats for beneficial microbes, which contribute to the bin’s internal heat generation. Furthermore, biochar improves aeration and moisture retention, two factors critical for worm health during winter. Studies suggest that biochar can increase microbial activity by up to 20% in composting systems, even in cooler conditions, helping the composting system keep functioning through winter [1]. This can add to your soil fertility efforts alongside cold-hardy nitrogen fixers in your garden.
- Use a soil thermometer to monitor core temperature.
- Target a core temperature range of 40-50°F.
- Check temperature weekly during cold periods.
- Add biochar at 5-10% by volume to bedding.
- Ensure biochar is charged before adding to the bin.
Winter vs. Summer Worm Bin Management
Aspect | Winter Strategy (USDA Zone 3-5) | Summer Strategy (USDA Zone 6+) |
|---|---|---|
Feeding Frequency | Once every 2-3 weeks | Once or twice weekly |
Food Volume | 25-35% of summer volume | Full volume, as consumed |
Food Type Focus | High-carbon (shredded paper, aged manure) | Balanced (kitchen scraps, garden waste) |
Insulation | 6-12 inches on all sides | Minimal or none, focus on shade |
Moisture Content | 60-80%, monitored closely | 60-80%, less critical monitoring |
Temperature Monitoring | Weekly with soil thermometer | Rarely needed, focus on overheating |
Critical Temperature: Worms will die if the core bin temperature drops below 32°F for extended periods; aim for 40-50°F.
Insulation Depth: A minimum of 6-12 inches of dry insulation, such as straw or shredded leaves, is required for outdoor bins in USDA zones 3-5.
Frequently asked questions
What is the lowest temperature an outdoor worm bin can survive?
Red wigglers (Eisenia fetida) can survive short periods down to 32°F, but prolonged exposure below this temperature will kill them. Ideally, the core temperature of the bin should remain above 40°F, with a target range of 40-50°F for optimal, albeit slowed, activity. With proper insulation, a bin can maintain this internal temperature even when ambient air drops to -10°F.
How often should I feed my worms in winter?
During winter, reduce feeding frequency to once every two to three weeks. Worms become less active in colder temperatures, consuming about 25-35% less food than in warmer months. Overfeeding can lead to anaerobic conditions and freezing of uneaten food, which can harm the colony.
What kind of insulation works best for outdoor worm bins?
Dry, organic materials like straw, shredded leaves, and wood chips are highly effective due to their high R-value. A 12-inch layer of dry straw, for example, provides an R-value of approximately 30. These materials should completely encase the bin, including the bottom, sides, and top, to create a thermal barrier.
Can I use a heating element for my outdoor worm bin?
While possible, using an external heating element is generally not recommended for outdoor worm bins due to energy costs and the risk of overheating or drying out the bedding. Passive insulation methods are usually sufficient and more sustainable. If used, a low-wattage reptile mat or soil heating cable with a thermostat set to 45°F might be considered for extreme zone 3 conditions, but this adds complexity and cost.
How do I prevent my worm bin from getting too wet from snow or rain?
To prevent excessive moisture, ensure your bin has a well-draining bottom and is covered with a waterproof lid or tarp. The insulation layer on top should also be covered to keep it dry. Elevating the bin 6-12 inches off the ground helps prevent water from seeping in from below. Regularly check the bedding moisture with a meter; it should feel like a damp sponge, not soggy, at 60-80% moisture content.
References
- Keep the Bones Alive (2022). Keep the Bones Alive.
- All Societies Die (2021). All Societies Die.
- Eddie Shaw: (2019). Eddie Shaw:.
- keep-alive, adj. (2023). keep-alive, adj..
- 2 Keep the Bones Alive (2022). 2 Keep the Bones Alive.
- A Sparse Function Prediction Approach for Cold Start Optimization and User Satisfaction Guarantee in Serverless (2025). A Sparse Function Prediction Approach for Cold Start Optimization and User Satisfaction Guarantee in Serverless.