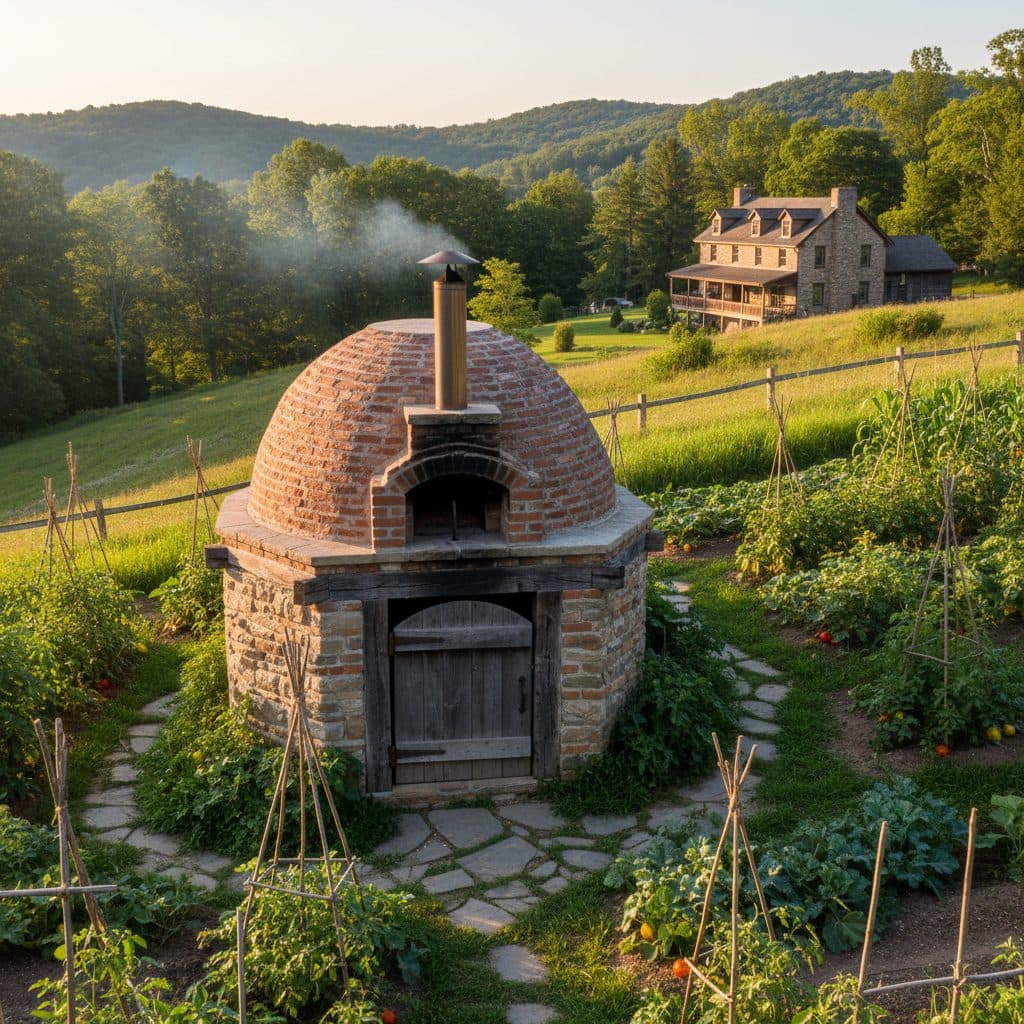
Key takeaways
- A true wood-fired oven relies on significant thermal mass, typically 6 to 8 inches of firebrick, to store and radiate heat efficiently for hours.
- The dome shape radiates heat downward and spreads it evenly so no cold spots form inside the cooking chamber.
- Proper insulation, including a base of refractory cement and a blanket of ceramic fiber, is essential to minimize heat loss and maintain temperatures above 500°F for baking.
- Curing the oven gradually over several days, increasing temperatures slowly, prevents cracking and ensures material integrity.
- Firing involves preheating the oven to 700-900°F for one to two hours, then allowing the temperature to stabilize for various cooking tasks.
- Selecting dense, well-seasoned hardwoods like oak or maple, with low moisture content, provides the best heat output and minimizes creosote buildup.
Quick answer: Building a wood-fired brick oven involves constructing a high-thermal-mass dome, typically 6-8 inches thick firebrick, on a well-insulated foundation. The dome’s shape ensures even heat distribution, while refractory materials and insulation maintain temperatures for efficient cooking.
For homesteaders across the Midwest, from Ohio to Nebraska, a wood-fired brick oven provides high-temperature baking and slow-heat cooking. Building one requires understanding some fundamental principles of heat transfer and material science. A typical oven with an internal diameter of 36 inches can weigh over 2,000 pounds, a substantial structure that demands careful planning and execution.
This article will cover the core concepts behind these ovens: the importance of the dome shape for even heat, how thermal mass stores energy, and the practical steps for firing your oven to achieve consistent, high temperatures. We’ll focus on materials suitable for a long-lasting oven, capable of reaching 800°F or more, perfect for baking pizzas in under two minutes or slow-roasting meats for hours.
Understanding thermal mass and dome dynamics
The effectiveness of a wood-fired brick oven hinges on its ability to store and radiate heat, a property known as thermal mass. Firebricks, specifically high-duty firebricks, are chosen for their high specific heat capacity and ability to withstand temperatures exceeding 2,500°F without degradation. An oven’s inner dome, often constructed with a thickness of 4.5 to 6 inches of firebrick, absorbs heat from the fire, reaching high internal temperatures. This stored energy then radiates back into the cooking chamber, providing consistent heat for hours after the fire dies down.
The importance of the dome shape
The dome shape serves a functional purpose by optimizing heat distribution. A perfectly rounded dome, with an internal height often 60% to 70% of its internal diameter (e.g., 25 inches high for a 36-inch diameter oven), ensures that heat reflects evenly downwards from all surfaces. This prevents cold spots and creates a uniform cooking environment for baking artisan breads or crisping pizza crusts in under two minutes. Without this specific geometry, heat would escape more rapidly, and the oven’s efficiency would drop [2].
- Radiant heat distribution: The dome shape reflects heat waves directly onto the food so even cooking.
- Structural integrity: Arched forms are inherently strong, supporting the weight of the bricks and insulation without needing internal supports.
- Draft management: The dome helps to create a natural draft, pulling air in for combustion and expelling smoke efficiently through the flue.
- Heat retention: Minimizes surface area exposed to the outside, reducing heat loss compared to square or rectangular chambers.
Selecting materials and insulation for durability
The longevity of your wood-fired oven depends heavily on the materials chosen, particularly for the cooking chamber and its insulation. For the inner dome and hearth, firebricks are non-negotiable due to their refractory properties and ability to handle extreme thermal cycling. These bricks, often rated ASTM C27, are designed to expand and contract without cracking under repeated heating and cooling, a critical factor for an oven that might be fired weekly in a USDA zone 5 homestead. Beyond the firebrick, a layer of refractory mortar, specifically designed to withstand high temperatures, is used for bonding so the structure remains stable even at 800°F.
Insulating the oven chamber
Effective insulation is what allows an oven to retain heat for many hours, reducing fuel consumption and allowing for diverse cooking methods. A common insulation strategy involves several layers. Directly over the firebrick dome, a 2 to 4-inch layer of ceramic fiber blanket, rated for high temperatures, provides excellent thermal resistance, significantly reducing heat loss. This is often followed by a layer of insulating concrete, made from perlite or vermiculite mixed with refractory cement, adding another 4 to 6 inches of thermal barrier. For the hearth, a 4-inch slab of calcium silicate board or a similar high-density insulation is placed beneath the firebrick floor to prevent heat from escaping into the foundation so the floor stays hot enough for proper crust development [2].
- Firebricks: High-duty firebricks (e.g., ASTM C27 rated) for the inner dome and hearth, capable of 2,500°F.
- Refractory mortar: Specifically formulated to bond firebricks and withstand temperatures over 2,000°F.
- Ceramic fiber blanket: A 2-inch to 4-inch layer, rated for 2,300°F, directly over the dome for primary insulation.
- Insulating concrete: A mix of perlite or vermiculite with refractory cement, providing secondary insulation around the dome.
- Hearth insulation: Calcium silicate board, 4 inches thick, placed under the firebrick floor to prevent heat loss downwards.
Building the foundation and hearth
A solid foundation is essential for a wood-fired oven, which can be very heavy when fully constructed with a stand. For homesteads in regions with frost heave, such as USDA zone 4 in northern Minnesota, a concrete slab foundation extending below the frost line is often necessary. This foundation should be at least 6 inches thick, reinforced with rebar, and poured on a compacted gravel base of 4 to 6 inches. The overall footprint needs to be larger than the oven itself, typically extending 6 to 12 inches beyond the oven’s base on all sides to provide ample working space and stability [2].
Constructing the hearth and insulation layer
Above the foundation, a sturdy stand is built, usually from concrete blocks or structural steel, to bring the cooking surface to a comfortable working height, typically 40 to 48 inches from the ground. On top of this stand, the hearth insulation layer is critical. A 4-inch thick slab of refractory concrete, made with lightweight aggregates like perlite or vermiculite, is often used. This layer prevents heat from escaping downwards into the stand and foundation so the oven floor retains its heat efficiently for baking. This is a critical step for achieving a crisp pizza crust quickly, as a cold hearth can absorb too much heat from the food. For more on managing off-grid power for tools used in such construction, consider reading about off-grid and hybrid solar systems.
- Concrete slab: A minimum 6-inch thick, reinforced concrete slab, extending below the frost line in cold climates.
- Gravel base: A 4-inch to 6-inch compacted gravel layer beneath the slab for drainage and stability.
- Structural stand: Built from concrete blocks or steel, raising the hearth to a comfortable working height of 40-48 inches.
- Hearth insulation: A 4-inch layer of refractory concrete with perlite or vermiculite, or calcium silicate board, to isolate the hearth from the stand.
- Hearth firebricks: The cooking surface, laid flat with tight joints using refractory mortar.
Firing the oven for consistent heat
The process of firing a wood-fired oven involves two distinct phases: initial curing and regular preheating. Curing is critical for new ovens or those that have been dormant for extended periods, especially in humid climates like coastal Georgia. It gradually removes moisture from the mortar and bricks, preventing steam buildup and potential cracking. This process typically spans several days, starting with small, low-temperature fires and slowly increasing the heat each day. This slow drying ensures the structural integrity of the oven for years of use [2].
Preheating and temperature management
Once cured, regular preheating for cooking involves building a fire directly in the oven chamber, using dense, well-seasoned hardwoods like oak, maple, or fruitwoods. These woods, with a moisture content below 20%, burn hotter and cleaner, producing fewer sparks and less creosote than softwoods. The goal is to bring the oven walls and hearth to a high temperature, typically 700°F to 900°F, over one to two hours. You’ll know the oven is ready when the soot on the dome interior has burned off, revealing clean white bricks. After the fire is pushed aside or removed, the oven temperature will slowly drop, providing a wide range of cooking temperatures over several hours. For instance, a hot oven can bake pizzas, then drop to lower temperatures for bread, and finally settle at even lower temperatures for slow roasts. Managing power for tools during wood preparation can be simplified with solutions like solar power for a shed.
- Curing fires: Start with small, low-temperature fires (150°F) for one to two hours daily over three to five days.
- Gradual temperature increase: Slowly raise the temperature each day during curing, reaching 500°F by the final day.
- Fuel selection: Use dense, seasoned hardwoods with less than 20% moisture content for optimal heat and clean burn.
- Preheating: Build a vigorous fire for one to two hours, aiming for 700°F to 900°F, until the dome is clear of soot.
- Temperature stabilization: Allow 30 to 60 minutes for the oven temperature to stabilize after removing the fire before cooking.
Maintaining and protecting your oven
Proper maintenance ensures the longevity and performance of a wood-fired oven, especially in varying US climates. In regions like the Pacific Northwest, where rainfall can exceed 50 inches annually, protecting the exterior from moisture is critical. An outer layer of stucco, natural stone, or a glazed brick veneer can provide this protection. While glazed bricks are typically used for decorative finishes and not the interior cooking chamber, their durability and low absorption rate make them suitable for exterior cladding, as per ASTM C126 standards [3, 4]. Regular inspection for cracks in the mortar joints and prompt repairs using refractory caulk or mortar can prevent minor issues from becoming significant structural problems.
Winterizing and long-term care
For homesteads in colder climates, such as USDA zone 3 in Montana, winterizing your oven is essential. This often involves covering the oven with a waterproof tarp or building a small shed around it to protect it from snow and ice. Ensuring good air circulation around the oven base can also prevent moisture buildup. If the oven will be unused for several months, a small, slow-burning fire once a month can help keep the bricks dry and prevent moisture absorption, which can lead to spalling. Proper care can extend an oven’s useful life to 20 years or more. For more comprehensive insights into self-sufficient practices, explore resources on off-grid living.
- Exterior protection: Apply stucco, natural stone, or a durable brick veneer to shield the oven from weather elements.
- Regular inspection: Check mortar joints and dome for cracks every six months, especially after periods of heavy use or extreme weather.
- Prompt repairs: Use refractory caulk or mortar to address small cracks immediately, preventing water ingress and further damage.
- Winter covering: In cold, wet climates, cover the oven with a waterproof tarp or construct a protective shelter.
- Ventilation: Ensure adequate airflow around the oven’s base to prevent moisture accumulation and mold growth.
Comparison of Firebrick vs. Common Red Brick for Oven Construction
Feature | Firebrick (Refractory Brick) | Common Red Brick (Building Brick) |
|---|---|---|
Material Composition | High alumina content, dense clay, grog | Common clay, shale |
Temperature Tolerance | 2,500°F – 3,000°F (high-duty) | 1,000°F – 1,200°F (can spall at higher temps) |
Thermal Shock Resistance | Excellent, designed for repeated heating/cooling | Poor, prone to cracking and spalling |
Thermal Mass/Heat Storage | High, stores and radiates heat effectively | Moderate, but less efficient at high temperatures |
Cost per Unit | Higher, typically $2.00 – $5.00 per brick | Lower, typically $0.50 – $1.00 per brick |
Typical Use | Inner dome, hearth, flue liner | Exterior veneer, foundation, stand (not cooking chamber) |
Dome Height Rule: For optimal heat reflection and even cooking, the internal height of a wood-fired oven’s dome should typically be a specific proportion of its internal diameter.
Fuel Moisture: Hardwoods with moisture content below 20% burn cleanly, reach temperatures above 700°F, and minimize creosote accumulation in the flue.
References
- Modeling of an Electric-fired Brick Oven, Directly Heated (2024).
- Oven Design and Construction (2024).
- Specification for Glazed Brick (Single Fired, Brick Units) (2023).
- Specification for Glazed Brick (Single Fired, Brick Units) (2023).
- Specification for Glazed Brick (Single Fired, Brick Units) (2023).
- USDA Natural Resources Conservation Service (2024).