Key takeaways
- Solar dehydrators can dry produce down to the leathery-or-brittle stage that makes long-term storage safe.
- A well-designed unit can reach internal temperatures of 120-160°F, suitable for drying most garden produce.
- Building materials like plywood, polycarbonate, and screen mesh are readily available for under $300 for a typical family-sized unit.
- Proper ventilation and airflow are crucial for efficient drying, preventing mold growth and spoilage.
- Positioning the dehydrator to face south at a 30-45 degree angle maximizes solar gain throughout the day.
- Drying times vary from 1-3 days depending on produce type, slice thickness, and local sun intensity in your region.
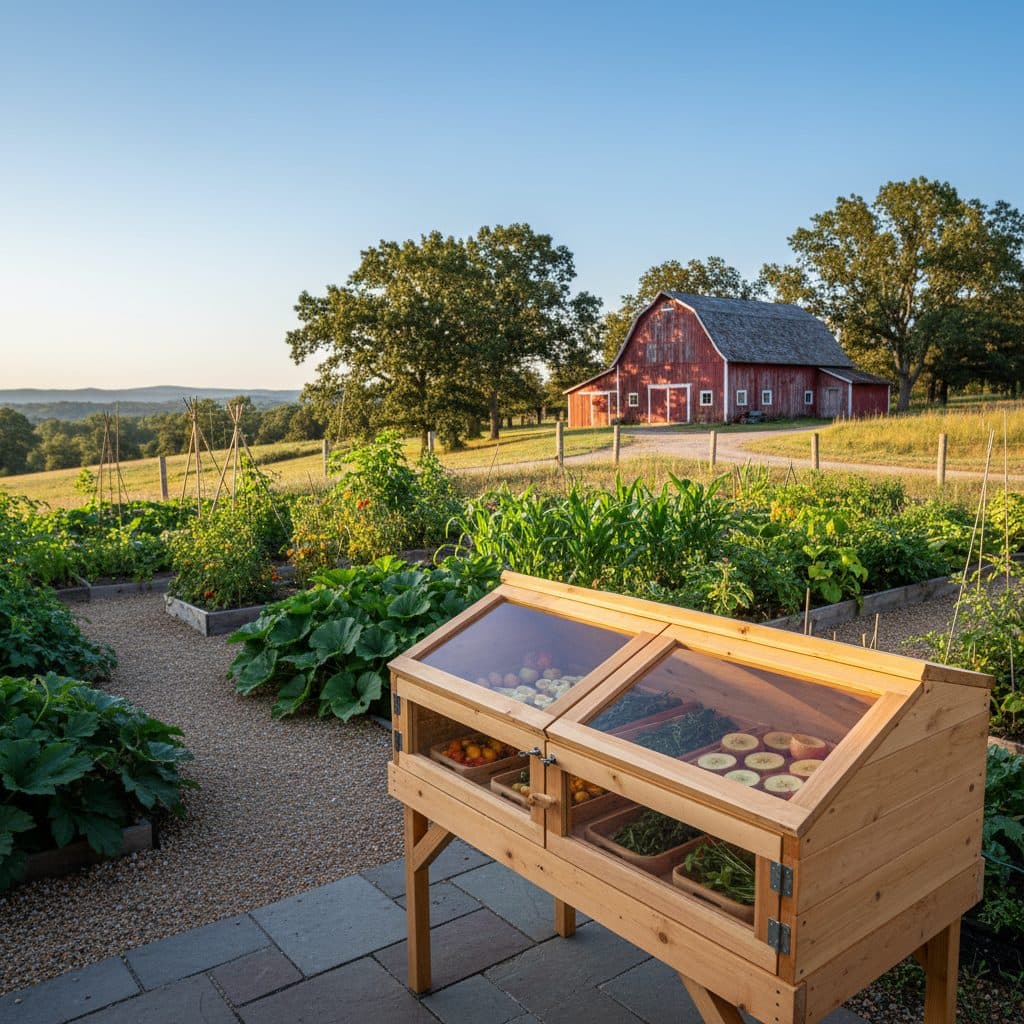
Quick answer: A solar dehydrator allows homesteaders to preserve garden produce by drying it down with only sunlight, significantly cutting energy costs and extending shelf life. Building one involves constructing a collector, drying chamber, and ventilation system from materials like plywood and polycarbonate.
In the high desert plains of eastern Oregon, or the humid Appalachian foothills, preserving a bountiful garden harvest without relying on grid electricity is a practical skill. For many growers in USDA zones 5 through 9, a DIY solar dehydrator offers an effective, low-cost solution. This approach allows you to process pounds of tomatoes, apples, herbs, or peppers and reduce their moisture content to a safe 10-15% for storage, all powered by the sun.
Building your own solar dehydrator is a straightforward project that can significantly cut down on food waste and energy bills. Unlike electric dehydrators that draw 500-1000 watts, a solar unit operates at zero electrical cost, making it an ideal component for any off-grid homestead. With a material investment often under $300, you can construct a durable dehydrator capable of processing 10-20 pounds of fresh produce per batch, extending your harvest well into the winter months.
Why choose solar drying for your harvest
These takeaways points carry into this section, too.
For homesteaders across the US, from the fertile Central Valley of California to the humid climate of Florida, solar drying offers a reliable method for food preservation. Unlike traditional open-air drying, which can expose produce to pests and unpredictable weather, a well-designed solar dehydrator provides a controlled environment. This control helps maintain internal temperatures between 120-160°F, which is ideal for drying most fruits and vegetables without cooking them, as confirmed by experimental studies [2]. This temperature range is critical for reducing moisture content to below 15%, ensuring long-term storage stability for items like sliced peaches or bell peppers.
The economic benefits are substantial, especially when considering the energy demands of electric dehydrators. An electric unit running for 24 hours might consume 12-24 kWh, costing several dollars in electricity depending on local rates in states like Texas or New York. A solar dehydrator, by contrast, operates with zero electricity cost, offering a direct saving of 100% on drying energy. This makes it a smart choice for those exploring off-grid living solutions and aiming for greater self-sufficiency on their property, whether it’s a 5-acre plot in Missouri or a 50-acre farm in Vermont.
- Energy independence: Operates entirely without grid electricity, so the drying itself costs nothing to run.
- Cost-effective preservation: Materials for a DIY unit can be under $300, offering significant savings over commercial electric models.
- Nutrient retention: Gentle, consistent heat helps preserve more vitamins and minerals compared to high-heat methods.
- Pest protection: Enclosed design keeps insects and rodents away from drying produce.
- Extended shelf life: Properly dried, conditioned, and airtight-stored produce keeps well for months, with cool and dark storage doing as much for shelf life as the drying itself.
Essential design principles and materials
The core of any effective solar dehydrator, whether for a small backyard garden in Ohio or a larger operation in California’s Central Valley, lies in its design. A simple solar dehydrator, first documented in detailed designs from 1984, typically consists of three main components: a solar collector, a drying chamber, and a ventilation system [5]. The collector, often a simple insulated box with a transparent cover, captures sunlight and converts it into heat. For optimal performance in most US latitudes, it should be angled between 30 and 45 degrees to the south, maximizing solar radiation capture throughout the day.
Putting it into practice
Materials selection is crucial for both efficiency and longevity. For the frame, exterior-grade plywood or untreated lumber provides a sturdy base, often costing less than $100 for a 4×8 foot sheet. The transparent cover for the collector is best made from 6mm twin-wall polycarbonate sheeting, which offers excellent insulation and UV resistance, typically retailing for $50-$70 per 2×4 foot panel. For the drying trays, food-grade fiberglass screen or stainless steel mesh is preferred over galvanized steel, which can leach zinc into food. A typical 10-foot roll of fiberglass screen costs around $15-$20. Proper airflow, similar to principles used in DIY solar panel systems, prevents moisture buildup and dries all 8-12 square feet of surface evenly.
- Collector Box: Insulated wooden box, often 2-4 feet wide and 3-5 feet long, painted black inside for heat absorption.
- Transparent Glazing: 6mm twin-wall polycarbonate or tempered glass for durability and UV protection.
- Drying Chamber: Enclosed area above the collector, housing 4-6 removable drying trays.
- Ventilation System: Bottom air inlet (cold air) and top air outlet (hot, moist air) for convection.
- Drying Trays: Constructed from 1×2 inch lumber frames with food-grade fiberglass or stainless steel mesh.
Step-by-step construction guide
Building your solar dehydrator begins with constructing the main frame, often from 2×4 or 1×4 inch untreated lumber, depending on the desired size. For a unit capable of drying 15-20 pounds of produce, a base frame of approximately 3 feet by 5 feet is a good starting point. Cut your lumber to create the collector box and the drying chamber, ensuring precise 90-degree angles for stability. Use galvanized screws or exterior-grade wood glue and screws for strong joints. For insulation, consider lining the collector box with 1-inch rigid foam insulation, which improves heat retention and is available for about $10-$15 per 2×4 foot sheet.
Putting it into practice
Next, install the transparent glazing on the collector. Secure the 6mm polycarbonate sheeting or tempered glass panels using wood stops and silicone sealant to create an airtight seal. This step is critical for maintaining the internal temperature of 120-160°F necessary for effective drying. For the drying chamber, create a series of ledges or runners for your trays. These can be simple 1×1 inch strips of wood spaced 4-6 inches apart vertically. Construct 4-6 drying trays using 1×2 inch lumber and staple food-grade fiberglass screen tightly across the bottom. Finally, cut and install the ventilation openings: a 4×12 inch inlet vent at the bottom of the collector and a similar sized outlet vent at the top of the drying chamber. Cover these with fine mesh to keep insects out, a practice important for any outdoor structure, including solar for tiny homes.
- Frame Assembly: Construct the base frame and vertical supports using 2x4s, ensuring a sturdy structure for a unit that can last 10-15 years.
- Collector Glazing: Secure polycarbonate or glass panels over the collector opening with silicone sealant for an airtight seal.
- Drying Tray Runners: Install 1×1 inch wood strips inside the drying chamber, spaced 4-6 inches apart, to support the trays.
- Tray Construction: Build 4-6 trays from 1×2 inch lumber and staple food-grade fiberglass mesh to the bottom of each frame.
- Ventilation Installation: Cut and cover 4×12 inch inlet and outlet vents with fine mesh to control airflow and prevent pest entry.
Optimizing performance and drying techniques
This builds directly on step-by-step construction guide.
To get the most out of your solar dehydrator, especially in varied climates from the sunny Southwest to the more temperate Northeast, strategic placement is paramount. Position the dehydrator facing true south, and ensure the collector is angled between 30 and 45 degrees relative to the ground. This angle helps capture maximum solar radiation throughout the day, maximizing the internal temperature. Avoid placing it in shaded areas — hours lost to shade lengthen drying times noticeably, and a load that stalls partway through is the one most likely to mold. For regions with high humidity, like the Gulf Coast, consider elevating the dehydrator on blocks to improve airflow around the bottom inlet vent.
Proper produce preparation and loading techniques also significantly impact drying efficiency. Slice fruits and vegetables uniformly, typically 1/8 to 1/4 inch thick, to ensure even drying. For example, a 1/4-inch slice of apple will dry faster and more uniformly than a 1/2-inch slice, reducing drying time by up to 30%. Arrange slices in a single layer on the trays, leaving a small gap between pieces for optimal air circulation. Overloading trays can impede airflow, leading to uneven drying and potential spoilage. Monitor the drying process regularly, especially during the first 24 hours, and rotate trays every 6-8 hours to ensure consistent exposure to heat and airflow. The goal is to reduce moisture content to 10-15% for most items, which can take 1-3 days depending on sun intensity and produce type.
- South-Facing Angle: Position the dehydrator at a 30-45 degree angle towards true south for maximum sun exposure.
- Uniform Slicing: Cut produce into 1/8 to 1/4 inch slices so pieces dry evenly and finish together.
- Single Layer Loading: Arrange produce in a single layer on trays, leaving space for air circulation to prevent mold.
- Regular Tray Rotation: Rotate trays every 6-8 hours to ensure uniform drying across all 4-6 levels.
- Moisture Monitoring: Check produce regularly until fruit is leathery and pliable and vegetables are brittle, typically 1-3 days.
Comparison of Food Drying Methods
Method | Cost to Operate (per 24 hrs) | Drying Time (average) | Control & Protection | Best Use Case |
|---|---|---|---|---|
DIY Solar Dehydrator | $0.00 | 1-3 days | Good (temp, pest) | Off-grid, large batches, sunny climates |
Electric Dehydrator | $2.40 – $4.80 | 12-36 hours | Excellent (temp, humidity) | Indoor use, precise drying, any climate |
Open-Air Drying | $0.00 | 3-7 days | Poor (weather, pests) | Small batches, very dry climates, herbs |
Temperature Range: On a clear day a well-built solar dehydrator can reach internal temperatures of 120-160°F, warm enough to dry most fruits and vegetables without cooking them [2].
Moisture Content Goal: Dry fruit until it is leathery and pliable, with no beads of moisture when a cooled piece is torn or squeezed, and dry vegetables until they are brittle. Use the per-crop doneness tests published by the National Center for Home Food Preservation rather than a single moisture figure.
Cost Savings: Building a DIY solar dehydrator can cost less than $300 in materials, providing 100% energy savings compared to electric models.
Frequently asked questions
How long does it take to dry produce in a solar dehydrator?
Drying times vary significantly based on sun intensity, humidity, and produce type. Typically, fruits like apples or vegetables like zucchini can take 1-3 days to dry completely in a well-designed solar dehydrator, reducing their weight by 80-90%.
What kind of produce can I dry in a solar dehydrator?
You can dry a wide variety of produce, including fruits like apples, peaches, and berries, and vegetables such as tomatoes, peppers, corn, and green beans. Herbs also dry exceptionally well, often in less than 24 hours in good conditions.
How do I know when the produce is fully dried?
Produce is fully dried when it’s pliable but not sticky, or brittle and snaps easily. A good test for fruits is to cut a piece; no moisture should be visible when squeezed. Two steps follow drying and both matter. Pasteurize solar-dried food to kill any insect eggs picked up during the long open-air cycle — freeze it for 48 hours at 0°F or below, or hold it in a 160°F oven for 30 minutes. Then condition it: pack the cooled food loosely in sealed jars for 7 to 10 days, shaking daily, and re-dry anything that shows condensation before it goes into storage.
Can I use a solar dehydrator in humid climates?
Yes, but it may take longer, and you’ll need to ensure excellent ventilation. In humid regions like the Southeastern US, consider adding a small, battery-powered fan (drawing less than 5 watts) to assist airflow, especially during the initial 12-24 hours of drying.
What is the ideal temperature for solar drying?
The ideal internal temperature for solar drying is typically between 120-160°F. This range is high enough to effectively remove moisture and inhibit microbial growth, but low enough to preserve nutrients and flavor in your garden produce.
References
- SOLAR DEHYDRATOR WITH SMART DRYING (2026). SOLAR DEHYDRATOR WITH SMART DRYING.
- Experimental studies on solar dehydrator, greenhouse dehydrator and open drying (2016). Experimental studies on solar dehydrator, greenhouse dehydrator and open drying.
- Study of Drying Kinetics and Activation Energy for Drying a Pineapple Piece in the Crossflow Dehydrator (2023). Study of Drying Kinetics and Activation Energy for Drying a Pineapple Piece in the Crossflow Dehydrator.
- Solar Assisted Dehydrator for Decentralized Controlled and Homogeneous Multi-Product Drying (2020). Solar Assisted Dehydrator for Decentralized Controlled and Homogeneous Multi-Product Drying.
- Design and development of a simple solar dehydrator for crop drying (1984). Design and development of a simple solar dehydrator for crop drying.
- USDA Natural Resources Conservation Service (2024). USDA Natural Resources Conservation Service.