Key takeaways
- Unglazed, low-fired terracotta ollas are essential for proper water seepage, typically allowing 0.5 to 1.5 gallons per day.
- Soil texture significantly impacts olla performance; sandy soils drain too fast, while heavy clay soils may restrict seepage.
- Proper installation, including burying the olla with good soil contact and leaving 1 to 2 inches of neck exposed, is important.
- Glazed or high-fired ollas prevent water release, acting as storage vessels rather than passive irrigation devices.
- Regular monitoring of soil moisture, especially within a 12-inch radius of the olla, helps determine refill frequency.
- Consider wicking beds or buried terracotta pipe systems for larger areas or specific soil challenges in arid regions like Arizona.
Quick answer: Olla irrigation saves water by delivering it directly to plant roots. To fix seepage and drainage issues, ensure you use unglazed, low-fired terracotta ollas, optimize soil contact, and amend surrounding soil for proper water release.
In the high desert of New Mexico, where summer temperatures can reach 100°F for weeks on end, efficient water use isn’t just a good idea — it’s a necessity for growing food. Many growers, myself included, have turned to ancient irrigation methods like ollas, those porous clay pots buried in the soil. These simple devices promise to deliver water directly to plant roots, minimizing evaporation and saving up to 50% of water compared to surface irrigation. However, the first time you bury an olla, fill it, and then check it an hour later, you might find yourself scratching your head: why is it still full, or worse, why is it completely empty?
Understanding how an olla works, or doesn’t work, boils down to a few key factors: the pot’s material, its firing temperature, and its interaction with the surrounding soil. A properly functioning olla in a mixed loam soil in USDA zone 7 should seep water at a rate of about 0.5 to 1.5 gallons per day, maintaining consistent moisture for plants within a 12-inch radius. When these rates are off, it’s usually due to issues with glaze, clay porosity, or inadequate soil contact, all of which we can address with practical, field-tested solutions.
The fundamental role of clay porosity and firing temperature
These takeaways points carry into this section, too.
The effectiveness of an olla hinges entirely on the clay’s ability to allow water to pass through its walls at a controlled rate. This characteristic, known as porosity, is directly influenced by the type of clay used and the temperature at which it was fired. For instance, a traditional terracotta olla, made from common red clay and fired at temperatures typically between 1,600°F and 1,800°F, will retain a significant level of porosity. This lower firing temperature leaves microscopic pores open within the clay structure, creating a network of tiny channels for water to move through by capillary action. In contrast, ceramics fired at higher temperatures, often exceeding 2,000°F, become vitrified — essentially turning into a non-porous, glass-like material that prevents any water from seeping out. This is why a glazed pot, or a pot fired to stoneware temperatures, will hold water indefinitely, acting as a decorative container rather than an irrigation tool. In a garden in central California, using a high-fired pot as an olla would provide zero irrigation benefit, wasting both time and effort.
identifying the right olla material
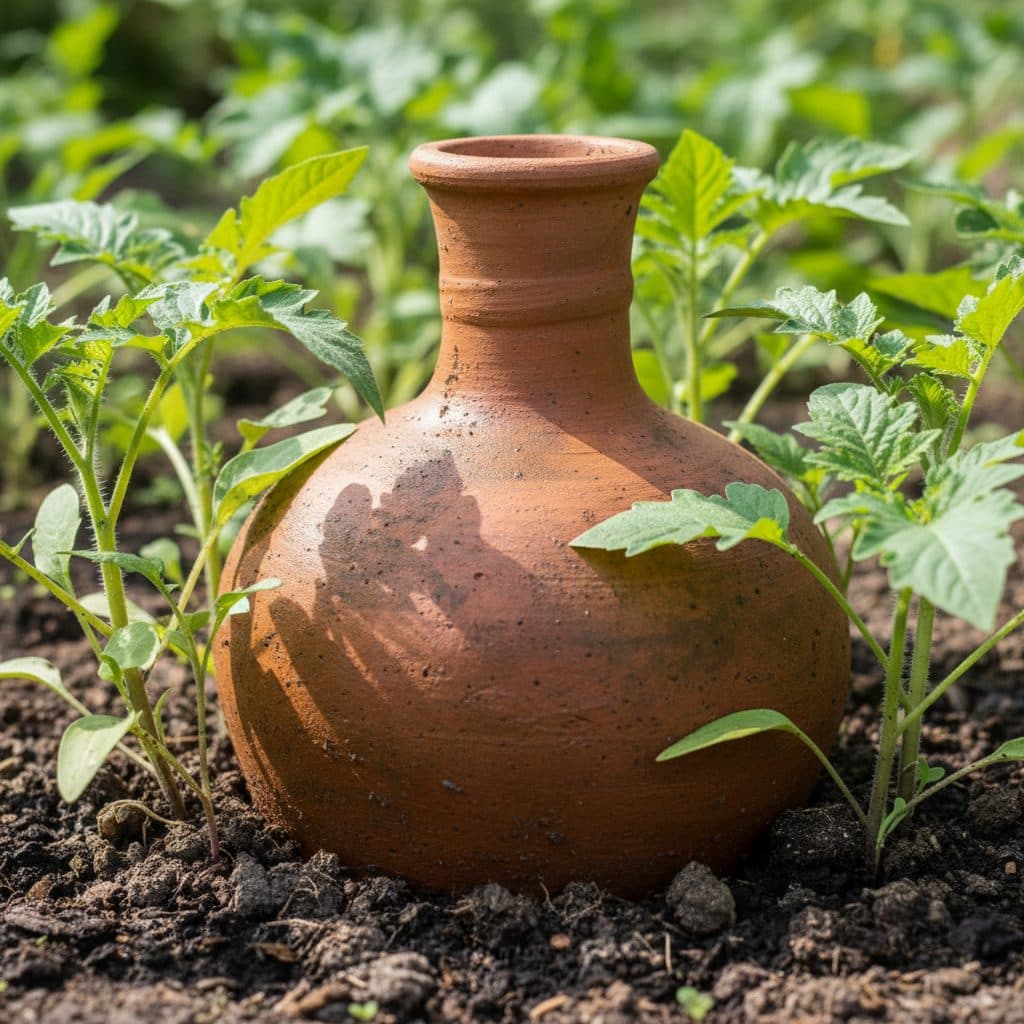
When selecting an olla, the most critical factor is ensuring it’s made from unglazed, low-fired terracotta. You should be able to feel a slight roughness to the surface, and if you tap it gently, it should produce a dull thud rather than a sharp ring. Many commercially available terracotta pots are suitable, but always check for any internal or external glazes. Even a thin layer of glaze on the inside can completely block water movement. A good test is to fill the pot with water and observe it for 20 to 30 minutes; you should see the outside surface become damp, indicating water is beginning to wick through. If the exterior remains dry, the pot is likely too dense or glazed. In a test garden in southern Arizona, growers found that pots with a wall thickness of 0.5 inches performed best, balancing durability with effective seepage rates for desert conditions.
- Look for unglazed terracotta with a matte finish.
- Avoid pots with any internal or external glaze.
- Check for a dull sound when tapped, not a high-pitched ring.
- Confirm the pot feels slightly rough to the touch.
- Test for initial dampness on the exterior within 30 minutes of filling.
The impact of soil texture on water movement
That work on fundamental role of sets up what follows here.
Soil texture is arguably the most significant factor influencing how well an olla functions once it’s in the ground. Different soil types have varying capacities to hold and transmit water, directly affecting the olla’s seepage rate. For instance, in a sandy loam soil common in parts of Florida, water will drain quickly from the olla, potentially emptying a 3-gallon pot in less than one day, as the large pore spaces in sandy soil offer little resistance to water movement. Conversely, a heavy clay soil, prevalent in much of the Midwest, has very small, tightly packed particles that restrict water flow, causing the olla to seep very slowly, or even not at all. This can leave plants thirsty even with a full olla. Research on steady-state flow patterns shows that soil structure significantly dictates water movement from a source like an olla into the surrounding soil profile [1].
optimizing soil contact and composition
To ensure optimal olla performance, you need to achieve good soil contact and, in some cases, amend the surrounding soil. When burying an olla, dig a hole that is slightly wider than the pot itself, ensuring about 1 to 2 inches of the pot’s neck remains above the soil line to prevent debris from falling in. Backfill around the olla with a mixture of your native soil and about 20% to 30% compost. This amendment improves the soil’s water-holding capacity in sandy soils and improves drainage and aeration in clay soils, creating a more balanced environment for the olla to work effectively. For very heavy clay soils, like those found in parts of Texas, consider creating a soil pocket around the olla by removing 6 to 8 inches of native clay and replacing it with a sandy loam mix. This allows the olla to establish a more consistent wicking action. For more on improving challenging soils, see our article on plants for clay soil that actually thrive.
- Dig a hole slightly wider than the olla.
- Leave 1 to 2 inches of the olla neck exposed above ground.
- Backfill with a 70:30 native soil to compost mix.
- For heavy clay, create a 6-inch to 8-inch sandy loam pocket.
- Ensure firm, even contact between the olla and the soil.
Installation best practices and troubleshooting seepage issues
Proper installation matters for an olla to work as intended and deliver water efficiently to plant roots. After selecting the right unglazed terracotta pot, the next step is to ensure it is buried correctly. In a garden in USDA zone 9, where summer heat can quickly dry out surface soil, burying the olla so that only its neck is visible helps minimize evaporation from the pot itself. The goal is to maximize the surface area of the olla in contact with the soil, creating a large wicking zone. If an olla isn’t seeping at all, the first check should be for any hidden glaze or if the pot was fired at too high a temperature. If it’s draining too fast, the soil might be too sandy, or there could be a crack in the pot, allowing water to escape quickly. The USDA Natural Resources Conservation Service emphasizes the importance of understanding local soil characteristics for effective water management [6].
common problems and practical solutions
One common issue is an olla that simply isn’t seeping. This can occur if the pot is made of stoneware or has an internal glaze, which acts as a barrier. The solution here is straightforward: replace the pot with a proper terracotta olla. Another problem is an olla that drains excessively fast, often emptying a 2-gallon pot in just a few hours. This usually points to very sandy soil or an undetected crack. For sandy soils, amending the area around the olla with 20% to 30% compost or creating a small clay-lined pocket can slow drainage. If a crack is suspected, remove the olla and inspect it thoroughly; a hairline fracture can cause significant water loss. In a large-scale vegetable plot in central Oregon, growers found that placing a layer of fine sand, about 1 inch thick, at the bottom of the olla hole before backfilling improved initial wicking in heavier soils. Regularly checking soil moisture with a trowel or moisture meter within 6 to 12 inches of the olla can help you fine-tune refill schedules.
- Confirm the olla is unglazed and low-fired terracotta.
- Ensure firm, continuous contact between the olla surface and soil.
- Amend sandy soils with 20-30% compost to improve water retention.
- For heavy clay, create a small, improved soil pocket around the olla.
- Inspect for cracks if the olla drains unusually fast.
Beyond ollas: wicking beds and passive irrigation earthworks
This builds directly on installation best practices.
While ollas are excellent for individual plants or small garden beds, larger-scale passive irrigation often benefits from systems like wicking beds or buried terracotta pipe networks. A wicking bed, essentially a self-watering raised garden bed, uses a water reservoir at the bottom and capillary action to draw water up into the soil. These systems can reduce water usage by 40% to 60% compared to traditional surface watering, making them ideal for arid regions like southern Nevada. They are particularly effective for thirsty crops such as tomatoes or leafy greens. The principles of water movement through soil, as described in early theories of flow nets for water seeping into drains, are fundamental to understanding how these larger systems function effectively [2].
integrating passive irrigation into your homestead
For homesteads in regions with limited rainfall or high evaporation rates, such as the Central Valley of California, integrating multiple passive irrigation techniques can create a resilient water management strategy. Rainwater harvesting is an important first step, providing a sustainable source to fill ollas and wicking beds. Consider installing a 500-gallon rain barrel connected to your gutter system to capture seasonal precipitation. For linear planting areas, a buried terracotta pipe system, where unglazed pipes are laid horizontally and connected to a water source, can distribute water over many feet. These systems, sometimes called ‘clay pipe irrigation,’ reduce surface evaporation by 70% to 80% compared to drip lines. Earthworks like swales and berms, designed to slow, spread, and sink rainwater, can also passively recharge soil moisture over large areas, benefiting fruit trees and perennial plantings in USDA zone 6 and warmer. Remember that understanding your soil’s percolation rate, often determined by a perc test, is vital when planning any buried irrigation system, as discussed in our article on buying land for homesteading.
- Combine ollas with wicking beds for diverse plant needs.
- Implement rainwater harvesting to supply passive irrigation systems.
- Consider buried terracotta pipe systems for row crops.
- Design earthworks like swales to capture and infiltrate rainwater.
- Monitor soil moisture levels to optimize all passive systems.
Maintaining your olla system for long-term success
Those beyond ollas habits matter here as well.
Once your ollas are properly installed and functioning, ongoing maintenance is minimal but important for ensuring their long-term effectiveness. In a garden in rural Pennsylvania, where winter freezes are common, growers empty and remove their ollas before the first hard frost, typically when temperatures drop below 28°F, to prevent cracking. If left in the ground, freezing water can expand and damage the porous clay. During the growing season, the primary maintenance task is refilling the ollas, which might be daily in hot, sandy conditions or every three to five days in cooler, loamy soils. Regularly check the water level and observe the surrounding plants for signs of stress. The goal is to keep the soil consistently moist, not waterlogged or bone dry, within a 12-inch radius of the pot. Over time, mineral buildup from hard water can slightly reduce seepage rates, but this is usually a slow process.
seasonal care and troubleshooting tips
At the end of the growing season, or before winter in colder climates (USDA zones 7 and below), it is advisable to empty your ollas and, if possible, gently lift them from the ground. Clean any soil or mineral residue from the exterior with a stiff brush and store them in a protected area, such as a shed or garage, where temperatures remain above freezing. For ollas that show signs of reduced seepage due to mineral buildup, a mild acid solution, like a 10% vinegar solution, can be used to soak the pot for a few hours to dissolve deposits. Rinse thoroughly before reuse. If you notice plants around an olla are struggling despite the pot being full, check the soil moisture with a hand trowel or a moisture meter at a depth of 6 inches. It’s possible the olla is not making sufficient contact with the soil, or the soil itself has become hydrophobic. In these cases, gently loosening the soil around the olla and re-establishing firm contact can often resolve the issue, extending the life of your system by many years.
- Empty and remove ollas before winter in freezing climates (below 28°F).
- Clean mineral buildup with a stiff brush or mild acid solution.
- Monitor water levels daily or every few days based on conditions.
- Check soil moisture around the olla at 6-inch depth.
- Re-establish soil contact if plants show signs of water stress.
Olla Material Comparison for Irrigation
Feature | Unglazed Terracotta Olla | Glazed Ceramic Pot | High-Fired Stoneware |
|---|---|---|---|
Porosity | High (0.5-1.5 gal/day seepage) | None (impermeable) | Very Low to None |
Firing Temperature | Low (1,600-1,800°F) | Varied (often lower, then glazed) | High (>2,000°F) |
Water Delivery | Passive seepage to roots | No water delivery | No water delivery |
Ideal Use | Subsurface irrigation | Container planting, decorative | Container planting, decorative |
Cost (approx. 2-gal) | $15 – $30 | $20 – $50 | $30 – $70 |
Water Savings: Olla irrigation can reduce water consumption by 30% to 50% compared to traditional surface watering methods in many US climates.
Optimal Seepage: A well-functioning olla in loam soil typically seeps 0.5 to 1.5 gallons of water per day, maintaining moisture for a 12-inch plant radius.
Soil Amendment: Amending sandy or heavy clay soils around an olla with 20% to 30% compost significantly improves its wicking efficiency.
Learn about rainwater harvesting
Frequently asked questions
How do I know if my olla is unglazed?
An unglazed olla will feel rough and porous to the touch, unlike the smooth, often shiny surface of a glazed pot. If you fill it with water, the outside should become damp within 20 to 30 minutes as water begins to seep through the clay walls.
My olla drains too fast, what’s wrong?
If your olla empties too quickly, usually within a few hours for a 2-gallon pot, the most likely culprits are very sandy soil or a crack in the pot. Amend sandy soil with 20% to 30% compost to improve water retention, or inspect the pot for hairline fractures.
My olla isn’t seeping at all, what should I do?
An olla that doesn’t seep water is typically either glazed, high-fired stoneware, or has poor contact with the surrounding soil. Confirm it’s unglazed terracotta. If it is, gently loosen the soil around it and re-establish firm contact, ensuring no air pockets, especially within a 6-inch radius.
Can I use ollas in heavy clay soil?
Yes, but it requires some modification. In heavy clay soils, which restrict water movement, create a pocket around the olla by removing 6 to 8 inches of clay and replacing it with a sandy loam and compost mix. This improves local drainage and allows the olla to seep more effectively.
How often do I need to refill an olla?
Refill frequency depends on soil type, plant water needs, and weather conditions. In hot, sandy conditions in USDA zone 9, you might need to refill a 3-gallon olla daily. In cooler, loamy soils, it could be every three to five days. Monitor the water level and plant health to establish a schedule.
Do ollas need to be removed in winter?
In climates with freezing winters, like USDA zone 6 and below, it’s advisable to empty and remove ollas from the ground before temperatures consistently drop below 28°F. Freezing water inside the porous clay can expand and cause the olla to crack, damaging it for future use.
References
- Steady-state flow patterns of rainwater seeping through bedded soil with and without tile drains (2023). Steady-state flow patterns of rainwater seeping through bedded soil with and without tile drains.
- Theory and flow nets for rain and Artesian water seeping into soil drains (1966). Theory and flow nets for rain and Artesian water seeping into soil drains.
- ‘All your drains belong to us’ (2017). ‘All your drains belong to us’.
- Your Negotiable Panorama: The Seeping Edges of Perceiving Yourself Perceiving (2017). Your Negotiable Panorama: The Seeping Edges of Perceiving Yourself Perceiving.
- Seeping Ugly (2021). Seeping Ugly.
- USDA Natural Resources Conservation Service (2024). USDA Natural Resources Conservation Service.