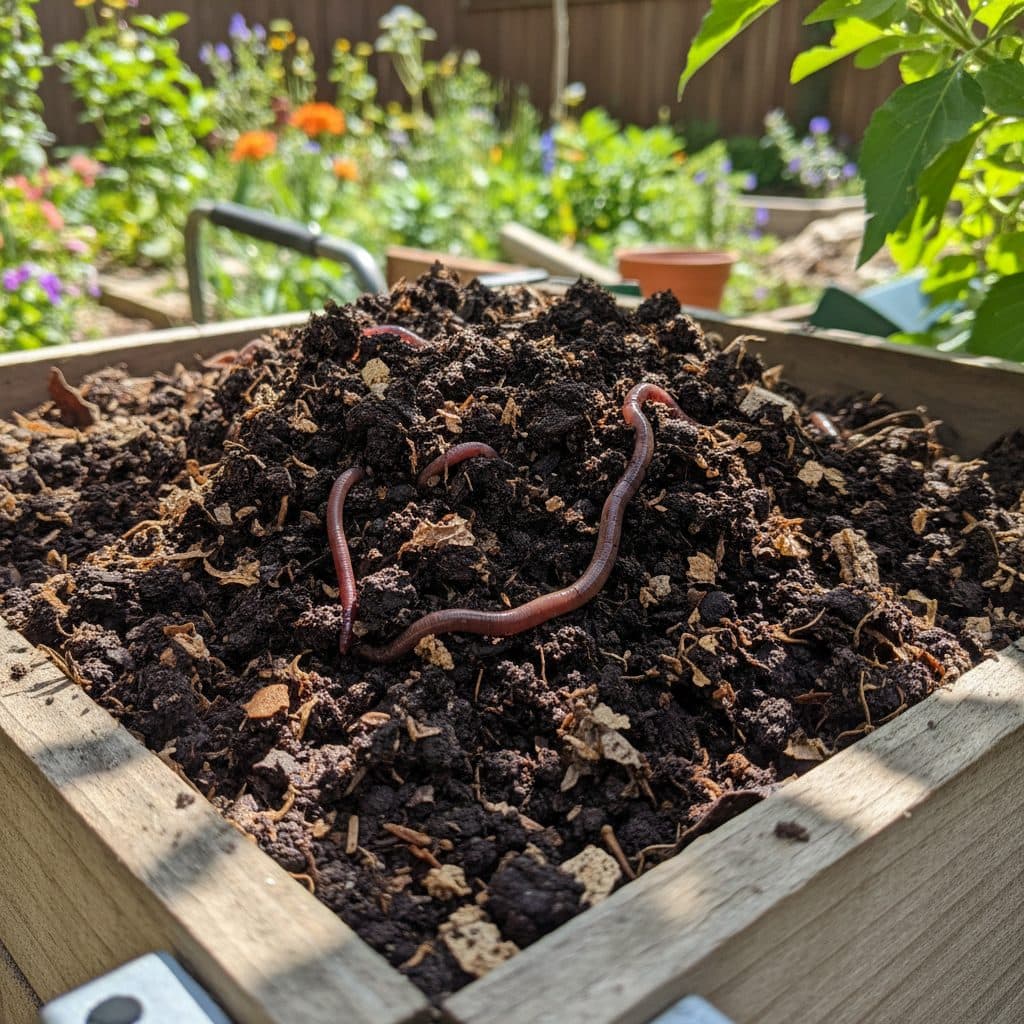
Key takeaways
- Four primary methods exist for separating worms from castings: migration, light, manual, and screening, each with varying efficiency.
- Properly harvested castings improve soil structure and nutrient availability for plants like tomatoes, increasing yields by 20% [5].
- Maintaining optimal bin conditions, like 70% moisture, simplifies the harvesting process.
- Worm castings contain diverse microbial populations, including beneficial bacteria like Leclercia barmae, which contribute to soil health [0, 1].
- Regular harvesting, every three to six months, prevents anaerobic conditions and maintains a healthy worm population of Eisenia fetida.
- Harvested castings can be stored for up to one year in breathable containers, ready for garden application in any USDA zone.
Quick answer: Worms can be separated from finished castings using four primary methods: migration, light, manual, and screening. These techniques help gardeners harvest nutrient-rich vermicompost to improve soil and boost plant yields.
In many backyard gardens across the US, from the humid Southeast to the arid Southwest, vermicomposting offers a powerful way to turn kitchen scraps into a potent soil amendment. A well-managed worm bin, often containing thousands of red wigglers (Eisenia fetida), can process up to 0.5 pounds of organic waste per square foot of surface area daily, yielding nutrient-rich worm castings. These castings are a goldmine for gardeners, enhancing soil structure and nutrient availability, with studies showing they can increase tomato transplant production by 20% [5].
The real trick, however, isn’t just making the castings; it’s separating the tiny worms from their finished product. Leaving too many worms in the harvested castings can lead to them drying out or dying off when applied to the garden, wasting valuable composting effort. This article will walk you through four practical methods for harvesting worm castings, ensuring you get the most out of your vermicomposting efforts and provide your plants with the best possible start, whether you are in USDA zone 5 or zone 9.
The migration method: enticing worms to move
The migration method is one of the most worm-friendly and least labor-intensive ways to harvest castings, especially if you have a multi-tiered or continuous flow vermicomposting system. This approach relies on the worms’ natural tendency to seek fresh food and avoid finished compost. In a two-tier bin, for instance, you simply stop feeding the lower tray for two to three weeks, allowing the worms to consume most of the remaining food scraps. Then, you place a new tray with fresh bedding and food on top. The worms, driven by hunger, will naturally migrate upwards into the new food source, leaving the finished castings in the bottom bin. This process can take anywhere from two to four weeks, depending on the bin’s size and the worm population, which might include 1,000 to 2,000 worms in a typical 10-gallon bin.
Horizontal migration for larger bins
For larger, single-compartment bins, a horizontal migration strategy works well. You feed only one side of the bin for several weeks, allowing the worms to concentrate their activity there. Once that side is nearly processed, you begin feeding the opposite side exclusively. Over a period of three to six weeks, the majority of the worms will move to the newly fed area, leaving the finished castings behind. This method is particularly effective for systems that process 5 pounds or more of food waste per week. You can then scoop out the finished castings from the unfed side, ensuring you leave about 2 to 3 inches of material to re-establish the microbial community. Maintaining a consistent moisture level of around 70% is important for worm activity and migration, which you can monitor with a soil moisture meter. Studies show that worm castings are rich in microbial populations, including bacteria like Leclercia barmae, which contribute to nutrient cycling [0, 1].
- Stop feeding one section of the bin for two to three weeks.
- Introduce fresh food and bedding to an adjacent or upper section.
- Wait three to six weeks for worms to migrate.
- Harvest the worm-free castings from the original section.
- Leave 2 to 3 inches of old material to aid microbial re-establishment.
The light method: using worms’ aversion to light
Worms, especially red wigglers (Eisenia fetida), are highly sensitive to light and will burrow away from it. This natural aversion forms the basis of the light method for harvesting castings. This technique is particularly useful for smaller bins or when you need to harvest a batch of castings relatively quickly, often within a few hours. To begin, dump the entire contents of your worm bin onto a large tarp or plastic sheet in a well-lit area, preferably outdoors on a sunny day or under bright artificial lights. Spread the material into a cone-shaped pile about 8 to 12 inches high. The worms will immediately start to burrow downwards to escape the light, typically moving 1 to 2 inches deeper every 10 to 15 minutes.
Pyramid or pile technique
After about 20 to 30 minutes, carefully scrape off the top 1 to 2 inches of castings from the pile, which should be largely worm-free. The worms will have moved further down. Repeat this process every 15 to 20 minutes, progressively removing layers of castings until you are left with a concentrated ball of worms at the bottom of the pile. This method can yield 5 to 10 pounds of castings from a medium-sized bin in about one to two hours. Be sure to work quickly to prevent the worms from overheating or drying out, especially if working in direct sunlight where temperatures can exceed 80°F. The remaining worm ball, which might contain 90% of your worm population, can then be returned to a refreshed bin with new bedding and food. This method is effective for maintaining a healthy worm population, which can process up to 3 pounds of food waste per week in a 10-gallon bin. Ensuring proper moisture in your compost is key, and a 3-in-1 soil meter can help monitor moisture, pH, and fertility.
- Dump bin contents onto a tarp in a well-lit area.
- Form a cone-shaped pile 8 to 12 inches high.
- Wait 20 to 30 minutes for worms to burrow down.
- Scrape off the top 1 to 2 inches of castings.
- Repeat scraping every 15 to 20 minutes until only worms remain.
The manual method: picking worms by hand
While more labor-intensive, the manual method offers the highest level of control over worm separation and is ideal for smaller-scale operations or when you want to ensure virtually no worms remain in your harvested castings. This method involves simply picking the worms out of the finished compost by hand. It’s best performed on a clean, flat surface, like a workbench or a large tray, where you can spread out small portions of the vermicompost. You might find this method suitable if you’re managing a single 5-gallon bucket system or have a small population of worms, perhaps 500 to 1,000 individuals. The process can be quite meditative, and it allows for a very thorough inspection of the castings, ensuring quality.
Sorting and sifting by hand
To execute this method, take a handful of finished vermicompost and spread it thinly, about 1 inch deep, on your sorting surface. Carefully pick out any visible worms, cocoons, or unprocessed food scraps. Place the worms into a separate container with a bit of moist bedding, ready to be returned to your main bin. The cocoons, which are lemon-shaped and about 0.125 inches in size, can also be collected and added back to the bin to boost future worm populations. This method can take a considerable amount of time (perhaps one hour for every 2 pounds of castings), but it guarantees a high-purity product. For gardeners in USDA zone 7, where growing seasons are long, these pure castings can be a valuable amendment for starting seedlings or enriching container plants. Consider using a product like fermented soybean meal as a supplemental slow-release fertilizer alongside your castings for maximum plant nutrition.
- Spread a small amount of vermicompost thinly on a surface.
- Manually pick out all visible worms and cocoons.
- Place worms and cocoons into a separate container.
- Return harvested worms to a refreshed worm bin.
- Repeat until all vermicompost is processed.
The screening method: sifting for speed and purity
The screening method is an efficient way to separate worms and larger unprocessed materials from finished castings, yielding a fine, uniform product. This technique is particularly useful for medium to large-scale vermicomposting operations, especially those producing 10 pounds or more of castings per harvest. It involves using a sieve or screen with a specific mesh size to allow the fine castings to pass through while retaining worms, cocoons, and larger organic fragments. Screens can be purchased or DIY-built using wooden frames and hardware cloth. Common mesh sizes range from 0.125 inches to 0.25 inches. A 0.125-inch screen will produce very fine castings but might retain more cocoons and small worms, while a 0.25-inch screen is faster but yields a coarser product.
Choosing the right screen size
To use this method, simply place your screen over a collection bin or tarp. Scoop handfuls of vermicompost onto the screen and gently agitate it, either by hand or by shaking the screen. The fine castings will fall through, leaving behind the worms and larger debris. For optimal results, the vermicompost should be slightly moist, but not wet: around 60% to 70% moisture content is ideal. If it’s too wet, it will clump and not pass through the screen; if too dry, it will create dust. This method can process 5 to 10 pounds of vermicompost in about 30 minutes to one hour, depending on the screen size and moisture. The retained material, rich in worms and partially decomposed organic matter, can be returned to the worm bin to continue the composting cycle. Research shows that worm castings blended with biochar improve microbial stability, which helps soil health [3, 1].
- Choose a screen with a mesh size between 0.125 and 0.25 inches.
- Place the screen over a collection container or tarp.
- Scoop vermicompost onto the screen.
- Gently agitate the screen to sift the castings.
- Return worms and larger debris to the worm bin.
Comparison of worm casting harvesting methods
Method | Time (for 10 lbs) | Effort Level | Worm Separation Efficiency | Equipment Needed |
|---|---|---|---|---|
Migration | 2-6 weeks | Low | High (90-95%) | Multi-tiered or partitioned bin |
Light | 1-2 hours | Medium | High (85-90%) | Tarp, bright light source |
Manual | 5-10 hours | High | Very High (98-100%) | Sorting surface, containers |
Screening | 0.5-1 hour | Medium | Medium-High (80-90%) | Sieve or screen (0.125-0.25 in mesh) |
Yield increase: Worm castings can improve tomato transplant production by 20% compared to peat moss in trials conducted in Chile [5].
Microbial diversity: Worm castings contain diverse microbial populations, including beneficial bacteria like Leclercia barmae, which contribute to soil health and nutrient cycling [0, 1].
Frequently asked questions
How often should I harvest worm castings?
You should typically harvest worm castings every three to six months, depending on the size of your bin and the amount of food scraps you add. Regular harvesting prevents the bin from becoming too full and maintains optimal conditions for your worm population, which can number in the thousands.
What do finished worm castings look like?
Finished worm castings are dark brown or black, crumbly, and have an earthy smell, similar to fresh soil. They should not contain large pieces of unprocessed food waste or smell foul. A healthy batch will often have a moisture content around 70%.
Can I use worm castings immediately after harvesting?
Yes, you can use worm castings immediately after harvesting. They are a stable and nutrient-rich amendment that can be directly applied to plants, mixed into potting soil, or used to make ‘compost tea.’ A typical application rate is 1 cup per square foot of garden bed.
What if I find worms in my harvested castings?
Finding a few worms in your harvested castings is normal and generally not a problem. These worms will either continue to break down organic matter in your garden soil or eventually perish. Aim for at least 80% worm-free castings for the best results.
How much worm casting should I use in my garden?
For garden beds, apply a 0.5-inch layer of castings over the soil surface, or mix 1 to 2 cups per plant. For potting mixes, castings can make up 10% to 20% of the total volume. For example, a 5-gallon container could benefit from 0.5 to 1 gallon of castings.
How long can I store worm castings?
Worm castings can be stored for up to one year if kept in a breathable container, like a burlap sack or a plastic bin with holes, in a cool, dark place. This helps maintain their beneficial microbial life and nutrient content, which can decrease by 5% to 10% after six months.
References
- Leclercia barmae sp. nov., a urease-positive, 3-nitropropionic acid and glycerol consuming bacterium, isolated from the worm castings of manure worm, Eisenia fe (2024). Leclercia barmae sp. nov., a urease-positive, 3-nitropropionic acid and glycerol consuming bacterium, isolated from the worm castings of manure worm, Eisenia fe.
- Identification of Microbial Populations in Blends of Worm Castings or Sugarcane Filter Mud Compost with Biochar (2021). Identification of Microbial Populations in Blends of Worm Castings or Sugarcane Filter Mud Compost with Biochar.
- A Marketing Feasibility Study of Incorporating Worm Castings into a Substrate Mix for Home Gardening (2005). A Marketing Feasibility Study of Incorporating Worm Castings into a Substrate Mix for Home Gardening.
- Microbial stability of worm castings and sugarcane filter mud compost blended with biochar (2018). Microbial stability of worm castings and sugarcane filter mud compost blended with biochar.
- (299) The Use of Worm Castings As an Alternative to Sphagnum Peat Moss in Tomato (Lycopersicon esculentum Mill.) Transplant Production in Chile (2006). (299) The Use of Worm Castings As an Alternative to Sphagnum Peat Moss in Tomato (Lycopersicon esculentum Mill.) Transplant Production in Chile.
- USDA Natural Resources Conservation Service (2024). USDA Natural Resources Conservation Service.