Key takeaways
- Select appropriate seeds for microgreens (e.g., broccoli, radish) and sprouts (e.g., alfalfa, mung bean).
- Use shallow trays with a 1-inch layer of growing medium for microgreens, or sprouting jars for sprouts.
- Provide 12-16 hours of light daily for microgreens, typically from LED grow lights.
- Harvest microgreens at 7-14 days and sprouts at 3-7 days for peak nutrition.
- Maintain consistent temperatures between 65-75°F and adequate humidity for optimal growth.
- Sanitize equipment regularly to prevent mold and bacterial issues, especially for sprouts.
Quick answer: To grow microgreens and sprouts indoors year-round, select appropriate seeds, use shallow trays with growing medium for microgreens or jars for sprouts, and provide adequate light and consistent temperatures. Harvest microgreens in 7-14 days and sprouts in 3-7 days for fresh, nutrient-dense produce.
In northern states like Minnesota or Maine, where winter temperatures can drop to 0°F or below for months, fresh, local produce becomes a rarity. Even in warmer regions like USDA Zone 9, seasonal shifts can limit garden output. Growing microgreens and sprouts indoors offers a practical solution, ensuring a consistent supply of nutrient-dense greens regardless of outdoor conditions or time of year.
These crops mature quickly, often ready in 7-14 days for microgreens and 3-7 days for sprouts, and supply fresh greens throughout the year.
Understanding microgreens and sprouts
Many home growers in the United States, from the humid Gulf Coast to the arid Southwest, seek ways to supplement their diets with fresh produce year-round. Microgreens and sprouts offer an excellent pathway, though they are distinct in their growth, harvest, and consumption. Sprouts are germinated seeds that are consumed whole (seed, root, and shoot), typically harvested after three to seven days of growth [1]. They are grown in water, often in glass jars, without a growing medium. For instance, a one-tablespoon batch of alfalfa seeds can yield a substantial amount of sprouts in about four days. In contrast, microgreens are young vegetable greens harvested when they are one to three inches tall, after the cotyledon leaves have fully developed and the first true leaves have just emerged [2]. This growth stage usually occurs seven to twenty-one days after planting. Unlike sprouts, microgreens are grown in a shallow layer of growing medium, such as coco coir or peat moss, and are cut above the soil line before consumption. Microgreens often contain higher concentrations of vitamins, minerals, and antioxidants than their mature counterparts.
key differences in cultivation
The primary distinction lies in the harvest stage and growing method. Sprouts require minimal equipment, often just a jar and water, and are ready in a few days. Microgreens, however, demand a growing medium, light, and slightly more time, typically one to three weeks depending on the species. For example, a tray of radish microgreens might be ready in eight days, while cilantro could take twenty days. Both offer rapid turnaround and a fresh source of nutrients, making them ideal for indoor cultivation in any US climate, from a small apartment in New York City to a spacious home in rural Kansas.
- Sprouts are consumed whole, including the seed and root, typically harvested in three to seven days.
- Microgreens are harvested by cutting the stem above the soil line, usually one to three inches tall, after seven to twenty-one days of growth.
- Sprouts are grown in water, often in jars, while microgreens require a growing medium in shallow trays.
- Microgreens generally require light for steady growth, whereas sprouts can grow in dim conditions.
Essential equipment and setup
Setting up an indoor growing area for microgreens and sprouts does not require a large investment, making it accessible for growers in various US settings, from urban apartments in Boston, Massachusetts, to suburban homes in Portland, Oregon. The most critical component for microgreens is adequate lighting. While a sunny south-facing window might suffice for a small batch, consistent growth year-round, especially during shorter winter days, necessitates supplemental lighting. Full-spectrum LED grow lights are highly efficient, consuming about 30-50 watts per two-foot fixture, and should be positioned six to twelve inches above the growing trays. These lights should run for twelve to sixteen hours daily to ensure steady growth. For sprouts, light is less critical, as they can germinate and grow in ambient room light or even darkness. Shallow growing trays, typically ten by twenty inches, are standard for microgreens and can be purchased for under five dollars each. A good quality growing medium, such as coco coir or a seed-starting mix, is also essential, providing the necessary support and moisture retention for microgreen seeds. A five-pound bag of coco coir can fill approximately ten to twelve standard trays.
creating an efficient grow space
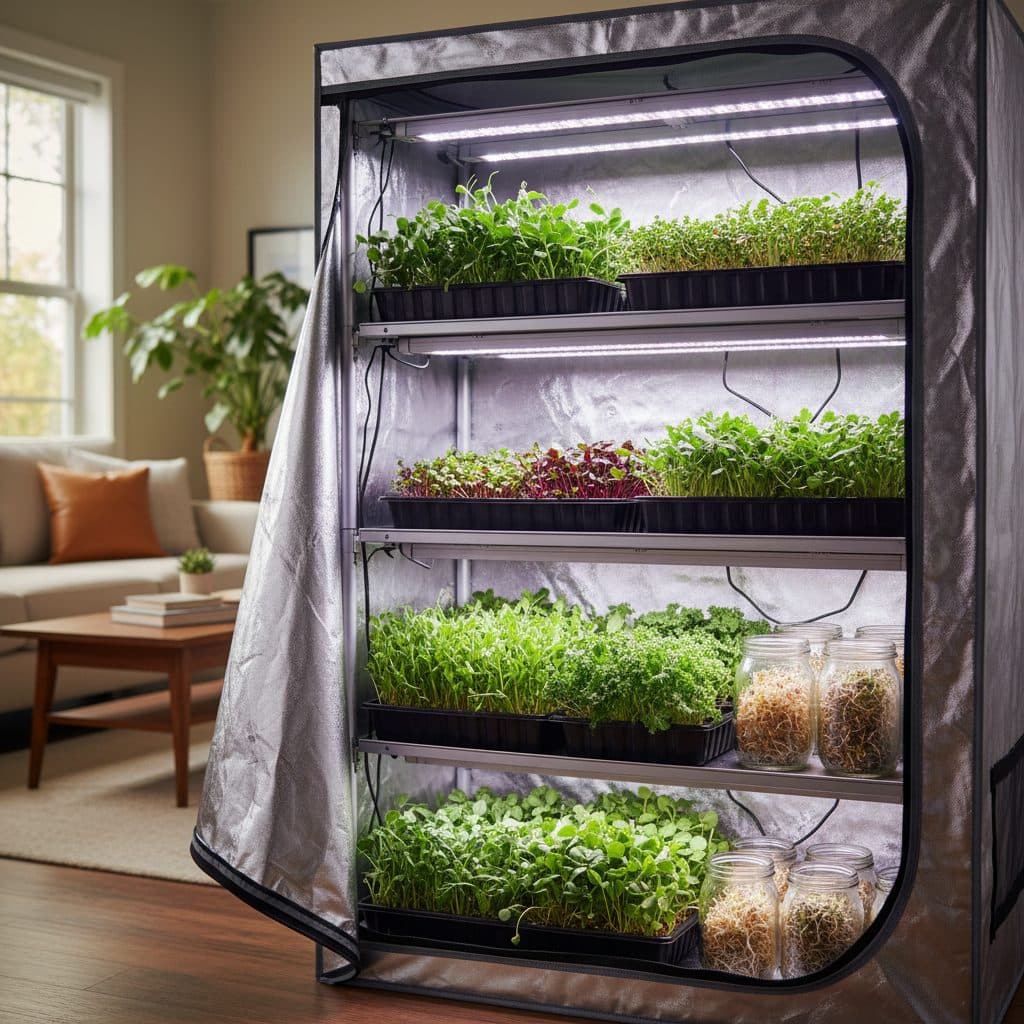
Consider a multi-tiered shelving unit to maximize vertical space, allowing for several trays to grow simultaneously. A reflective grow tent will bounce stray light back onto the trays and helps hold a steadier temperature, though microgreens under a shop light on a shelf do fine without one. For sprouts, simple wide-mouth glass jars with mesh lids are ideal, costing about ten dollars for a set of two. A spray bottle for misting microgreens and a small fan for air circulation, which can prevent mold, are also beneficial. These items represent an initial investment of around one hundred to two hundred dollars, depending on the scale of your operation.
- Full-spectrum LED grow lights, providing twelve to sixteen hours of light daily, are necessary for microgreens.
- Shallow ten by twenty-inch growing trays are standard for microgreens, often costing less than five dollars each.
- A high-quality growing medium like coco coir or seed-starting mix is necessary for microgreens.
- Wide-mouth glass jars with mesh lids are ideal for sprouting, typically costing around ten dollars for a pair.
- A small fan for air circulation helps maintain optimal temperatures between 65-75°F and prevents mold.
Growing microgreens step-by-step
Cultivating microgreens is a straightforward process that can yield fresh greens in as little as seven days. The first step is seed selection. Choose high-quality, untreated seeds specifically for microgreens; common varieties include broccoli, radish, kale, and mustard. For example, a one-ounce packet of radish seeds can densely cover a standard ten by twenty-inch tray. Some seeds, particularly larger ones like peas or sunflowers, benefit from pre-soaking in cool water for four to eight hours to encourage germination. Next, prepare your trays by filling them with about one inch of moist growing medium, leveling it gently without compacting it too much. Spread your chosen seeds evenly across the surface of the medium. For most varieties, aim for a density that allows seeds to touch but not overlap, using approximately one ounce of small seeds per tray.
from blackout to harvest
After seeding, mist the seeds thoroughly with water from a spray bottle. Then, place another tray directly on top of the seeded tray to create a blackout period for two to four days. This gentle pressure and darkness encourage uniform germination and stronger root development. During this time, the seeds will push against the top tray, building strength. After the blackout period, expose the trays to light, positioning your LED grow lights six to twelve inches above the seedlings for twelve to sixteen hours daily. Water the trays once or twice a day, preferably from the bottom, by placing the seeded tray into a slightly larger tray filled with about one-half inch of water for fifteen to twenty minutes. This method helps prevent damping-off disease. Most microgreens will be ready for harvest when they reach one to three inches in height and have developed their first true leaves, typically between seven and fourteen days. Use sharp scissors or a knife to cut the stems just above the soil line. You can learn more about specific varieties and setup at agripure.org/articles/how-to-grow-microgreens.
- Select high-quality, untreated microgreen seeds, such as broccoli or radish, which are ready in seven to ten days.
- Fill ten by twenty-inch trays with one inch of moist growing medium and spread seeds evenly, about one ounce per tray.
- Implement a blackout period of two to four days by stacking another tray on top to encourage germination.
- Provide twelve to sixteen hours of light daily from LED grow lights positioned six to twelve inches above plants.
- Water from the bottom daily or twice daily to maintain consistent moisture and prevent disease.
- Harvest microgreens at one to three inches tall, typically seven to fourteen days after planting, using sharp scissors.
Growing sprouts step-by-step
Growing sprouts is arguably one of the quickest ways to produce fresh food indoors, with many varieties ready for consumption in just three to seven days. This method is particularly popular in compact living spaces across the US, from apartments in Chicago, Illinois, to small homes in Honolulu, Hawaii, due to its minimal space requirements. Begin by selecting your seeds. Popular sprout varieties include alfalfa, mung bean, broccoli, and lentil. Buy seed sold specifically for sprouting, from a supplier that publishes pathogen test results for the lot. A sprouting label on its own is not a guarantee that the seed was tested, and contaminated seed is the usual source of sprout-related illness. For a standard one-quart wide-mouth jar, one to two tablespoons of seeds are usually sufficient. Next, soak the seeds in cool water for eight to twelve hours. This rehydrates the seeds and kick-starts the germination process. After soaking, drain the water thoroughly using a mesh lid or cheesecloth secured with a rubber band.
rinsing and draining for healthy sprouts
The most important step in sprout cultivation is rinsing and draining. Rinse the seeds two to three times daily with cool, fresh water. After each rinse, drain the jar completely, ensuring no standing water remains, as excess moisture can lead to mold or bacterial growth. Store the jar on its side or at an angle in a well-ventilated area, away from direct sunlight, to allow for air circulation and continued draining. A temperature range of 65-75°F is ideal for most sprout varieties. Continue this rinse-and-drain cycle for three to seven days, or until the sprouts reach your desired length, typically one to two inches. For example, mung beans might be ready in three days, while alfalfa could take five days. Once harvested, store your fresh sprouts in an airtight container in the refrigerator, where they will remain fresh for five to seven days. Regular sanitation of your sprouting equipment, such as washing jars in hot, soapy water and sanitizing with one tablespoon of unscented bleach per gallon of water, is important for food safety.
- Select high-quality seeds specifically labeled for sprouting, such as alfalfa or mung bean, using one to two tablespoons per quart jar.
- Soak seeds in cool water for eight to twelve hours to initiate germination.
- Rinse and drain sprouts two to three times daily with cool water, ensuring no standing water remains.
- Store jars on their side or at an angle in a well-ventilated area, maintaining 65-75°F.
- Harvest sprouts after three to seven days when they reach one to two inches in length.
- Store fresh sprouts in an airtight container in the refrigerator for five to seven days.
Troubleshooting common issues
Even experienced growers across the US, whether in the humid climate of Louisiana or the dry air of Arizona, can encounter challenges when cultivating microgreens and sprouts. One of the most frequent problems is mold growth. This often appears as white, fuzzy patches on seeds or growing medium, distinct from the fine, hair-like root fuzz (radicles) of healthy seedlings. Mold typically results from insufficient air circulation, excessive humidity above 70%, or overwatering. To combat this, ensure your growing area has good airflow, perhaps by using a small oscillating fan for fifteen to thirty minutes a few times a day. Reduce watering frequency or volume, and ensure trays drain completely. For sprouts, thorough draining after each rinse is paramount to prevent mold. Another common issue is inconsistent germination or growth. This can stem from old or low-quality seeds, incorrect temperature (outside the 65-75°F range), or uneven moisture. Always purchase fresh seeds from reputable suppliers, and check their germination rates, which should ideally be above 85%.
preventing pests and promoting health
While indoor growing reduces pest pressure significantly compared to outdoor gardens, tiny fungus gnats can sometimes appear, especially if the growing medium remains too wet. These small black flies are mostly a nuisance but can indicate overly moist conditions. Allow the top layer of your microgreen medium to dry slightly between waterings to deter them. For sprouts, bacterial contamination is a serious concern that hygiene alone does not remove. Raw and lightly cooked sprouts have been tied to repeated Salmonella and E. coli outbreaks, because the warm, humid conditions sprouts need are also ideal for bacteria, and pathogens can sit inside the seed where rinsing cannot reach them. The FDA advises that children, older adults, pregnant people and anyone with a weakened immune system avoid raw sprouts entirely, and that everyone else cook sprouts thoroughly before eating. Always sanitize sprouting jars and lids with hot, soapy water or a dilute bleach solution (one tablespoon of bleach per gallon of water) before each use. Seed pre-treatments lower surface contamination but do not sterilize seed, and no home treatment reaches pathogens sitting inside the seed coat. Treat them as one small layer of protection, not as a reason to skip the cooking guidance above. Maintaining a clean growing environment and monitoring conditions daily helps ensure a successful harvest of healthy microgreens and sprouts. For more general advice on starting a garden, see agripure.org/articles/starting-a-herb-garden.
- Address mold by improving air circulation with a small fan for fifteen to thirty minutes daily and reducing humidity below 70%.
- Prevent inconsistent germination by using fresh seeds with a germination rate above 85% and maintaining temperatures between 65-75°F.
- Control fungus gnats by allowing the top layer of microgreen growing medium to dry slightly between waterings.
- Sanitize sprouting jars with hot, soapy water or a dilute bleach solution (one tablespoon per gallon) before each use.
- Treat any seed pre-soak as a small extra precaution only; no home treatment sterilizes seed.
Key Differences Between Sprouts and Microgreens
Feature | Sprouts | Microgreens |
|---|---|---|
Growth Medium | Water (jars or trays) | Soil or soilless medium (trays) |
Harvest Stage | Consumed whole (seed, root, shoot) | Cut above soil (cotyledons, first true leaves) |
Growth Time | 3-7 days | 7-21 days |
Light Requirement | Minimal or none | 12-16 hours of light daily |
Typical Height | 1-2 inches | 1-3 inches |
Nutrient Boost: Some microgreens can contain significantly higher nutrient levels than their mature plant counterparts.
Quick Harvest: Most microgreens are ready for harvest in 7-14 days from seeding.
Rapid Sprouting: Sprouts typically mature in just 3-7 days, offering a very quick source of fresh greens.
Frequently asked questions
What’s the main difference between microgreens and sprouts?
The main difference lies in their growth stage and harvest method. Sprouts are consumed whole, including the seed and root, typically after 3-7 days of growth, while microgreens are cut above the soil line after 7-21 days, once their first true leaves appear.
What are the easiest microgreens to grow for beginners?
Radish, broccoli, and kale are excellent choices for beginners. They germinate quickly and are often ready for harvest in 7-10 days, making them simple to start with and providing satisfying results rapidly.
Do I need special lights to grow microgreens indoors?
Yes, bright light is necessary for healthy microgreen growth. Standard full-spectrum LED shop lights or dedicated grow lights providing 12-16 hours of light daily are recommended to support strong greens.
How often should I water microgreens?
Microgreens typically require watering once or twice daily, preferably from the bottom, to keep the growing medium consistently moist but not waterlogged. This is especially important during the first 5 days of growth.
Can I reuse the growing medium for microgreens?
No, it is best practice to use fresh growing medium for each batch of microgreens. Reusing medium can lead to disease, pest issues, and nutrient depletion, impacting the health and yield of subsequent crops.
What temperature is best for growing microgreens and sprouts?
Most varieties of microgreens and sprouts thrive in a consistent room temperature range of 65-75°F. Maintaining this temperature helps ensure optimal germination rates and steady, healthy growth for your indoor crops.
References
- Sprouts versus Microgreens (2015). Sprouts versus Microgreens.
- The Amazing Power of Microgreens: Easy to Grow and a Superfood (2025). The Amazing Power of Microgreens: Easy to Grow and a Superfood.
- Sprouts versus Microgreens (2015). Sprouts versus Microgreens.
- Advanced Research on Sprouts and Microgreens as a Source of Bioactive Compounds (2023). Advanced Research on Sprouts and Microgreens as a Source of Bioactive Compounds.
- USDA Natural Resources Conservation Service (2024). USDA Natural Resources Conservation Service.