Key takeaways
- Damping-off, a fungal disease, is prevented by using sterilized medium to ensure good air circulation, and avoiding overwatering.
- Leggy microgreen growth is primarily caused by insufficient light intensity or duration, requiring grow lights to be closer or on for longer periods.
- Uneven germination often stems from poor seed quality, inconsistent moisture, or incorrect temperatures, which can be improved by pre-soaking and environmental control.
- Maintaining a consistent growing environment with temperatures between 60-75°F and humidity between 40-60% is important for microgreen health.
- Proper sanitation of trays and tools with a 10% bleach solution can significantly reduce the risk of disease transmission.
- Harvest most microgreens at the first true-leaf stage, generally 7-21 days after seeding, for the best texture and flavor.
Quick answer: Troubleshooting microgreens involves addressing common issues like damping-off, leggy growth, and uneven germination through proper environmental control, sanitation, and optimized light and moisture.
Growing microgreens at home offers a quick and rewarding harvest, often ready in under three weeks. However, even experienced growers in USDA zones 5-9 can encounter common issues that hinder success. Damping-off, leggy growth and uneven germination are the setbacks new microgreen growers run into most often. These issues can lead to wasted seeds, reduced yields, and frustration, but understanding their causes and implementing targeted solutions can turn a struggling crop into a thriving one.
Identifying these common microgreen issues and adjusting light, moisture, and airflow helps prevent crop loss and ensures consistent harvests. For a foundational understanding of setting up your microgreen operation, consider reviewing our comprehensive guide on how to grow microgreens at home.
Preventing damping-off in microgreens
Damping-off is a common and often devastating issue for young microgreen seedlings, particularly prevalent in humid environments like those found in the southeastern US. This fungal disease, caused by pathogens such as Pythium, Rhizoctonia, and Fusarium, attacks seedlings at the soil line, causing them to collapse and die. It’s often identifiable by a fuzzy, white mold growing on the soil surface or around the base of the stems. High humidity, typically above 70%, combined with warm temperatures exceeding 70°F, creates an ideal breeding ground for these pathogens. To combat this, growers must focus on creating an environment that is inhospitable to fungal growth to ensure their trays are not overly moist and have adequate air circulation. Good environmental control (a dry medium surface, moving air, moderate humidity) is the most reliable way to keep damping-off out of a tray.
implementing effective damping-off prevention strategies
The first line of defense against damping-off is using a sterilized growing medium. While many commercial seed-starting mixes are pre-sterilized, if you’re mixing your own, consider baking it at 180°F for 30 minutes to kill off potential pathogens. Secondly, proper air circulation is paramount; a small oscillating fan running 24 hours a day, placed a few feet from your trays, can significantly reduce humidity around the seedlings. Aim for ambient humidity levels between 40-60%. Thirdly, practice bottom watering to keep the surface of the growing medium dry, which discourages fungal spores from germinating. Instead of watering from above, place your microgreen trays into a larger tray containing 0.5-1 inch of water for 10-15 minutes, allowing the medium to wick up moisture. Finally, avoid packing the tray; reduce your seeding rate instead of sowing wall to wall, since a dense canopy holds moisture against the stems. Regularly cleaning trays and tools with a 10% bleach solution also helps prevent the spread of fungal pathogens.
- Use a sterile, well-draining growing medium.
- Ensure constant air circulation with a small fan.
- Water from the bottom to keep the surface dry.
- Avoid overcrowding seeds in the tray.
- Maintain ambient humidity below 60% once trays come out of blackout.
Addressing leggy microgreen growth
Leggy growth is a common frustration for microgreen growers, characterized by tall, thin, and often pale stems with small leaves. This issue typically arises from insufficient light, a problem frequently observed in indoor setups without adequate supplemental lighting, particularly during the shorter days of winter across northern US states like Michigan or Montana. When microgreens don’t receive enough light, they stretch excessively toward the light source, expending energy on stem elongation instead of leaf development. This stretching leads to weak plants that are prone to lodging and have reduced market appeal. Optimal light intensity is critical; many microgreen varieties do well at a Photosynthetic Photon Flux Density (PPFD) of roughly 100-200 µmol/m²/s. Without this intensity, seedlings will inevitably become leggy, impacting overall yield and quality.
optimizing light and spacing for compact growth
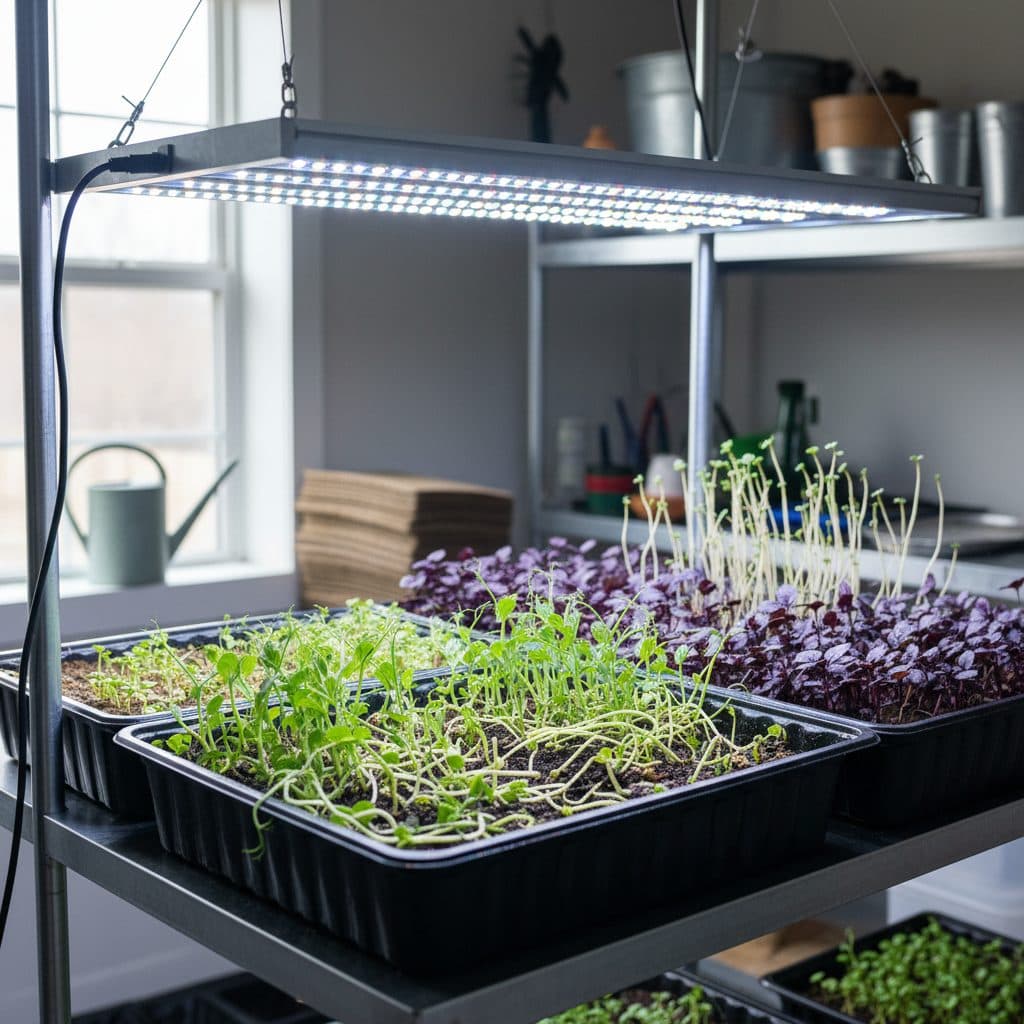
The primary solution to leggy growth is to provide adequate light intensity and duration. For most microgreens, 12-16 hours of light daily is sufficient. If using LED grow lights, position them 2-6 inches above the canopy, adjusting as the seedlings grow. The specific distance will depend on the light’s power; stronger lights can be placed further away. Consider a reflective indoor grow tent to maximize light efficiency and create a controlled environment. Another critical factor is seeding density. Overcrowding forces seedlings to compete for light, exacerbating legginess. Aim for a density that gives every seedling room to stand up; if trays come out matted and slow to dry, reduce the seeding rate on the next sowing. Experiment with different varieties; some, like sunflower microgreens, require more space than others. Ensuring the correct light spectrum, often full-spectrum white light, also contributes to healthy, compact growth, preventing the plants from stretching for specific wavelengths. Consistent monitoring and adjustment of your grow lights are key to preventing this common issue.
- Provide 12-16 hours of light daily.
- Position grow lights 2-6 inches above the canopy.
- Ensure adequate light intensity (100-200 µmol/m²/s PPFD).
- Avoid overcrowding by using appropriate seeding density.
- Consider using full-spectrum LED grow lights.
Ensuring consistent microgreen germination
Uneven germination can be a frustrating hurdle in microgreen cultivation, leading to patchy trays and staggered harvests. This problem is particularly noticeable with varieties known for slower or more erratic germination, such as cilantro or beets, which may take 5-10 days longer to sprout than quick-germinating brassicas. Several factors contribute to inconsistent sprouting, including poor seed quality, fluctuating temperatures, inadequate or excessive moisture, and improper planting depth. For instance, seed stored warm or damp loses viability quickly, and a year-old bag kept that way can germinate poorly and unevenly. Without a uniform start, the faster-growing seedlings can outcompete the slower ones for light and nutrients, further exacerbating the problem and resulting in an overall lower-quality crop. Addressing these variables systematically is key to achieving a full, even tray of microgreens, which is essential for commercial growers and home enthusiasts alike.
strategies for uniform seed sprouting
To achieve uniform germination, start with high-quality seeds from a reputable supplier to ensure they have a germination rate of 85% or higher. Many seed packets will state this percentage. Next, maintain a consistent germination temperature, typically between 65-75°F, which is optimal for most microgreen varieties. Using a heat mat can help stabilize soil temperature, especially in cooler environments like unheated basements in the northern US. Ensure consistent moisture by thoroughly wetting the growing medium before seeding and then covering the trays with a dome or another tray during the blackout period to maintain high humidity (around 80-90%) until germination. Some seeds, like peas or sunflowers, benefit significantly from pre-soaking seeds in water for 4-8 hours before planting, which helps to break dormancy and speed up germination. Others, like basil, require light to germinate and should not be covered too deeply. Finally, apply a light top layer of growing medium or simply press the seeds gently into the surface, depending on the variety, to ensure proper seed-to-soil contact without burying them too deep. These steps, when followed consistently, noticeably improve how evenly a tray comes up.
- Use high-quality seeds with a known germination rate.
- Maintain a consistent germination temperature (65-75°F).
- Ensure consistent moisture during the blackout period.
- Pre-soak larger seeds like peas or sunflowers.
- Provide appropriate light or darkness based on seed requirements.
General best practices for healthy microgreen cultivation
Beyond addressing specific issues like damping-off or leggy growth, a holistic approach to microgreen cultivation ensures consistent success. Maintaining a clean and stable growing environment is paramount, regardless of whether you’re growing in a small kitchen setup in an urban apartment or a dedicated grow room in a rural setting. Many microgreen varieties, including popular brassicas like broccoli and radish, are sensitive to environmental fluctuations. For instance, a sudden drop in ambient temperature below 60°F noticeably slows growth, while temperatures consistently above 75°F encourage pest and disease problems. Adhering to general best practices minimizes stress on the plants, leading to healthier, more vigorous growth and a higher quality harvest. This proactive approach reduces troubleshooting and maintains consistent harvests.
maintaining an optimal microgreen growing environment
One of the most important elements is strict sanitation. Always clean trays, tools and surfaces with a 10% bleach solution or food-grade hydrogen peroxide between batches, then rinse with clean water and let them air-dry before seeding so no residue reaches the crop. This simple step prevents pathogens and pests carrying over between batches. Adequate ventilation is also key; beyond preventing damping-off, good airflow helps regulate temperature and humidity, creating a stable growing environment. For most microgreens, aim for ambient temperatures between 60-75°F and relative humidity between 40-60%. While microgreens generally don’t require external nutrient availability due to their short growth cycle, some growers find a very dilute solution of fermented soybean meal (at 1:100 dilution) can boost growth for longer-cycle varieties like wheatgrass, though this is often unnecessary. Finally, proper harvesting techniques are essential for quality. Harvest microgreens when they reach their first true leaf stage, typically 7-21 days after seeding, using a sharp knife or scissors to cut just above the soil line. This ensures a clean cut and maximizes shelf life, which can be extended by up to 5 days with proper post-harvest handling [4].
- Practice rigorous sanitation for all equipment.
- Ensure constant air circulation and stable temperatures.
- Maintain relative humidity between 40-60%.
- Harvest at the appropriate stage (7-21 days).
- Consider minimal nutrient supplementation for specific varieties.
Common Microgreen Issues and Their Primary Solutions
Issue | Primary Cause | Key Solution |
|---|---|---|
Damping-off | Fungal pathogens, high humidity (>70%), overwatering | Sterile medium, air circulation, bottom watering |
Leggy Growth | Insufficient light intensity or duration (<12 hours/day) | Adjust light distance (2-6 in), increase light duration (12-16 hours) |
Uneven Germination | Poor seed quality, inconsistent moisture/temperature | High-quality seeds, consistent 65-75°F, pre-soaking |
Slow Growth | Suboptimal temperature (<60°F), low light, nutrient deficiency | Maintain 60-75°F, adequate light (100-200 µmol/m²/s), consider dilute feed |
Yellowing Leaves | Overwatering, nutrient deficiency, low light | Improve drainage, ensure adequate light, check pH (if applicable) |
Humidity Control: Keeping relative humidity between 40-60% markedly reduces damping-off in microgreen trays.
Light Distance: Positioning grow lights 2-6 inches above the microgreen canopy ensures sufficient light intensity, often 100-200 µmol/m²/s PPFD, preventing leggy growth.
Frequently asked questions
What is damping-off and how can I prevent it?
Damping-off is a fungal disease that causes young microgreen seedlings to collapse and die at the soil line. You can prevent it by using a sterile growing medium to ensure good air circulation with a fan 24 hours a day, bottom watering to keep the surface dry, and maintaining humidity below 60%.
Why are my microgreens growing tall and thin (leggy)?
Leggy microgreens are typically a result of insufficient light. To fix this, move your grow lights closer to the seedlings (2-6 inches above the canopy) and ensure they receive 12-16 hours of light daily at an intensity of 100-200 µmol/m²/s PPFD.
How can I achieve more even germination for my microgreens?
To promote even germination, start with high-quality seeds with an 85% or higher germination rate, maintain a consistent temperature between 65-75°F, ensure continuous moisture during the blackout period, and consider pre-soaking larger seeds for 4-8 hours.
Do microgreens need fertilizer?
Most microgreens do not require fertilizer because they complete their growth cycle within 7-21 days, relying on the nutrients stored in the seed. However, for longer-growing varieties, a very dilute nutrient solution (e.g., 1:100 fermented soybean meal) might be considered after the first week.
What is the ideal temperature and humidity for growing microgreens?
The ideal temperature range for most microgreens is between 60-75°F. Relative humidity should be maintained between 40-60% to prevent fungal issues like damping-off and ensure healthy plant development throughout the 7-21 day growth cycle.
When should I harvest my microgreens?
Harvest microgreens when they have developed their first set of true leaves, typically 7-21 days after seeding, depending on the variety. Use a sharp knife or scissors to cut the stems just above the soil line.
References
- Amaranthaceae Microgreens: Nutrient-Dense Microgreens (2026). Amaranthaceae Microgreens: Nutrient-Dense Microgreens.
- Stress-Induced Functional Enhancement of Microgreens (2026). Stress-Induced Functional Enhancement of Microgreens.
- The science behind microgreens (2023). The science behind microgreens.
- Interventions for Shelf-Life Extension and Quality Retention of Microgreens (2026). Interventions for Shelf-Life Extension and Quality Retention of Microgreens.