Key takeaways
- Ferment tomato seeds for two to three days to remove germination inhibitors and improve viability.
- Dry bean and pepper seeds thoroughly on the plant or in a well-ventilated area to less than 8% moisture content.
- Harvest lettuce seeds from bolted plants after flower heads dry and fluff appears, indicating maturity.
- Store all seeds in cool, dark, and dry conditions, ideally between 35-40°F and 30-40% relative humidity.
- Label seed packets clearly with variety, harvest date, and location for accurate future planting and tracking.
- Integrating seed saving with crop rotation and succession planting strengthens garden resilience and regional adaptation.
Quick answer: To save seeds, ferment tomato seeds, dry bean and pepper seeds thoroughly on the plant, and harvest lettuce seeds after bolting. Store all seeds in cool, dark, and dry conditions to maintain viability for future planting.
In the fertile valleys of California’s Central Valley, or across the rich soils of the Midwest’s USDA zone 5, many growers understand the value of self-sufficiency in the garden. Each year, gardeners plant thousands of seeds, hoping for a bountiful harvest. But what happens to the best performers, the most flavorful tomatoes, or the most vigorous beans? Saving seeds from these plants is a practical step, ensuring that the genetic traits you appreciate can be carried forward, often for many seasons to come. This practice maintains favored varieties and strengthens garden resilience against regional challenges.
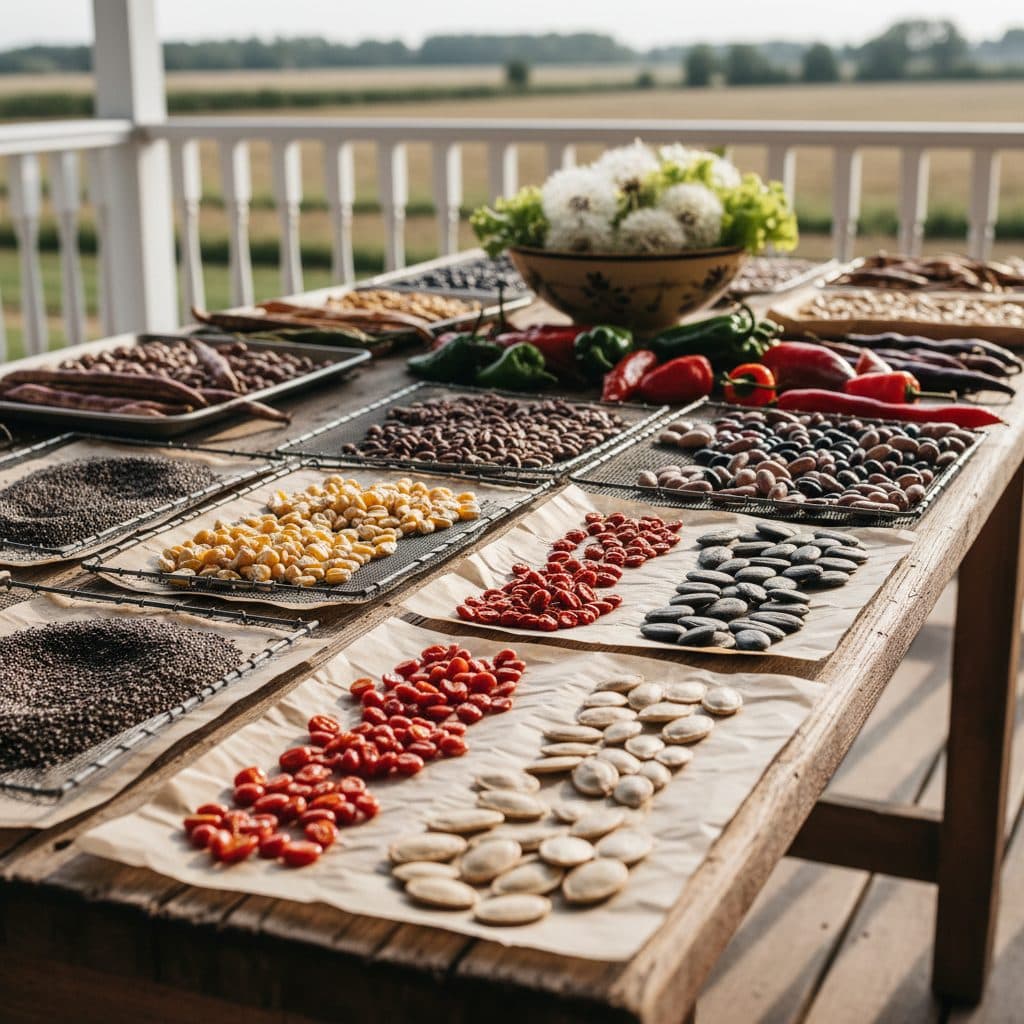
This guide focuses on four common garden crops (tomato, bean, pepper, and lettuce), providing a practical approach to harvesting, drying, and storing their seeds. From the fermentation process required for tomato seeds to the simple air-drying of beans and peppers, we’ll cover the essential techniques. Proper seed saving, drying, and storage maintain viability until the next planting season.
Saving tomato seeds: the fermentation method
Tomato seeds, unlike many other garden vegetable seeds, benefit significantly from a fermentation process before drying and storage. This method, studied in agricultural contexts like Kyrgyzstan in 2023, helps remove the gelatinous coating that surrounds each seed, which contains germination inhibitors. For growers in humid regions like USDA zone 8 in the Southeast, this step is particularly important for preventing mold during drying.
Why ferment tomato seeds?
The fermentation process serves two primary purposes: first, it breaks down the gel sac, making the seeds easier to clean and dry. Second, it can help eliminate seed-borne diseases, resulting in healthier plants in subsequent seasons. To begin, select ripe, disease-free tomatoes from your best-performing plants. Cut the fruit in half and squeeze the pulp, seeds, and juice into a glass jar. Aim for about one cup of pulp for every 10-15 tomatoes. Add an equal amount of water to the jar, creating a 1:1 pulp-to-water ratio.
- Select ripe, disease-free tomatoes from vigorous plants.
- Squeeze seeds and pulp into a glass jar.
- Add an equal volume of water to the jar.
- Stir daily, allowing a thin layer of mold to form.
- Rinse and dry seeds after two to three days.
Cover the jar loosely with a cloth or lid and let it sit at room temperature, ideally around 70°F, for two to three days. During this time, a layer of mold may form on top, which is a normal part of the process. Stir the mixture once a day. After two or three days, the seeds should have sunk to the bottom of the jar, indicating successful fermentation. Carefully pour off the moldy liquid and rinse the seeds thoroughly in a sieve under running water until they are completely clean. Lay the clean seeds on a non-stick surface, like a ceramic plate or parchment paper, to dry for 10-14 days in a well-ventilated area.
Harvesting and drying bean seeds
Saving bean seeds is one of the simplest and most rewarding tasks for any grower, especially for varieties adapted to local conditions in regions like USDA zone 6. Unlike tomatoes, bean seeds do not require fermentation; they are best left to dry directly on the plant. This method ensures the seeds reach their optimal maturity and moisture content for long-term viability. For a reliable seed stock, plan to save from at least 10-15 healthy, productive plants of your chosen variety.
When to harvest bean pods
The key to successful bean seed saving is patience. Allow the bean pods to mature fully on the plant, well past the point of being edible as green beans. They should turn yellow, then brown, becoming brittle and dry. In many parts of the US, including the arid Southwest, this drying process can take several weeks, often extending into late summer or early fall. The pods should rattle when shaken, indicating the seeds inside are hard and dry. This natural drying process helps the seeds reach a moisture content below 8%, which is ideal for storage.
- Allow pods to fully mature and dry on the plant.
- Harvest pods when they are brittle and rattle.
- Shell the dried pods by hand to extract seeds.
- Inspect seeds for any signs of damage or disease.
- Perform a final air dry for one to two weeks indoors.
Once the pods are thoroughly dry on the plant, harvest them by hand. If there’s a risk of frost or prolonged wet weather in your area, such as in USDA zone 4, you can pull up the entire plant and hang it upside down in a sheltered, dry location, like a shed or garage, for two to three weeks to complete the drying process. After drying, shell the pods by hand, separating the seeds from the chaff. Inspect the seeds carefully, discarding any that are discolored, shriveled, or show signs of insect damage. Spread the clean seeds on a tray or screen for a final air dry indoors for one to two weeks to ensure they are completely dry before storage.
Collecting and preparing pepper seeds
Saving pepper seeds is straightforward, similar to beans in its simplicity, but requires ensuring the fruit is fully ripe. Peppers also cross-pollinate readily between varieties: if a sweet pepper flowered near a hot one, the seed you save can grow out as unexpectedly hot fruit the following season. Bag a few flowers by hand, or keep varieties well apart, if you want seed that comes true. For gardeners in warmer climates like USDA zone 9, allowing peppers to reach their mature color (red, orange, or yellow, depending on the variety) is necessary for viable seed. Harvesting from at least 5-10 healthy plants helps maintain genetic diversity and ensures an ample seed supply for future plantings.
Selecting the best pepper fruits
Choose only the ripest, healthiest peppers from plants that have shown strong growth and disease resistance throughout the season. Avoid any fruits that show signs of disease, insect damage, or rot, as these issues can be passed on to the seeds. For instance, if you’re growing a bell pepper variety, select fruits that have fully ripened to a deep red color rather than the green stage. This ensures the seeds inside are fully developed and mature for better germination.
- Select fully ripe, disease-free peppers.
- Cut peppers open and scrape out seeds.
- Separate seeds from any remaining pulp.
- Spread seeds on a non-stick surface to dry.
- Ensure good air circulation during drying for 10-14 days.
To extract the seeds, carefully cut open the ripe pepper and use a spoon or your fingers to scrape the seeds from the core. Try to remove as much of the surrounding pulp and membrane as possible. Spread the clean seeds in a single layer on a non-stick surface, such as a ceramic plate, a fine mesh screen, or parchment paper. Place the seeds in a warm, dry, well-ventilated area, away from direct sunlight. Ideal drying temperatures range from 70-75°F. Allow the seeds to air dry for 10-14 days, or until they are completely brittle and snap when bent, indicating a moisture content below 8%.
Lettuce seeds: from bolt to harvest
Lettuce seed saving requires allowing the plant to ‘bolt’ (send up a flower stalk), which is generally undesirable for leafy vegetable production but necessary for harvesting seed. This method is suitable for a wide range of climates, from cooler USDA zone 4 gardens to warmer USDA zone 7 areas, though timing will vary. Selecting 10-15 healthy plants for seed production ensures a good genetic base for future crops.
Recognizing mature lettuce seeds
Once a lettuce plant bolts, it will produce a tall flower stalk, sometimes reaching 3-4 feet in height, adorned with numerous small, yellow, daisy-like flowers. After the flowers fade, they will develop into seed heads that resemble tiny dandelion puffs. These fluffy seed heads are the key indicator of maturity. The seeds themselves are small, elongated, and typically white, gray, or black, depending on the variety. The process from first open flower to mature seed can take two to three weeks in warm, dry conditions, such as those found in the arid parts of the Mountain West, with several more weeks needed between bolting and flowering.
- Allow healthy lettuce plants to bolt and flower.
- Monitor flower heads as they dry and form ‘puffs’.
- Collect seed heads by hand or by shaking stalks into a bag.
- Remove any remaining chaff or plant material.
- Perform a final air dry for one week to ensure dryness.
To harvest, wait until the seed heads are completely dry and fluffy. You can either gently rub the dried flower heads between your fingers over a bucket or cloth to release the seeds, or, for larger quantities, cut the entire stalk and hang it upside down in a paper bag. The seeds will fall into the bag as they dry further. Once collected, clean the seeds by winnowing or sifting to remove any remaining chaff or plant debris. Spread the clean lettuce seeds on a tray for a final air dry indoors for about one week to ensure they are thoroughly dry before storage, aiming for less than 8% moisture content.
General drying, storage, and viability
Regardless of the specific crop, thorough drying and proper storage maintain seed viability over time. A common goal for all saved seeds is to reduce their moisture content to below 8%. This low moisture level, combined with cool temperatures, significantly slows down the metabolic processes within the seed, preserving its ability to germinate for several years. Research from 2023 suggests that chlorophyll content in tomato seeds may indicate seed performance.
Optimal storage conditions
For most garden seeds, the ideal storage environment is cool, dark, and dry. Temperatures between 35-40°F and relative humidity between 30-40% are generally recommended for maximizing seed longevity. A refrigerator is often a good option for small quantities of seeds, provided they are stored in airtight containers to prevent moisture absorption. For larger collections, a cool, dry basement or root cellar can work well, maintaining consistent conditions even in fluctuating climates like those in USDA zone 5.
- Ensure seeds are completely dry before storage.
- Store seeds in airtight containers like glass jars or sealed bags.
- Maintain a cool, consistent temperature, ideally 35-40°F.
- Keep humidity low, between 30-40% relative humidity.
- Protect seeds from light exposure by using opaque containers or dark storage.
Once dried and ready for storage, place seeds in airtight containers, such as glass jars with tight-fitting lids, or sealed plastic bags. Label each container clearly with the seed variety, the date of harvest, and any relevant notes about the parent plant or location. This detailed labeling helps track performance and plan future crop rotations. Depending on the species and storage conditions, properly stored seeds stay viable for several years, giving you a consistent supply and cutting your seed costs for these crops.
Integrating seed saving with garden planning
Saving seeds cuts costs and integrates with garden planning strategies like crop rotation and succession planting. Selecting seeds from your most productive plants helps adapt varieties to your specific microclimate and soil conditions, whether in the humid Southeast or the dry Southwest.
Crop rotation and succession planting benefits
Saved seeds allow you to precisely plan your garden’s layout for optimal health. For example, if you saved bean seeds, you can use them in a three-year crop rotation cycle, ensuring that legumes follow heavy feeders, replenishing soil nitrogen. This strategy is enhanced by practices such as using Best Living-Mulch and Cover-Crop Legumes by USDA Zone for No-Dig Beds or incorporating The Best Nitrogen-Fixing Trees for Every USDA Zone (2 to 12). Succession planting, where you plant small batches of seeds every two to three weeks, becomes more economical and flexible when you have a ready supply of your own seeds, ensuring a continuous harvest throughout the growing season in regions like USDA zone 7.
- Enhances genetic adaptation to local conditions.
- Supports long-term crop rotation strategies.
- Facilitates economical succession planting.
- Reduces reliance on external seed suppliers.
- Contributes to garden resilience and self-sufficiency.
Saving seeds from plants that perform well in your specific USDA zone (from zone 3 in the northern plains to zone 10 in Florida) allows you to develop strains suited to local pests, diseases, and climate fluctuations. This localized adaptation can lead to higher yields and healthier plants over time. The process of seed saving connects you to the agricultural cycle, supporting a productive garden that benefits both soil and grower.
Seed Saving Methods for Common Garden Vegetables
Vegetable | Method | Drying Time (Approx.) | Key Step |
|---|---|---|---|
Tomato | Fermentation | 10-14 days | Remove gelatinous coating |
Bean | Dry on Plant | 2-3 weeks | Pods brittle and rattling |
Pepper | Air Dry | 10-14 days | Scrape seeds from ripe fruit |
Lettuce | Bolt & Dry | 1-2 weeks | Collect from fluffy seed heads |
Tomato Fermentation: Fermenting tomato seeds for two to three days at 70°F removes the gel coat that carries germination inhibitors and makes the seed easier to clean and dry.
Optimal Storage: Store seeds at 35-40°F with 30-40% humidity to get the longest life each species allows.
Frequently asked questions
How long do saved seeds remain viable?
The viability of saved seeds varies by species and storage conditions. Properly dried and stored seeds, such as those kept at 35-40°F and 30-40% humidity, commonly stay viable for three to five years for beans and peppers, and longer for tomatoes.
Can I save seeds from hybrid plants?
While you can save seeds from hybrid (F1) plants, they will not reliably produce offspring identical to the parent plant. The resulting plants may exhibit a wide range of traits, often reverting to one of the parent lines.
What is the best way to test seed viability?
A simple germination test can be performed by placing ten seeds on a damp paper towel, rolling it up, and placing it in a plastic bag at room temperature. After five to seven days, count how many seeds have sprouted; if eight out of ten sprout, you have an 80% germination rate.
Why is it important to dry seeds thoroughly?
Thorough drying is necessary because excess moisture promotes mold growth and reduces seed viability during storage. Seeds with a moisture content above 8% are much more susceptible to fungal diseases and lose germination capacity faster in storage.
How many plants should I save seeds from?
To maintain genetic diversity and ensure a healthy seed stock, it is generally recommended to save seeds from at least 10-15 healthy, disease-free plants of a particular variety. This helps prevent inbreeding depression and maintains genetic diversity for future generations.
Can I save seeds from store-bought vegetables?
Yes, you can save seeds from store-bought vegetables, but be aware that many commercial varieties are hybrids (F1). As with any hybrid, the seeds may not grow true to type. Additionally, some produce is treated to prevent sprouting, which can affect germination.
References
- Possible ways to save seeds of tomato varieties in Kyrgyzstan (2023). Possible ways to save seeds of tomato varieties in Kyrgyzstan.
- Chlorophyll in tomato seeds: marker for seed performance? (2023). Chlorophyll in tomato seeds: marker for seed performance?.
- USDA Natural Resources Conservation Service (2024). USDA Natural Resources Conservation Service.