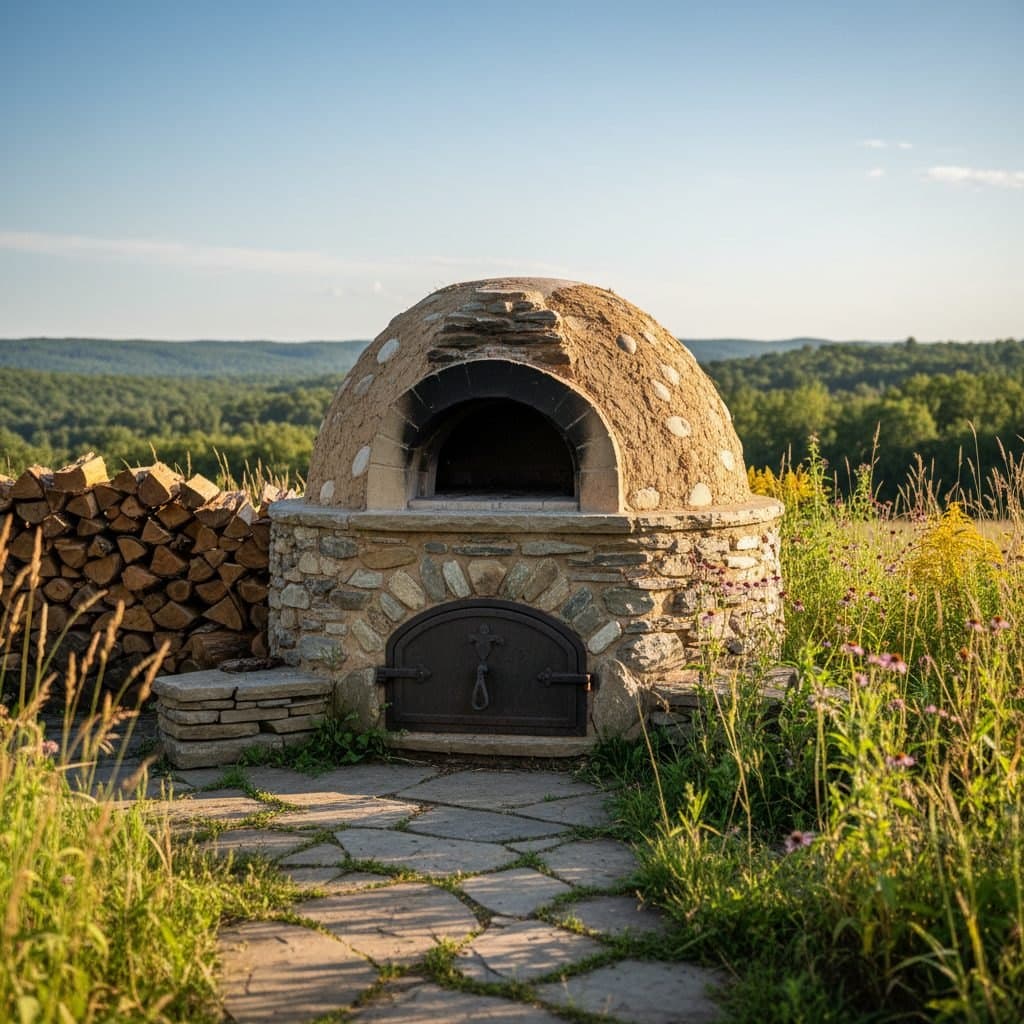
Key takeaways
- Earth ovens offer a durable, low-cost cooking solution, often built from local clay, sand, and straw, suitable for off-grid homesteads.
- Proper material selection, including a 2:1 sand-to-clay ratio for the thermal mass layer, matters for oven performance and longevity.
- A typical earth oven requires a curing period of 2 to 3 weeks before full use, allowing moisture to escape and preventing cracking.
- Strategic placement and ventilation are important to manage smoke and particulate matter, especially in high-use scenarios like commercial pizzerias [1].
- Earth-based construction provides excellent thermal mass, retaining heat for hours after the fire is raked out, so a single firing carries you through several batches of cooking.
- Integrating an earth oven into an off-grid system can complement solar energy solutions by providing a reliable cooking alternative during cloudy periods.
Quick answer: A wood-fired earth oven stores heat in a thick clay-sand dome, so one firing bakes pizza, then bread, then slow-cooked dishes as the oven falls through its temperature range — burning wood you can gather instead of propane or grid electricity. These ovens utilize natural materials like clay, sand, and straw to create thermal mass that retains heat for hours, minimizing fuel consumption.
Across the Ozark Mountains, homesteaders are rediscovering the practical value of wood-fired earth ovens. These structures, often built from local clay and sand, can provide a reliable cooking method for a family of four, using significantly less fuel than a conventional indoor oven. A well-built oven, costing as little as $100 in raw materials if sourced locally, offers a durable, self-sufficient cooking solution that can last for 15 years or more with proper maintenance.
For those pursuing an off-grid lifestyle, an outdoor oven complements other self-sufficiency efforts, such as generating power with solar panels for off-grid living. While solar arrays handle electricity, a wood-fired oven addresses cooking needs without relying on propane or grid electricity. The heat capacity of a thick earth dome is what makes an earth oven work: it soaks up the fire's heat and gives it back slowly, which suits slow cooking and baking.
Planning your earth oven: site selection and design considerations
Before breaking ground on your wood-fired earth oven, careful planning is essential. Site selection plays a critical role in both the oven’s performance and your convenience. Choose a location that is relatively flat, well-drained, and close enough to your main homestead for easy access, but far enough to manage smoke effectively. Site it well clear of buildings, fences, decks, dry vegetation and overhanging branches: the dome exterior and the mouth get hot enough to ignite adjacent combustibles, and embers leave the mouth. Never fire an earth oven indoors, in a garage, or under an enclosed roof — a wood fire in an unvented space produces carbon monoxide at lethal concentrations. Check local burn rules and any seasonal wildfire restrictions before your first firing. In a typical USDA zone 6 homestead, placing the oven within 50 feet of the kitchen often strikes a good balance. Consider prevailing winds to direct smoke away from living areas, as studies on wood-fired kitchens indicate particulate matter concerns [1].
Oven size and foundation
The size of your oven depends on your cooking needs. A dome with an internal diameter of 24 to 30 inches is sufficient for a family of four, allowing you to bake two medium pizzas or a large loaf of bread simultaneously. For the foundation, a solid, level base is paramount. Many builders opt for a rubble trench foundation extending 12 to 18 inches deep, topped with a concrete slab or packed gravel. Ensure the foundation extends at least 6 inches beyond the oven’s footprint on all sides for stability. A solid foundation prevents settling and cracking, which can compromise the oven’s thermal efficiency over its estimated 15-year lifespan.
- Choose a level, well-drained site.
- Consider prevailing winds for smoke dispersion.
- Ensure the site is within 50 feet of your primary cooking area.
- Plan for an internal dome diameter of 24 to 30 inches.
- Build a foundation that extends at least 6 inches beyond the oven’s base.
Sourcing and preparing natural materials for construction
The beauty of earth ovens lies in their reliance on readily available, natural materials. The primary components are clay, sand, and straw. For homesteaders in regions like the Great Plains or the Southeast, suitable clay soils are often found just below the topsoil, sometimes within 12 inches of the surface. You can test your soil by rolling a moist sample into a 1-inch thick worm; if it holds its shape without crumbling, it likely has sufficient clay content. The USDA Natural Resources Conservation Service provides soil maps that can help identify local clay deposits [6].
Mixing the thermal mass and insulation layers
The oven’s thermal mass layer, responsible for retaining heat, typically consists of a 2:1 sand-to-clay ratio, with a thickness of 6 to 8 inches. This mixture, when properly kneaded, becomes a dense, heat-absorbing material. For the insulation layer, which keeps the heat inside the oven, a lighter mix of clay, sand, and straw is used, often with a 1:1:2 ratio by volume. The straw fibers, usually cut to 2 to 3 inches in length, provide structural integrity and trap air, improving insulation compared to a straw-free mix.
- Identify local clay deposits using soil maps [6].
- Test clay by rolling a 1-inch moist worm.
- Mix thermal mass layer with a 2:1 sand-to-clay ratio.
- Prepare insulation layer with a 1:1:2 clay, sand, and straw ratio.
- Cut straw fibers to 2 to 3 inches for optimal insulation.
Building the oven dome and curing process
With your foundation ready and materials mixed, the next step is building the oven dome. Start by creating a sand form in the desired shape of your oven’s interior, typically a hemisphere or a catenary arch. This form should be 24 to 30 inches in diameter for a family-sized oven. Cover the sand form with damp newspaper or cloth to prevent the clay mix from sticking. Then, begin applying the thermal mass layer, pressing the 2:1 sand-clay mixture firmly onto the form, ensuring a consistent thickness of 6 to 8 inches across the entire dome. This layer is critical for absorbing and radiating heat for hours of cooking.
Applying insulation and curing
Once the thermal mass layer is complete, allow it to dry for one to two days until it is firm enough to support the insulation layer. Then, apply the straw-rich insulation mix, aiming for another 4 to 6 inches of thickness. This outer layer significantly improves the oven’s efficiency, keeping stored heat in the thermal mass instead of bleeding it to the outside air. After the dome is fully constructed, the most important phase begins: the curing process. This involves slowly drying the oven over 2 to 3 weeks. Start with small, cool fires for 30 minutes each day, gradually increasing duration and temperature. This controlled drying prevents large cracks and ensures the structural integrity of the oven for years of use.
- Build a sand form for the oven’s interior shape.
- Apply the 6 to 8 inch thermal mass layer evenly.
- Allow the thermal mass to firm up for one to two days.
- Apply the 4 to 6 inch straw-rich insulation layer.
- Cure the oven with small, cool fires over 2 to 3 weeks.
Firing and using your earth oven for homestead cooking
Once your earth oven is fully cured, it is ready for its first real firing. The goal is to heat the thermal mass thoroughly, allowing it to store enough energy to cook for several hours. Start with a small fire in the center of the oven, gradually adding more wood over one to two hours until the dome’s interior turns white, indicating that the soot has burned off and the oven has reached temperatures of 700 to 900°F. This process typically consumes 10 to 15 pounds of dry hardwood. For consistent results, aim to maintain this high temperature for at least 45 minutes before raking out the coals.
Cooking with residual heat and maintenance
After the coals are removed, the oven’s internal temperature will slowly drop, providing a range of cooking temperatures perfect for different foods. The initial high heat is ideal for pizzas, baking in 90 seconds to two minutes. As the temperature falls to 400-500°F over the next two to three hours, you can bake bread or roasts. Below 350°F, the oven becomes perfect for slow-cooked stews or drying fruits for six to eight hours. Regular maintenance includes patching any small cracks with a fresh clay-sand mix and covering the oven to protect it from heavy rain, which can erode the outer layers. This attention is what gets an earth oven to the fifteen years or more of service quoted above. For other off-grid energy solutions, consider exploring resources like off-grid and hybrid solar systems.
- Build a fire for one to two hours until the dome turns white.
- Aim for internal temperatures of 700 to 900°F.
- Maintain peak temperature for at least 45 minutes.
- Cook pizzas at 700-900°F in 90 seconds.
- Bake bread or roasts at 400-500°F for two to three hours.
Integrating your earth oven into a sustainable homestead
A wood-fired earth oven is more than just a cooking appliance; it is a cornerstone of a self-sufficient homestead. By reducing reliance on purchased fuels, it enhances your energy independence. In many rural areas, fallen branches or sustainably harvested wood from your property can provide the necessary fuel, costing significantly less than propane or electricity. For example, at 10 to 15 pounds of wood per firing, a single cord of seasoned hardwood covers a great many firings. Delivered cord prices vary widely by region and year, so price one locally before assuming a saving. This fits broader off-grid principles, where every resource gets used well, from solar livestock water heaters to efficient cooking methods.
Long-term benefits and community building
Beyond the immediate fuel savings, an earth oven builds a deeper connection to food preparation and community. It encourages cooking from scratch, using local ingredients, and often becomes a focal point for gatherings. The skills learned in building and using such an oven are invaluable for any homesteader, providing practical knowledge of natural building techniques. Over years of regular use an earth oven displaces propane or electricity for baking, though how much you actually save depends on how often you bake and what you were paying before. For a comprehensive look at off-grid living, you might explore off-grid living: cutting the three cords of power, water, and waste.
- Reduces reliance on purchased cooking fuels.
- Utilizes local, sustainably harvested wood for fuel.
- Displaces propane or grid electricity for baking, roasting and slow cooking.
- Fosters community and connection to food.
- Provides practical experience in natural building.
Comparison of wood-fired earth ovens and modern outdoor ovens
Feature | Wood-fired earth oven | Modern outdoor pizza oven (gas/electric) |
|---|---|---|
Material cost (approx.) | $100 – $500 (local materials) | $1,000 – $5,000+ |
Fuel source | Wood (local, renewable) | Propane, natural gas, electricity |
Heat retention | Excellent (6-12 hours) | Moderate (1-3 hours) |
Construction skill | Moderate (DIY-friendly) | Low (assembly required) |
Lifespan (with maintenance) | 15+ years | 5-10 years |
Thermal performance | High thermal mass, even heat distribution [3] | Faster heat-up, less residual heat |
Environmental impact | Low (local, natural materials) | Moderate (manufactured materials, fossil fuels) |
Thermal Mass: A thick clay-sand dome holds usable cooking heat long after the coals come out, which is what lets a single firing carry pizza, then bread, then a slow-cooked stew.
Particulate Matter: Research on indoor wood-fired pizzeria kitchens has found substantially elevated airborne particulate concentrations compared with outdoor air, which is a good reason to site a homestead oven outdoors and keep it well ventilated.
Frequently asked questions
How long does it take to build an earth oven?
The active construction phase for an earth oven can take three to seven days, depending on skill and weather. However, the curing process, which involves slow drying with small fires, typically extends over two to three weeks to prevent cracking and ensure durability.
What is the best type of wood to use for firing an earth oven?
Hardwoods like oak, maple, hickory, or fruit woods are best for firing an earth oven because they burn hotter and longer, producing fewer creosote deposits. Softwoods burn faster and leave more soot, so you feed the fire more often and the dome takes longer to clear.
Can an earth oven be built in any climate?
Earth ovens can be built in most climates, but cold or wet regions like the Pacific Northwest require extra attention to waterproofing and insulation. In areas with high humidity, like coastal Georgia, a protective roof and a longer curing time of up to four weeks might be necessary to prevent moisture damage.
How much does an earth oven cost to build?
If you source clay and sand locally, the material cost for an earth oven can be as low as $100 to $200 for a basic model. If you need to purchase materials, including firebrick for the hearth, the cost can range from $300 to $800, still significantly less than commercial ovens.
What kind of food can I cook in an earth oven?
An earth oven can cook a wide variety of foods. At its peak temperature of 700-900°F, it’s perfect for pizzas in 90 seconds. As it cools, you can bake bread, roast meats and vegetables, or slow-cook stews for six to eight hours, making it highly versatile for homestead meals.
References
- Characterization of indoor airborne particulate matter and bioaerosols in wood-fired pizzeria kitchens (2024). Characterization of indoor airborne particulate matter and bioaerosols in wood-fired pizzeria kitchens.
- Wood-And-Earth Materials in the Military Architecture of Forest-Steppe Saltovo-Mayaki Hillforts (2025). Wood-And-Earth Materials in the Military Architecture of Forest-Steppe Saltovo-Mayaki Hillforts.
- Thermal performance of fired and unfired earth bricks walls (2020). Thermal performance of fired and unfired earth bricks walls.
- Improvement of Malagasy Traditional Earth Bricks by Using a Derivative of CNSL as a Binding Agent (2025). Improvement of Malagasy Traditional Earth Bricks by Using a Derivative of CNSL as a Binding Agent.
- Hygrothermal and Economic Analysis of an Earth-Based Building Using In Situ Investigations and Artificial Neural Network Modeling for Normandy’s Climate Conditi (2023). Hygrothermal and Economic Analysis of an Earth-Based Building Using In Situ Investigations and Artificial Neural Network Modeling for Normandy’s Climate Conditi.
- USDA Natural Resources Conservation Service (2024). USDA Natural Resources Conservation Service.